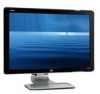
W2408h Monitor Won't Turn On - HP 24 LCD
W2408h Monitor Won't Turn On
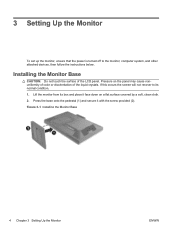
Related Manual Pages


Similar Questions

How To Repair My Hp Vs17e Monitor Will Not Turn On
(Posted by taggbr 10 years ago)

What Hookup Do I Need For Sound From The Monitor To My Laptop Computer Vista?
(Posted by celloone 13 years ago)


Monitor Will Not Turn On?
Monitor screen stopped working...turn off and then turn back on it will show the full screen for abo...
Monitor screen stopped working...turn off and then turn back on it will show the full screen for abo...
(Posted by ddigiovanni 13 years ago)
Why Do My Monitor Has A Vertical Green Line
SINCE YESTERDAY MY HP 24" W2408h MONITOR HAS A VERTICAL GREEN LINE AT THE LEFT SIDE PANEL
SINCE YESTERDAY MY HP 24" W2408h MONITOR HAS A VERTICAL GREEN LINE AT THE LEFT SIDE PANEL
(Posted by hegascru 14 years ago)