HP w20 / w22 LCD Monitor - User's Guide
Page 9
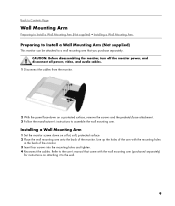
... face-down on a flat, soft, protected surface. 2 Place the wall mounting arm onto the back of the monitor. 3 Insert four screws into the mounting holes and tighten. 4 Reconnect the cables. Refer to the user's manual that you purchase separately. Line up the holes of the arm with the wall mounting arm (purchased... Wall Mounting Arm Preparing to Install a Wall Mounting Arm (Not supplied) • Installing a Wall Mounting Arm Preparing to Install a Wall Mounting Arm (Not supplied) This monitor can be attached to a wall mounting arm that came with the mounting holes in the back of the...
... face-down on a flat, soft, protected surface. 2 Place the wall mounting arm onto the back of the monitor. 3 Insert four screws into the mounting holes and tighten. 4 Reconnect the cables. Refer to the user's manual that you purchase separately. Line up the holes of the arm with the wall mounting arm (purchased... Wall Mounting Arm Preparing to Install a Wall Mounting Arm (Not supplied) • Installing a Wall Mounting Arm Preparing to Install a Wall Mounting Arm (Not supplied) This monitor can be attached to a wall mounting arm that came with the mounting holes in the back of the...
HP v220 LCD Monitor User's Guide
Page 10
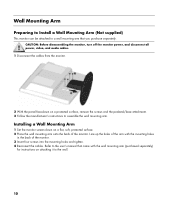
... separately) for instructions on a flat, soft, protected surface. 2 Place the wall mounting arm onto the back of the monitor. 3 Insert four screws into the mounting holes and tighten. 4 Reconnect the cables. Refer to the user's manual that you purchase separately. Wall Mounting Arm Preparing to Install a Wall Mounting Arm (Not supplied) This...
... separately) for instructions on a flat, soft, protected surface. 2 Place the wall mounting arm onto the back of the monitor. 3 Insert four screws into the mounting holes and tighten. 4 Reconnect the cables. Refer to the user's manual that you purchase separately. Wall Mounting Arm Preparing to Install a Wall Mounting Arm (Not supplied) This...
User's Guide w2228h, 2229h w2448h, w2448hc, w2558hc LCD Display
Page 25
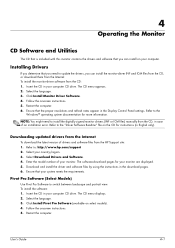
... Drivers If you determine that you need to the Windows® operating system documentation for instructions (in your monitor. The CD menu appears. 2. Downloading updated drivers from the HP Support site: 1. The CD menu displays. 2. Enter the model number of drivers and software files from ...the monitor-driver INF and ICM files from the CD, or download them from the Internet. Refer to install the digitally signed monitor drivers (INF or ICM files) manually from the CD: 1. Select the language. 3. Pivot Pro Software (Select Models) Use Pivot Pro Software to : http://www.hp.com/...
... Drivers If you determine that you need to the Windows® operating system documentation for instructions (in your monitor. The CD menu appears. 2. Downloading updated drivers from the HP Support site: 1. The CD menu displays. 2. Enter the model number of drivers and software files from ...the monitor-driver INF and ICM files from the CD, or download them from the Internet. Refer to install the digitally signed monitor drivers (INF or ICM files) manually from the CD: 1. Select the language. 3. Pivot Pro Software (Select Models) Use Pivot Pro Software to : http://www.hp.com/...
User's Guide w2228h, 2229h w2448h, w2448hc, w2558hc LCD Display
Page 33
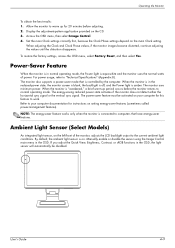
... the current ambient light conditions. Power-Saver Feature When the monitor is aqua-white and the monitor uses the normal watts of the monitor, adjusts the LCD backlight output to warm up period occurs before adjusting. 2. User's Guide 4-9 Set the main Clock settings correctly first, because ...of power. Access the OSD menu, then select Image Control. 4. NOTE: The energy-saver feature works only when the monitor is controlled by the computer. Manually enable or disable the sensor using the Image Control main menu in normal operating mode, the Power light is in the ...
... the current ambient light conditions. Power-Saver Feature When the monitor is aqua-white and the monitor uses the normal watts of the monitor, adjusts the LCD backlight output to warm up period occurs before adjusting. 2. User's Guide 4-9 Set the main Clock settings correctly first, because ...of power. Access the OSD menu, then select Image Control. 4. NOTE: The energy-saver feature works only when the monitor is controlled by the computer. Manually enable or disable the sensor using the Image Control main menu in normal operating mode, the Power light is in the ...


