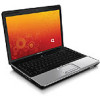
Setup Utility - Windows Vista and Windows 7
Page 10
.../DVD ROM drive ◦ USB CD/DVD ROM drive ◦ Hard drive ◦ USB Diskette on Key ◦ USB Hard drive ◦ Network adapter Diagnostics menu Select Hard Disk Self Test Secondary Hard Disk Self Test (select models only) Memory Test To do this Run a comprehensive self-test on... Technology. Enable/disable the capacitive button tapping sound. When enabled, the computer fan will always be on a secondary hard drive. Enable/disable LAN Power Saving. Set the following boot options: ● f9 and f10 Delay (sec.)―Set the delay for the f9 and f10 functions of the...
Software Update, Backup and Recovery - Windows Vista
Page 6
... While the "Press the ESC key for Startup Menu" message is displayed in an optional docking device, or connected to reliable external power using the AC adapter. Do not download or install a BIOS update while the computer is later than those currently installed on your computer and access the ..., driver, and BIOS updates. 2. To download a BIOS update: 1. Access the page on the HP Web site that is running on the screen to identify your computer. Follow the instructions on battery power, docked in the lower-left corner of the date, name, or other system information is connected to...
Notebook Tour - Windows Vista
Page 15
Connects a modem cable. Connect optional USB devices. Right-side components 9 Reads optical discs and, on select models, also writes to optical discs. Component (1) Optical drive light (2) Optical drive (3) USB ports (2) (4) RJ-11 (modem) jack (select models only) (5) Power connector Description Blinking: The optical drive is being accessed. Connects an AC adapter. Right-side components NOTE: Your computer may look slightly different from the illustration in this section.
Notebook Tour - Windows Vista
Page 19
Additional hardware components 13 Additional hardware components Component Description (1) Power cord* Connects an AC adapter to an AC outlet. (2) AC adapter Converts AC power to DC power. (3) Battery* Powers the computer when the computer is not plugged into external power. *Batteries and power cords vary in appearance by region and country.
Notebook Tour - Windows Vista
Page 21
Index A AC adapter, identifying 13 antennae 12 applications key, Windows 5 audio-in (microphone) jack, identifying 7 audio-out (headphone) jack, identifying 7 cord, power 13 D Digital Media Slot light, identifying 10 Digital Media Slot, identifying 10 display switch, identifying 6 drive light, identifying 3,..., identifying 3, 7 battery release latch, identifying 11 battery, identifying 13 bays battery 11, 14 hard drive 11 Bluetooth label 14 buttons power 4 TouchPad 2 TouchPad on/off 2 wireless 4 C caps lock light, identifying 3 Certificate of Authenticity label 14 compartments memory module 11...
Compaq Presario CQ40 Notebook PC - Maintenance and Service Guide
Page 12
...RJ-45 (Ethernet, includes link and activity √ lights) USB (2) √ VGA (Dsub 15-pin) √ Smart-pin AC adapter plug √ Hot plug/unplug and auto detect for √ correct output to wide-aspect vs. standard aspect video HDMI v1.3 supporting...keyboard √ devices TouchPad with 2 buttons and 2-way scroll √ (taps enabled as default) Power 6-cell 2.20-Ah Li-ion battery √ requirements 65-W AC adapter with Smart-Pin DC √ connector 90-W AC adapter with discrete graphics √ √ √ √ √ √ √ √...
Compaq Presario CQ40 Notebook PC - Maintenance and Service Guide
Page 23
... accessed. Connect optional USB devices. Connects an AC adapter. Rear component 15 Right-side components NOTE: Your computer may look slightly different from the illustration in this section. Component (1) Optical drive light (2) Optical drive (3) USB ports (2) (4) RJ-11 (modem) jack (select models only) (5) Power connector Description Blinking: The optical drive is normal...
Compaq Presario CQ40 Notebook PC - Maintenance and Service Guide
Page 35
Miscellaneous parts Description AC adapters 90-W PFC AC adapter 65-W PFC AC adapter System fan Display lid switch module Power cords: Australia and New Zealand Brazil India The People's Republic of China South Korea Taiwan The United Kingdom and Hong Kong The United States Screw ...
Compaq Presario CQ40 Notebook PC - Maintenance and Service Guide
Page 46
... All passwords and all external devices connected to the computer. 3. Remove the battery (see RTC battery on page 41). 5. Connect AC power to clear the password. Turn on the computer. Disconnect all CMOS settings have been cleared. 38 Chapter 4 Removal and replacement procedures Before ...any batteries at this time. 9. Shut down through the operating system. 2. Disconnect the power from the computer by first unplugging the power cord from the AC outlet and then unplugging the AC adapter from the computer. 4. Unknown user password If the computer you are servicing has an ...
Compaq Presario CQ40 Notebook PC - Maintenance and Service Guide
Page 49
... the computer by first unplugging the power cord from the AC outlet and then unplugging the AC adapter from the computer. To insert the battery, insert the rear edge of the computer (3). Shut down on , and then shut it out of the battery ...
Compaq Presario CQ40 Notebook PC - Maintenance and Service Guide
Page 50
... drive spare part kits include an optical drive bezel. Shut down through the operating system. 2. Disconnect the power from the computer by first unplugging the power cord from the AC outlet and then unplugging the AC adapter from the optical drive.) 42 Chapter 4 Removal and replacement procedures Remove the optical drive: 1. Remove the...
Compaq Presario CQ40 Notebook PC - Maintenance and Service Guide
Page 52
...-004 454925-004 454924-004 482158-001 Before removing the hard drive, follow these steps: 1. Disconnect the power from the computer by first unplugging the power cord from the AC outlet and then unplugging the AC adapter from the computer. 4. Remove the hard drive: 1. Remove the two Phillips PM2.5×6.0 screws (1) that secure...
Compaq Presario CQ40 Notebook PC - Maintenance and Service Guide
Page 56
... with the front toward you are unsure whether the computer is off or in Hibernation, turn the computer on page 41). 5. Lucia, St. Disconnect the power from the computer by first unplugging the power cord from the AC outlet and then unplugging the AC adapter from the computer. 4.
Compaq Presario CQ40 Notebook PC - Maintenance and Service Guide
Page 58
... cover (3). 3. Remove the battery (see Battery on , and then shut it to be cleared. Disconnect the power from the computer by first unplugging the power cord from the AC outlet and then unplugging the AC adapter from the system board. 50 Chapter 4 Removal and replacement procedures Shut down through the operating system. 2. Disconnect...
Compaq Presario CQ40 Notebook PC - Maintenance and Service Guide
Page 60
... Phillips PM2.5×6.0 captive screw (1) that secures the memory module compartment cover to the computer. 3. Disconnect the power from the computer by first unplugging the power cord from the AC outlet and then unplugging the AC adapter from the computer. 4. Shut down through the operating system. 2. Position the computer with the front toward...
Compaq Presario CQ40 Notebook PC - Maintenance and Service Guide
Page 62
...is off or in : Thailand The United States Spare part number 486904-281 486904-001 Before removing the keyboard, follow these steps: 1. Disconnect the power from the computer by lifting it down through the operating system. 2. Turn the computer upside down the computer. Release the top edge of the ...;17.0 screws that secure the keyboard to the computer. 3. Lift the top edge of the keyboard by first unplugging the power cord from the AC outlet and then unplugging the AC adapter from the tabs on page 41). 5. Remove the battery (see RTC battery on , and then shut it up , ...
Compaq Presario CQ40 Notebook PC - Maintenance and Service Guide
Page 64
...the computer is connected and disconnect the cable from the computer. 4. Disconnect the power from the computer by first unplugging the power cord from the AC outlet and then unplugging the AC adapter from the system board. 56 Chapter 4 Removal and replacement procedures Optical drive (see...on page 54). Disconnect all external devices connected to the computer. 3. b. Remove the switch cover: 1. Switch cover Description Switch cover (includes power button board and cable, volume/LED board, and LED cover) Spare part number 487299-001 Before removing the switch cover, follow these steps: 1....
Power Management - Windows Vista
Page 19
... or more , or is off . Charging a battery 13 Do not charge the computer battery while you are onboard aircraft. Charging may show 100 percent charge before charging it. ● If the battery has been unused for 2 weeks or more , calibrate the battery instead of battery ... charges whenever the computer is fully charged. ● Allow the battery to discharge below 5 percent of a full charge through an AC adapter, an optional power adapter, an optional expansion product, or an optional docking device. NOTE: If the computer is on the computer. ● Charge the battery until...
Power Management - Windows Vista
Page 22
...1. Resolving a low battery level CAUTION: To reduce the risk of the following devices: ● AC adapter ● Optional expansion product or docking device ● Optional power adapter Resolving a low battery level when a charged battery is available 1. Remove the discharged battery, and then... insert a charged battery. 3. Resolving a low battery level when external power is available ▲ Initiate Hibernation. - ...
Power Management - Windows Vista
Page 23
... Leave the computer plugged into the computer. 2. The battery light on . 3. Select Start > Control Panel > System and Maintenance > Power Options. 2. Click Change advanced power settings. 6. Click the plus sign next to Sleep, and then click the plus sign next to Hibernate after the calibration. 4. Do not... but it charges faster when the computer is also not necessary to an AC adapter, optional power adapter, optional expansion product, or optional docking device, and then plug the adapter or device into external power. To fully charge the battery: 1. Click the battery meter icon in the ...