
Resolving Start Up and No Boot Problems Checklist
Page 1
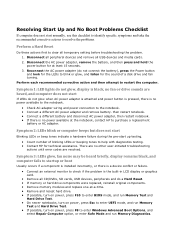
... indicate a hardware failure during the pre-start up testing. Count number of a disk drive and fan turning. Symptom 3: LEDs glow, fan noise may be heard briefly, display remains black, and computer fails to startup or boot Usually occurs if a component is installed incorrectly, or there is a device conflict or failure. Connect an external monitor to check if the problem is the built-in LCD display or graphics card. Remove all USB devices and media cards...
... indicate a hardware failure during the pre-start up testing. Count number of a disk drive and fan turning. Symptom 3: LEDs glow, fan noise may be heard briefly, display remains black, and computer fails to startup or boot Usually occurs if a component is installed incorrectly, or there is a device conflict or failure. Connect an external monitor to check if the problem is the built-in LCD display or graphics card. Remove all USB devices and media cards...
Resolving Start Up and No Boot Problems Checklist
Page 2
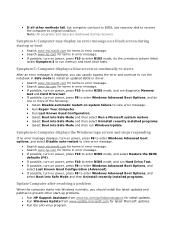
..., turn on power, press F8 to enter Windows Advanced Boot Options, and select Boot into Safe Mode and then Uninstall recently installed programs. Update Computer after resolving a problem When the computer starts into Safe Mode and then run memory and hard drive tests. Symptom 4: Computer may display an error message on a black screen during recovery. Symptom 6: Computer displays the Windows logo screen and stops responding If no error message displays, turn on power, press F8 to enter Windows Advanced boot options, and select Disable auto...
..., turn on power, press F8 to enter Windows Advanced Boot Options, and select Boot into Safe Mode and then Uninstall recently installed programs. Update Computer after resolving a problem When the computer starts into Safe Mode and then run memory and hard drive tests. Symptom 4: Computer may display an error message on a black screen during recovery. Symptom 6: Computer displays the Windows logo screen and stops responding If no error message displays, turn on power, press F8 to enter Windows Advanced boot options, and select Disable auto...
HP Notebook Reference Guide - Windows 7
Page 7
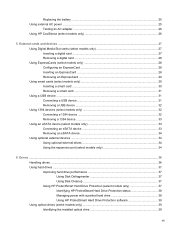
...card ...31 Using a USB device ...31 Connecting a USB device 31 Removing a USB device ...32 Using 1394 devices (select models only 32 Connecting a 1394 device 32 Removing a 1394 device 33 Using an eSATA device (select models only 33 Connecting an eSATA device 33 Removing an eSATA device 34 Using optional external devices ...34 Using optional external drives 34 Using the expansion port (select models only 34 6 Drives ...36 Handling drives ...36 Using hard drives ...37 Improving hard drive performance 37 Using Disk Defragmenter 37 Using Disk Cleanup 37 Using HP ProtectSmart Hard Drive...
...card ...31 Using a USB device ...31 Connecting a USB device 31 Removing a USB device ...32 Using 1394 devices (select models only 32 Connecting a 1394 device 32 Removing a 1394 device 33 Using an eSATA device (select models only 33 Connecting an eSATA device 33 Removing an eSATA device 34 Using optional external devices ...34 Using optional external drives 34 Using the expansion port (select models only 34 6 Drives ...36 Handling drives ...36 Using hard drives ...37 Improving hard drive performance 37 Using Disk Defragmenter 37 Using Disk Cleanup 37 Using HP ProtectSmart Hard Drive...
HP Notebook Reference Guide - Windows 7
Page 28
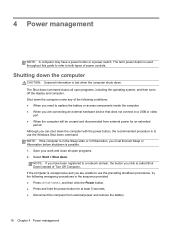
... connecting an external hardware device that does not connect to a USB or video port ● When the computer will be unused and disconnected from external power for at least 5 seconds. ● Disconnect the computer from external power and remove the battery. 18 Chapter 4 Power management Select Start > Shut down . The term power button is used throughout this guide to refer to both types of the following conditions: ● When you need to replace the battery...
... connecting an external hardware device that does not connect to a USB or video port ● When the computer will be unused and disconnected from external power for at least 5 seconds. ● Disconnect the computer from external power and remove the battery. 18 Chapter 4 Power management Select Start > Shut down . The term power button is used throughout this guide to refer to both types of the following conditions: ● When you need to replace the battery...
HP Notebook Reference Guide - Windows 7
Page 29
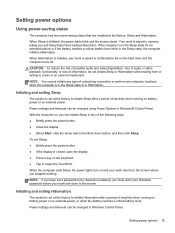
... audio or video playback functionality, or loss of information, do not initiate Sleep or Hibernation while reading from or writing to memory, letting you must enter your Windows password before your work is initiated, the power lights blink and the screen clears. NOTE: You cannot initiate any type of networking connection or perform any of the following ways: ● Briefly press the power button. ● Close the display. ● Select Start...
... audio or video playback functionality, or loss of information, do not initiate Sleep or Hibernation while reading from or writing to memory, letting you must enter your Windows password before your work is initiated, the power lights blink and the screen clears. NOTE: You cannot initiate any type of networking connection or perform any of the following ways: ● Briefly press the power button. ● Close the display. ● Select Start...
HP Notebook Reference Guide - Windows 7
Page 44
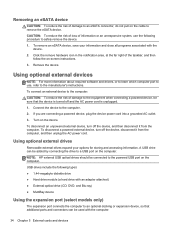
... device. Using optional external devices NOTE: For more information about required software and drivers, or to learn which computer port to use the following types: ● 1.44-megabyte diskette drive ● Hard drive module (a hard drive with the device. 2. Turn on -screen instructions. 3. USB drives include the following procedure to the computer. 2. Removing an eSATA device CAUTION: To reduce the risk of damage to an eSATA connector, do not pull on the cable to the powered USB port...
... device. Using optional external devices NOTE: For more information about required software and drivers, or to learn which computer port to use the following types: ● 1.44-megabyte diskette drive ● Hard drive module (a hard drive with the device. 2. Turn on -screen instructions. 3. USB drives include the following procedure to the computer. 2. Removing an eSATA device CAUTION: To reduce the risk of damage to an eSATA connector, do not pull on the cable to the powered USB port...
HP Notebook Reference Guide - Windows 7
Page 47
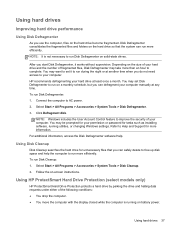
... running utilities, or changing Windows settings. Connect the computer to complete. NOTE: Windows includes the User Account Control feature to improve the security of the following conditions: ● You drop the computer. ● You move the computer with the display closed while the computer is not necessary to Help and Support for tasks such as installing software, running on the hard drive become fragmented. Using hard drives...
... running utilities, or changing Windows settings. Connect the computer to complete. NOTE: Windows includes the User Account Control feature to improve the security of the following conditions: ● You drop the computer. ● You move the computer with the display closed while the computer is not necessary to Help and Support for tasks such as installing software, running on the hard drive become fragmented. Using hard drives...
HP Notebook Reference Guide - Windows 7
Page 55
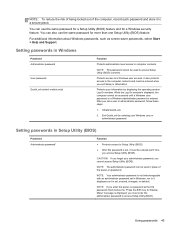
... of being locked out of the power-on password at the first password check before the "Press the ESC key for Startup Menu" message is entered. You can also use the same password for a Setup Utility (BIOS) feature and for more than one Setup Utility (BIOS) feature. Setting passwords in Windows, nor is it displayed as screen-saver passwords, select Start > Help and Support. It also protects access to Setup Utility (BIOS). ● After this password is set, entered, changed, or deleted...
... of being locked out of the power-on password at the first password check before the "Press the ESC key for Startup Menu" message is entered. You can also use the same password for a Setup Utility (BIOS) feature and for more than one Setup Utility (BIOS) feature. Setting passwords in Windows, nor is it displayed as screen-saver passwords, select Start > Help and Support. It also protects access to Setup Utility (BIOS). ● After this password is set, entered, changed, or deleted...
HP Notebook Reference Guide - Windows 7
Page 63
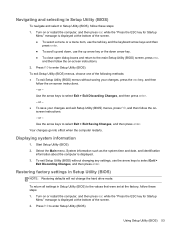
... the onscreen instructions. - Displaying system information 1. Select the Main menu. Using Setup Utility (BIOS) 53 Press f10 to select Exit > Exit Saving Changes, and then press enter. Turn on or restart the computer, and then press esc while the "Press the ESC key for Startup Menu" message is displayed at the factory, follow these steps: 1. Restoring factory settings in Setup Utility (BIOS) NOTE: Restoring defaults will not change the hard drive mode. or - To exit Setup Utility (BIOS) without saving...
... the onscreen instructions. - Displaying system information 1. Select the Main menu. Using Setup Utility (BIOS) 53 Press f10 to select Exit > Exit Saving Changes, and then press enter. Turn on or restart the computer, and then press esc while the "Press the ESC key for Startup Menu" message is displayed at the factory, follow these steps: 1. Restoring factory settings in Setup Utility (BIOS) NOTE: Restoring defaults will not change the hard drive mode. or - To exit Setup Utility (BIOS) without saving...
HP Notebook Reference Guide - Windows 7
Page 65
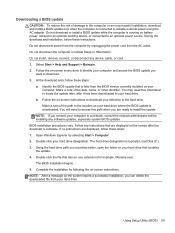
... on -screen instructions to reliable external power using the AC adapter. Do not download or install a BIOS update while the computer is later than the BIOS version currently installed on your selection to download your computer. Select Start > Help and Support > Maintain. 2. If no instructions are ready to an optional power source. Using the hard drive path you want to a network, consult the network administrator before installing any device, cable, or cord. 1. During the download and installation, follow...
... on -screen instructions to reliable external power using the AC adapter. Do not download or install a BIOS update while the computer is later than the BIOS version currently installed on your selection to download your computer. Select Start > Help and Support > Maintain. 2. If no instructions are ready to an optional power source. Using the hard drive path you want to a network, consult the network administrator before installing any device, cable, or cord. 1. During the download and installation, follow...
HP Notebook Reference Guide - Windows 7
Page 71
...displaying remaining charge 23 disposing 25 low battery levels 23 replacing 25 storing 24 Battery Check 22 battery information, finding 22 battery power 22 battery temperature 24 BIOS determining version 54 downloading an update 55 updating 54 Bluetooth device 2, 8 buttons media 13 power 18 volume 14 C cables 1394 32 eSATA 33 USB 31 checking audio functions 14 computer, traveling 24, 57 configuring audio for HDMI 17 configuring ExpressCards 28 connecting to a wired network 8 connecting to an existing wireless network 4 Connection Manager 3 conservation, power 24 creating a wireless connection...
...displaying remaining charge 23 disposing 25 low battery levels 23 replacing 25 storing 24 Battery Check 22 battery information, finding 22 battery power 22 battery temperature 24 BIOS determining version 54 downloading an update 55 updating 54 Bluetooth device 2, 8 buttons media 13 power 18 volume 14 C cables 1394 32 eSATA 33 USB 31 checking audio functions 14 computer, traveling 24, 57 configuring audio for HDMI 17 configuring ExpressCards 28 connecting to a wired network 8 connecting to an existing wireless network 4 Connection Manager 3 conservation, power 24 creating a wireless connection...
HP Notebook Reference Guide - Windows 7
Page 72
...9 connecting a modem cable adapter 9 selecting a location setting 10 N network cable, connecting 11 network icon 2 O operating system controls 4 optical disc inserting 39 removing 40 optical drive 34 optional external devices, using 34 P passwords set in Setup Utility (BIOS) 45 set in Windows 45 ports DisplayPort 15 expansion 34 external monitor 15 HDMI 16 Intel Wireless Display 17 VGA 15 power battery 22 conserving 24 options 19 power button 18 power meter 20 power plans customizing 21 selecting 20 viewing current 20 power switch 18 power-on password creating 47 entering 47 managing 47 power...
...9 connecting a modem cable adapter 9 selecting a location setting 10 N network cable, connecting 11 network icon 2 O operating system controls 4 optical disc inserting 39 removing 40 optical drive 34 optional external devices, using 34 P passwords set in Setup Utility (BIOS) 45 set in Windows 45 ports DisplayPort 15 expansion 34 external monitor 15 HDMI 16 Intel Wireless Display 17 VGA 15 power battery 22 conserving 24 options 19 power button 18 power meter 20 power plans customizing 21 selecting 20 viewing current 20 power switch 18 power-on password creating 47 entering 47 managing 47 power...
HP Limited Warranty and Techincal Support - 3-year - North America
Page 10
... the use of a CSR part, HP will be charged for the travel and labor costs of this may be 6 Notebook Documentation Team Saved date: 9/3/2006 09:29:00 Part Number: 413886-001 Title: Notebook Products Subject: Commercial-SMB Limited Warranty and Technical Support To locate the nearest HP service partner, call your needs: „ Access to drivers and product documentation: Find original product drivers, latest updates and software fixes...
... the use of a CSR part, HP will be charged for the travel and labor costs of this may be 6 Notebook Documentation Team Saved date: 9/3/2006 09:29:00 Part Number: 413886-001 Title: Notebook Products Subject: Commercial-SMB Limited Warranty and Technical Support To locate the nearest HP service partner, call your needs: „ Access to drivers and product documentation: Find original product drivers, latest updates and software fixes...

Getting Started HP Notebook - Windows 7
Page 24
... connected to the computer, pressing this feature in Setup Utility (BIOS) and revert back to standard settings by pressing the fn key and one of a DVD or a BD 18 Chapter 4 Keyboard and pointing devices Most external monitors receive video information from computer display to monitor display to simultaneous display on the f1 through f12 keys represent the action key functions. CAUTION: Use extreme care when making changes in the HP Notebook Reference Guide for instructions. Using the keyboard Using...
... connected to the computer, pressing this feature in Setup Utility (BIOS) and revert back to standard settings by pressing the fn key and one of a DVD or a BD 18 Chapter 4 Keyboard and pointing devices Most external monitors receive video information from computer display to monitor display to simultaneous display on the f1 through f12 keys represent the action key functions. CAUTION: Use extreme care when making changes in the HP Notebook Reference Guide for instructions. Using the keyboard Using...
Getting Started HP Notebook - Windows 7
Page 36
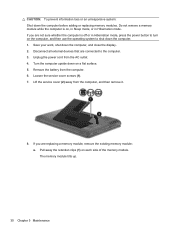
... you are replacing a memory module, remove the existing memory module: a. Pull away the retention clips (1) on a flat surface. 5. The memory module tilts up. 30 Chapter 5 Maintenance If you are not sure whether the computer is on, in Sleep mode, or in Hibernation mode, press the power button to turn on the computer, and then use the operating system to the computer. 3. Loosen the service cover screws (1). 7. Save your work, shut...
... you are replacing a memory module, remove the existing memory module: a. Pull away the retention clips (1) on a flat surface. 5. The memory module tilts up. 30 Chapter 5 Maintenance If you are not sure whether the computer is on, in Sleep mode, or in Hibernation mode, press the power button to turn on the computer, and then use the operating system to the computer. 3. Loosen the service cover screws (1). 7. Save your work, shut...
Getting Started HP Notebook - Windows 7
Page 52
... D digital media slot, identifying MultiMedia Card (MMC) 9 Secure Digital (SD) Memory Card 9 display image, switching 18 E esc key, identifying 7 external monitor port, identifying 9 F f11 36 fn key, identifying 7 H hard drive installing 28 removing 27 hard drive light, identifying 10 HDMI port, identifying 9 headphone (audio-out) jack 9 Help and Support action key 18 hotkeys Help and Support 18 HP Recovery Manager 36 I input power 44 integrated webcam light, identifying 11 internal microphone, identifying 11 Internet connection setup 15 ISP, using 14 J jacks audio-in (microphone) 9 audio-out...
... D digital media slot, identifying MultiMedia Card (MMC) 9 Secure Digital (SD) Memory Card 9 display image, switching 18 E esc key, identifying 7 external monitor port, identifying 9 F f11 36 fn key, identifying 7 H hard drive installing 28 removing 27 hard drive light, identifying 10 HDMI port, identifying 9 headphone (audio-out) jack 9 Help and Support action key 18 hotkeys Help and Support 18 HP Recovery Manager 36 I input power 44 integrated webcam light, identifying 11 internal microphone, identifying 11 Internet connection setup 15 ISP, using 14 J jacks audio-in (microphone) 9 audio-out...
Getting Started HP Notebook - Windows 7
Page 53
... removing 30 replacing 32 microphone (audio-in) jack, identifying 9 Microsoft Certificate of Authenticity label 43 mouse, external setting preferences 20 mute key, identifying 19 N network jack, identifying 9 restore points 40 RJ-45 (network) jack, identifying 9 rotating TouchPad gesture 24 S screen brightness keys 18 screen image, switching 18 scrolling TouchPad gesture 23 security cable slot security cable slot, identifying 8 serial number 43 serial number, computer 43 service cover, identifying 12 setup of WLAN 15 supported discs 35 system recovery 36 system restore points 40 O operating...
... removing 30 replacing 32 microphone (audio-in) jack, identifying 9 Microsoft Certificate of Authenticity label 43 mouse, external setting preferences 20 mute key, identifying 19 N network jack, identifying 9 restore points 40 RJ-45 (network) jack, identifying 9 rotating TouchPad gesture 24 S screen brightness keys 18 screen image, switching 18 scrolling TouchPad gesture 23 security cable slot security cable slot, identifying 8 serial number 43 serial number, computer 43 service cover, identifying 12 setup of WLAN 15 supported discs 35 system recovery 36 system restore points 40 O operating...

HP Pavilion G6 Notebook PC - Maintenance and Service Guide
Page 99
... reliable external power using Setup Utility. 1. Updating the BIOS Updated versions of the BIOS may need to know the version of the system BIOS currently installed. Do not download or install a BIOS update while the computer is later than those currently installed on -screen instructions to your hard drive. Follow the on the computer, you need this information to locate the update later, after it has been downloaded to download your computer: Windows 7-Select Start > Help and Support > Maintain. BIOS...
... reliable external power using Setup Utility. 1. Updating the BIOS Updated versions of the BIOS may need to know the version of the system BIOS currently installed. Do not download or install a BIOS update while the computer is later than those currently installed on -screen instructions to your hard drive. Follow the on the computer, you need this information to locate the update later, after it has been downloaded to download your computer: Windows 7-Select Start > Help and Support > Maintain. BIOS...

HP Pavilion G6 Notebook PC - Maintenance and Service Guide
Page 117
... ROM and DVD±R/RW SuperMulti Double-Layer Drive spare part number 26 buttons left TouchPad 7 power 9 right TouchPad 7 C cables, service considerations 38 camera module removal 68 spare part number 68 camera, product description 4 caps lock light, identifying 8 chipset, product description 2 components bottom 16 buttons 9 display 15 front 7, 11 keys 10 left side 13 lights 8 right side 12 top 7 computer feet locations 43 spare part number 43 computer specifications 83 connector, power 12 connectors, service considerations 38 D default settings, restoring 90 digital media slot...
... ROM and DVD±R/RW SuperMulti Double-Layer Drive spare part number 26 buttons left TouchPad 7 power 9 right TouchPad 7 C cables, service considerations 38 camera module removal 68 spare part number 68 camera, product description 4 caps lock light, identifying 8 chipset, product description 2 components bottom 16 buttons 9 display 15 front 7, 11 keys 10 left side 13 lights 8 right side 12 top 7 computer feet locations 43 spare part number 43 computer specifications 83 connector, power 12 connectors, service considerations 38 D default settings, restoring 90 digital media slot...
HP Pavilion G6 Notebook PC - Maintenance and Service Guide
Page 119
... workstation guidelines 40 T thermal paste, replacement 78 tools required 37 top cover removal 56 spare part number 20, 56 TouchPad buttons 7 removal 60 TouchPad button board spare part number 60 TouchPad LED board removal 61 spare part number 61 TouchPad light 7 transporting guidelines 40 U USB board removal 63 spare part number 20, 63 USB port, identifying 13 using system restore 99 V vents, identifying 13, 16 W webcam light, identifying 15 webcam module, spare part number 24 webcam, identifying 15 Windows applications key, identifying 10 Windows logo key, identifying 10 ENWW Index 111
... workstation guidelines 40 T thermal paste, replacement 78 tools required 37 top cover removal 56 spare part number 20, 56 TouchPad buttons 7 removal 60 TouchPad button board spare part number 60 TouchPad LED board removal 61 spare part number 61 TouchPad light 7 transporting guidelines 40 U USB board removal 63 spare part number 20, 63 USB port, identifying 13 using system restore 99 V vents, identifying 13, 16 W webcam light, identifying 15 webcam module, spare part number 24 webcam, identifying 15 Windows applications key, identifying 10 Windows logo key, identifying 10 ENWW Index 111


