Security - Windows Vista
Page 8
... choose to enter it with the same keys. For additional information about Windows passwords, such as they are not displayed as screen-saver passwords, select Start > Help and Support. 2 Chapter 2 Using passwords ENWW 2 Using passwords A password is a group of characters that could be easily discovered by an outsider. Use the following tips for creating and saving passwords: ● When creating passwords, follow requirements set a password with keyboard number keys, your computer information. Passwords can be...
... choose to enter it with the same keys. For additional information about Windows passwords, such as they are not displayed as screen-saver passwords, select Start > Help and Support. 2 Chapter 2 Using passwords ENWW 2 Using passwords A password is a group of characters that could be easily discovered by an outsider. Use the following tips for creating and saving passwords: ● When creating passwords, follow requirements set a password with keyboard number keys, your computer information. Passwords can be...
Security - Windows Vista
Page 18
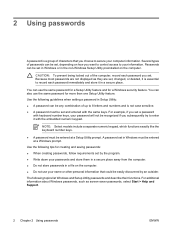
... screen and then click Start Over. 7. To set up the fingerprint reader before performing the steps below. 1. NOTE: If you are using an optional external fingerprint reader, connect the reader to Windows as that user and then repeat steps 1 through 8. 12 Chapter 7 Using the fingerprint reader (select models only) ENWW On the "Services and Applications" page, click I want to register a fingerprint. When the VeriSoft Access Manager Registration Wizard opens...
... screen and then click Start Over. 7. To set up the fingerprint reader before performing the steps below. 1. NOTE: If you are using an optional external fingerprint reader, connect the reader to Windows as that user and then repeat steps 1 through 8. 12 Chapter 7 Using the fingerprint reader (select models only) ENWW On the "Services and Applications" page, click I want to register a fingerprint. When the VeriSoft Access Manager Registration Wizard opens...

Memory Modules - Windows Vista
Page 7
... equipment, unplug the power cord and remove all external devices connected to the Lock button, and then click Shut Down. 3. NOTE: To use a dual-channel configuration when adding a second memory module, be increased by touching a grounded metal object. If you must first exit Sleep or Hibernation before installing a memory module. Unplug the power cord from the computer. 8. ENWW 1 Replacing a memory module The computer has one memory module compartment, which is located on a flat...
... equipment, unplug the power cord and remove all external devices connected to the Lock button, and then click Shut Down. 3. NOTE: To use a dual-channel configuration when adding a second memory module, be increased by touching a grounded metal object. If you must first exit Sleep or Hibernation before installing a memory module. Unplug the power cord from the computer. 8. ENWW 1 Replacing a memory module The computer has one memory module compartment, which is located on a flat...
Setup Utility - Windows Vista
Page 8
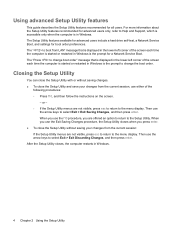
... arrow keys to Help and Support, which is accessible only when the computer is in Windows. The Setup Utility features available for advanced users include a hard drive self-test, a Network Service Boot, and settings for all users. or - ◦ If the Setup Utility menus are offered an option to return to the menu display. When you use the f10 procedure, you press enter. ● To close the Setup Utility and save your changes from LAN...
... arrow keys to Help and Support, which is accessible only when the computer is in Windows. The Setup Utility features available for advanced users include a hard drive self-test, a Network Service Boot, and settings for all users. or - ◦ If the Setup Utility menus are offered an option to return to the menu display. When you use the f10 procedure, you press enter. ● To close the Setup Utility and save your changes from LAN...
Software Update, Backup, and Recovery - Windows Vista
Page 5
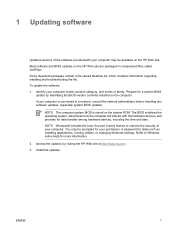
... tasks such as installing applications, running utilities, or changing Windows settings. Prepare for a system BIOS update by visiting the HP Web site at http://www.hp.com. 3. NOTE The computer system BIOS is connected to Windows online Help for your computer model, product category, and series or family. Refer to a network, consult the network administrator before installing any software updates, especially system BIOS updates. The BIOS initializes the operating system, determines how the...
... tasks such as installing applications, running utilities, or changing Windows settings. Prepare for a system BIOS update by visiting the HP Web site at http://www.hp.com. 3. NOTE The computer system BIOS is connected to Windows online Help for your computer model, product category, and series or family. Refer to a network, consult the network administrator before installing any software updates, especially system BIOS updates. The BIOS initializes the operating system, determines how the...
Software Update, Backup, and Recovery - Windows Vista
Page 6
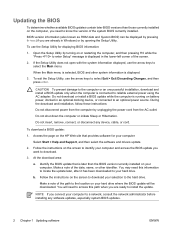
... power cord from the AC outlet. To exit the Setup Utility, use the arrow keys to your computer: Select Start > Help and Support, and then select the software and drivers update. 2. To download a BIOS update: 1. Make a note of the system BIOS currently installed. You may need to access this information to locate the update later, after it has been downloaded to select the Main menu. Open the Setup Utility by turning on your hard drive where the BIOS update will need...
... power cord from the AC outlet. To exit the Setup Utility, use the arrow keys to your computer: Select Start > Help and Support, and then select the software and drivers update. 2. To download a BIOS update: 1. Make a note of the system BIOS currently installed. You may need to access this information to locate the update later, after it has been downloaded to select the Main menu. Open the Setup Utility by turning on your hard drive where the BIOS update will need...
Software Update, Backup, and Recovery - Windows Vista
Page 13
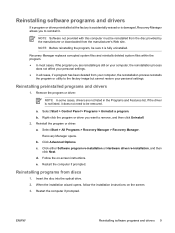
... the program or utility to the factory image but cannot restore your personal settings. If the driver is not listed, it . Select Start > All Programs > Recovery Manager > Recovery Manager. Click either Software program re-installation or Hardware driver re-installation, and then click Next. When the installation wizard opens, follow the installation instructions on -screen instructions. a. Reinstall the program or driver: a. Follow the on the screen. 3. Insert the disc into the optical drive. 2. NOTE Software not provided...
... the program or utility to the factory image but cannot restore your personal settings. If the driver is not listed, it . Select Start > All Programs > Recovery Manager > Recovery Manager. Click either Software program re-installation or Hardware driver re-installation, and then click Next. When the installation wizard opens, follow the installation instructions on -screen instructions. a. Reinstall the program or driver: a. Follow the on the screen. 3. Insert the disc into the optical drive. 2. NOTE Software not provided...
Touchpad and Keyboard - Windows Vista
Page 15
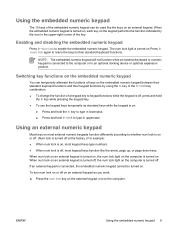
Enabling and disabling the embedded numeric keypad Press fn+num lock to an optional docking device or optional expansion product. When num lock on an external keypad is turned off, the num lock light on : ● Press and hold the fn key to keypad functions while the keypad is off at the factory.) For example: ● When num lock is connected, the embedded numeric keypad cannot be...
Enabling and disabling the embedded numeric keypad Press fn+num lock to an optional docking device or optional expansion product. When num lock on an external keypad is turned off, the num lock light on : ● Press and hold the fn key to keypad functions while the keypad is off at the factory.) For example: ● When num lock is connected, the embedded numeric keypad cannot be...
Multimedia - Windows Vista
Page 27
... playback 19 Q Quick Launch buttons 5 QuickPlay 5 J jacks audio-in (microphone) 1, 3 audio-out (headphone) 1, 3 S-Video-out 7 M media activity buttons 14 media activity hotkeys 13 media button 5 microphone, internal 1 microphones, supported 3 monitor, connecting 6 multimedia software described 16 using 18 R region codes, DVD 20 S S-Video-out jack 7 software multimedia 16 using 18 speakers 1 T TV 3 V VCR 3 volume, adjusting 4 O optical disc inserting 10 removing, with power 11 removing, without power 12 writing to 16 optical drive playing 19 protecting 16 P ports external monitor 6 ENWW...
... playback 19 Q Quick Launch buttons 5 QuickPlay 5 J jacks audio-in (microphone) 1, 3 audio-out (headphone) 1, 3 S-Video-out 7 M media activity buttons 14 media activity hotkeys 13 media button 5 microphone, internal 1 microphones, supported 3 monitor, connecting 6 multimedia software described 16 using 18 R region codes, DVD 20 S S-Video-out jack 7 software multimedia 16 using 18 speakers 1 T TV 3 V VCR 3 volume, adjusting 4 O optical disc inserting 10 removing, with power 11 removing, without power 12 writing to 16 optical drive playing 19 protecting 16 P ports external monitor 6 ENWW...
Power Management - Windows Vista
Page 7
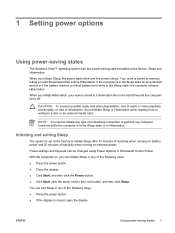
... external media card. ENWW Using power-saving states 1 CAUTION: To prevent possible audio and video degradation, loss of audio or video playback functionality, or loss of networking connection or perform any of inactivity when running on external power. When you can be changed using Power Options in Hibernation. Initiating and exiting Sleep The system is set at the factory: Sleep and Hibernation. If the computer is closed, open the display. 1 Setting power options Using power-saving states The Windows Vista™ operating...
... external media card. ENWW Using power-saving states 1 CAUTION: To prevent possible audio and video degradation, loss of audio or video playback functionality, or loss of networking connection or perform any of inactivity when running on external power. When you can be changed using Power Options in Hibernation. Initiating and exiting Sleep The system is set at the factory: Sleep and Hibernation. If the computer is closed, open the display. 1 Setting power options Using power-saving states The Windows Vista™ operating...

Power Management - Windows Vista
Page 19
... adapter or device into external power until the battery is off the display and Put the computer to sleep settings to Never. 5. Select Start > Control Panel > System and Maintenance > Power Options. 2. Click Change advanced power settings. 6. Click Save changes. ENWW Calibrating a battery 13 The battery light on the computer turns on the computer turns off the display and Put the computer to sleep settings listed in use, but it should not need to calibrate a new battery. Step 2: Disable Hibernation and Sleep 1. Click the battery...
... adapter or device into external power until the battery is off the display and Put the computer to sleep settings to Never. 5. Select Start > Control Panel > System and Maintenance > Power Options. 2. Click Change advanced power settings. 6. Click Save changes. ENWW Calibrating a battery 13 The battery light on the computer turns on the computer turns off the display and Put the computer to sleep settings listed in use, but it should not need to calibrate a new battery. Step 2: Disable Hibernation and Sleep 1. Click the battery...

Power Management - Windows Vista
Page 21
... - ENWW Calibrating a battery 15 Click Change advanced power settings. 5. Plug the computer into external power and maintain external power until the battery is recharged, the battery light on when the battery is off . You can use the computer while the battery is recharging, but the battery will charge faster if the computer is fully charged and the battery light has turned off . 2. Select Start > Control Panel > System and Maintenance > Power Options. 2. Reenter the setting that you recorded...
... - ENWW Calibrating a battery 15 Click Change advanced power settings. 5. Plug the computer into external power and maintain external power until the battery is recharged, the battery light on when the battery is off . You can use the computer while the battery is recharging, but the battery will charge faster if the computer is fully charged and the battery light has turned off . 2. Select Start > Control Panel > System and Maintenance > Power Options. 2. Reenter the setting that you recorded...
Power Management - Windows Vista
Page 27
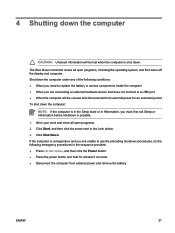
Click Start, and then click the arrow next to a USB port ● When the computer will be unused and disconnected from external power and remove the battery. If the computer is possible. 1. Save your work and close all open programs. 2. The Shut Down command closes all open programs, including the operating system, and then turns off the display and computer. Shut down . 4 Shutting down...
Click Start, and then click the arrow next to a USB port ● When the computer will be unused and disconnected from external power and remove the battery. If the computer is possible. 1. Save your work and close all open programs. 2. The Shut Down command closes all open programs, including the operating system, and then turns off the display and computer. Shut down . 4 Shutting down...

Drives - Windows Vista
Page 14
..., access the Disk Defragmenter online Help. Using Disk Cleanup Disk Cleanup searches the hard drive for unnecessary files that the system can safely delete to free up disk space and help the computer to run more efficiently. Select Start > All Programs > Accessories > System Tools > Disk Defragmenter. 2. NOTE: Windows® includes the User Account Control feature to Windows online Help for tasks such as installing applications, running utilities, or changing Windows settings...
..., access the Disk Defragmenter online Help. Using Disk Cleanup Disk Cleanup searches the hard drive for unnecessary files that the system can safely delete to free up disk space and help the computer to run more efficiently. Select Start > All Programs > Accessories > System Tools > Disk Defragmenter. 2. NOTE: Windows® includes the User Account Control feature to Windows online Help for tasks such as installing applications, running utilities, or changing Windows settings...

Notebook Tour - Windows Vista
Page 10
... external power source, the light stays off until the battery reaches a low battery level. Blinking: The volume scroll zone is being accessed. Turns on . ● Amber: Computer sound is pressed. Turns on when the stop button is pressed. ● Blue: Computer sound is turned on when the DVD button is turned off . Blinking: The hard drive or optical drive is on when the media button is turned off when all batteries in the computer are fully charged. Turns...
... external power source, the light stays off until the battery reaches a low battery level. Blinking: The volume scroll zone is being accessed. Turns on . ● Amber: Computer sound is pressed. Turns on when the stop button is pressed. ● Blue: Computer sound is turned on when the DVD button is turned off . Blinking: The hard drive or optical drive is on when the media button is turned off when all batteries in the computer are fully charged. Turns...

HP Pavilion dx6500 Entertainment PC - Maintenance and Service Guide
Page 19
... network must already be set up. ● Blue: An integrated wireless device, such as the HP Remote Control. Blinking: The hard drive or optical drive is turned off. Connects an optional computer headset microphone, stereo array microphone, or monaural microphone. Front components Item (1) Component Power light (2) Battery light (3) Drive light (4) Wireless switch (5) Wireless light (6) Consumer infrared lens (7) Audio-in (microphone) jack (8) Audio-out (headphone) jacks (2) Function ● On: The computer is on. ● Blinking: The computer is in the Sleep...
... network must already be set up. ● Blue: An integrated wireless device, such as the HP Remote Control. Blinking: The hard drive or optical drive is turned off. Connects an optional computer headset microphone, stereo array microphone, or monaural microphone. Front components Item (1) Component Power light (2) Battery light (3) Drive light (4) Wireless switch (5) Wireless light (6) Consumer infrared lens (7) Audio-in (microphone) jack (8) Audio-out (headphone) jacks (2) Function ● On: The computer is on. ● Blinking: The computer is in the Sleep...

HP Pavilion dx6500 Entertainment PC - Maintenance and Service Guide
Page 89
..., system BIOS, and keyboard controller version (select models only). The Setup Utility features available for advanced users include a hard drive self-test, a Network Service Boot, and settings for all users. After the Setup Utility closes, the computer restarts in Windows. Using advanced Setup Utility features 81 The " to boot from LAN" message that is displayed in the lower-left corner of the following procedures: ◦ Press f10, and then follow the instructions on the screen...
..., system BIOS, and keyboard controller version (select models only). The Setup Utility features available for advanced users include a hard drive self-test, a Network Service Boot, and settings for all users. After the Setup Utility closes, the computer restarts in Windows. Using advanced Setup Utility features 81 The " to boot from LAN" message that is displayed in the lower-left corner of the following procedures: ◦ Press f10, and then follow the instructions on the screen...

HP Pavilion dx6500 Entertainment PC - Maintenance and Service Guide
Page 122
..., if a program has been deleted from your personal settings. c. e. b. b. a. Select Start > All Programs > Recovery Manager > Recovery Manager. Click Advanced Options. Follow the on the screen. 3. NOTE: Before reinstalling the program, be reinstalled from the disc provided by the manufacturer or downloaded from discs 1. Reinstall the program or driver: a. When the installation wizard opens, follow the installation instructions on -screen instructions. Recovery Manager replaces corrupted system files and reinstalls deleted system files...
..., if a program has been deleted from your personal settings. c. e. b. b. a. Select Start > All Programs > Recovery Manager > Recovery Manager. Click Advanced Options. Follow the on the screen. 3. NOTE: Before reinstalling the program, be reinstalled from the disc provided by the manufacturer or downloaded from discs 1. Reinstall the program or driver: a. When the installation wizard opens, follow the installation instructions on -screen instructions. Recovery Manager replaces corrupted system files and reinstalls deleted system files...

HP Pavilion dx6500 Entertainment PC - Maintenance and Service Guide
Page 139
...S-Video-out jack 12 K keyboard components 9 product description 3 removal 53 spare part numbers 18, 26, 53 keypad keys 9 keys embedded numeric keypad 9 esc 9 fn 9 function 9 Windows applications 9 Windows logo 9 L language support 79, 82 LED board cable, illustrated 22 left-side components 12 light components 6 lights battery 6, 11 caps lock 6 drive 6, 11 num lock 6 optical drive 13 power 6, 11 volume down 6 volume mute 6 volume up 6 wireless 11 M main menu 81 mass storage devices, spare part numbers 23 media button 7 memory map specifications 91 memory module product description 1 removal...
...S-Video-out jack 12 K keyboard components 9 product description 3 removal 53 spare part numbers 18, 26, 53 keypad keys 9 keys embedded numeric keypad 9 esc 9 fn 9 function 9 Windows applications 9 Windows logo 9 L language support 79, 82 LED board cable, illustrated 22 left-side components 12 light components 6 lights battery 6, 11 caps lock 6 drive 6, 11 num lock 6 optical drive 13 power 6, 11 volume down 6 volume mute 6 volume up 6 wireless 11 M main menu 81 mass storage devices, spare part numbers 23 media button 7 memory map specifications 91 memory module product description 1 removal...

HP Pavilion dx6500 Entertainment PC - Maintenance and Service Guide
Page 140
...docking support 3 Ethernet 2 external media cards 2 graphics 1 hard drives 1 keyboard 3 memory module 1 microphone 2 modem module 2 operating system 3 optical drives 2 pointing devices 3 ports 2 power requirements 3 processors 1 product name 1 security 3 serviceability 3 wireless 2 product name 1 R rear component 14 recovery discs 113 recovery partition, deleting 116 recovery, system 115 remote control, spare part numbers 24, 25, 26 removal/replacement preliminaries 28 procedures 34 restore points 112 RF input adapter cable, spare part number 24, 25 right-side components 13 RJ-45 jack location...
...docking support 3 Ethernet 2 external media cards 2 graphics 1 hard drives 1 keyboard 3 memory module 1 microphone 2 modem module 2 operating system 3 optical drives 2 pointing devices 3 ports 2 power requirements 3 processors 1 product name 1 security 3 serviceability 3 wireless 2 product name 1 R rear component 14 recovery discs 113 recovery partition, deleting 116 recovery, system 115 remote control, spare part numbers 24, 25, 26 removal/replacement preliminaries 28 procedures 34 restore points 112 RF input adapter cable, spare part number 24, 25 right-side components 13 RJ-45 jack location...


