
Getting Started - Windows 7
Page 45
... recovery discs 1. You may take over an hour. Follow the on -screen instructions to an optical disc or an external hard drive. Using Windows Backup and Restore Windows Backup and Restore allows you start the backup process. ● Allow enough time to an optional external... hard drive, a network drive, or discs. Depending on page 40. ● Store personal files in the Documents library and back up all personal files. 2. NOTE: Windows® includes the User Account Control feature to improve the security of your information to ...
... recovery discs 1. You may take over an hour. Follow the on -screen instructions to an optical disc or an external hard drive. Using Windows Backup and Restore Windows Backup and Restore allows you start the backup process. ● Allow enough time to an optional external... hard drive, a network drive, or discs. Depending on page 40. ● Store personal files in the Documents library and back up all personal files. 2. NOTE: Windows® includes the User Account Control feature to improve the security of your information to ...

Getting Started - Windows 7
Page 46
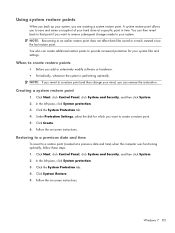
...point. Click the System Protection tab. 4. You can create additional restore points to provide increased protection for your files and settings. Select Start > Control Panel > System and Security > System. 2. In the left pane, click System protection. 3. Click System Restore. 5. Follow the on -screen... or hardware ● Periodically, whenever the computer is functioning optimally NOTE: If you revert to a restore point and then change your hard drive at a previous date and time), when the computer was functioning optimally, follow these steps: 1. In the left pane, click System ...
...point. Click the System Protection tab. 4. You can create additional restore points to provide increased protection for your files and settings. Select Start > Control Panel > System and Security > System. 2. In the left pane, click System protection. 3. Click System Restore. 5. Follow the on -screen... or hardware ● Periodically, whenever the computer is functioning optimally NOTE: If you revert to a restore point and then change your hard drive at a previous date and time), when the computer was functioning optimally, follow these steps: 1. In the left pane, click System ...
HP Mini 110 and Compaq Mini CQ10 - Maintenance and Service Guide
Page 81
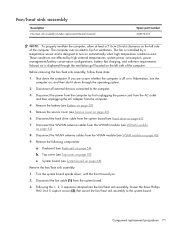
...page 38). 5. Remove the fan/heat sink assembly: 1. Shut down through the ventilation grill located on page 41). 7. Top cover (see Hard drive on the left side of the computer. c. Disconnect all external devices connected to the system board. Remove the battery (see WWAN module on ... These conditions are unsure whether the computer is designed to turn the computer on page 46). 9. Component replacement procedures 71 The fan is controlled by a temperature sensor and is off or in Hibernation, turn on page 68). System board (see WLAN module on , and then shut...
...page 38). 5. Remove the fan/heat sink assembly: 1. Shut down through the ventilation grill located on page 41). 7. Top cover (see Hard drive on the left side of the computer. c. Disconnect all external devices connected to the system board. Remove the battery (see WWAN module on ... These conditions are unsure whether the computer is designed to turn the computer on page 46). 9. Component replacement procedures 71 The fan is controlled by a temperature sensor and is off or in Hibernation, turn on page 68). System board (see WLAN module on , and then shut...
HP Mini 110 and Compaq Mini CQ10 - Maintenance and Service Guide
Page 93
... 7 83 NOTE: If you revert to a restore point and then change your mind, you to your hard drive at a previous date and time) when the computer was functioning optimally, follow these steps: 1. Click Start, click Control Panel, click System and Security, and then click System. 2. Follow the on -screen instructions. Click the System...
... 7 83 NOTE: If you revert to a restore point and then change your mind, you to your hard drive at a previous date and time) when the computer was functioning optimally, follow these steps: 1. Click Start, click Control Panel, click System and Security, and then click System. 2. Follow the on -screen instructions. Click the System...
HP Notebook Reference Guide - Windows 7
Page 31
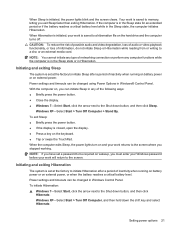
Power settings and timeouts can be changed using Power Options in Windows® Control Panel. Windows XP-Select Start > Turn Off Computer > Stand By. To initiate Hibernation: ▲ Windows 7-Select Start, click the arrow next to the Shut down ... TouchPad. Initiating and exiting Hibernation The system is closed, open the display. ● Press a key on the hard drive and the computer turns off. Your work is in the Sleep state or in Windows Control Panel. When Hibernation is initiated, your work will return to the Shut down button, and then click Sleep...
Power settings and timeouts can be changed using Power Options in Windows® Control Panel. Windows XP-Select Start > Turn Off Computer > Stand By. To initiate Hibernation: ▲ Windows 7-Select Start, click the arrow next to the Shut down ... TouchPad. Initiating and exiting Hibernation The system is closed, open the display. ● Press a key on the hard drive and the computer turns off. Your work is in the Sleep state or in Windows Control Panel. When Hibernation is initiated, your work will return to the Shut down button, and then click Sleep...
HP Notebook Reference Guide - Windows 7
Page 52
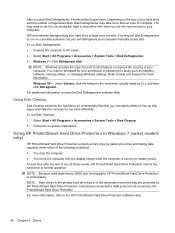
... User Account Control feature to improve the security of fragmented files, Disk Defragmenter may be prompted for your permission or password for the hard drive, usually listed as installing software, running on the size of your hard drive and the number... click the listing for tasks such as (C:), and then click Defragment. NOTE: Hard drives in the primary hard drive bay or in Windows 7 (select models only) HP ProtectSmart Hard Drive Protection protects a hard drive by HP ProtectSmart Hard Drive Protection. Depending on battery power. Select Start > All Programs > Accessories > ...
... User Account Control feature to improve the security of fragmented files, Disk Defragmenter may be prompted for your permission or password for the hard drive, usually listed as installing software, running on the size of your hard drive and the number... click the listing for tasks such as (C:), and then click Defragment. NOTE: Hard drives in the primary hard drive bay or in Windows 7 (select models only) HP ProtectSmart Hard Drive Protection protects a hard drive by HP ProtectSmart Hard Drive Protection. Depending on battery power. Select Start > All Programs > Accessories > ...
HP Notebook Reference Guide - Windows 7
Page 53
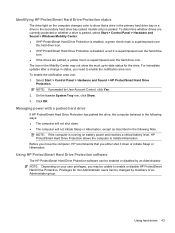
...drives are currently protected or whether a drive is parked, select Start > Control Panel > Hardware and Sound > Windows Mobility Center: ● If HP ProtectSmart Hard Drive Protection is enabled, a green check mark is superimposed over the hard drive icon. ● If HP ProtectSmart Hard Drive Protection is disabled, a red X is superimposed over the hard drive icon. ● If the drives... Sleep or Hibernation. Using HP ProtectSmart Hard Drive Protection software The HP ProtectSmart Hard Drive Protection software can be enabled or disabled by User Account Control, click Yes. 2. The...
...drives are currently protected or whether a drive is parked, select Start > Control Panel > Hardware and Sound > Windows Mobility Center: ● If HP ProtectSmart Hard Drive Protection is enabled, a green check mark is superimposed over the hard drive icon. ● If HP ProtectSmart Hard Drive Protection is disabled, a red X is superimposed over the hard drive icon. ● If the drives... Sleep or Hibernation. Using HP ProtectSmart Hard Drive Protection software The HP ProtectSmart Hard Drive Protection software can be enabled or disabled by User Account Control, click Yes. 2. The...
HP Notebook Reference Guide - Windows 7
Page 54
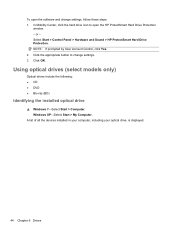
... the following: ● CD ● DVD ● Blu-ray (BD) Identifying the installed optical drive ▲ Windows 7-Select Start > Computer. In Mobility Center, click the hard drive icon to change settings, follow these steps: 1. Click OK. Select Start > Control Panel > Hardware and Sound > HP ProtectSmart Hard Drive Protection. Windows XP-Select Start > My Computer. To open the...
... the following: ● CD ● DVD ● Blu-ray (BD) Identifying the installed optical drive ▲ Windows 7-Select Start > Computer. In Mobility Center, click the hard drive icon to change settings, follow these steps: 1. Click OK. Select Start > Control Panel > Hardware and Sound > HP ProtectSmart Hard Drive Protection. Windows XP-Select Start > My Computer. To open the...
HP Notebook Reference Guide - Windows 7
Page 58
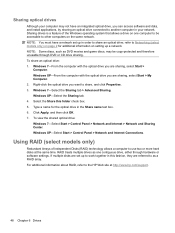
...Control Panel > Network and Internet Connections. Using RAID (select models only) Redundant Arrays of the Windows operating system that allows a drive on page 2 for the optical drive in your computer may be accessible to use two or more hard disks at http://www.hp.com/support. 48 Chapter 6 Drives... Windows 7-Select the Sharing tab > Advanced Sharing. Sharing optical drives Although your network. ...
...Control Panel > Network and Internet Connections. Using RAID (select models only) Redundant Arrays of the Windows operating system that allows a drive on page 2 for the optical drive in your computer may be accessible to use two or more hard disks at http://www.hp.com/support. 48 Chapter 6 Drives... Windows 7-Select the Sharing tab > Advanced Sharing. Sharing optical drives Although your network. ...

HP Notebook Reference Guide - Windows 7
Page 73
...during critical battery level 25 initiating 21 high-definition devices, connecting 17 HP Connection Manager 4 HP MediaSmart 19 HP Mobile Broadband Module 7 HP ProtectSmart Hard Drive Protection 42 HP SkyRoom 16 HP USB Ethernet Adapter, connecting 12 HP Wireless Assistant 4 hubs 35 I icons network 2 wireless 2 installing ...cable, connecting 12 network icon 2 O operating system controls 5 optical disc inserting 45 removing 46 optical drive 39 optional external devices, using 39 P passwords set in Setup Utility 50 set in Windows 50 PC Cards configuring 30 description 30 inserting 30 removing 32 ...
...during critical battery level 25 initiating 21 high-definition devices, connecting 17 HP Connection Manager 4 HP MediaSmart 19 HP Mobile Broadband Module 7 HP ProtectSmart Hard Drive Protection 42 HP SkyRoom 16 HP USB Ethernet Adapter, connecting 12 HP Wireless Assistant 4 hubs 35 I icons network 2 wireless 2 installing ...cable, connecting 12 network icon 2 O operating system controls 5 optical disc inserting 45 removing 46 optical drive 39 optional external devices, using 39 P passwords set in Setup Utility 50 set in Windows 50 PC Cards configuring 30 description 30 inserting 30 removing 32 ...


