
Specifications
Page 6
... form factor. the combined weight of an "all devices mounted, i.e. Accessories Included VGA cable; QuickSpecs HP L1950g 19-inch LCD Monitor Technical Specifications End-of-life Management and Recycling Reduce size and weight of a 17- Products returned to improve transportation fuel... well as the HP Thin Client cannot exceed 24 pounds. Features include dual speakers with a qualified engineering, architectural or construction professional to ISO 11469 and DIN 6120 standards. HP LCD Monitor Quick Release - Please note this is properly installed to securely lock down...
... form factor. the combined weight of an "all devices mounted, i.e. Accessories Included VGA cable; QuickSpecs HP L1950g 19-inch LCD Monitor Technical Specifications End-of-life Management and Recycling Reduce size and weight of a 17- Products returned to improve transportation fuel... well as the HP Thin Client cannot exceed 24 pounds. Features include dual speakers with a qualified engineering, architectural or construction professional to ISO 11469 and DIN 6120 standards. HP LCD Monitor Quick Release - Please note this is properly installed to securely lock down...

User Guide
Page 3
WARNING! Text set off in this manner indicates that failure to follow directions could result in this manner indicates that failure to follow directions could result in damage to equipment or loss of life. NOTE: Text set off in bodily harm or loss of information. CAUTION: Text set off in this manner provides important supplemental information. iii About This Guide This guide provides information on setting up the monitor, installing drivers, using the on-screen display menu, troubleshooting and technical specifications.
WARNING! Text set off in this manner indicates that failure to follow directions could result in this manner indicates that failure to follow directions could result in damage to equipment or loss of life. NOTE: Text set off in bodily harm or loss of information. CAUTION: Text set off in this manner provides important supplemental information. iii About This Guide This guide provides information on setting up the monitor, installing drivers, using the on-screen display menu, troubleshooting and technical specifications.
User Guide
Page 5
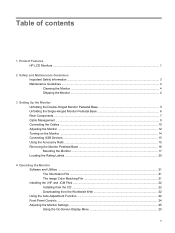
Table of contents 1 Product Features HP LCD Monitors ...1 2 Safety and Maintenance Guidelines Important Safety Information ...3 Maintenance Guidelines ...4 Cleaning the Monitor ...4 Shipping the Monitor ...4 3 Setting Up the Monitor Unfolding the Double-Hinged Monitor Pedestal Base 5 Unfolding the Single-Hinged Monitor Pedestal Base 6 Rear Components ...7 Cable Management ...9 Connecting the Cables ...10 Adjusting the Monitor ...12 Turning on the Monitor ...14 Connecting USB Devices...
Table of contents 1 Product Features HP LCD Monitors ...1 2 Safety and Maintenance Guidelines Important Safety Information ...3 Maintenance Guidelines ...4 Cleaning the Monitor ...4 Shipping the Monitor ...4 3 Setting Up the Monitor Unfolding the Double-Hinged Monitor Pedestal Base 5 Unfolding the Single-Hinged Monitor Pedestal Base 6 Rear Components ...7 Cable Management ...9 Connecting the Cables ...10 Adjusting the Monitor ...12 Turning on the Monitor ...14 Connecting USB Devices...
User Guide
Page 6
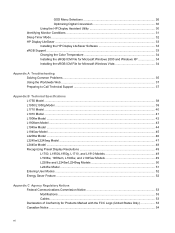
...the HP Display Assistant Utility 30 Identifying Monitor Conditions ...31 Sleep Timer Mode ...32 HP Display LiteSaver ...33 Installing the HP Display LiteSaver Software 33 sRGB Support ...33 Changing the Color Temperature 34 Installing the sRGB ICM File for Microsoft Windows 2000 and Windows XP 34 Installing the...44 L1945wv Model ...45 L2208w Model ...46 L2245w/L2245wg Model ...47 L2445w Model ...48 Recognizing Preset Display Resolutions 49 L1750, L1950/L1950g, L1710, and L1910 Models 49 L1908w, 1908wm, L1945w, and L1945wv Models 49 L2208w and L2245w/L2245wg Models 50 L2445w Model ...51...
...the HP Display Assistant Utility 30 Identifying Monitor Conditions ...31 Sleep Timer Mode ...32 HP Display LiteSaver ...33 Installing the HP Display LiteSaver Software 33 sRGB Support ...33 Changing the Color Temperature 34 Installing the sRGB ICM File for Microsoft Windows 2000 and Windows XP 34 Installing the...44 L1945wv Model ...45 L2208w Model ...46 L2245w/L2245wg Model ...47 L2445w Model ...48 Recognizing Preset Display Resolutions 49 L1750, L1950/L1950g, L1710, and L1910 Models 49 L1908w, 1908wm, L1945w, and L1945wv Models 49 L2208w and L2245w/L2245wg Models 50 L2445w Model ...51...

User Guide
Page 12
...HP dealer, reseller, or service provider. ● Use only a power source and connection appropriate for this product yourself. You can easily reach. These openings must lay the monitor face down on the cord. ● Keep the monitor in the cabinet are provided for each device. ● Install the monitor... near an outlet that are covered in a storage area. Unplug the monitor from the outlet. Do not walk on ...
...HP dealer, reseller, or service provider. ● Use only a power source and connection appropriate for this product yourself. You can easily reach. These openings must lay the monitor face down on the cord. ● Keep the monitor in the cabinet are provided for each device. ● Install the monitor... near an outlet that are covered in a storage area. Unplug the monitor from the outlet. Do not walk on ...
User Guide
Page 22
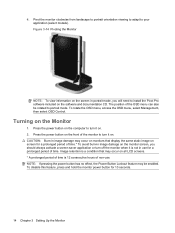
... or turn it is not in image damage on all LCD screens. * A prolonged period of time is a condition that display the same static image on screen for a prolonged period of time. The position of the monitor to turn off the monitor when it on the software and documentation CD. To rotate...To avoid burn-in use . NOTE: If pressing the power button has no effect, the Power Button Lockout feature may occur on the monitor screen, you will need to install the Pivot Pro software included on . 2. Turning on . Image retention is 12 consecutive hours of non-use for 10 seconds. 14 ...
... or turn it is not in image damage on all LCD screens. * A prolonged period of time is a condition that display the same static image on screen for a prolonged period of time. The position of the monitor to turn off the monitor when it on the software and documentation CD. To rotate...To avoid burn-in use . NOTE: If pressing the power button has no effect, the Power Button Lockout feature may occur on the monitor screen, you will need to install the Pivot Pro software included on . 2. Turning on . Image retention is 12 consecutive hours of non-use for 10 seconds. 14 ...

User Guide
Page 24
... audio cable, disconnect it. 1. Removing the Monitor Pedestal Base You can remove the monitor panel from the back of the monitor that connect the monitor panel to the pedestal base. On the double-hinged base, there are both disconnected. Lay the monitor face down on a wall, a swing arm...the Monitor Disconnect and remove the signal and power cables from the pedestal base to disassemble the monitor, be sure the monitor is turned off and the power and signal cables are four screws that connect the monitor panel with the pedestal base. CAUTION: Before beginning to install the...
... audio cable, disconnect it. 1. Removing the Monitor Pedestal Base You can remove the monitor panel from the back of the monitor that connect the monitor panel to the pedestal base. On the double-hinged base, there are both disconnected. Lay the monitor face down on a wall, a swing arm...the Monitor Disconnect and remove the signal and power cables from the pedestal base to disassemble the monitor, be sure the monitor is turned off and the power and signal cables are four screws that connect the monitor panel with the pedestal base. CAUTION: Before beginning to install the...

User Guide
Page 25
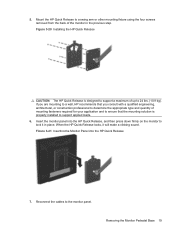
... to quickly and securely attach the panel to the pedestal base. It is rated to the monitor, four 4 mm, 0.7 pitch, and 10 mm long screws are three screws that installs to the back of the monitor display panel. Lift up on the pedestal base to remove it is important to use the... power and video cables provided with the VESA standard and is important to Removing the Monitor Pedestal Base on a flat, soft, protected surface. Longer screws should not be used because they may damage the monitor. To install the HP Quick Release: 1.
... to quickly and securely attach the panel to the pedestal base. It is rated to the monitor, four 4 mm, 0.7 pitch, and 10 mm long screws are three screws that installs to the back of the monitor display panel. Lift up on the pedestal base to remove it is important to use the... power and video cables provided with the VESA standard and is important to Removing the Monitor Pedestal Base on a flat, soft, protected surface. Longer screws should not be used because they may damage the monitor. To install the HP Quick Release: 1.
User Guide
Page 27
...cables to 24 lbs. (10.9 kg). Figure 3-20 Installing the HP Quick Release CAUTION: The HP Quick Release is properly installed to lock it will make a clicking sound. 5. Insert the monitor panel into the HP Quick Release 7. Mount the HP Quick Release to a swing arm or other mounting fixture using... the four screws removed from the back of up to the monitor panel. When the HP Quick Release locks, it in the previous step. Removing the Monitor Pedestal Base 19
...cables to 24 lbs. (10.9 kg). Figure 3-20 Installing the HP Quick Release CAUTION: The HP Quick Release is properly installed to lock it will make a clicking sound. 5. Insert the monitor panel into the HP Quick Release 7. Mount the HP Quick Release to a swing arm or other mounting fixture using... the four screws removed from the back of up to the monitor panel. When the HP Quick Release locks, it in the previous step. Removing the Monitor Pedestal Base 19
User Guide
Page 29
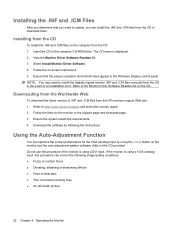
...(Image Color Matching) file ● auto-adjustment pattern utility ● additional software for the monitor model NOTE: If the monitor does not include a CD, the .INF and .ICM files can install on page 22 in accordance with the International Color Consortium (ICC) Profile Format specification. NOTE... distribution buffers/boxes. The Information File The .INF file defines monitor resources used in conjunction with graphics programs to provide consistent color matching from monitor screen to printer, or from the HP monitors support Web site. The Image Color Matching File The .ICM ...
...(Image Color Matching) file ● auto-adjustment pattern utility ● additional software for the monitor model NOTE: If the monitor does not include a CD, the .INF and .ICM files can install on page 22 in accordance with the International Color Consortium (ICC) Profile Format specification. NOTE... distribution buffers/boxes. The Information File The .INF file defines monitor resources used in conjunction with graphics programs to provide consistent color matching from monitor screen to printer, or from the HP monitors support Web site. The Image Color Matching File The .ICM ...
User Guide
Page 30
.... 3. The CD menu is using a VGA (analog) input, this procedure if the monitor is displayed. 2. Ensure the system meets the requirements. 4. If the monitor is using a DVI input. Refer to install the digitally signed monitor .INF and .ICM files manually from the HP monitors support Web site: 1. Using the Auto-Adjustment Function You can optimize the...
.... 3. The CD menu is using a VGA (analog) input, this procedure if the monitor is displayed. 2. Ensure the system meets the requirements. 4. If the monitor is using a DVI input. Refer to install the digitally signed monitor .INF and .ICM files manually from the HP monitors support Web site: 1. Using the Auto-Adjustment Function You can optimize the...

User Guide
Page 41
... reached. It allows you to most internal circuits. This helps protect the LCD panel against image retention. Installing the HP Display LiteSaver Software 1. The CD menu is reached, regardless of keyboard or mouse activity. Display Off Sets the time when the monitor automatically turns off as soon as the Display Off time is displayed...
... reached. It allows you to most internal circuits. This helps protect the LCD panel against image retention. Installing the HP Display LiteSaver Software 1. The CD menu is reached, regardless of keyboard or mouse activity. Display Off Sets the time when the monitor automatically turns off as soon as the Display Off time is displayed...

User Guide
Page 42
...Management button. 6. Press the Menu button on the computer monitor, but some color variation may prevent you from completing this procedure. Select the sRGB Color Space Profile.icm file, then click the Add button 5. Installing the sRGB ICM File for Microsoft Windows 2000 and Windows XP... NOTE: To complete the following procedure, you must set it as the Default Monitor Profile. Click the Advanced Settings button. 5. Click Appearance and ...
...Management button. 6. Press the Menu button on the computer monitor, but some color variation may prevent you from completing this procedure. Select the sRGB Color Space Profile.icm file, then click the Add button 5. Installing the sRGB ICM File for Microsoft Windows 2000 and Windows XP... NOTE: To complete the following procedure, you must set it as the Default Monitor Profile. Click the Advanced Settings button. 5. Click Appearance and ...

User Guide
Page 61
... The FCC requires the user to be notified that any interference received, including interference that interference will not occur in a particular installation. Operation is connected. ● Consult the dealer or an experienced radio or television technician for Products Marked with the FCC Logo...user is no guarantee that may cause harmful interference to which can radiate radio frequency energy and, if not installed and used in a residential installation. This device must be determined by turning the equipment off and on a circuit different from that are designed...
... The FCC requires the user to be notified that any interference received, including interference that interference will not occur in a particular installation. Operation is connected. ● Consult the dealer or an experienced radio or television technician for Products Marked with the FCC Logo...user is no guarantee that may cause harmful interference to which can radiate radio frequency energy and, if not installed and used in a residential installation. This device must be determined by turning the equipment off and on a circuit different from that are designed...

User Guide
Page 63
... which bear the "GS" approval mark, when forming part of a system comprising HP brand computers, keyboards and monitors that country. The installation guides included with this product. This feature allows the monitor to obtain a power cord for use , contact an authorized HP service provider. The power cord set (flexible cord or wall plug) received with...
... which bear the "GS" approval mark, when forming part of a system comprising HP brand computers, keyboards and monitors that country. The installation guides included with this product. This feature allows the monitor to obtain a power cord for use , contact an authorized HP service provider. The power cord set (flexible cord or wall plug) received with...


