
Security - Window Vista and Windows 7
Page 8
... same password for creating and saving passwords: ● When creating passwords, follow requirements set in Windows or in Windows must be entered at a Setup Utility prompt. For additional information about Windows passwords, such as they are not displayed as screen-saver passwords, select Start > Help and Support. 2 Chapter 2 Using passwords The following tips for more than one Setup Utility feature. Because most passwords are set, changed, or deleted, it is case sensitive. ● A password set in Setup Utility: ● A password...
... same password for creating and saving passwords: ● When creating passwords, follow requirements set in Windows or in Windows must be entered at a Setup Utility prompt. For additional information about Windows passwords, such as they are not displayed as screen-saver passwords, select Start > Help and Support. 2 Chapter 2 Using passwords The following tips for more than one Setup Utility feature. Because most passwords are set, changed, or deleted, it is case sensitive. ● A password set in Setup Utility: ● A password...

Setup Utility - Windows Vista and Windows 7
Page 10
...; USB CD/DVD ROM drive ◦ Hard drive ◦ USB Diskette on Key ◦ USB Hard drive ◦ Network adapter Diagnostics menu Select Hard Disk Self Test Secondary Hard Disk Self Test (select models only) Memory Test To do this Run a comprehensive self-test on a secondary hard drive. Enable/disable LAN Power Saving. Enabled/disable Fan Always On. Set the following boot options: ● f9 and f10 Delay (sec.)―Set the delay for the f9 and f10 functions of the Setup Utility in DC mode. System Configuration menu...
...; USB CD/DVD ROM drive ◦ Hard drive ◦ USB Diskette on Key ◦ USB Hard drive ◦ Network adapter Diagnostics menu Select Hard Disk Self Test Secondary Hard Disk Self Test (select models only) Memory Test To do this Run a comprehensive self-test on a secondary hard drive. Enable/disable LAN Power Saving. Enabled/disable Fan Always On. Set the following boot options: ● f9 and f10 Delay (sec.)―Set the delay for the f9 and f10 functions of the Setup Utility in DC mode. System Configuration menu...
Software Update - Windows Vista and Windows 7
Page 5
... software and BIOS updates on the system ROM. You may be prompted for tasks such as installing applications, running utilities, or changing Windows settings. To update the software, follow these steps, which contains information regarding installing and troubleshooting the file. Access the updates on the HP Web site at http://www.hp.com. 3. The BIOS initializes the operating system, determines how the computer will interact with your permission or password...
... software and BIOS updates on the system ROM. You may be prompted for tasks such as installing applications, running utilities, or changing Windows settings. To update the software, follow these steps, which contains information regarding installing and troubleshooting the file. Access the updates on the HP Web site at http://www.hp.com. 3. The BIOS initializes the operating system, determines how the computer will interact with your permission or password...

Software Update - Windows Vista and Windows 7
Page 6
... optional power source. Do not insert, remove, connect, or disconnect any device, cable, or cord. Access the page on the screen to reliable external power using the AC adapter. Follow the instructions on the HP Web site that is displayed. 3. Make a note of the date, name, or other system information is later than those currently installed on your computer. To exit the Setup Utility, use the Setup Utility for software, driver, and BIOS updates. 2. Do not download...
... optional power source. Do not insert, remove, connect, or disconnect any device, cable, or cord. Access the page on the screen to reliable external power using the AC adapter. Follow the instructions on the HP Web site that is displayed. 3. Make a note of the date, name, or other system information is later than those currently installed on your computer. To exit the Setup Utility, use the Setup Utility for software, driver, and BIOS updates. 2. Do not download...
Software Update - Windows Vista and Windows 7
Page 8
... and then select a storage location on your computer model number in the Search box, press enter, and follow these steps: To use the HP Web site: 1. Click the option for software and driver downloads, type your hard drive. After the file is displayed, click an updated driver to your operating system. 5. If prompted to do this, click Download only to save the file to open a window containing additional information. 6. Select...
... and then select a storage location on your computer model number in the Search box, press enter, and follow these steps: To use the HP Web site: 1. Click the option for software and driver downloads, type your hard drive. After the file is displayed, click an updated driver to your operating system. 5. If prompted to do this, click Download only to save the file to open a window containing additional information. 6. Select...
Wireless (Select Models Only) - Windows 7
Page 23
... Start > Control Panel > System and Security. 2. Cannot connect to expand the list and show all adapters. 4. In the System area, click Device Manager. 3. If no WLAN device is not properly installed. For more information. 1. Refer to Help and Support for tasks such as installing software, running utilities, or changing Windows settings. Click the arrow next to Network adapters to a WLAN 19 Identify the WLAN device from the Network adapters list. The listing for a WLAN device...
... Start > Control Panel > System and Security. 2. Cannot connect to expand the list and show all adapters. 4. In the System area, click Device Manager. 3. If no WLAN device is not properly installed. For more information. 1. Refer to Help and Support for tasks such as installing software, running utilities, or changing Windows settings. Click the arrow next to Network adapters to a WLAN 19 Identify the WLAN device from the Network adapters list. The listing for a WLAN device...
Drives - Windows 7
Page 15
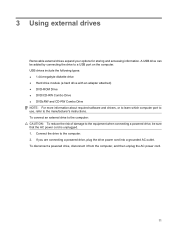
... AC power cord. 11 USB drives include the following types: ● 1.44-megabyte diskette drive ● Hard drive module (a hard drive with an adapter attached) ● DVD-ROM Drive ● DVD/CD-RW Combo Drive ● DVD±RW and CD-RW Combo Drive NOTE: For more information about required software and drivers, or to learn which computer port to use, refer to the computer. 2. Connect the drive to the manufacturer's instructions. 3 Using external drives Removable external drives expand your options for...
... AC power cord. 11 USB drives include the following types: ● 1.44-megabyte diskette drive ● Hard drive module (a hard drive with an adapter attached) ● DVD-ROM Drive ● DVD/CD-RW Combo Drive ● DVD±RW and CD-RW Combo Drive NOTE: For more information about required software and drivers, or to learn which computer port to use, refer to the computer. 2. Connect the drive to the manufacturer's instructions. 3 Using external drives Removable external drives expand your options for...
Drives - Windows 7
Page 16
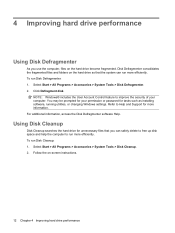
.... 2. You may be prompted for tasks such as installing software, running utilities, or changing Windows settings. Select Start > All Programs > Accessories > System Tools > Disk Cleanup. 2. 4 Improving hard drive performance Using Disk Defragmenter As you can run more information. Refer to Help and Support for unnecessary files that the system can safely delete to free up disk space and help the computer to run more efficiently. To...
.... 2. You may be prompted for tasks such as installing software, running utilities, or changing Windows settings. Select Start > All Programs > Accessories > System Tools > Disk Cleanup. 2. 4 Improving hard drive performance Using Disk Defragmenter As you can run more information. Refer to Help and Support for unnecessary files that the system can safely delete to free up disk space and help the computer to run more efficiently. To...
Drives - Windows 7
Page 17
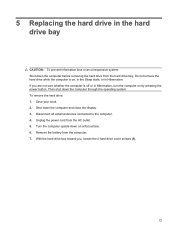
... power button. Unplug the power cord from the computer. 7. If you , loosen the 4 hard drive cover screws (1). 13 To remove the hard drive: 1. Do not remove the hard drive while the computer is off or in Hibernation, turn the computer on a flat surface. 6. Disconnect all external devices connected to the computer. 4. 5 Replacing the hard drive in Hibernation. Save your work. 2. Turn the computer upside down the computer before removing the hard drive from the hard drive...
... power button. Unplug the power cord from the computer. 7. If you , loosen the 4 hard drive cover screws (1). 13 To remove the hard drive: 1. Do not remove the hard drive while the computer is off or in Hibernation, turn the computer on a flat surface. 6. Disconnect all external devices connected to the computer. 4. 5 Replacing the hard drive in Hibernation. Save your work. 2. Turn the computer upside down the computer before removing the hard drive from the hard drive...
Drives - Windows 7
Page 24
Click the option for software and driver downloads, type your computer model number in the Search box, press enter, and follow the instructions provided. NOTE: In some locations you want a specific SoftPaq, enter the SoftPaq number in the search box, and then press enter. - This feature can be prompted to your computer after the installation is displayed, click an updated driver to install. 7. Click Start > All Programs > Windows Update. If you may be...
Click the option for software and driver downloads, type your computer model number in the Search box, press enter, and follow the instructions provided. NOTE: In some locations you want a specific SoftPaq, enter the SoftPaq number in the search box, and then press enter. - This feature can be prompted to your computer after the installation is displayed, click an updated driver to install. 7. Click Start > All Programs > Windows Update. If you may be...
Drives - Windows 7
Page 25
... 6 removing 10 Blu-ray ROM with LightScribe 3 E external drive 11 H hard disk drive external 11 installing 14 removing 13 replacing 13 hard drive external 11 installing 14 removing 13 replacing 13 M maintenance Disk Cleanup 12 Disk Defragmenter 12 O optical disc playing 6 removing 10 optical drive 2, 11 R region codes, DVD 7 S software Disk Cleanup 12 Disk Defragmenter 12 T troubleshooting burning discs 19 device driver 19 disc play 18 HP device drivers 20 optical disc tray 16 optical drive detection 17 Windows drivers 20 Index 21 optical drive DVD burning 9, 19 changing region setting...
... 6 removing 10 Blu-ray ROM with LightScribe 3 E external drive 11 H hard disk drive external 11 installing 14 removing 13 replacing 13 hard drive external 11 installing 14 removing 13 replacing 13 M maintenance Disk Cleanup 12 Disk Defragmenter 12 O optical disc playing 6 removing 10 optical drive 2, 11 R region codes, DVD 7 S software Disk Cleanup 12 Disk Defragmenter 12 T troubleshooting burning discs 19 device driver 19 disc play 18 HP device drivers 20 optical disc tray 16 optical drive detection 17 Windows drivers 20 Index 21 optical drive DVD burning 9, 19 changing region setting...
Notebook Tour - Windows 7
Page 8
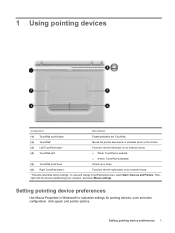
...To view and change pointing device preferences, select Start > Devices and Printers. 2 Components Top components TouchPad Component Description (1) TouchPad on/off button Enables/disables the TouchPad. (2) TouchPad* Moves the pointer and selects or activates items on the screen. (3) Left TouchPad button* (4) TouchPad light Functions like the left button on an external mouse. ● White: TouchPad is enabled. ● Amber: TouchPad is disabled. (5) TouchPad scroll zone Scrolls up or down. (6) Right TouchPad button* Functions like the right button on an external mouse. *This...
...To view and change pointing device preferences, select Start > Devices and Printers. 2 Components Top components TouchPad Component Description (1) TouchPad on/off button Enables/disables the TouchPad. (2) TouchPad* Moves the pointer and selects or activates items on the screen. (3) Left TouchPad button* (4) TouchPad light Functions like the left button on an external mouse. ● White: TouchPad is enabled. ● Amber: TouchPad is disabled. (5) TouchPad scroll zone Scrolls up or down. (6) Right TouchPad button* Functions like the right button on an external mouse. *This...
Notebook Tour - Windows 7
Page 15
Enables airflow to cool internal components and prevent overheating. Connects an external VGA monitor or projector. Connects a network cable. NOTE: The computer fan starts up automatically to cool internal components. Connects an optional video or audio device, such as a deterrent, but it may not prevent the computer from the illustration in use. It is in this location. Left-side components NOTE: Your computer may look slightly different from being...
Enables airflow to cool internal components and prevent overheating. Connects an external VGA monitor or projector. Connects a network cable. NOTE: The computer fan starts up automatically to cool internal components. Connects an optional video or audio device, such as a deterrent, but it may not prevent the computer from the illustration in use. It is in this location. Left-side components NOTE: Your computer may look slightly different from being...
Notebook Tour - Windows 7
Page 20
... optional wireless devices and the approval markings of some of the countries or regions in which the devices have been approved for your notebook. ◦ Warranty period (5). If your notebook. ◦ Serial number (s/n) (2). This is affixed to the bottom of Authenticity-Contains the Windows® Product Key. This is an alphanumeric identifier that is the alphanumeric identifier used to locate documents, drivers, and support...
... optional wireless devices and the approval markings of some of the countries or regions in which the devices have been approved for your notebook. ◦ Warranty period (5). If your notebook. ◦ Serial number (s/n) (2). This is affixed to the bottom of Authenticity-Contains the Windows® Product Key. This is an alphanumeric identifier that is the alphanumeric identifier used to locate documents, drivers, and support...
Pointing Devices and Keyboard - Windows 7
Page 5
...right button on an external mouse. ● White: TouchPad is enabled. ● Amber: TouchPad is disabled. Moves the pointer and selects or activates items on /off button (2) TouchPad* (3) Left TouchPad button* (4) TouchPad light (5) TouchPad scroll zone Enables/disables the TouchPad. Scrolls up or down. (6) Right TouchPad button* Functions like the left button on an external mouse. *This table describes factory settings. To view and change TouchPad preferences, select Start > Devices and Printers. 1 Using pointing devices Component Description (1) TouchPad on the screen. Then...
...right button on an external mouse. ● White: TouchPad is enabled. ● Amber: TouchPad is disabled. Moves the pointer and selects or activates items on /off button (2) TouchPad* (3) Left TouchPad button* (4) TouchPad light (5) TouchPad scroll zone Enables/disables the TouchPad. Scrolls up or down. (6) Right TouchPad button* Functions like the left button on an external mouse. *This table describes factory settings. To view and change TouchPad preferences, select Start > Devices and Printers. 1 Using pointing devices Component Description (1) TouchPad on the screen. Then...
Pointing Devices and Keyboard - Windows 7
Page 6
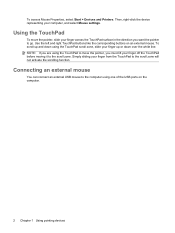
... select Mouse settings. Use the left and right TouchPad buttons like the corresponding buttons on the computer. 2 Chapter 1 Using pointing devices To access Mouse Properties, select Start > Devices and Printers. Using the TouchPad To move the pointer, you want the pointer to the scroll zone will not activate the scrolling function. Connecting an external mouse You can connect an external USB mouse to the scroll zone. Then, right-click the device representing your finger across the TouchPad surface...
... select Mouse settings. Use the left and right TouchPad buttons like the corresponding buttons on the computer. 2 Chapter 1 Using pointing devices To access Mouse Properties, select Start > Devices and Printers. Using the TouchPad To move the pointer, you want the pointer to the scroll zone will not activate the scrolling function. Connecting an external mouse You can connect an external USB mouse to the scroll zone. Then, right-click the device representing your finger across the TouchPad surface...
Multimedia - Windows 7
Page 29
... software and driver downloads, type your computer. Proceed to install the updated driver. Click Install now to step 6. 3. To do this, click Download only to your computer model number in the Search box, press enter, and follow the instructions provided. A device driver must be reinstalled 1. In the Device Manager window, click Action, and then click Scan for any devices requiring drivers. Try to http://www.hp.com/support, and select your device. Open your Internet...
... software and driver downloads, type your computer. Proceed to install the updated driver. Click Install now to step 6. 3. To do this, click Download only to your computer model number in the Search box, press enter, and follow the instructions provided. A device driver must be reinstalled 1. In the Device Manager window, click Action, and then click Scan for any devices requiring drivers. Try to http://www.hp.com/support, and select your device. Open your Internet...
Power Management - Windows 7
Page 16
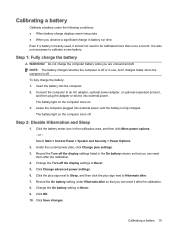
... battery power. To prolong battery life and optimize the accuracy of a full charge through normal use before charging it is fully charged, in a cool, dry location. 12 Chapter 3 Using battery power Maximum discharge time gradually shortens, as the battery storage capacity naturally degrades. Tips for maximizing battery discharge time: ● Lower the brightness on the computer. ● Charge the battery until the battery light turns off or in Power Options. ● Remove...
... battery power. To prolong battery life and optimize the accuracy of a full charge through normal use before charging it is fully charged, in a cool, dry location. 12 Chapter 3 Using battery power Maximum discharge time gradually shortens, as the battery storage capacity naturally degrades. Tips for maximizing battery discharge time: ● Lower the brightness on the computer. ● Charge the battery until the battery light turns off or in Power Options. ● Remove...
Power Management - Windows 7
Page 19
... used, it after the calibration. 8. Select Start > Control Panel > System and Security > Power Options. 2. Change the Turn off . Record the On battery setting under the following conditions: ● When battery charge displays seem inaccurate ● When you observe a significant change in the notification area, and then click More power options. - Click OK. 10. The battery light on . 3. Insert the battery into external power until the battery is also not necessary to Never. 9. Connect...
... used, it after the calibration. 8. Select Start > Control Panel > System and Security > Power Options. 2. Change the Turn off . Record the On battery setting under the following conditions: ● When battery charge displays seem inaccurate ● When you observe a significant change in the notification area, and then click More power options. - Click OK. 10. The battery light on . 3. Insert the battery into external power until the battery is also not necessary to Never. 9. Connect...

HP Notebook Hard Drives & Solid State Drives Identifying, Preventing, Diagnosing and Recovering from Drive Failures Care and Mai
Page 6
... Storage Manager driver for notebook PC models that are released to SATA AHCI mode Using Sysprep with Serial ATA hard disk drives. Page 6 To download the latest version of the Intel Matrix Storage Technology driver: http://www8.hp.com/us/en/support-drivers.html Installing SATA drivers SATA Native Mode is a storage interface technology that could affect hard disk drive performance and reliability. Intel Matrix Storage Manager Driver provides support for lower power consumption...
... Storage Manager driver for notebook PC models that are released to SATA AHCI mode Using Sysprep with Serial ATA hard disk drives. Page 6 To download the latest version of the Intel Matrix Storage Technology driver: http://www8.hp.com/us/en/support-drivers.html Installing SATA drivers SATA Native Mode is a storage interface technology that could affect hard disk drive performance and reliability. Intel Matrix Storage Manager Driver provides support for lower power consumption...


