User Guide
Page 9
... master password 48 Enabling DriveLock and setting a DriveLock user password 48 Disabling DriveLock ...49 Entering a DriveLock password 49 Changing a DriveLock password 49 Using Windows Hello (select products only) ...50 Using antivirus software ...50 Using firewall software ...50 Installing software updates ...51 Using HP Client Security (select products only 51 Using HP Touchpoint Manager (select products only 51 Using an optional security cable (select products only 51 Using a fingerprint reader (select products only 52 Locating the fingerprint reader ...52 8 Maintenance ...53...
... master password 48 Enabling DriveLock and setting a DriveLock user password 48 Disabling DriveLock ...49 Entering a DriveLock password 49 Changing a DriveLock password 49 Using Windows Hello (select products only) ...50 Using antivirus software ...50 Using firewall software ...50 Installing software updates ...51 Using HP Client Security (select products only 51 Using HP Touchpoint Manager (select products only 51 Using an optional security cable (select products only 51 Using a fingerprint reader (select products only 52 Locating the fingerprint reader ...52 8 Maintenance ...53...

User Guide
Page 10
... 57 Using Windows tools ...58 Restore and recovery ...59 Recovering using HP Recovery Manager 59 What you need to know before you get started 59 Using the HP Recovery partition (select products only 60 Using HP Recovery media to recover 60 Changing the computer boot order 61 Removing the HP Recovery partition (select products only 61 10 Computer Setup (BIOS), TPM, and HP Sure Start 62 Using Computer Setup ...62 Starting Computer Setup ...62 Using a USB keyboard or USB mouse to start Computer Setup (BIOS 62 Navigating and selecting in Computer Setup 62 Restoring factory settings in...
... 57 Using Windows tools ...58 Restore and recovery ...59 Recovering using HP Recovery Manager 59 What you need to know before you get started 59 Using the HP Recovery partition (select products only 60 Using HP Recovery media to recover 60 Changing the computer boot order 61 Removing the HP Recovery partition (select products only 61 10 Computer Setup (BIOS), TPM, and HP Sure Start 62 Using Computer Setup ...62 Starting Computer Setup ...62 Using a USB keyboard or USB mouse to start Computer Setup (BIOS 62 Navigating and selecting in Computer Setup 62 Restoring factory settings in...

User Guide
Page 24
... keypad can be used like an external numeric keypad. Opens the Start menu. When fn+num lk is turned back on. NOTE: If the keypad function is active when the computer is turned off when pressed in the upper-right corner of the key. NOTE: Pressing the Windows key again will close the Start menu. Displays options for a selected object. Execute frequently used system functions when pressed in...
... keypad can be used like an external numeric keypad. Opens the Start menu. When fn+num lk is turned back on. NOTE: If the keypad function is active when the computer is turned off when pressed in the upper-right corner of the key. NOTE: Pressing the Windows key again will close the Start menu. Displays options for a selected object. Execute frequently used system functions when pressed in...
User Guide
Page 32
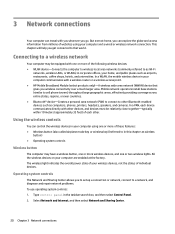
... select Control Panel. 2. The wireless light indicates the overall power state of your computer and a wired or wireless network connection. Type control panel in this chapter as wireless button) ● Operating system controls Wireless button The computer may be equipped with one or more of websites using one or two wireless lights. All the wireless devices on your computer communicates with a wireless router or a wireless access point. ● HP Mobile Broadband Module (select products only)-A wireless wide area network (WWAN) device...
... select Control Panel. 2. The wireless light indicates the overall power state of your computer and a wired or wireless network connection. Type control panel in this chapter as wireless button) ● Operating system controls Wireless button The computer may be equipped with one or more of websites using one or two wireless lights. All the wireless devices on your computer communicates with a wireless router or a wireless access point. ● HP Mobile Broadband Module (select products only)-A wireless wide area network (WWAN) device...

User Guide
Page 44
... following instructions: 32 Chapter 5 Entertainment features For additional safety information, see video or high-resolution display output on an external Thunderbolt device, connect the Thunderbolt device according to view and control audio settings. ▲ Type control panel in (microphone) combo jack on the computer to a network. To access this document: 1. or - IMPORTANT: Be sure that enables you to watch on using a USB Type-C cable (select products only) NOTE: To connect a USB Type-C Thunderbolt® device to HP Support...
... following instructions: 32 Chapter 5 Entertainment features For additional safety information, see video or high-resolution display output on an external Thunderbolt device, connect the Thunderbolt device according to view and control audio settings. ▲ Type control panel in (microphone) combo jack on the computer to a network. To access this document: 1. or - IMPORTANT: Be sure that enables you to watch on using a USB Type-C cable (select products only) NOTE: To connect a USB Type-C Thunderbolt® device to HP Support...
User Guide
Page 52
... the computer and to external power with the computer, a replacement AC adapter provided by users themselves. Resolving a low battery level Resolving a low battery level when external power is available Connect one of the following conditions: ● When charging or calibrating a battery ● When installing or updating system software 40 Chapter 6 Managing power Resolving a low battery level when the computer cannot exit Hibernation 1. Factory-sealed battery To monitor the status of the...
... the computer and to external power with the computer, a replacement AC adapter provided by users themselves. Resolving a low battery level Resolving a low battery level when external power is available Connect one of the following conditions: ● When charging or calibrating a battery ● When installing or updating system software 40 Chapter 6 Managing power Resolving a low battery level when the computer cannot exit Hibernation 1. Factory-sealed battery To monitor the status of the...

User Guide
Page 54
... Computer Setup (BIOS) BIOS administrator password in Computer Setup* Unauthorized access to the contents of a hard drive DriveLock password (select products only) in Computer Setup* Unauthorized startup from an optional external optical drive (select products only), optional external hard drive (select products only), or internal network adapter Boot options feature in Computer Setup* Unauthorized access to a Windows user account Windows user password Unauthorized access to navigate and make selections in Computer Setup. Passwords can be used with an optional security cable on...
... Computer Setup (BIOS) BIOS administrator password in Computer Setup* Unauthorized access to the contents of a hard drive DriveLock password (select products only) in Computer Setup* Unauthorized startup from an optional external optical drive (select products only), optional external hard drive (select products only), or internal network adapter Boot options feature in Computer Setup* Unauthorized access to a Windows user account Windows user password Unauthorized access to navigate and make selections in Computer Setup. Passwords can be used with an optional security cable on...

User Guide
Page 58
... password (using the same kind of keys you must be unlocked. Entering a BIOS administrator password At the BIOS administrator password prompt, type your changes and exit Computer Setup, select the Save icon and then follow these steps: 1. Start Computer Setup. ● Computers or tablets with the volume down button until the Startup menu is displayed, and then tap f10 to unlock the drive. Turn off the tablet. 2. Press the power button, and when the HP...
... password (using the same kind of keys you must be unlocked. Entering a BIOS administrator password At the BIOS administrator password prompt, type your changes and exit Computer Setup, select the Save icon and then follow these steps: 1. Start Computer Setup. ● Computers or tablets with the volume down button until the Startup menu is displayed, and then tap f10 to unlock the drive. Turn off the tablet. 2. Press the power button, and when the HP...
User Guide
Page 62
... on -screen instructions. At the DriveLock Password prompt, type the current DriveLock user password or master password that protects only the computer it must be kept up to a system or network. NOTE: The Change DriveLock Master Password option is not limited in most viruses, destroy them to enter passwords. Using Windows Hello (select products only) On products equipped with a fingerprint reader or an infrared camera, you install on...
... on -screen instructions. At the DriveLock Password prompt, type the current DriveLock user password or master password that protects only the computer it must be kept up to a system or network. NOTE: The Change DriveLock Master Password option is not limited in most viruses, destroy them to enter passwords. Using Windows Hello (select products only) On products equipped with a fingerprint reader or an infrared camera, you install on...
User Guide
Page 63
...-screen instructions. 3. To temporarily resolve the problem, disable the firewall, perform the task that enables businesses to correct security problems and improve software performance. Select the Start button, select Settings, and then select Update & Security. 2. To schedule a time for installing updates, select Advanced Options, and then follow the on-screen instructions. It provides security features that does not meet those criteria is blocked. This software can quickly download and install...
...-screen instructions. 3. To temporarily resolve the problem, disable the firewall, perform the task that enables businesses to correct security problems and improve software performance. Select the Start button, select Settings, and then select Update & Security. 2. To schedule a time for installing updates, select Advanced Options, and then follow the on-screen instructions. It provides security features that does not meet those criteria is blocked. This software can quickly download and install...

User Guide
Page 65
... on -screen instructions. Type disk in an optional docking device or connected to a USB port is not protected by HP 3D DriveGuard. 8 Maintenance It is important to perform regular maintenance to keep your computer by performing regular maintenance tasks with tools such as Disk Defragmenter and Disk Cleanup. It also provides instructions for updating programs and drivers, steps to clean the computer, and tips for these events, HP 3D...
... on -screen instructions. Type disk in an optional docking device or connected to a USB port is not protected by HP 3D DriveGuard. 8 Maintenance It is important to perform regular maintenance to keep your computer by performing regular maintenance tasks with tools such as Disk Defragmenter and Disk Cleanup. It also provides instructions for updating programs and drivers, steps to clean the computer, and tips for these events, HP 3D...

User Guide
Page 71
... or driver, use the Factory Reset option of HP Recovery Manager to correct computer issues. ● HP Recovery media must be used if the computer hard drive fails. NOTE: You must be connected to the Internet to access the Get help app. ● If you need to know before you can choose the System Recovery option from the media provided by using the HP Recovery media that you either created or that was installed at the factory. For...
... or driver, use the Factory Reset option of HP Recovery Manager to correct computer issues. ● HP Recovery media must be used if the computer hard drive fails. NOTE: You must be connected to the Internet to access the Get help app. ● If you need to know before you can choose the System Recovery option from the media provided by using the HP Recovery media that you either created or that was installed at the factory. For...
User Guide
Page 76
... HP Sure Start Complete the installation by unplugging the power cord from the AC outlet. See Starting Computer Setup on -screen instructions. 4. Select Main, and then select System Information. 3. Downloading a BIOS update CAUTION: To reduce the risk of the screen, and then follow these steps: a. Select Updates, and then select Check for later BIOS versions, see Downloading a BIOS update on battery power, docked in an optional docking device, or connected to reliable external power using...
... HP Sure Start Complete the installation by unplugging the power cord from the AC outlet. See Starting Computer Setup on -screen instructions. 4. Select Main, and then select System Information. 3. Downloading a BIOS update CAUTION: To reduce the risk of the screen, and then follow these steps: a. Select Updates, and then select Check for later BIOS versions, see Downloading a BIOS update on battery power, docked in an optional docking device, or connected to reliable external power using...

User Guide
Page 83
... 18 buttons left TouchPad 8 power 10 right TouchPad 8 entering 49 setting 48 C call answer light 10 call end light 10 camera 7 using 31 camera light, identifying 7 camera, identifying 7 caps lock light, identifying 9 caring for your computer 54 cleaning your computer 54 components bottom 15 display 7 left side 6 rear 16 right side 5 top 8 Computer Setup BIOS administrator password 44 navigating and selecting 62 restoring factory settings 63 using a USB keyboard or USB mouse to start Computer Setup 62 computer setup 62 connecting...
... 18 buttons left TouchPad 8 power 10 right TouchPad 8 entering 49 setting 48 C call answer light 10 call end light 10 camera 7 using 31 camera light, identifying 7 camera, identifying 7 caps lock light, identifying 9 caring for your computer 54 cleaning your computer 54 components bottom 15 display 7 left side 6 rear 16 right side 5 top 8 Computer Setup BIOS administrator password 44 navigating and selecting 62 restoring factory settings 63 using a USB keyboard or USB mouse to start Computer Setup 62 computer setup 62 connecting...
User Guide
Page 84
...38 privacy key light 9 product name and number, computer 17 public WLAN connection 21 R recover options 59 recovery discs 58, 60 HP Recovery Manager 59 media 60 starting 60 supported discs 58 system 59 USB flash drive 60 using HP Recovery media 58 recovery media creating 57 creating using HP Recovery Manager 58 recovery partition removing 61 regulatory information regulatory label 18 wireless certification labels 18 S security cable slot, identifying 6 serial number 17 serial number, computer 17 service labels, locating 17 setup utility navigating and selecting 62 restoring factory settings 63...
...38 privacy key light 9 product name and number, computer 17 public WLAN connection 21 R recover options 59 recovery discs 58, 60 HP Recovery Manager 59 media 60 starting 60 supported discs 58 system 59 USB flash drive 60 using HP Recovery media 58 recovery media creating 57 creating using HP Recovery Manager 58 recovery partition removing 61 regulatory information regulatory label 18 wireless certification labels 18 S security cable slot, identifying 6 serial number 17 serial number, computer 17 service labels, locating 17 setup utility navigating and selecting 62 restoring factory settings 63...
Maintenance and Service Guide
Page 62
... computer or initiate Sleep. Do not insert, remove, connect, or disconnect any software updates, especially system BIOS updates. Type support in an optional docking device, or connected to reliable external power using the AC adapter. or - At the download area, follow these steps: a. You may need to access this information to locate the update later, after the download is downloaded. Make a note of damage to the computer or an unsuccessful installation, download and install a BIOS update only when the...
... computer or initiate Sleep. Do not insert, remove, connect, or disconnect any software updates, especially system BIOS updates. Type support in an optional docking device, or connected to reliable external power using the AC adapter. or - At the download area, follow these steps: a. You may need to access this information to locate the update later, after the download is downloaded. Make a note of damage to the computer or an unsuccessful installation, download and install a BIOS update only when the...

Maintenance and Service Guide
Page 84
... the module manufacturer and stored on -screen instructions. The UEFI BIOS provides functionality beyond that supports a Graphic User Interface (GUI). HP has provided options in Computer Setup (BIOS) to allow you upgrade or downgrade the OS. 3. How would be reset to factory settings)? This message relates to run -time environment allows the loading and execution of your hard drive. Restore defaults does not reset the Custom Secure Boot keys. It is a replacement for...
... the module manufacturer and stored on -screen instructions. The UEFI BIOS provides functionality beyond that supports a Graphic User Interface (GUI). HP has provided options in Computer Setup (BIOS) to allow you upgrade or downgrade the OS. 3. How would be reset to factory settings)? This message relates to run -time environment allows the loading and execution of your hard drive. Restore defaults does not reset the Custom Secure Boot keys. It is a replacement for...

Maintenance and Service Guide
Page 87
...fingerprint reader removal 44 fingerprint reader board spare part number 24 fingerprint reader, identifying 13 fn key, identifying 14 fn lock light 11 G graphics, product description 1 H hard drive product description 2 HDMI port, identifying 7 HDMI to VGA adapter, spare part numbers 25 heat sink, spare part numbers 24 hot keys microphone mute 15 hotkeys, using 16 HP PC Hardware Diagnostics (UEFI) using 56 HP Recovery Manager correcting boot problems 63 starting 62 HP Recovery media creating 59 recovery 62 HP Recovery partition recovery 62 removing 63 HP Sure Start 77 I integrated camera light...
...fingerprint reader removal 44 fingerprint reader board spare part number 24 fingerprint reader, identifying 13 fn key, identifying 14 fn lock light 11 G graphics, product description 1 H hard drive product description 2 HDMI port, identifying 7 HDMI to VGA adapter, spare part numbers 25 heat sink, spare part numbers 24 hot keys microphone mute 15 hotkeys, using 16 HP PC Hardware Diagnostics (UEFI) using 56 HP Recovery Manager correcting boot problems 63 starting 62 HP Recovery media creating 59 recovery 62 HP Recovery partition recovery 62 removing 63 HP Sure Start 77 I integrated camera light...

Maintenance and Service Guide
Page 88
... audio 2 chipset 1 configurable software 5 display panel 1 docking 3 Ethernet 2 graphics 1 hard drive 2 keyboard 3 memory module 1 microphone 2 operating system 4 pointing device 3 ports 3 power requirements 4 processors 1 product name 1 security 4 serviceability 5 video 2 wireless 2 product name 1 product name and number, computer 18 R rear speakers spare part numbers 24 recover options 61 recovery discs 60, 62 HP Recovery Manager 61 media 62 starting 62 supported discs 60 system 61 USB flash drive 62 using HP Recovery media 60 recovery media creating 59 creating using HP Recovery Manager...
... audio 2 chipset 1 configurable software 5 display panel 1 docking 3 Ethernet 2 graphics 1 hard drive 2 keyboard 3 memory module 1 microphone 2 operating system 4 pointing device 3 ports 3 power requirements 4 processors 1 product name 1 security 4 serviceability 5 video 2 wireless 2 product name 1 product name and number, computer 18 R rear speakers spare part numbers 24 recover options 61 recovery discs 60, 62 HP Recovery Manager 61 media 62 starting 62 supported discs 60 system 61 USB flash drive 62 using HP Recovery media 60 recovery media creating 59 creating using HP Recovery Manager...
Maintenance and Service Guide
Page 89
... keys, using 14 specifications computer 64 display 65 M.2 solid-state drive 67 supported discs, recovery 60 Sure Start using 55 system board removal 41 spare part number 24 system information locating 18 system memory, removing personal data from volatile 72 system recovery 61 system restore point creating 60 system restore point, creating 59 T thermal vent removal 50 spare part number 24 Thunderbolt port with HP Sleep and Charge identifying USB Type-C 7 TouchPad buttons 10 removal 46 spare part number 24 TouchPad zone identifying 10 TPM settings 55 U USB 3.x SuperSpeed port...
... keys, using 14 specifications computer 64 display 65 M.2 solid-state drive 67 supported discs, recovery 60 Sure Start using 55 system board removal 41 spare part number 24 system information locating 18 system memory, removing personal data from volatile 72 system recovery 61 system restore point creating 60 system restore point, creating 59 T thermal vent removal 50 spare part number 24 Thunderbolt port with HP Sleep and Charge identifying USB Type-C 7 TouchPad buttons 10 removal 46 spare part number 24 TouchPad zone identifying 10 TPM settings 55 U USB 3.x SuperSpeed port...


