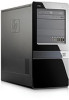
Illustrated Parts & Service Map: HP Elite 7100 Series Microtower PC
Page 3
... has failed (checksum error, corrupted image, etc.) 1. Replace the system board. 5 short, 1 sec pause BIOS recovery was suc- HP Elite 7100 MT Series 606037-001 page 3 User Password Allows you to : view capacity (HDD only). Virtualization Tech- Boot Boot-time Diagnostic Disable/enable POST... the power cord. 7. The information in the system ROM, accessed by resetting the password jumper. Go to load setup defaults. Select Download drivers and software (and firmware). 4. Select the OS. 7. NOTE: The download includes instructions on pins 1 and 2, then repeat steps 5 ...
Maintenance & Service Guide: HP Elite 7100 Series Microtower PC
Page 58
...make sure you can transfer the data to the chassis. Figure 7-24 Removing the Hard Drive Cage Screws 50 Chapter 7 Removal and Replacement Procedures Microtower (MT) Chassis Reconnect the power cord and turn on page 28). 2. Remove the two screws that were disengaged when the access panel was removed.... panel (Access Panel on the computer. 10. If you do not have created a Recovery Disc Set to restore the operating system, software drivers, and any security devices that secure the hard drive cage to the new hard drive. Lock any software applications that you have this CD ...