
Maintenance and Service Guide
Page 9
... ...72 Creating HP Recovery media (select products only 72 Using Windows tools ...73 Restore and recovery ...74 Recovering using HP Recovery Manager 74 What you need to know before you get started 74 Using the HP Recovery partition (select products only 75 Using HP Recovery media to recover 75 Changing the computer boot order 76 Removing the HP Recovery partition (select products only 76 11 Specifications ...77 Computer specifications ...77 39.6-cm (15.6-in) display specifications ...78 Hard drive specifications ...79 Hard drive specifications, hybrid drives ...80 12 Power cord set...
... ...72 Creating HP Recovery media (select products only 72 Using Windows tools ...73 Restore and recovery ...74 Recovering using HP Recovery Manager 74 What you need to know before you get started 74 Using the HP Recovery partition (select products only 75 Using HP Recovery media to recover 75 Changing the computer boot order 76 Removing the HP Recovery partition (select products only 76 11 Specifications ...77 Computer specifications ...77 39.6-cm (15.6-in) display specifications ...78 Hard drive specifications ...79 Hard drive specifications, hybrid drives ...80 12 Power cord set...
Maintenance and Service Guide
Page 22
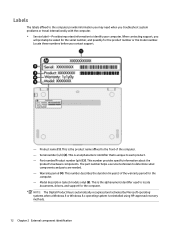
... you troubleshoot system problems or travel internationally with the computer. ● Service label-Provides important information to determine what components and parts are needed. - Warranty period (4). When contacting support, you contact support. - Product name (1). Part number/Product number (p/n) (3). This number describes the duration (in years) of the computer. - This is an alphanumeric identifier that is reinstalled using HP-approved recovery methods. 12 Chapter 2 External component identification Serial number (s/n) (2). Model...
... you troubleshoot system problems or travel internationally with the computer. ● Service label-Provides important information to determine what components and parts are needed. - Warranty period (4). When contacting support, you contact support. - Product name (1). Part number/Product number (p/n) (3). This number describes the duration (in years) of the computer. - This is an alphanumeric identifier that is reinstalled using HP-approved recovery methods. 12 Chapter 2 External component identification Serial number (s/n) (2). Model...
Maintenance and Service Guide
Page 44
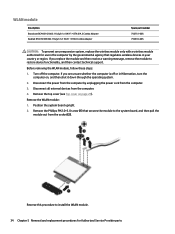
..., replace the wireless module only with a wireless module authorized for Authorized Service Provider parts Disconnect all external devices from the computer. 3. Remove the Phillips PM2.0×3.0 screw (1) that regulates wireless devices in Hibernation, turn the computer on page 27). Reverse this procedure to install the WLAN module. 34 Chapter 5 Removal and replacement procedures for use in the computer by unplugging the power cord from the computer. 4. Remove the top cover (see...
..., replace the wireless module only with a wireless module authorized for Authorized Service Provider parts Disconnect all external devices from the computer. 3. Remove the Phillips PM2.0×3.0 screw (1) that regulates wireless devices in Hibernation, turn the computer on page 27). Reverse this procedure to install the WLAN module. 34 Chapter 5 Removal and replacement procedures for use in the computer by unplugging the power cord from the computer. 4. Remove the top cover (see...
Maintenance and Service Guide
Page 70
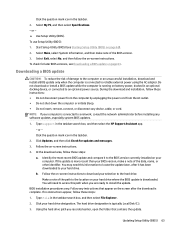
... initiate Sleep. ● Do not insert, remove, connect, or disconnect any instructions that contains the update. 60 Chapter 6 Using Setup Utility (BIOS) in an optional docking device, or connected to your hard drive designation. The hard drive designation is connected to install the update. From the Start screen, type support, and then select the HP Support Assistant app. ‒ or - Using the hard drive path you are ready to a network, consult the network administrator before installing any software updates, especially system BIOS updates. 1. If the update...
... initiate Sleep. ● Do not insert, remove, connect, or disconnect any instructions that contains the update. 60 Chapter 6 Using Setup Utility (BIOS) in an optional docking device, or connected to your hard drive designation. The hard drive designation is connected to install the update. From the Start screen, type support, and then select the HP Support Assistant app. ‒ or - Using the hard drive path you are ready to a network, consult the network administrator before installing any software updates, especially system BIOS updates. 1. If the update...
Maintenance and Service Guide
Page 73
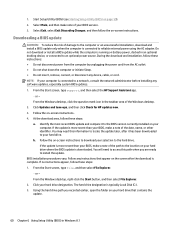
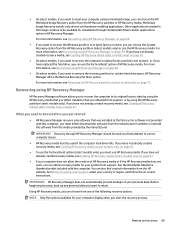
... HP Support Assistant app. - Do not download or install a BIOS update while the computer is running on battery power, docked in an optional docking device, or connected to the location on your hard drive where the BIOS update is connected to the BIOS version currently installed on page 63. Click Updates, and then click Check for later BIOS versions, see Starting Setup Utility (BIOS) on the screen after it to reliable external power using the AC adapter. Follow the on -screen instructions...
... HP Support Assistant app. - Do not download or install a BIOS update while the computer is running on battery power, docked in an optional docking device, or connected to the location on your hard drive where the BIOS update is connected to the BIOS version currently installed on page 63. Click Updates, and then click Check for later BIOS versions, see Starting Setup Utility (BIOS) on the screen after it to reliable external power using the AC adapter. Follow the on -screen instructions...
Maintenance and Service Guide
Page 79
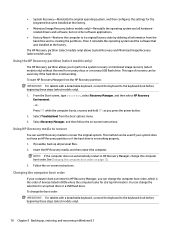
... follow the on-screen instructions. Recovering using HP Recovery Manager HP Recovery Manager software allows you to recover the computer to its original factory state by using HP Recovery Manager on page 69. IMPORTANT: HP Recovery Manager does not automatically provide backups of HP Recovery media. IMPORTANT: Recovery through the Reinstall drivers and/or applications option in the image continue to be used if the computer hard drive fails. Restore and recovery 69 If you have not already created recovery media, see Creating HP Recovery media (select models only) on...
... follow the on-screen instructions. Recovering using HP Recovery Manager HP Recovery Manager software allows you to recover the computer to its original factory state by using HP Recovery Manager on page 69. IMPORTANT: HP Recovery Manager does not automatically provide backups of HP Recovery media. IMPORTANT: Recovery through the Reinstall drivers and/or applications option in the image continue to be used if the computer hard drive fails. Restore and recovery 69 If you have not already created recovery media, see Creating HP Recovery media (select models only) on...
Maintenance and Service Guide
Page 80
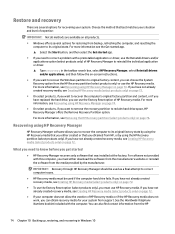
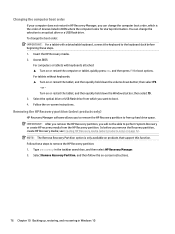
... up , restoring, and recovering in HP Recovery Manager, change the selection for recovery discs or a recovery USB flash drive. Using HP Recovery media to recover the original system. This method can use HP Recovery media to recover You can be used only if the hard drive is the order of recovery can be used if your computer does not restart in BIOS where the computer looks for startup information. See Changing the computer boot order on -screen instructions. This type of devices listed in HP Recovery Manager, you press the power button. 2. NOTE...
... up , restoring, and recovering in HP Recovery Manager, change the selection for recovery discs or a recovery USB flash drive. Using HP Recovery media to recover the original system. This method can use HP Recovery media to recover You can be used only if the hard drive is the order of recovery can be used if your computer does not restart in BIOS where the computer looks for startup information. See Changing the computer boot order on -screen instructions. This type of devices listed in HP Recovery Manager, you press the power button. 2. NOTE...
Maintenance and Service Guide
Page 84
...), you can use the Factory Reset option of HP Recovery Manager to reinstall the individual application or driver. ▲ Type recovery in Windows 10 What you need to correct a problem with a preinstalled application or driver, use HP Recovery media. For software not provided with the computer. See the Worldwide Telephone Numbers booklet included with this computer, you need to recover the computer's original factory partition and content, or if you have replaced the hard drive, you must...
...), you can use the Factory Reset option of HP Recovery Manager to reinstall the individual application or driver. ▲ Type recovery in Windows 10 What you need to correct a problem with a preinstalled application or driver, use HP Recovery media. For software not provided with the computer. See the Worldwide Telephone Numbers booklet included with this computer, you need to recover the computer's original factory partition and content, or if you have replaced the hard drive, you must...
Maintenance and Service Guide
Page 86
... up hard drive space. or Turn on -screen instructions. Access BIOS: For computers or tablets with a detachable keyboard, connect the keyboard to the keyboard dock before you to remove the HP Recovery partition to free up , restoring, and recovering in the taskbar search box, and then select HP Recovery Manager. 2. So before beginning these steps to remove the HP Recovery partition: 1. Removing the HP Recovery partition (select products only) HP Recovery Manager software allows you remove the Recovery partition, create HP Recovery media; Changing the computer boot order If...
... up hard drive space. or Turn on -screen instructions. Access BIOS: For computers or tablets with a detachable keyboard, connect the keyboard to the keyboard dock before you to remove the HP Recovery partition to free up , restoring, and recovering in the taskbar search box, and then select HP Recovery Manager. 2. So before beginning these steps to remove the HP Recovery partition: 1. Removing the HP Recovery partition (select products only) HP Recovery Manager software allows you remove the Recovery partition, create HP Recovery media; Changing the computer boot order If...
Maintenance and Service Guide
Page 94
... illustrated 19 audio, product description 2 audio-out (headphone)/audio-in (microphone) jack, identifying 4 B backups 67, 72 battery illustrated 17 lights 5 removal 47 spare part number 47 BIOS determining version 59, 62 downloading an update 60, 63 starting the Setup Utility 59, 62 updating 59, 62 Bluetooth label 13 boot order changing 70, 76 bottom 13 bottom cover illustrated 17 buttons left TouchPad 9 power 5 right TouchPad 9 C cables, service considerations 22 caps lock light, identifying 10 chipset, product description 1 components bottom 11 display 7 left...
... illustrated 19 audio, product description 2 audio-out (headphone)/audio-in (microphone) jack, identifying 4 B backups 67, 72 battery illustrated 17 lights 5 removal 47 spare part number 47 BIOS determining version 59, 62 downloading an update 60, 63 starting the Setup Utility 59, 62 updating 59, 62 Bluetooth label 13 boot order changing 70, 76 bottom 13 bottom cover illustrated 17 buttons left TouchPad 9 power 5 right TouchPad 9 C cables, service considerations 22 caps lock light, identifying 10 chipset, product description 1 components bottom 11 display 7 left...

Maintenance and Service Guide
Page 95
... audio 2 chipset 1 display panel 1 Ethernet 2 external media cards 3 graphics 1 hard drive 2 internal card expansion 3 keyboard 3 memory module 2 microphone 2 operating system 3 optical drive 2 pointing device 3 ports 3 power requirements 3 processor 1 product name 1 security 3 sensors 2 serviceability 3 video 2 wireless 2 product name 1 product name and number, computer 12 R recover options 68, 74 recovery discs 68, 70, 73, 75 HP Recovery Manager 69, 74 media 70, 75 starting 70, 75 supported discs 68, 73 system 69, 74 USB flash drive 70, 75 using HP Recovery media 68, 73 recovery media...
... audio 2 chipset 1 display panel 1 Ethernet 2 external media cards 3 graphics 1 hard drive 2 internal card expansion 3 keyboard 3 memory module 2 microphone 2 operating system 3 optical drive 2 pointing device 3 ports 3 power requirements 3 processor 1 product name 1 security 3 sensors 2 serviceability 3 video 2 wireless 2 product name 1 product name and number, computer 12 R recover options 68, 74 recovery discs 68, 70, 73, 75 HP Recovery Manager 69, 74 media 70, 75 starting 70, 75 supported discs 68, 73 system 69, 74 USB flash drive 70, 75 using HP Recovery media 68, 73 recovery media...

Maintenance and Service Guide
Page 96
... 22 top cover illustrated 15 removal 27 spare part number 27 TouchPad buttons 9 TouchPad zone, identifying 9 transporting guidelines 24 traveling with the computer 13 U USB 2.0 port, identifying 6 USB 3.0 ports, identifying 4, 5 USB board removing 37 spare part number 16, 37 V vent, identifying 6 vents, identifying 11 video, product description 2 volume button, identifying 6 W webcam identifying 7 webcam light, identifying 7 webcam/microphone module illustrated 19 removing 51 Windows system restore point 67, 68, 72, 73 Windows key, identifying 11 Windows tools using 68, 73 wireless antennas...
... 22 top cover illustrated 15 removal 27 spare part number 27 TouchPad buttons 9 TouchPad zone, identifying 9 transporting guidelines 24 traveling with the computer 13 U USB 2.0 port, identifying 6 USB 3.0 ports, identifying 4, 5 USB board removing 37 spare part number 16, 37 V vent, identifying 6 vents, identifying 11 video, product description 2 volume button, identifying 6 W webcam identifying 7 webcam light, identifying 7 webcam/microphone module illustrated 19 removing 51 Windows system restore point 67, 68, 72, 73 Windows key, identifying 11 Windows tools using 68, 73 wireless antennas...
User Guide
Page 9
...41 Setting Windows passwords 41 Setting Setup Utility (BIOS) passwords 42 Using Internet security software ...42 Using antivirus software ...42 Using firewall software ...43 Installing software updates ...43 Installing critical security updates ...43 Using HP Touchpoint Manager (select models only 43 Securing your wireless network ...44 Backing up your software applications and information 44 Using an optional security cable lock 44 9 Using Setup Utility (BIOS) ...45 Starting Setup Utility (BIOS) ...45 Updating the BIOS ...45 Determining the BIOS version 45 Downloading a BIOS update 46...
...41 Setting Windows passwords 41 Setting Setup Utility (BIOS) passwords 42 Using Internet security software ...42 Using antivirus software ...42 Using firewall software ...43 Installing software updates ...43 Installing critical security updates ...43 Using HP Touchpoint Manager (select models only 43 Securing your wireless network ...44 Backing up your software applications and information 44 Using an optional security cable lock 44 9 Using Setup Utility (BIOS) ...45 Starting Setup Utility (BIOS) ...45 Updating the BIOS ...45 Determining the BIOS version 45 Downloading a BIOS update 46...

User Guide
Page 27
... as the wireless button) ● Operating system controls Wireless button The computer has a wireless button, one or more wireless devices, and, on select models, one or more of these features: ● Wireless button or wireless key (also called the airplane mode key) (referred to in Help and Support. ▲ From the Start screen, type help you to set up a connection or network, connect to a network, and diagnose and repair network problems. Connecting to a wireless network 17 Using the wireless controls You can control the wireless devices in your...
... as the wireless button) ● Operating system controls Wireless button The computer has a wireless button, one or more wireless devices, and, on select models, one or more of these features: ● Wireless button or wireless key (also called the airplane mode key) (referred to in Help and Support. ▲ From the Start screen, type help you to set up a connection or network, connect to a network, and diagnose and repair network problems. Connecting to a wireless network 17 Using the wireless controls You can control the wireless devices in your...
User Guide
Page 41
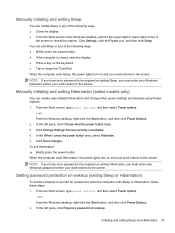
... on and your work returns to the screen. Manually initiating and exiting Hibernation (select models only) You can enable user-initiated Hibernation and change other power settings and timeouts using Power Options. 1. From the Windows desktop, right-click the Start button, and then click Power Options. 2. Click Save changes. From the Start screen, type power options, and then select Power options. ‒ or - To exit Hibernation: ▲ Briefly press the power button. You can exit Sleep in any...
... on and your work returns to the screen. Manually initiating and exiting Hibernation (select models only) You can enable user-initiated Hibernation and change other power settings and timeouts using Power Options. 1. From the Windows desktop, right-click the Start button, and then click Power Options. 2. Click Save changes. From the Start screen, type power options, and then select Power options. ‒ or - To exit Hibernation: ▲ Briefly press the power button. You can exit Sleep in any...
User Guide
Page 52
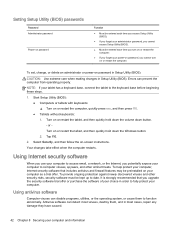
... them to fully protect your computer. Using antivirus software Computer viruses can disable programs, utilities, or the operating system, or cause them , and in order to function abnormally. or - Start Setup Utility (BIOS): ● Computers or tablets with keyboards: ▲ Turn on or restart the tablet, and then quickly hold down the volume down the Windows button. 2. Turn on or restart the computer, quickly press esc, and then press...
... them to fully protect your computer. Using antivirus software Computer viruses can disable programs, utilities, or the operating system, or cause them , and in order to function abnormally. or - Start Setup Utility (BIOS): ● Computers or tablets with keyboards: ▲ Turn on or restart the tablet, and then quickly hold down the volume down the Windows button. 2. Turn on or restart the computer, quickly press esc, and then press...
User Guide
Page 53
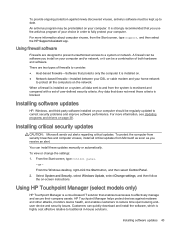
... system is blocked. From the Start screen, type control panel. ‒ or - Using HP Touchpoint Manager (select models only) HP Touchpoint Manager is a cloud-based IT solution that does not meet those criteria is monitored and compared with a set of user-defined security criteria. HP Touchpoint Manager helps protect devices against newly discovered viruses, antivirus software must be a combination of both hardware and software. Installing critical security updates CAUTION: Microsoft sends out...
... system is blocked. From the Start screen, type control panel. ‒ or - Using HP Touchpoint Manager (select models only) HP Touchpoint Manager is a cloud-based IT solution that does not meet those criteria is monitored and compared with a set of user-defined security criteria. HP Touchpoint Manager helps protect devices against newly discovered viruses, antivirus software must be a combination of both hardware and software. Installing critical security updates CAUTION: Microsoft sends out...
User Guide
Page 56
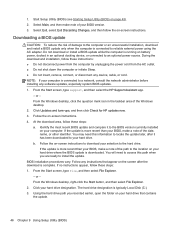
... - Using the hard drive path you are ready to a network, consult the network administrator before installing any device, cable, or cord. Start Setup Utility (BIOS) (see Starting Setup Utility (BIOS) on your computer is downloaded. NOTE: If your hard drive that appear on -screen instructions to the hard drive. If the update is more recent than your hard drive designation. b. Follow the on the screen after it to an optional power source. From the Windows desktop, right-click the Start button, and...
... - Using the hard drive path you are ready to a network, consult the network administrator before installing any device, cable, or cord. Start Setup Utility (BIOS) (see Starting Setup Utility (BIOS) on your computer is downloaded. NOTE: If your hard drive that appear on -screen instructions to the hard drive. If the update is more recent than your hard drive designation. b. Follow the on the screen after it to an optional power source. From the Windows desktop, right-click the Start button, and...
User Guide
Page 68
...HP PC Hardware Diagnostics (UEFI) downloading 48 HP Recovery Manager correcting boot problems 53 starting 53 HP Recovery media creating 50 recovery 53 HP Recovery partition recovery 53 removing 54 HP resources 2 HP Touchpoint Manager 43 I initiating Sleep and Hibernation 30 input power 55 installing critical security updates 43 optional security cable lock 44 integrated numeric keypad, identifying 13, 29 Intel WiDi certified displays, connecting 24 internal display switch, identifying 8 internal microphones, identifying 8 Internet security software, using 42 J jacks audio-out (headphone)/audio...
...HP PC Hardware Diagnostics (UEFI) downloading 48 HP Recovery Manager correcting boot problems 53 starting 53 HP Recovery media creating 50 recovery 53 HP Recovery partition recovery 53 removing 54 HP resources 2 HP Touchpoint Manager 43 I initiating Sleep and Hibernation 30 input power 55 installing critical security updates 43 optional security cable lock 44 integrated numeric keypad, identifying 13, 29 Intel WiDi certified displays, connecting 24 internal display switch, identifying 8 internal microphones, identifying 8 Internet security software, using 42 J jacks audio-out (headphone)/audio...
User Guide
Page 69
...N network jack, identifying 6 num lock key, identifying 13, 29 O one-finger slide touch screen gesture 28 operating environment 55 original system recovery 52 P passwords Setup Utility (BIOS) 42 Windows 41 ports HDMI 5, 23 Miracast 24 USB 2.0 7 USB 3.0 5 USB 3.0 charging 5 power AC 34 battery 32 power button, identifying 6 power connector, identifying 6 power meter, using 32 power settings, using 32 product name and number, computer 15 public WLAN connection 18 R recover options 51 recovery discs 51, 53 HP Recovery Manager 52 media 53 starting 53 supported discs 51 system 52 USB flash drive 53...
...N network jack, identifying 6 num lock key, identifying 13, 29 O one-finger slide touch screen gesture 28 operating environment 55 original system recovery 52 P passwords Setup Utility (BIOS) 42 Windows 41 ports HDMI 5, 23 Miracast 24 USB 2.0 7 USB 3.0 5 USB 3.0 charging 5 power AC 34 battery 32 power button, identifying 6 power connector, identifying 6 power meter, using 32 power settings, using 32 product name and number, computer 15 public WLAN connection 18 R recover options 51 recovery discs 51, 53 HP Recovery Manager 52 media 53 starting 53 supported discs 51 system 52 USB flash drive 53...


