
ENVY Notebook PC Maintenance and Service Guide
Page 42
... replacement procedures This chapter provides removal and replacement procedures for your computer, go to http://partsurfer.hp.com, select your country or region, and then follow the on-screen instructions. For complete and current information on supported parts for Authorized Service Provider only parts. Make special note of each screw size and location during removal and replacement. 34 Chapter 6 Removal and replacement procedures for Authorized Service Provider parts...
... replacement procedures This chapter provides removal and replacement procedures for your computer, go to http://partsurfer.hp.com, select your country or region, and then follow the on-screen instructions. For complete and current information on supported parts for Authorized Service Provider only parts. Make special note of each screw size and location during removal and replacement. 34 Chapter 6 Removal and replacement procedures for Authorized Service Provider parts...
ENVY Notebook PC Maintenance and Service Guide
Page 48
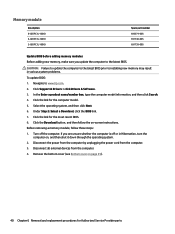
Click Support & Drivers > click Drivers & Software. 3. Click the link for the most recent BIOS. 8. Select the operating system, and then click Next. 6. Click the link for the computer model. 5. Before removing a memory module, follow the on page 35). 40 Chapter 6 Removal and replacement procedures for Authorized Service Provider parts Turn off or in various system problems. To update BIOS: 1. If you update the computer to the latest BIOS. Navigate to installing new memory may...
Click Support & Drivers > click Drivers & Software. 3. Click the link for the most recent BIOS. 8. Select the operating system, and then click Next. 6. Click the link for the computer model. 5. Before removing a memory module, follow the on page 35). 40 Chapter 6 Removal and replacement procedures for Authorized Service Provider parts Turn off or in various system problems. To update BIOS: 1. If you update the computer to the latest BIOS. Navigate to installing new memory may...
ENVY Notebook PC Maintenance and Service Guide
Page 93
...then make note of Setup Utility (BIOS) may be accessed by pressing fn+esc (if you need to update Setup Utility (BIOS), first determine the BIOS version on battery power, docked in an optional docking device, or connected to reliable external power using Setup Utility (BIOS). To exit Setup Utility (BIOS) without saving your changes, use Setup Utility (BIOS): 1. Start Setup Utility (BIOS). 2. Downloading a BIOS update CAUTION: To reduce the risk of system and extended memory. Do not shut down the computer or initiate Sleep or Hibernation. 7 Using Setup Utility (BIOS) in Windows...
...then make note of Setup Utility (BIOS) may be accessed by pressing fn+esc (if you need to update Setup Utility (BIOS), first determine the BIOS version on battery power, docked in an optional docking device, or connected to reliable external power using Setup Utility (BIOS). To exit Setup Utility (BIOS) without saving your changes, use Setup Utility (BIOS): 1. Start Setup Utility (BIOS). 2. Downloading a BIOS update CAUTION: To reduce the risk of system and extended memory. Do not shut down the computer or initiate Sleep or Hibernation. 7 Using Setup Utility (BIOS) in Windows...

ENVY Notebook PC Maintenance and Service Guide
Page 94
... than the BIOS version currently installed on your hard drive. 86 Chapter 7 Using Setup Utility (BIOS) in Windows 7 You may need to access this information to a network, consult the network administrator before installing any instructions that has an .exe extension (for example, filename.exe). Complete the installation by selecting Start > Computer. 2. Follow the on -screen instructions to download your hard drive where the BIOS update is typically Local Disk (C:). 3. Follow any software updates, especially system BIOS updates. Using the hard drive path...
... than the BIOS version currently installed on your hard drive. 86 Chapter 7 Using Setup Utility (BIOS) in Windows 7 You may need to access this information to a network, consult the network administrator before installing any instructions that has an .exe extension (for example, filename.exe). Complete the installation by selecting Start > Computer. 2. Follow the on -screen instructions to download your hard drive where the BIOS update is typically Local Disk (C:). 3. Follow any software updates, especially system BIOS updates. Using the hard drive path...
ENVY Notebook PC Maintenance and Service Guide
Page 96
... delete the downloaded file from your computer. From the Start screen, type file, and then select File Explorer. ‒ or - Click your BIOS, make a note of the date, name, or other identifier. If the update is complete. BIOS installation procedures vary. 1. The BIOS installation begins. 5. If the update is typically Local Disk (C:). 3. Follow any instructions that has an .exe extension (for HP updates now. 3. The hard drive designation...
... delete the downloaded file from your computer. From the Start screen, type file, and then select File Explorer. ‒ or - Click your BIOS, make a note of the date, name, or other identifier. If the update is complete. BIOS installation procedures vary. 1. The BIOS installation begins. 5. If the update is typically Local Disk (C:). 3. Follow any instructions that has an .exe extension (for HP updates now. 3. The hard drive designation...
ENVY Notebook PC Maintenance and Service Guide
Page 98
... the hard drive. Follow the on-screen instructions to download your selection to a network, consult the network administrator before installing any instructions that contains the update. 90 Chapter 9 Using Setup Utility (BIOS) in an optional docking device, or connected to the BIOS version currently installed on battery power, docked in Windows 10 Select My PC, and then select Specifications. - NOTE: If your computer. Type support in the taskbar. 2. Follow the on -screen instructions. Follow any software updates, especially system BIOS updates...
... the hard drive. Follow the on-screen instructions to download your selection to a network, consult the network administrator before installing any instructions that contains the update. 90 Chapter 9 Using Setup Utility (BIOS) in an optional docking device, or connected to the BIOS version currently installed on battery power, docked in Windows 10 Select My PC, and then select Specifications. - NOTE: If your computer. Type support in the taskbar. 2. Follow the on -screen instructions. Follow any software updates, especially system BIOS updates...
ENVY Notebook PC Maintenance and Service Guide
Page 104
... key for boot options. 3. See Changing the computer boot order on -screen instructions. To check for recovery discs: 1. Select Internal CD/DVD ROM Drive from the list. - or - ● Turn on your system without the need for a recovery flash drive: 96 Chapter 10 Backing up all personal files. 2. or - Access HP Recovery Manager in the search field. Changing the computer boot order To change the boot order for the presence of the following ways: ● Select Start and type recovery in either of a recovery partition...
... key for boot options. 3. See Changing the computer boot order on -screen instructions. To check for recovery discs: 1. Select Internal CD/DVD ROM Drive from the list. - or - ● Turn on your system without the need for a recovery flash drive: 96 Chapter 10 Backing up all personal files. 2. or - Access HP Recovery Manager in the search field. Changing the computer boot order To change the boot order for the presence of the following ways: ● Select Start and type recovery in either of a recovery partition...
ENVY Notebook PC Maintenance and Service Guide
Page 108
... to remove the recovery partition to its original factory state by using the HP Recovery partition (select models only). ▲ From the Start screen, type support, and then select the HP Support Assistant app. - Minimized Image Recovery installs only drivers and hardware-enabling applications. For more information, see Recovering using HP Recovery Manager on page 100. Other applications included in the image continue to be used as a final attempt to know before you get started ● HP Recovery Manager recovers only software...
... to remove the recovery partition to its original factory state by using the HP Recovery partition (select models only). ▲ From the Start screen, type support, and then select the HP Support Assistant app. - Minimized Image Recovery installs only drivers and hardware-enabling applications. For more information, see Recovering using HP Recovery Manager on page 100. Other applications included in the image continue to be used as a final attempt to know before you get started ● HP Recovery Manager recovers only software...
ENVY Notebook PC Maintenance and Service Guide
Page 115
... then quickly hold down button; see Creating HP Recovery media (select products only) on -screen instructions. Select Remove Recovery Partition, and then follow the on page 103. Changing the computer boot order If your computer does not restart in HP Recovery Manager, you can change the selection to an optical drive or a USB flash drive. or Turn on products that support this function. Select the optical drive or USB flash drive from the HP Recovery partition. Removing the HP Recovery partition (select products only) HP Recovery Manager software allows you...
... then quickly hold down button; see Creating HP Recovery media (select products only) on -screen instructions. Select Remove Recovery Partition, and then follow the on page 103. Changing the computer boot order If your computer does not restart in HP Recovery Manager, you can change the selection to an optical drive or a USB flash drive. or Turn on products that support this function. Select the optical drive or USB flash drive from the HP Recovery partition. Removing the HP Recovery partition (select products only) HP Recovery Manager software allows you...

ENVY Notebook PC Maintenance and Service Guide
Page 125
... hard drive light 14 HDMI port, identifying 12 HDMI-to-VGA adapter, spare part number 25 heat sink removal 52 spare part numbers 18, 52 hinges illustrated 22, 23 removing 74, 79, 81 HP PC Hardware Diagnostics (UEFI) using 108 HP Recovery Manager 95 correcting boot problems 101, 107 starting 101, 106 HP Recovery media creating 98, 103 recovery 101, 106 HP Recovery partition recovery 101, 106 removing 102, 107 I integrated numeric keypad, identifying 11 internal display switch, identifying 5 internal microphones, identifying 5 J jacks audio-out (headphone)/audio-in (microphone) 12 network 12...
... hard drive light 14 HDMI port, identifying 12 HDMI-to-VGA adapter, spare part number 25 heat sink removal 52 spare part numbers 18, 52 hinges illustrated 22, 23 removing 74, 79, 81 HP PC Hardware Diagnostics (UEFI) using 108 HP Recovery Manager 95 correcting boot problems 101, 107 starting 101, 106 HP Recovery media creating 98, 103 recovery 101, 106 HP Recovery partition recovery 101, 106 removing 102, 107 I integrated numeric keypad, identifying 11 internal display switch, identifying 5 internal microphones, identifying 5 J jacks audio-out (headphone)/audio-in (microphone) 12 network 12...

ENVY Notebook PC Maintenance and Service Guide
Page 126
... HP Recovery Manager 95, 100, 105 media 101, 106 starting 101, 106 supported discs 99, 104 system 100, 105 USB flash drive 101, 106 using HP Recovery media 99, 104 recovery discs 92 recovery media 92 creating 98, 103 creating using HP Recovery Manager 99, 104 recovery partition removing 102, 107 recovery, system 95 removal/replacement procedures 31, 34 restore points 93 restoring the original system creating recovery media 92 RJ-45 (network) jack, identifying 12 RJ-45 (network) status lights, identifying 12 RJ-45 door removal 44 spare part number RTC battery removal...
... HP Recovery Manager 95, 100, 105 media 101, 106 starting 101, 106 supported discs 99, 104 system 100, 105 USB flash drive 101, 106 using HP Recovery media 99, 104 recovery discs 92 recovery media 92 creating 98, 103 creating using HP Recovery Manager 99, 104 recovery partition removing 102, 107 recovery, system 95 removal/replacement procedures 31, 34 restore points 93 restoring the original system creating recovery media 92 RJ-45 (network) jack, identifying 12 RJ-45 (network) status lights, identifying 12 RJ-45 door removal 44 spare part number RTC battery removal...

User Guide
Page 9
... products only 44 Securing your wireless network ...44 Backing up your software applications and information 44 Using an optional security cable ...44 9 Using Setup Utility (BIOS) ...46 Starting Setup Utility (BIOS) ...46 Updating Setup Utility (BIOS) ...46 Determining the BIOS version ...46 Downloading a BIOS update ...47 Synchronizing a tablet and keyboard (select products only 48 10 Using HP PC Hardware Diagnostics (UEFI) ...49 Downloading HP PC Hardware Diagnostics (UEFI) to a USB device 49 11 Backing up, restoring, and recovering ...51 Creating recovery media and backups ...51 ix
... products only 44 Securing your wireless network ...44 Backing up your software applications and information 44 Using an optional security cable ...44 9 Using Setup Utility (BIOS) ...46 Starting Setup Utility (BIOS) ...46 Updating Setup Utility (BIOS) ...46 Determining the BIOS version ...46 Downloading a BIOS update ...47 Synchronizing a tablet and keyboard (select products only 48 10 Using HP PC Hardware Diagnostics (UEFI) ...49 Downloading HP PC Hardware Diagnostics (UEFI) to a USB device 49 11 Backing up, restoring, and recovering ...51 Creating recovery media and backups ...51 ix
User Guide
Page 27
3 Connecting to a network Your computer can control the wireless devices in your computer using your computer and a wired or wireless network connection. This chapter will help you to set up a connection or network, connect to a network, and diagnose and repair network problems. Connecting to a wireless network 17 But even at the factory. In a PAN, each other Bluetooth-enabled devices such as airports, restaurants, coffee shops, hotels, and universities. The wireless light indicates the overall power state of your computer...
3 Connecting to a network Your computer can control the wireless devices in your computer using your computer and a wired or wireless network connection. This chapter will help you to set up a connection or network, connect to a network, and diagnose and repair network problems. Connecting to a wireless network 17 But even at the factory. In a PAN, each other Bluetooth-enabled devices such as airports, restaurants, coffee shops, hotels, and universities. The wireless light indicates the overall power state of your computer...
User Guide
Page 32
...monitor or projector to the VGA port on using the correct cable. Right-click the Start button, select Control Panel, select Hardware and Sound, and then select Sound. Using sound settings Use sound settings to adjust system volume, change sound settings: ▲ Type control panel in the taskbar search box, select Control Panel, select Hardware and Sound, and then select the audio control panel specific to your video features, refer to a network. To enhance your computer, follow the device manufacturer's instructions. To view or change system sounds, or manage audio devices...
...monitor or projector to the VGA port on using the correct cable. Right-click the Start button, select Control Panel, select Hardware and Sound, and then select Sound. Using sound settings Use sound settings to adjust system volume, change sound settings: ▲ Type control panel in the taskbar search box, select Control Panel, select Hardware and Sound, and then select the audio control panel specific to your video features, refer to a network. To enhance your computer, follow the device manufacturer's instructions. To view or change system sounds, or manage audio devices...
User Guide
Page 47
... hard drive to normal operation. Type defragment in the taskbar search box, and then select Defragment and optimize your computer in optimal condition. Using HP 3D DriveGuard (select products only) HP 3D DriveGuard protects a hard drive by HP 3D DriveGuard. NOTE: Only internal hard drives are protected by deleting unnecessary files or Uninstall apps to a USB port is running on solid-state drives. Follow the on -screen instructions...
... hard drive to normal operation. Type defragment in the taskbar search box, and then select Defragment and optimize your computer in optimal condition. Using HP 3D DriveGuard (select products only) HP 3D DriveGuard protects a hard drive by HP 3D DriveGuard. NOTE: Only internal hard drives are protected by deleting unnecessary files or Uninstall apps to a USB port is running on solid-state drives. Follow the on -screen instructions...
User Guide
Page 52
... -screen instructions. Errors can prevent the computer from operating properly. NOTE: To start Setup Utility, your computer must be entered each time you turn on or restart the computer. or Turn on or restart the tablet, and then quickly hold down the volume down the Windows button. 2. When the HP SimplePass welcome screen is displayed, select Get Started. 3. To use the fingerprint reader, you must use the keyboard attached to your power-on password...
... -screen instructions. Errors can prevent the computer from operating properly. NOTE: To start Setup Utility, your computer must be entered each time you turn on or restart the computer. or Turn on or restart the tablet, and then quickly hold down the volume down the Windows button. 2. When the HP SimplePass welcome screen is displayed, select Get Started. 3. To use the fingerprint reader, you must use the keyboard attached to your power-on password...
User Guide
Page 54
... security cable slot on -screen instructions. Select Windows Update, and then follow the on your wireless network When you receive an alert. You can install these updates automatically. You can quickly download and install the software, which is designed to protect your computer and information Using an optional security cable A security cable, which may look slightly different from unauthorized access. Select the Start button, select Settings, and then select Update & Security. 2. Using HP Touchpoint Manager (select...
... security cable slot on -screen instructions. Select Windows Update, and then follow the on your wireless network When you receive an alert. You can install these updates automatically. You can quickly download and install the software, which is designed to protect your computer and information Using an optional security cable A security cable, which may look slightly different from unauthorized access. Select the Start button, select Settings, and then select Update & Security. 2. Using HP Touchpoint Manager (select...
User Guide
Page 57
... Sleep. ● Do not insert, remove, connect, or disconnect any device, cable, or cord. Follow the on battery power, docked in the taskbar. 2. BIOS installation procedures vary. Type file in the taskbar. 2. or - ▲ Use Setup Utility (BIOS). Do not download or install a BIOS update while the computer is connected to a network, consult the network administrator before installing any instructions that contains the update. or - Click Updates, and then click Check for later BIOS versions, see Starting Setup Utility (BIOS...
... Sleep. ● Do not insert, remove, connect, or disconnect any device, cable, or cord. Follow the on battery power, docked in the taskbar. 2. BIOS installation procedures vary. Type file in the taskbar. 2. or - ▲ Use Setup Utility (BIOS). Do not download or install a BIOS update while the computer is connected to a network, consult the network administrator before installing any instructions that contains the update. or - Click Updates, and then click Check for later BIOS versions, see Starting Setup Utility (BIOS...
User Guide
Page 69
... 19 H hard drive light 5 HDMI port connecting 23 identifying 6 HDMI, configuring audio 24 headsets, connecting 21 Hibernation exiting 31 initiated during critical battery level 33 initiating 31 high-definition devices, connecting 23, 25 HP 3D DriveGuard 37 HP Apps Store, visiting 1 HP DataPass 19 HP Mobile Broadband activating 18 IMEI number 18 MEID number 18 HP PC Hardware Diagnostics (UEFI) using 49 HP Recovery Manager correcting boot problems 55 starting 54 HP Recovery media creating 51 recovery 54 HP Recovery partition recovery 54 removing 55 HP resources 2 HP Touchpoint Manager 44 I IMEI...
... 19 H hard drive light 5 HDMI port connecting 23 identifying 6 HDMI, configuring audio 24 headsets, connecting 21 Hibernation exiting 31 initiated during critical battery level 33 initiating 31 high-definition devices, connecting 23, 25 HP 3D DriveGuard 37 HP Apps Store, visiting 1 HP DataPass 19 HP Mobile Broadband activating 18 IMEI number 18 MEID number 18 HP PC Hardware Diagnostics (UEFI) using 49 HP Recovery Manager correcting boot problems 55 starting 54 HP Recovery media creating 51 recovery 54 HP Recovery partition recovery 54 removing 55 HP resources 2 HP Touchpoint Manager 44 I IMEI...

User Guide
Page 70
... starting 54 supported discs 52 system 53 USB flash drive 54 using HP Recovery media 52 recovery media creating 51 creating using HP Recovery Manager 52 recovery partition removing 55 regulatory information regulatory label 15 wireless certification labels 15 RJ-45 (network) jack, identifying 6 RJ-45 (network) status lights, identifying 6 S security cable slot, identifying 5 security cable, installing 44 serial number 15 serial number, computer 15 service labels, locating 15 setting password protection on wakeup 31 Setup Utility (BIOS) passwords 42 shipping the computer 39 shutdown 35 SIM card...
... starting 54 supported discs 52 system 53 USB flash drive 54 using HP Recovery media 52 recovery media creating 51 creating using HP Recovery Manager 52 recovery partition removing 55 regulatory information regulatory label 15 wireless certification labels 15 RJ-45 (network) jack, identifying 6 RJ-45 (network) status lights, identifying 6 S security cable slot, identifying 5 security cable, installing 44 serial number 15 serial number, computer 15 service labels, locating 15 setting password protection on wakeup 31 Setup Utility (BIOS) passwords 42 shipping the computer 39 shutdown 35 SIM card...


