HP Notebook Hard Drives & Solid State Drives Identifying, Preventing, Diagnosing and Recovering from Drive Failures Care and Ma
Page 6
.../docs/support/SupportManual/c01600726/c01600726.pdf. The latest device driver versions address multiple known issues that provides up to address known issues. Procedures for adding SATA drivers to RIS (Remote Installation Service) installation points include: • Adding SATA drivers to installation CDs, building an image, and switching to SATA AHCI mode • Using Sysprep with Serial ATA hard disk drives. Updates to the Intel Matrix Storage Manager driver are configured with...
.../docs/support/SupportManual/c01600726/c01600726.pdf. The latest device driver versions address multiple known issues that provides up to address known issues. Procedures for adding SATA drivers to RIS (Remote Installation Service) installation points include: • Adding SATA drivers to installation CDs, building an image, and switching to SATA AHCI mode • Using Sysprep with Serial ATA hard disk drives. Updates to the Intel Matrix Storage Manager driver are configured with...
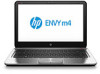
HP ENVY m4 Notebook PC Maintenance and Service Guide
Page 22
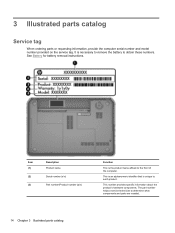
... name Serial number (s/n) Part number/Product number (p/n) Function This is unique to the front of the computer. See Battery for battery removal instructions. 3 Illustrated parts catalog Service tag When ordering parts or requesting information, provide the computer serial number and model number provided on the service tag. It is necessary to remove the battery to determine what components and parts are needed. 14 Chapter 3 Illustrated parts catalog This number provides specific information about the product's hardware components...
... name Serial number (s/n) Part number/Product number (p/n) Function This is unique to the front of the computer. See Battery for battery removal instructions. 3 Illustrated parts catalog Service tag When ordering parts or requesting information, provide the computer serial number and model number provided on the service tag. It is necessary to remove the battery to determine what components and parts are needed. 14 Chapter 3 Illustrated parts catalog This number provides specific information about the product's hardware components...
HP ENVY m4 Notebook PC Maintenance and Service Guide
Page 44
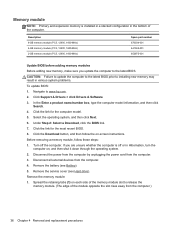
... www.hp.com. 2. Disconnect the power from the computer by unplugging the power cord from the computer. 4. Remove the battery (see Hard drive). Remove the service cover (see Battery). 5. Under Step 2: Select a Download, click the BIOS link. 7. Before removing a memory module, follow the on each side of the module opposite the slot rises away from the computer.) 36 Chapter 4 Removal and replacement procedures In the Enter a product name/number box, type the computer model...
... www.hp.com. 2. Disconnect the power from the computer by unplugging the power cord from the computer. 4. Remove the battery (see Hard drive). Remove the service cover (see Battery). 5. Under Step 2: Select a Download, click the BIOS link. 7. Before removing a memory module, follow the on each side of the module opposite the slot rises away from the computer.) 36 Chapter 4 Removal and replacement procedures In the Enter a product name/number box, type the computer model...
HP ENVY m4 Notebook PC Maintenance and Service Guide
Page 80
... downloaded to a network, consult the network administrator before installing any software updates, especially system BIOS updates. If no instructions are displayed on the screen after it to the hard drive. NOTE: After a message on -screen instructions to the location on -screen instructions. Follow the on the screen reports a successful installation, you want to run diagnostic tests to locate the update later, after the download is functioning properly. The hard drive designation is running on -screen instructions. 72 Chapter 5 Using Setup Utility (BIOS...
... downloaded to a network, consult the network administrator before installing any software updates, especially system BIOS updates. If no instructions are displayed on the screen after it to the hard drive. NOTE: After a message on -screen instructions to the location on -screen instructions. Follow the on the screen reports a successful installation, you want to run diagnostic tests to locate the update later, after the download is functioning properly. The hard drive designation is running on -screen instructions. 72 Chapter 5 Using Setup Utility (BIOS...
HP ENVY m4 Notebook PC Maintenance and Service Guide
Page 87
... settings, and reinstall Windows. Restore and recovery There are several options for recovering your computer or were purchased from the HP Recovery media. Minimized Image Recovery installs only drivers and hardware-enabling applications. For more information, see Recovering using HP Recovery Manager. ● If you have replaced the hard drive, you can choose the HP Minimized Image Recovery option from the backups you created. From the Start screen, type h, and then select Help and Support. ● If you want to the replacement drive...
... settings, and reinstall Windows. Restore and recovery There are several options for recovering your computer or were purchased from the HP Recovery media. Minimized Image Recovery installs only drivers and hardware-enabling applications. For more information, see Recovering using HP Recovery Manager. ● If you have replaced the hard drive, you can choose the HP Minimized Image Recovery option from the backups you created. From the Start screen, type h, and then select Help and Support. ● If you want to the replacement drive...
HP ENVY m4 Notebook PC Maintenance and Service Guide
Page 95
... audio-out jack 11 B b key 7 base enclosure, spare part number 17, 22 battery removal 31 spare part number 17, 21, 31 battery bay 13 battery release latch 13 bottom components 13 button components 6 buttons optical drive eject 11 power 6 TouchPad 9 TouchPad on/off 9 C cables, service considerations 24 caps lock light 8 chipset, product description 1 components bottom 13 buttons 6 display 5 fingerprint reader 6 front 10 keys 7 left-side 10 lights 8 right-side 11 speakers 6 TouchPad 9 computer major components 16 part number 29 specifications...
... audio-out jack 11 B b key 7 base enclosure, spare part number 17, 22 battery removal 31 spare part number 17, 21, 31 battery bay 13 battery release latch 13 bottom components 13 button components 6 buttons optical drive eject 11 power 6 TouchPad 9 TouchPad on/off 9 C cables, service considerations 24 caps lock light 8 chipset, product description 1 components bottom 13 buttons 6 display 5 fingerprint reader 6 front 10 keys 7 left-side 10 lights 8 right-side 11 speakers 6 TouchPad 9 computer major components 16 part number 29 specifications...

HP ENVY m4 Notebook PC Maintenance and Service Guide
Page 96
... description 3 removal 41 spare part numbers 17, 22, 41 keys action 7 b7 esc 7 fn 7 Windows apps 7 Windows logo key 7 L left-side components 10 light components 8 lights caps lock 8 fingerprint reader 8 hard drive 12 mute 8 optical drive 11 power 8, 12 TouchPad 9 webcam 5 wireless 8 M mass storage device illustrated 20 precautions 25 spare part numbers 20 memory module product description 1 removal 36 spare part numbers 18, 21, 36 microphone location 5 product description 2 microphone jack 11 model description 29 model name 1 monitor port 10 mute light 8 N network jack 12 O operating system...
... description 3 removal 41 spare part numbers 17, 22, 41 keys action 7 b7 esc 7 fn 7 Windows apps 7 Windows logo key 7 L left-side components 10 light components 8 lights caps lock 8 fingerprint reader 8 hard drive 12 mute 8 optical drive 11 power 8, 12 TouchPad 9 webcam 5 wireless 8 M mass storage device illustrated 20 precautions 25 spare part numbers 20 memory module product description 1 removal 36 spare part numbers 18, 21, 36 microphone location 5 product description 2 microphone jack 11 model description 29 model name 1 monitor port 10 mute light 8 N network jack 12 O operating system...
HP ENVY m4 Notebook PC Maintenance and Service Guide
Page 97
... video, product description 2 W warranty period 29 webcam 5 webcam light 5 webcam/microphone module removal 65 spare part number 19, 23, 66 Windows apps key 7 Windows logo key 7 wireless antenna locations 5 removal 69 spare part number 19, 22, 70 wireless light 8 wireless module compartment cover location 13 removal 38 spare part number 22, 39 wireless, product description 2 WLAN module removal 38 spare part numbers 18, 21, 22, 38 workstation guidelines 27 T tools required 24 top cover removal 45 spare part number 17, 23, 45 TouchPad button 9 TouchPad button board removal 51 spare part number...
... video, product description 2 W warranty period 29 webcam 5 webcam light 5 webcam/microphone module removal 65 spare part number 19, 23, 66 Windows apps key 7 Windows logo key 7 wireless antenna locations 5 removal 69 spare part number 19, 22, 70 wireless light 8 wireless module compartment cover location 13 removal 38 spare part number 22, 39 wireless, product description 2 WLAN module removal 38 spare part numbers 18, 21, 22, 38 workstation guidelines 27 T tools required 24 top cover removal 45 spare part number 17, 23, 45 TouchPad button 9 TouchPad button board removal 51 spare part number...
User Guide - Windows 8
Page 5
... know your computer ...4 Finding your hardware and software information 4 Locating hardware ...4 Locating software ...4 Front ...4 Right side ...5 Left side ...6 Display ...7 Top ...8 TouchPad ...8 Lights ...9 Button, speakers, and fingerprint reader 10 Keys ...11 Bottom ...12 Labels ...13 3 Connecting to a network ...15 Connecting to a wireless network ...15 Using the wireless controls 15 Using the wireless button 15 Using operating system controls 16 Using a WLAN ...16 Using an Internet service provider 16 Setting up a WLAN 16 Configuring a wireless router 17 Protecting your WLAN 17...
... know your computer ...4 Finding your hardware and software information 4 Locating hardware ...4 Locating software ...4 Front ...4 Right side ...5 Left side ...6 Display ...7 Top ...8 TouchPad ...8 Lights ...9 Button, speakers, and fingerprint reader 10 Keys ...11 Bottom ...12 Labels ...13 3 Connecting to a network ...15 Connecting to a wireless network ...15 Using the wireless controls 15 Using the wireless button 15 Using operating system controls 16 Using a WLAN ...16 Using an Internet service provider 16 Setting up a WLAN 16 Configuring a wireless router 17 Protecting your WLAN 17...
User Guide - Windows 8
Page 6
...local area network (LAN 19 4 Enjoying entertainment features ...20 Using the webcam ...23 Using audio ...23 Connecting speakers ...23 Connecting headphones ...23 Connecting a microphone (select models only 23 Using Beats Audio ...23 Accessing Beats Audio Control Panel 23 Enabling and Disabling Beats Audio 24 Checking the sound ...24 Using video ...24 Connecting a VGA monitor or projector 25 Connecting an HDMI device 26 Configuring audio settings (with HDMI TV 27 Using Intel Wireless Display (select models only 27 Managing your audio and video files 27 5 Navigating using touch gestures...
...local area network (LAN 19 4 Enjoying entertainment features ...20 Using the webcam ...23 Using audio ...23 Connecting speakers ...23 Connecting headphones ...23 Connecting a microphone (select models only 23 Using Beats Audio ...23 Accessing Beats Audio Control Panel 23 Enabling and Disabling Beats Audio 24 Checking the sound ...24 Using video ...24 Connecting a VGA monitor or projector 25 Connecting an HDMI device 26 Configuring audio settings (with HDMI TV 27 Using Intel Wireless Display (select models only 27 Managing your audio and video files 27 5 Navigating using touch gestures...
User Guide - Windows 8
Page 8
Handling drives ...58 Replacing a hard drive ...59 Using HP 3D DriveGuard (select models only 61 Using Disk Defragmenter 61 Using Disk Cleanup ...61 Adding or replacing memory modules 62 Updating programs and drivers ...64 Cleaning your computer ...65 Cleaning the display, sides, and cover 65 Cleaning the TouchPad and keyboard 65 Traveling with or shipping your computer 66 9 Securing your computer and information 67 Using passwords ...67 Setting Windows passwords 68 Setting Setup Utility (BIOS) passwords 68 Using the fingerprint reader ...69 Using HP SimplePass...
Handling drives ...58 Replacing a hard drive ...59 Using HP 3D DriveGuard (select models only 61 Using Disk Defragmenter 61 Using Disk Cleanup ...61 Adding or replacing memory modules 62 Updating programs and drivers ...64 Cleaning your computer ...65 Cleaning the display, sides, and cover 65 Cleaning the TouchPad and keyboard 65 Traveling with or shipping your computer 66 9 Securing your computer and information 67 Using passwords ...67 Setting Windows passwords 68 Setting Setup Utility (BIOS) passwords 68 Using the fingerprint reader ...69 Using HP SimplePass...
User Guide - Windows 8
Page 26
... number of computers and accessories and can use operating system controls: 1. Because the wireless devices are setting up a WLAN and connect to the Internet, you must connect to turn on or turn off . The ISP will give you must establish an account with an Internet service provider (ISP). Type network and sharing in a safe place. From the Start screen, type h, and then select Help and Support from an Internet service provider ● A wireless router...
... number of computers and accessories and can use operating system controls: 1. Because the wireless devices are setting up a WLAN and connect to the Internet, you must connect to turn on or turn off . The ISP will give you must establish an account with an Internet service provider (ISP). Type network and sharing in a safe place. From the Start screen, type h, and then select Help and Support from an Internet service provider ● A wireless router...

User Guide - Windows 8
Page 46
... audio CD, a DVD, or a BD. NOTE: A wireless network must be set up before a wireless connection is possible. Press the Windows logo key in combination with Windows 8 functions. f12 Turns the wireless feature on or off or on Windows 8 shortcut keys, go to perform the action. For additional information on . NOTE: Continue to the Start screen from an open apps. From the Start screen, type h, and then select Help and Support. Pressing the key...
... audio CD, a DVD, or a BD. NOTE: A wireless network must be set up before a wireless connection is possible. Press the Windows logo key in combination with Windows 8 functions. f12 Turns the wireless feature on or off or on Windows 8 shortcut keys, go to perform the action. For additional information on . NOTE: Continue to the Start screen from an open apps. From the Start screen, type h, and then select Help and Support. Pressing the key...
User Guide - Windows 8
Page 61
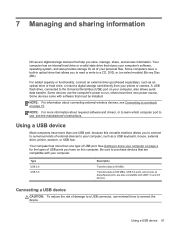
... internal hard drive or a solid state drive that must be installed. A USB flash drive, connected to purchase devices that are compatible with your computer, also allows quick data transfer. others have a built-in optical drive that allows you to connect to numerous kinds of USB ports you store, manage, share, and access information. USB 3.0 ports, also known as a USB keyboard, mouse, external drive, printer, scanner, or USB hub. Using a USB device 51 Be sure to the Universal Serial Bus (USB) port...
... internal hard drive or a solid state drive that must be installed. A USB flash drive, connected to purchase devices that are compatible with your computer, also allows quick data transfer. others have a built-in optical drive that allows you to connect to numerous kinds of USB ports you store, manage, share, and access information. USB 3.0 ports, also known as a USB keyboard, mouse, external drive, printer, scanner, or USB hub. Using a USB device 51 Be sure to the Universal Serial Bus (USB) port...
User Guide - Windows 8
Page 71
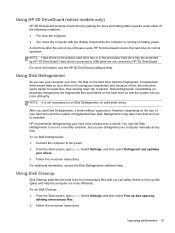
... on battery power. Follow the on -screen instructions. Using Disk Cleanup Disk Cleanup searches the hard drive for unnecessary files that the system can run more than an hour to USB ports are protected by HP 3D DriveGuard. From the Start screen, type disk. Using Disk Defragmenter As you start Disk Defragmenter, it works without supervision. After you use your computer manually at least once a month. Connect the computer to normal operation. From the Start screen, type disk. You...
... on battery power. Follow the on -screen instructions. Using Disk Cleanup Disk Cleanup searches the hard drive for unnecessary files that the system can run more than an hour to USB ports are protected by HP 3D DriveGuard. From the Start screen, type disk. Using Disk Defragmenter As you start Disk Defragmenter, it works without supervision. After you use your computer manually at least once a month. Connect the computer to normal operation. From the Start screen, type disk. You...
User Guide - Windows 8
Page 78
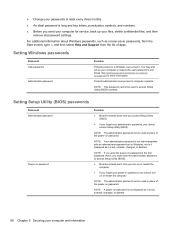
...you cannot turn on password Function ● Must be used to access Setup Utility (BIOS) contents. You may also set , entered, changed , or deleted. 68 Chapter 9 Securing your files, delete confidential files, and then remove all password settings. Setting Setup Utility (BIOS) passwords Password Administrator password Power-on or restart the computer. NOTE: The administrator password can be used in place of apps. Protects administrator-level access to a Windows user account. Setting Windows passwords Password User password Administrator password Function Protects access to...
...you cannot turn on password Function ● Must be used to access Setup Utility (BIOS) contents. You may also set , entered, changed , or deleted. 68 Chapter 9 Securing your files, delete confidential files, and then remove all password settings. Setting Setup Utility (BIOS) passwords Password Administrator password Power-on or restart the computer. NOTE: The administrator password can be used in place of apps. Protects administrator-level access to a Windows user account. Setting Windows passwords Password User password Administrator password Function Protects access to...
User Guide - Windows 8
Page 84
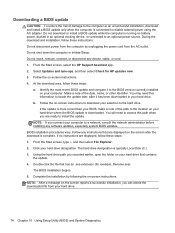
...-screen instructions to download your selection to the location on your hard drive. From the Start screen, type e, and then select File Explorer. 2. Downloading a BIOS update CAUTION: To reduce the risk of damage to the computer or an unsuccessful installation, download and install a BIOS update only when the computer is connected to install the update. From the Start screen, select the HP Support Assistant app. 2. Follow any instructions that are ready to reliable external power using the AC adapter...
...-screen instructions to download your selection to the location on your hard drive. From the Start screen, type e, and then select File Explorer. 2. Downloading a BIOS update CAUTION: To reduce the risk of damage to the computer or an unsuccessful installation, download and install a BIOS update only when the computer is connected to install the update. From the Start screen, select the HP Support Assistant app. 2. Follow any instructions that are ready to reliable external power using the AC adapter...
User Guide - Windows 8
Page 89
... models only) or HP Recovery media. From the Start screen, type h, and then select Help and Support. ● If you need to restore your personal files and data, you to restore without the requirements of HP Recovery Manager to remove all personal data, apps, and settings, and reinstall Windows. System Restore allows you can choose the System Recovery option from the HP Recovery media. Minimized Image Recovery installs only drivers and hardware-enabling applications. For more information, see Recovering using Windows...
... models only) or HP Recovery media. From the Start screen, type h, and then select Help and Support. ● If you need to restore your personal files and data, you to restore without the requirements of HP Recovery Manager to remove all personal data, apps, and settings, and reinstall Windows. System Restore allows you can choose the System Recovery option from the HP Recovery media. Minimized Image Recovery installs only drivers and hardware-enabling applications. For more information, see Recovering using Windows...
User Guide - Windows 8
Page 97
... battery temperature 45 Beats Audio 11, 21, 23, 37 Beats Audio Control Panel 23 Beats Audio hot key 24 best practices 1 BIOS determining version 73 downloading an update 74 updating 73 Bluetooth device 15, 18 Bluetooth label 14 boot order changing HP Recovery Manager 82 bottom 14 buttons left TouchPad 8 optical drive eject 5 power 10 right TouchPad 8 TouchPad on/off 8 C cables USB 52 caps lock light, identifying 9 caring for your computer 65 checking audio functions 24 cleaning your computer 65 components bottom 12 display...
... battery temperature 45 Beats Audio 11, 21, 23, 37 Beats Audio Control Panel 23 Beats Audio hot key 24 best practices 1 BIOS determining version 73 downloading an update 74 updating 73 Bluetooth device 15, 18 Bluetooth label 14 boot order changing HP Recovery Manager 82 bottom 14 buttons left TouchPad 8 optical drive eject 5 power 10 right TouchPad 8 TouchPad on/off 8 C cables USB 52 caps lock light, identifying 9 caring for your computer 65 checking audio functions 24 cleaning your computer 65 components bottom 12 display...
User Guide - Windows 8
Page 98
... replacing 62 memory module compartment, identifying 13 minimized image creating 81 minimized image recovery 82 mouse, external setting preferences 29 mute light, identifying 9 N network jack, identifying 5 O operating environment 85 optical disc inserting 55 removing 56 optical drive eject button, identifying 5 optical drive light, identifying 5 optical drive, identifying 5, 21 optional external devices, using 52 original system recovery 81 P passwords Setup Utility (BIOS) 68 Windows 68 pinching TouchPad gesture 31 ports external monitor 6, 22, 25 HDMI 6, 22, 26 Intel Wireless Display 27 USB...
... replacing 62 memory module compartment, identifying 13 minimized image creating 81 minimized image recovery 82 mouse, external setting preferences 29 mute light, identifying 9 N network jack, identifying 5 O operating environment 85 optical disc inserting 55 removing 56 optical drive eject button, identifying 5 optical drive light, identifying 5 optical drive, identifying 5, 21 optional external devices, using 52 original system recovery 81 P passwords Setup Utility (BIOS) 68 Windows 68 pinching TouchPad gesture 31 ports external monitor 6, 22, 25 HDMI 6, 22, 26 Intel Wireless Display 27 USB...


