
User Guide
Page 5
... 4 Locating hardware ...4 Locating software ...4 Front ...4 Right side ...5 Left side ...7 Back ...8 Top ...8 Bottom ...9 Labels ...9 Identifying the labels ...9 3 Connecting to a network ...10 Connecting to a wireless network ...10 Using the wireless controls 10 Using an Internet service provider 10 Setting up a WLAN ...11 Configuring a wireless router 11 Protecting your WLAN ...11 Connecting to a WLAN ...12 Connecting to a wired network ...13 Connecting to a local area network (LAN 13 4 Enjoying entertainment features ...14 Volume control ...14 Using the webcam ...14 Using audio ...14...
... 4 Locating hardware ...4 Locating software ...4 Front ...4 Right side ...5 Left side ...7 Back ...8 Top ...8 Bottom ...9 Labels ...9 Identifying the labels ...9 3 Connecting to a network ...10 Connecting to a wireless network ...10 Using the wireless controls 10 Using an Internet service provider 10 Setting up a WLAN ...11 Configuring a wireless router 11 Protecting your WLAN ...11 Connecting to a WLAN ...12 Connecting to a wired network ...13 Connecting to a local area network (LAN 13 4 Enjoying entertainment features ...14 Volume control ...14 Using the webcam ...14 Using audio ...14...
User Guide
Page 6
... swipe 20 Using the keyboard ...21 Using the action keys ...22 Using Microsoft Windows 8 shortcut keys 23 Using the integrated numeric keypad 23 6 Managing power ...25 Initiating Sleep and Hibernation ...25 Intel Rapid Start Technology (select models only 25 Manually initiating and exiting Sleep 25 Manually initiating and exiting Hibernation 26 Setting password protection on wakeup 26 HP CoolSense (select models only 26 Refreshing your software content with Intel Smart Connect Technology (select models...
... swipe 20 Using the keyboard ...21 Using the action keys ...22 Using Microsoft Windows 8 shortcut keys 23 Using the integrated numeric keypad 23 6 Managing power ...25 Initiating Sleep and Hibernation ...25 Intel Rapid Start Technology (select models only 25 Manually initiating and exiting Sleep 25 Manually initiating and exiting Hibernation 26 Setting password protection on wakeup 26 HP CoolSense (select models only 26 Refreshing your software content with Intel Smart Connect Technology (select models...
User Guide
Page 7
...Downloading HP PC Hardware Diagnostics (UEFI) to a USB device 38 10 Backing up, restoring, and recovering ...39 Creating recovery media and backups 39 Creating HP Recovery media 40 Restore and recovery ...41 Using Windows Refresh for quick and easy recovery 42 Remove everything and reinstall Windows 42 Recovering using HP Recovery Manager 43 What you need to know 43 Using the HP Recovery partition (select models only 43 Using HP Recovery media to recover 44 Changing the computer boot order 44 Removing the HP Recovery partition 44 11 Troubleshooting ...46 Wireless connection problems...
...Downloading HP PC Hardware Diagnostics (UEFI) to a USB device 38 10 Backing up, restoring, and recovering ...39 Creating recovery media and backups 39 Creating HP Recovery media 40 Restore and recovery ...41 Using Windows Refresh for quick and easy recovery 42 Remove everything and reinstall Windows 42 Recovering using HP Recovery Manager 43 What you need to know 43 Using the HP Recovery partition (select models only 43 Using HP Recovery media to recover 44 Changing the computer boot order 44 Removing the HP Recovery partition 44 11 Troubleshooting ...46 Wireless connection problems...

User Guide
Page 8
... codes are unavailable 47 Cannot connect to the wireless router 47 Network status icon is not displayed 48 Power problems ...48 Computer will not turn on or start 48 Hard drive error ...48 Computer is not responding 49 Computer shuts down unexpectedly 49 Display problems ...49 The display is blank ...49 Images on the screen are too large or too small, or the images are fuzzy 49 Keyboard and mouse problems...
... codes are unavailable 47 Cannot connect to the wireless router 47 Network status icon is not displayed 48 Power problems ...48 Computer will not turn on or start 48 Hard drive error ...48 Computer is not responding 49 Computer shuts down unexpectedly 49 Display problems ...49 The display is blank ...49 Images on the screen are too large or too small, or the images are fuzzy 49 Keyboard and mouse problems...

User Guide
Page 12
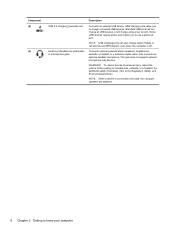
... the System area, click Device Manager. Select the All apps icon. Locating software To find out what software is installed on your computer: 1. Front Component (1) WLAN antennas (2)* (2) Internal microphones (2) (3) Webcam light Description Send and receive wireless signals. 2 Getting to know your computer Finding your hardware and software information Locating hardware To find out what hardware is installed on your computer: 1. From the Start screen, type c, and then select Control Panel. 2.
... the System area, click Device Manager. Select the All apps icon. Locating software To find out what software is installed on your computer: 1. Front Component (1) WLAN antennas (2)* (2) Internal microphones (2) (3) Webcam light Description Send and receive wireless signals. 2 Getting to know your computer Finding your hardware and software information Locating hardware To find out what hardware is installed on your computer: 1. From the Start screen, type c, and then select Control Panel. 2.
User Guide
Page 14
... your computer Connects optional powered stereo speakers, headphones, earbuds, a headset, or a television audio cable. WARNING! Also connects an optional headset microphone. To reduce the risk of cell phones and MP3 players, even when the computer is connected to the jack, the computer speakers are disabled. 6 Chapter 2 Getting to charge connected USB devices. For additional safety information, refer to use a powered port. NOTE: When a device is off. Standard USB ports will...
... your computer Connects optional powered stereo speakers, headphones, earbuds, a headset, or a television audio cable. WARNING! Also connects an optional headset microphone. To reduce the risk of cell phones and MP3 players, even when the computer is connected to the jack, the computer speakers are disabled. 6 Chapter 2 Getting to charge connected USB devices. For additional safety information, refer to use a powered port. NOTE: When a device is off. Standard USB ports will...
User Guide
Page 18
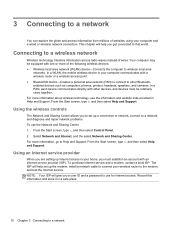
... a user ID and a password to a wireless network Wireless technology transfers information across radio waves instead of wires. For more information, go to a network, and diagnose and repair network problems. To use for Internet access. The ISP will help set up Internet access in your computer communicates with other Bluetoothenabled devices such as computers, phones, printers, headsets, speakers, and cameras. From the Start screen, type h, and then select Help and Support. 3 Connecting to a network You...
... a user ID and a password to a wireless network Wireless technology transfers information across radio waves instead of wires. For more information, go to a network, and diagnose and repair network problems. To use for Internet access. The ISP will help set up Internet access in your computer communicates with other Bluetoothenabled devices such as computers, phones, printers, headsets, speakers, and cameras. From the Start screen, type h, and then select Help and Support. 3 Connecting to a network You...
User Guide
Page 33
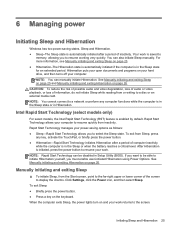
.... Manually initiating and exiting Sleep ▲ To initiate Sleep, from inactivity. Initiating Sleep and Hibernation 25 You can manually initiate Hibernation. Rapid Start Technology manages your work. To exit Sleep: ● Briefly press the power button. ● Press a key on and your computer. When the computer exits Sleep, the power lights turn on the keyboard. NOTE: You cannot connect to the screen. Intel Rapid Start Technology (select models only) For select models...
.... Manually initiating and exiting Sleep ▲ To initiate Sleep, from inactivity. Initiating Sleep and Hibernation 25 You can manually initiate Hibernation. Rapid Start Technology manages your work. To exit Sleep: ● Briefly press the power button. ● Press a key on and your computer. When the computer exits Sleep, the power lights turn on the keyboard. NOTE: You cannot connect to the screen. Intel Rapid Start Technology (select models only) For select models...
User Guide
Page 42
... Start screen, type h, and then select Help and Support. Microsoft sends out alerts regarding critical updates. NOTE: The administrator password can be used in Windows, nor is it revealed as it is set, entered, changed , or deleted. To help protect your computer, Internet security software that includes antivirus and firewall features is not interchangeable with an administrator password set in place of the power-on -screen instructions. Setting Setup Utility (BIOS) passwords Password Administrator password Power...
... Start screen, type h, and then select Help and Support. Microsoft sends out alerts regarding critical updates. NOTE: The administrator password can be used in Windows, nor is it revealed as it is set, entered, changed , or deleted. To help protect your computer, Internet security software that includes antivirus and firewall features is not interchangeable with an administrator password set in place of the power-on -screen instructions. Setting Setup Utility (BIOS) passwords Password Administrator password Power...
User Guide
Page 45
... external power using the AC adapter. Follow the on battery power, docked in an optional docking device, or connected to install the update. Follow the on your hard drive where the BIOS update is complete. NOTE: If you can isolate hardware failures from the AC outlet. Complete the installation by unplugging the power cord from issues that it to the BIOS version currently installed on your BIOS, make a note of the path to a network...
... external power using the AC adapter. Follow the on battery power, docked in an optional docking device, or connected to install the update. Follow the on your hard drive where the BIOS update is complete. NOTE: If you can isolate hardware failures from the AC outlet. Complete the installation by unplugging the power cord from issues that it to the BIOS version currently installed on your BIOS, make a note of the path to a network...

User Guide
Page 49
.... Windows creates system restore points automatically during a Windows update and other system maintenance events. Minimized Image Recovery installs only drivers and hardware-enabling applications. For more information, see Help and Support. This option does not require backing up data to be available for using HP Recovery Manager on page 44. From the Start screen, type h, and then select Help and Support. ● If you want to recover the computer's original factory partitioning and...
.... Windows creates system restore points automatically during a Windows update and other system maintenance events. Minimized Image Recovery installs only drivers and hardware-enabling applications. For more information, see Help and Support. This option does not require backing up data to be available for using HP Recovery Manager on page 44. From the Start screen, type h, and then select Help and Support. ● If you want to recover the computer's original factory partitioning and...
User Guide
Page 52
... boot options menu. 4. See Changing the computer boot order on -screen instructions. You can be used if your keyboard layout. 3. Select the optical drive or USB flash drive you created into an optional external optical drive, and then restart the computer. - So before you press the power button. 2. Press and hold f11 as you remove the Recovery partition, create HP Recovery media; Choose your system does not have an HP Recovery partition or if the hard drive is the order of devices listed in HP Recovery Manager, change...
... boot options menu. 4. See Changing the computer boot order on -screen instructions. You can be used if your keyboard layout. 3. Select the optical drive or USB flash drive you created into an optional external optical drive, and then restart the computer. - So before you press the power button. 2. Press and hold f11 as you remove the Recovery partition, create HP Recovery media; Choose your system does not have an HP Recovery partition or if the hard drive is the order of devices listed in HP Recovery Manager, change...

User Guide
Page 59
... Sleep by briefly pressing the power button. ● Check the audio functions. Open a multimedia program and play back the sound. When the Sound window opens, click the Sounds tab. From the Start screen, type s, and then select Sound Recorder. 2. NOTE: To confirm or change the audio settings on the receiver lights up or stops flashing. Audio problems 51 Save the file to your computer, from the Start screen, type c, and then select Control Panel. From the Start screen, type...
... Sleep by briefly pressing the power button. ● Check the audio functions. Open a multimedia program and play back the sound. When the Sound window opens, click the Sounds tab. From the Start screen, type s, and then select Sound Recorder. 2. NOTE: To confirm or change the audio settings on the receiver lights up or stops flashing. Audio problems 51 Save the file to your computer, from the Start screen, type c, and then select Control Panel. From the Start screen, type...
User Guide
Page 63
...-definition devices, connecting 15 HP PC Hardware Diagnostics (UEFI) downloading 38 HP Recovery Manager correcting boot problems 44 starting 44 HP Recovery media creating 40 recovery 44 HP Recovery partition recovery 43 removing 44 hubs 28 I input power 53 installing, critical updates 34 integrated numeric keypad, identifying 21, 24 integrated webcam, identifying 5 Intel Wireless Display 15 Intel Wireless Music 15 internal microphones, identifying 4 Internet connection setup 11 Internet security software, using 34 ISP 10 J jacks audio-out (headphone) 6 K keys fn 21 Sleep 21 volume 21 Windows...
...-definition devices, connecting 15 HP PC Hardware Diagnostics (UEFI) downloading 38 HP Recovery Manager correcting boot problems 44 starting 44 HP Recovery media creating 40 recovery 44 HP Recovery partition recovery 43 removing 44 hubs 28 I input power 53 installing, critical updates 34 integrated numeric keypad, identifying 21, 24 integrated webcam, identifying 5 Intel Wireless Display 15 Intel Wireless Music 15 internal microphones, identifying 4 Internet connection setup 11 Internet security software, using 34 ISP 10 J jacks audio-out (headphone) 6 K keys fn 21 Sleep 21 volume 21 Windows...

User Guide
Page 64
... minimized image recovery 43 N num lock key, identifying 24 O operating specifications 53 original system recovery 43 P passwords Setup Utility (BIOS) 34 Windows 33 pinching touch screen gesture 18 ports Intel Wireless Display 15 Intel Wireless Music 15 USB 3.0 7 power button, identifying 8 power connector, identifying 7 product name and number, computer 9 programs, updating 31 public WLAN connection 12 R re-pair, keyboard and mouse 50 recovery discs 40, 44 HP Recovery Manager 43 media 44 options 39 refresh 42 starting 44 supported discs 40 system 43 USB flash drive 44 using HP Recovery media...
... minimized image recovery 43 N num lock key, identifying 24 O operating specifications 53 original system recovery 43 P passwords Setup Utility (BIOS) 34 Windows 33 pinching touch screen gesture 18 ports Intel Wireless Display 15 Intel Wireless Music 15 USB 3.0 7 power button, identifying 8 power connector, identifying 7 product name and number, computer 9 programs, updating 31 public WLAN connection 12 R re-pair, keyboard and mouse 50 recovery discs 40, 44 HP Recovery Manager 43 media 44 options 39 refresh 42 starting 44 supported discs 40 system 43 USB flash drive 44 using HP Recovery media...
HP ENVY Rove 20 Mobile All-in-One PC - Maintenance and Service Guide
Page 73
... battery power, docked in an optional docking device, or connected to an optional power source. b. If no instructions are caused by the operating system or other identifier. Using HP PC Hardware Diagnostics (UEFI) 65 Click Updates and tune-ups, and then click Check for example, filename.exe). Follow the on-screen instructions to download your hard drive designation. From the Start screen, type e, and then select File Explorer. 2. The BIOS installation begins. 5. Complete the installation...
... battery power, docked in an optional docking device, or connected to an optional power source. b. If no instructions are caused by the operating system or other identifier. Using HP PC Hardware Diagnostics (UEFI) 65 Click Updates and tune-ups, and then click Check for example, filename.exe). Follow the on-screen instructions to download your hard drive designation. From the Start screen, type e, and then select File Explorer. 2. The BIOS installation begins. 5. Complete the installation...
HP ENVY Rove 20 Mobile All-in-One PC - Maintenance and Service Guide
Page 79
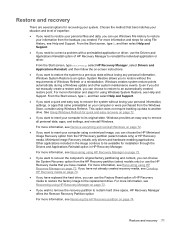
... reset your computer using a minimized image, you can choose the HP Minimized Image Recovery option from the HP Recovery partition (select models only) or HP Recovery media. Restore and recovery 71 Minimized Image Recovery installs only drivers and hardware-enabling applications. Windows creates system restore points automatically during a Windows update and other system maintenance events. For more information and steps for using HP Recovery Manager on page 73. ● If you wish to remove the recovery partition to reclaim hard drive space, HP Recovery Manager offers the Remove...
... reset your computer using a minimized image, you can choose the HP Minimized Image Recovery option from the HP Recovery partition (select models only) or HP Recovery media. Restore and recovery 71 Minimized Image Recovery installs only drivers and hardware-enabling applications. Windows creates system restore points automatically during a Windows update and other system maintenance events. For more information and steps for using HP Recovery Manager on page 73. ● If you wish to remove the recovery partition to reclaim hard drive space, HP Recovery Manager offers the Remove...
HP ENVY Rove 20 Mobile All-in-One PC - Maintenance and Service Guide
Page 82
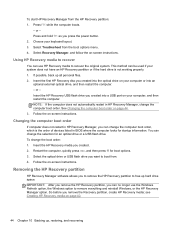
.... Select the optical drive or USB flash drive you want to the keyboard dock before beginning these steps (select models only). 1. To start HP Recovery Manager from the HP Recovery partition: IMPORTANT: For tablets, connect to boot from the boot options menu. 4. See Changing the computer boot order on -screen instructions. Press f11 while the computer boots. - or - Select Troubleshoot from . 4. Follow the on -screen instructions. Removing the HP Recovery partition HP Recovery Manager software allows you to remove the HP Recovery partition to free up hard drive space. 74 Chapter...
.... Select the optical drive or USB flash drive you want to the keyboard dock before beginning these steps (select models only). 1. To start HP Recovery Manager from the HP Recovery partition: IMPORTANT: For tablets, connect to boot from the boot options menu. 4. See Changing the computer boot order on -screen instructions. Press f11 while the computer boots. - or - Select Troubleshoot from . 4. Follow the on -screen instructions. Removing the HP Recovery partition HP Recovery Manager software allows you to remove the HP Recovery partition to free up hard drive space. 74 Chapter...

HP ENVY Rove 20 Mobile All-in-One PC - Maintenance and Service Guide
Page 88
... description audio 1 chipset 1 display panel 1 Ethernet 1 external media cards 2 graphics 1 hard drive 1 memory module 1 microphone 1 operating system 2 optical drive 1 power requirements 2 processors 1 product name 1 security 2 sensors 1 serviceability 2 video 1 wireless 2 product name 1 R rear cover removal 26 spare part number 10, 15, 26 recovery discs 70, 74 HP Recovery Manager 73 media 74 options 69 refresh 72 starting 74 supported discs 70 system 73 USB flash drive 74 using HP Recovery media 70 recovery media creating 70 creating using HP Recovery Manager 70 recovery partition removing...
... description audio 1 chipset 1 display panel 1 Ethernet 1 external media cards 2 graphics 1 hard drive 1 memory module 1 microphone 1 operating system 2 optical drive 1 power requirements 2 processors 1 product name 1 security 2 sensors 1 serviceability 2 video 1 wireless 2 product name 1 R rear cover removal 26 spare part number 10, 15, 26 recovery discs 70, 74 HP Recovery Manager 73 media 74 options 69 refresh 72 starting 74 supported discs 70 system 73 USB flash drive 74 using HP Recovery media 70 recovery media creating 70 creating using HP Recovery Manager 70 recovery partition removing...
HP ENVY Rove 20 Mobile All-in-One PC - Maintenance and Service Guide
Page 89
... 7 video, product description 1 volume control button 6 X X-axis capacitor board removal 33 spare part number 11, 17, 33 Y Y-axis capacitor board removal 30 spare part number 11, 17, 30 S Screw Kit, spare part number 14, 17 security, product description 2 sensors, product description 1 service considerations cables 19 connectors 19 plastic parts 18 serviceability, product description 2 Speaker Kit, spare part number 11, 17, 39 speakers location 4 removal 39 spare part number 11, 17, 39 specifications computer 67 hard drive 68 supported discs recovery 70 system board removal...
... 7 video, product description 1 volume control button 6 X X-axis capacitor board removal 33 spare part number 11, 17, 33 Y Y-axis capacitor board removal 30 spare part number 11, 17, 30 S Screw Kit, spare part number 14, 17 security, product description 2 sensors, product description 1 service considerations cables 19 connectors 19 plastic parts 18 serviceability, product description 2 Speaker Kit, spare part number 11, 17, 39 speakers location 4 removal 39 spare part number 11, 17, 39 specifications computer 67 hard drive 68 supported discs recovery 70 system board removal...


