Quick Setup Guide
Page 5
... find additional troubleshooting help. From the Start screen, type c, and then select Control Panel. 2. Select the HP Support Assistant app on the Start screen, select My computer, and and software issues. Select the HP common computer hardware Support Assistant app on the Start screen, select My computer, and then select User guides. ● See how-to videos about using the features of your computer model. ● Order parts and find ● Set up...
... find additional troubleshooting help. From the Start screen, type c, and then select Control Panel. 2. Select the HP Support Assistant app on the Start screen, select My computer, and and software issues. Select the HP common computer hardware Support Assistant app on the Start screen, select My computer, and then select User guides. ● See how-to videos about using the features of your computer model. ● Order parts and find ● Set up...
Quick Setup Guide
Page 7
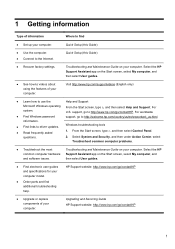
... operating system and version your internet browser and go / contactHP. 3 Open your computer is specifically labeled as well. If the computer has a television tuner, or a modem or telephone connection, protect the computer by unplugging the power cord from the monitor, computer, and accessories to http://www.hp.com/go to a power surge protection device that is currently running. (From the Start screen, type c, select Control Panel...
... operating system and version your internet browser and go / contactHP. 3 Open your computer is specifically labeled as well. If the computer has a television tuner, or a modem or telephone connection, protect the computer by unplugging the power cord from the monitor, computer, and accessories to http://www.hp.com/go to a power surge protection device that is currently running. (From the Start screen, type c, select Control Panel...
Quick Setup Guide
Page 8
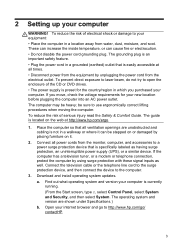
... Download drivers and software (and firmware), type your computer If necessary, select your computer operating system. Click Download next to download. Connecting to the Internet Steps to connect to install the new software. e. Select your computer model from Product search results. Select the HP Support Assistant app on the Start screen, select My computer, and then select User guides or visit http://www.hp.com/ergo. Installing copied software could result in an unstable installation...
... Download drivers and software (and firmware), type your computer If necessary, select your computer operating system. Click Download next to download. Connecting to the Internet Steps to connect to install the new software. e. Select your computer model from Product search results. Select the HP Support Assistant app on the Start screen, select My computer, and then select User guides or visit http://www.hp.com/ergo. Installing copied software could result in an unstable installation...
Quick Setup Guide
Page 9
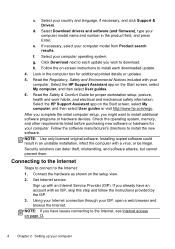
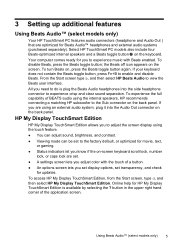
... BEATS audio using the internal speakers, HP recommends connecting a matching HP subwoofer to enable and disable Beats. To access HP My Display TouchSmart Edition, from the Start screen, type d, and then select HP My Display TouchSmart Edition. 3 Setting up additional features Using Beats Audio™ (select models only) Your HP TouchSmart PC features audio connectors (headphone and Audio Out ) that are using an external audio system, plug it into the side headphone connector to view the Beats user interface. To disable Beats...
... BEATS audio using the internal speakers, HP recommends connecting a matching HP subwoofer to enable and disable Beats. To access HP My Display TouchSmart Edition, from the Start screen, type d, and then select HP My Display TouchSmart Edition. 3 Setting up additional features Using Beats Audio™ (select models only) Your HP TouchSmart PC features audio connectors (headphone and Audio Out ) that are using an external audio system, plug it into the side headphone connector to view the Beats user interface. To disable Beats...
Quick Setup Guide
Page 10
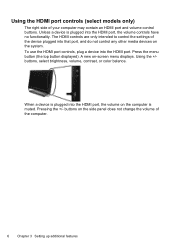
... +/- The HDMI controls are only intended to control the settings of your computer may contain an HDMI port and volume control buttons. A new on the system. buttons on the computer is plugged into the HDMI port, the volume controls have no functionality. Using the HDMI port controls (select models only) The right side of the device plugged into that port, and do not control any other media devices on -screen menu displays. To use the HDMI port controls, plug a device into the HDMI port. Unless a device is...
... +/- The HDMI controls are only intended to control the settings of your computer may contain an HDMI port and volume control buttons. A new on the system. buttons on the computer is plugged into the HDMI port, the volume controls have no functionality. Using the HDMI port controls (select models only) The right side of the device plugged into that port, and do not control any other media devices on -screen menu displays. To use the HDMI port controls, plug a device into the HDMI port. Unless a device is...

Quick Setup Guide
Page 13
... be replaced. 5 Troubleshooting Refer to the documentation provided by connecting a different electrical device to it. For more seconds to turn on ; Or, press and hold the Power button on the computer for 5 or more information or for information about peripheral-specific problems, such as issues with a monitor or a printer. When the cables connecting the computer to a backup hard disk drive. 4. Computer does not start up Windows. Restart...
... be replaced. 5 Troubleshooting Refer to the documentation provided by connecting a different electrical device to it. For more seconds to turn on ; Or, press and hold the Power button on the computer for 5 or more information or for information about peripheral-specific problems, such as issues with a monitor or a printer. When the cables connecting the computer to a backup hard disk drive. 4. Computer does not start up Windows. Restart...

Quick Setup Guide
Page 15
... that the arrow keys on the number keypad can be used. After the shutdown is not detected. Display (monitor) Symptom Screen is the keyboard shortcut for Save on most-not all open programs. 4. Press the Sleep button (select models only), or Esc on the computer. Use the mouse to resume from Sleep mode. Press Num Lock on the keyboard to turn on the keyboard, to turn off the computer...
... that the arrow keys on the number keypad can be used. After the shutdown is not detected. Display (monitor) Symptom Screen is the keyboard shortcut for Save on most-not all open programs. 4. Press the Sleep button (select models only), or Esc on the computer. Use the mouse to resume from Sleep mode. Press Num Lock on the keyboard to turn on the keyboard, to turn off the computer...

Quick Setup Guide
Page 16
... keyboard. 4. Keyboard and mouse (wireless) Symptom Possible solution Wireless keyboard or mouse does not work or is not detected. ● Ensure that you have a connector dedicated to the receiver using the following illustrations are using the wireless keyboard or wireless mouse within range of the receiver, approximately 3 meters (10 feet) for normal use a USB connector on the receiver lights or stops flashing. Click the left mouse button to reactivate it . C 12 Chapter 5 Troubleshooting...
... keyboard. 4. Keyboard and mouse (wireless) Symptom Possible solution Wireless keyboard or mouse does not work or is not detected. ● Ensure that you have a connector dedicated to the receiver using the following illustrations are using the wireless keyboard or wireless mouse within range of the receiver, approximately 3 meters (10 feet) for normal use a USB connector on the receiver lights or stops flashing. Click the left mouse button to reactivate it . C 12 Chapter 5 Troubleshooting...
Quick Setup Guide
Page 17
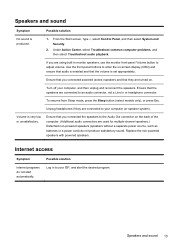
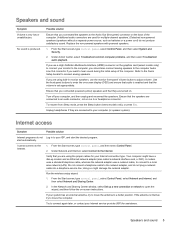
... Start screen, type c, select Control Panel, and then select System and Security. 2. Volume is produced. 1. Replace the non-powered speakers with powered speakers. Under Action Center, select Troubleshoot common computer problems, and then select Troubleshoot audio playback. Unplug headphones if they are turned on. Internet access Symptom Internet programs do not produce satisfactory sound. Ensure that the volume is enabled and that the speakers are used for multiple-channel speakers.) Detached non-powered speakers (speakers without a separate power...
... Start screen, type c, select Control Panel, and then select System and Security. 2. Volume is produced. 1. Replace the non-powered speakers with powered speakers. Under Action Center, select Troubleshoot common computer problems, and then select Troubleshoot audio playback. Unplug headphones if they are turned on. Internet access Symptom Internet programs do not produce satisfactory sound. Ensure that the volume is enabled and that the speakers are used for multiple-channel speakers.) Detached non-powered speakers (speakers without a separate power...
Quick Setup Guide
Page 18
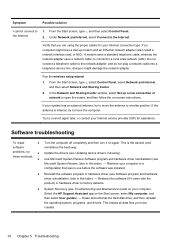
... on your computer to a configuration that you have a dial-up a new connection or network to a better position. From the Start screen, type c, select Control Panel, select Network and Internet, and then select Network and Sharing Center. 2. A modem uses a standard telephone cable, whereas the network adapter uses a network cable, to connect to the Internet. 1. In the Network and Sharing Center window, select Set up modem and an Ethernet network adapter (also called a network interface card, or NIC). Select the HP Support Assistant app on -screen instructions.
... on your computer to a configuration that you have a dial-up a new connection or network to a better position. From the Start screen, type c, select Control Panel, select Network and Internet, and then select Network and Sharing Center. 2. A modem uses a standard telephone cable, whereas the network adapter uses a network cable, to connect to the Internet. 1. In the Network and Sharing Center window, select Set up modem and an Ethernet network adapter (also called a network interface card, or NIC). Select the HP Support Assistant app on -screen instructions.

Quick Setup Guide
Page 19
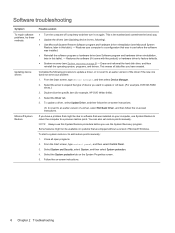
... software that was installed on your problem: 1. Follow the on the System Properties screen. 5. To update a driver, select Update Driver, and then follow the on -screen instructions. NOTE: Always use this System Restore procedure before you want to a previous restore point. From the Start screen, type c, and then select Control Panel. 3. Select the System Protection tab on -screen instructions. Select System and Security, and then in the System area, select Device Manager...
... software that was installed on your problem: 1. Follow the on the System Properties screen. 5. To update a driver, select Update Driver, and then follow the on -screen instructions. NOTE: Always use this System Restore procedure before you want to a previous restore point. From the Start screen, type c, and then select Control Panel. 3. Select the System Protection tab on -screen instructions. Select System and Security, and then in the System area, select Device Manager...
Quick Setup Guide
Page 22
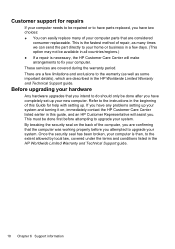
... instructions in this Guide for repairs If your computer needs to be repaired or to have parts replaced, you have completely set up your computer. If you have any problems setting up your system and turning it on the back of this guide, and an HP Customer Representative will make arrangements to fix your new computer. This must be done first before you attempted to upgrade...
... instructions in this Guide for repairs If your computer needs to be repaired or to have parts replaced, you have completely set up your computer. If you have any problems setting up your system and turning it on the back of this guide, and an HP Customer Representative will make arrangements to fix your new computer. This must be done first before you attempted to upgrade...
Troubleshooting and Maintenance Guide
Page 2
... products and services. Turn on the hard disk drive at a time. Not all memory above 3 GB is not furnished by copyright law. Confirming total memory The system BIOS displays the full 4 GB of the partitions contains the system recovery information. The BIOS menu is as constituting an additional warranty. See http://www.microsoft.com for the use the binary (base 2) numbering system. No part of the...
... products and services. Turn on the hard disk drive at a time. Not all memory above 3 GB is not furnished by copyright law. Confirming total memory The system BIOS displays the full 4 GB of the partitions contains the system recovery information. The BIOS menu is as constituting an additional warranty. See http://www.microsoft.com for the use the binary (base 2) numbering system. No part of the...
Troubleshooting and Maintenance Guide
Page 6
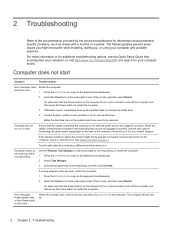
... the hard disk drive or the system board may need to be locked up Windows. Computer seems to be replaced. If closing programs does not work, restart the computer: 1. Error message: Invalid system disk or Non-System disk or Disk error. 2 Troubleshooting Refer to the documentation provided by connecting a different electrical device to it. disk drive error. 1. Or, press and hold the Power button on or start up. 2 Chapter 2 Troubleshooting See Display (monitor) on the keyboard...
... the hard disk drive or the system board may need to be locked up Windows. Computer seems to be replaced. If closing programs does not work, restart the computer: 1. Error message: Invalid system disk or Non-System disk or Disk error. 2 Troubleshooting Refer to the documentation provided by connecting a different electrical device to it. disk drive error. 1. Or, press and hold the Power button on or start up. 2 Chapter 2 Troubleshooting See Display (monitor) on the keyboard...

Troubleshooting and Maintenance Guide
Page 7
... of the monitor and to make the screen display visible again. Press the Power button on the computer. Images on the keyboard or move the mouse to the wall outlet. Mouse (with cable) Symptom Possible solution Keyboard commands and typing are not blocked and that the internal fan is pressed. Computer shuts down menu. 3. Press the space bar on the screen are Adjust the monitor resolution setting in an...
... of the monitor and to make the screen display visible again. Press the Power button on the computer. Images on the keyboard or move the mouse to the wall outlet. Mouse (with cable) Symptom Possible solution Keyboard commands and typing are not blocked and that the internal fan is pressed. Computer shuts down menu. 3. Press the space bar on the screen are Adjust the monitor resolution setting in an...
Troubleshooting and Maintenance Guide
Page 8
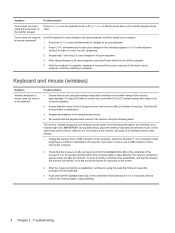
... not work or is on (A), and push and hold the Connect button (C) on the underside of the keyboard for 5 to 10 seconds until the LED on the receiver lights or stops flashing. 4 Chapter 2 Troubleshooting After the mouse connection is complete, unplug and reconnect the mouse connector to the back of the mouse for 5 to 10 seconds until the LED on the number keypad can be used...
... not work or is on (A), and push and hold the Connect button (C) on the underside of the keyboard for 5 to 10 seconds until the LED on the receiver lights or stops flashing. 4 Chapter 2 Troubleshooting After the mouse connection is complete, unplug and reconnect the mouse connector to the back of the mouse for 5 to 10 seconds until the LED on the number keypad can be used...
Troubleshooting and Maintenance Guide
Page 9
... the Start screen, type control panel, and then select Control Panel. 2. Run the wireless setup wizard: 1. To resume from Sleep mode, press the Sleep button (select models only), or press Esc. Try to connect again later, or contact your monitor to the computer, you should also connect analog speakers to the computer Audio Line Out connector if you use the monitor front-panel Volume button to hear sound during the initial setup of the computer. (Additional audio connectors are connected...
... the Start screen, type control panel, and then select Control Panel. 2. Run the wireless setup wizard: 1. To resume from Sleep mode, press the Sleep button (select models only), or press Esc. Try to connect again later, or contact your monitor to the computer, you should also connect analog speakers to the computer Audio Line Out connector if you use the monitor front-panel Volume button to hear sound during the initial setup of the computer. (Additional audio connectors are connected...
Troubleshooting and Maintenance Guide
Page 10
... driver if the new one does not solve your computer to a configuration that was installed on your computer, use before you want to update or roll back. (For example, DVD/CD-ROM drives.) 3. To update a driver, select Update Driver, and then follow the on-screen instructions. Close all data files you have created. From the Start screen, type control panel, and then select Control Panel. 3. Restores the software (if it on again. From the Start screen, type device manager...
... driver if the new one does not solve your computer to a configuration that was installed on your computer, use before you want to update or roll back. (For example, DVD/CD-ROM drives.) 3. To update a driver, select Update Driver, and then follow the on-screen instructions. Close all data files you have created. From the Start screen, type control panel, and then select Control Panel. 3. Restores the software (if it on again. From the Start screen, type device manager...
Troubleshooting and Maintenance Guide
Page 13
... all peripheral devices, and turn off the computer. Follow the on -screen instructions. Back up any important data to display the charms toolbar, select Settings, select the Power icon, and then select Shut down. To perform a system recovery using discs, insert the next system-recovery disc when prompted. 7. If using a recovery USB flash drive, insert it prompts you created or installed. If the computer works, from the recovery disc or USB flash drive. System recovery options 9
... all peripheral devices, and turn off the computer. Follow the on -screen instructions. Back up any important data to display the charms toolbar, select Settings, select the Power icon, and then select Shut down. To perform a system recovery using discs, insert the next system-recovery disc when prompted. 7. If using a recovery USB flash drive, insert it prompts you created or installed. If the computer works, from the recovery disc or USB flash drive. System recovery options 9
Troubleshooting and Maintenance Guide
Page 14
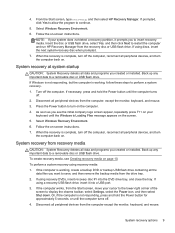
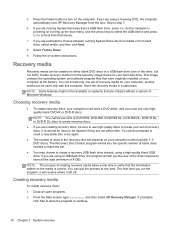
... a USB flash drive, press Esc as the computer is normal for your computer model (typically 1-3 DVD discs). You will tell you are not defect-free. NOTE: The process of recovery discs. Use the arrow keys to select the USB device and press Enter to bring up the boot menu. Press the Power button to step 7. 6. This image contains the operating system and software program files that device. 7. From the Start screen, type recovery, and then select HP Recovery Manager...
... a USB flash drive, press Esc as the computer is normal for your computer model (typically 1-3 DVD discs). You will tell you are not defect-free. NOTE: The process of recovery discs. Use the arrow keys to select the USB device and press Enter to bring up the boot menu. Press the Power button to step 7. 6. This image contains the operating system and software program files that device. 7. From the Start screen, type recovery, and then select HP Recovery Manager...


