

HP USB Digital Drive
Page 2
You can be included. User Guide 1 However, you will need an SD memory card to operate the Digital Drive. The Digital Drive can purchase one (in various storage capacities) from any computer that is a pocket-sized SD (Secure Digital) memory drive for storing and transferring files such as digital pictures, music, video, and data. An SD memory card 2 may not be used with any HP authorized reseller. The HP USB Digital Drive 1 is running Microsoft Windows XP Home, Windows XP Pro, or Windows 2000.
You can be included. User Guide 1 However, you will need an SD memory card to operate the Digital Drive. The Digital Drive can purchase one (in various storage capacities) from any computer that is a pocket-sized SD (Secure Digital) memory drive for storing and transferring files such as digital pictures, music, video, and data. An SD memory card 2 may not be used with any HP authorized reseller. The HP USB Digital Drive 1 is running Microsoft Windows XP Home, Windows XP Pro, or Windows 2000.
HP USB Digital Drive
Page 112
SD Logo is subject to change without notice. User Guide HP USB Digital Drive First Edition July 2003 Microsoft and Windows are set forth in the U.S. HP shall not be liable for HP products and services are trademarks of Microsoft Corporation in the express warranty statements accompanying such products and services. and/or other countries. The information contained herein is a trademark. © 2003 Hewlett-Packard Development Company, L.P. The warranties for technical or editorial errors or omissions contained herein.
SD Logo is subject to change without notice. User Guide HP USB Digital Drive First Edition July 2003 Microsoft and Windows are set forth in the U.S. HP shall not be liable for HP products and services are trademarks of Microsoft Corporation in the express warranty statements accompanying such products and services. and/or other countries. The information contained herein is a trademark. © 2003 Hewlett-Packard Development Company, L.P. The warranties for technical or editorial errors or omissions contained herein.
Bluetooth Wireless Technology Basics
Page 6
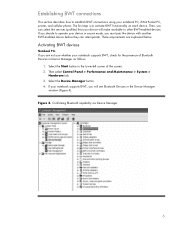
... BWT, check for the presence of the screen. 2. Confirming Bluetooth capability via Device Manager 6 If you decide to operate your device in the Device Manager window (Figure 4). Then select Control Panel > Performance and Maintenance > System > Hardware tab. 3. If your notebook PC, iPAQ Pocket PC, printer, and cellular phone. Establishing BWT connections...
... BWT, check for the presence of the screen. 2. Confirming Bluetooth capability via Device Manager 6 If you decide to operate your device in the Device Manager window (Figure 4). Then select Control Panel > Performance and Maintenance > System > Hardware tab. 3. If your notebook PC, iPAQ Pocket PC, printer, and cellular phone. Establishing BWT connections...

Bluetooth Wireless Technology Basics
Page 7
... are explained below. Refer to white. Right-click the Bluetooth icon, and then select Explore My Bluetooth Places. 2. When the Software Setup Welcome window is off, turn on HP notebook PCs; When you need help locating the wireless button and light. The logo will appear in the... Windows System Tray located in the Folders pane of Windows Explorer and select Bluetooth Setup Wizard to configure the service and security features as follows: 1. Right-click the...
... are explained below. Refer to white. Right-click the Bluetooth icon, and then select Explore My Bluetooth Places. 2. When the Software Setup Welcome window is off, turn on HP notebook PCs; When you need help locating the wireless button and light. The logo will appear in the... Windows System Tray located in the Folders pane of Windows Explorer and select Bluetooth Setup Wizard to configure the service and security features as follows: 1. Right-click the...
Backup and Recovery - Windows Vista
Page 2
© Copyright 2007-2009 Hewlett-Packard Development Company, L.P. Some features may not be liable for HP products and services are common to change without notice. The information contained herein is a U.S. The only warranties for technical or... user guide describes features that are set forth in the express warranty statements accompanying such products and services. HP shall not be available on your computer. Nothing herein should be construed as constituting an additional warranty. Windows is subject to most models. registered trademark of Microsoft Corporation.
© Copyright 2007-2009 Hewlett-Packard Development Company, L.P. Some features may not be liable for HP products and services are common to change without notice. The information contained herein is a U.S. The only warranties for technical or... user guide describes features that are set forth in the express warranty statements accompanying such products and services. HP shall not be available on your computer. Nothing herein should be construed as constituting an additional warranty. Windows is subject to most models. registered trademark of Microsoft Corporation.
Backup and Recovery - Windows Vista
Page 5
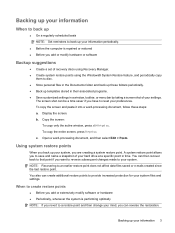
...instability. ● Backing up (boot) your computer and restore the operating system and software programs to factory settings in case of the window. 1 As you add new software and data files, you should continue to recover your computer includes a solid-state drive (SSD), ...after a system failure is listed in case of a system failure: ● Creating a set of a recovery partition, select Start > Computer. HP recommends that do not have a recovery partition. Tools provided by restoring the computer to maintain a reasonably current backup. System restore points allow you to...
...instability. ● Backing up (boot) your computer and restore the operating system and software programs to factory settings in case of the window. 1 As you add new software and data files, you should continue to recover your computer includes a solid-state drive (SSD), ...after a system failure is listed in case of a system failure: ● Creating a set of a recovery partition, select Start > Computer. HP recommends that do not have a recovery partition. Tools provided by restoring the computer to maintain a reasonably current backup. System restore points allow you to...
Backup and Recovery - Windows Vista
Page 9
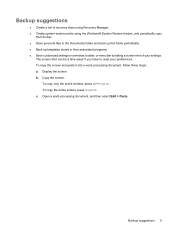
... and back up this folder periodically. ● Back up templates stored in their associated programs. ● Save customized settings in a window, toolbar, or menu bar by taking a screen shot of recovery discs using Recovery Manager. ● Create system restore points using the... your settings. To copy the screen and paste it into a word-processing document, follow these steps: a. Copy the screen: To copy only the active window, press alt+fn+prt sc. Backup suggestions 5 Backup suggestions ● Create a set of your preferences. Open a word-processing document, and then select ...
... and back up this folder periodically. ● Back up templates stored in their associated programs. ● Save customized settings in a window, toolbar, or menu bar by taking a screen shot of recovery discs using Recovery Manager. ● Create system restore points using the... your settings. To copy the screen and paste it into a word-processing document, follow these steps: a. Copy the screen: To copy only the active window, press alt+fn+prt sc. Backup suggestions 5 Backup suggestions ● Create a set of your preferences. Open a word-processing document, and then select ...
Backup and Recovery - Windows Vista
Page 10
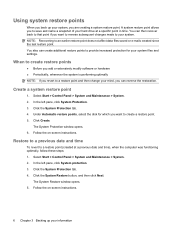
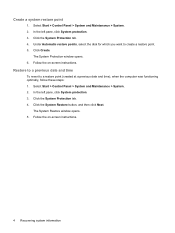
.... 4. You also can then recover back to that point if you can reverse the restoration. In the left pane, click System protection. 3. The System Protection window opens. 6. When to create restore points ● Before you add or extensively modify software or hardware ● Periodically, whenever the system is performing optimally NOTE... > System. 2. Using system restore points When you back up your information Restore to a previous date and time To revert to your system. The System Restore window opens. 5.
.... 4. You also can then recover back to that point if you can reverse the restoration. In the left pane, click System protection. 3. The System Protection window opens. 6. When to create restore points ● Before you add or extensively modify software or hardware ● Periodically, whenever the system is performing optimally NOTE... > System. 2. Using system restore points When you back up your information Restore to a previous date and time To revert to your system. The System Restore window opens. 5.
Backup and Recovery - Windows Vista
Page 11
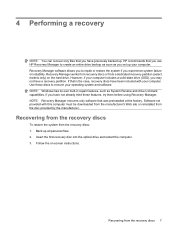
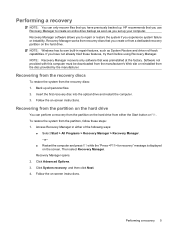
...the first recovery disc into the optical drive and restart the computer. 3. If that you use HP Recovery Manager to repair or restore the system if you may not have previously backed up. NOTE: Windows has its own built-in repair features, such as you set up all personal files. 2.... the manufacturer's Web site or reinstalled from a dedicated recovery partition (select models only) on -screen instructions. Follow the on the hard drive. HP recommends that is the case, recovery discs have not already tried these discs to recover your computer. Recovering from the recovery discs: 1.
...the first recovery disc into the optical drive and restart the computer. 3. If that you use HP Recovery Manager to repair or restore the system if you may not have previously backed up. NOTE: Windows has its own built-in repair features, such as you set up all personal files. 2.... the manufacturer's Web site or reinstalled from a dedicated recovery partition (select models only) on -screen instructions. Follow the on the hard drive. HP recommends that is the case, recovery discs have not already tried these discs to recover your computer. Recovering from the recovery discs: 1.
Backup and Recovery - Windows Vista
Page 13
Index B backing up customized window, toolbar, and menu bar settings 5 personal files 5 templates 5 backup suggestions 5 F f11 8 full system recovery 1 P performing a recovery 7 R recovering a program or driver 1 recovering from the dedicated recovery ...
Index B backing up customized window, toolbar, and menu bar settings 5 personal files 5 templates 5 backup suggestions 5 F f11 8 full system recovery 1 P performing a recovery 7 R recovering a program or driver 1 recovering from the dedicated recovery ...
Modem and Local Area Network - Windows Vista and Windows XP
Page 11
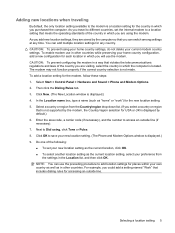
...configuration, add a new configuration for any time. To add a location setting for the new location setting. 5. Click New. (The New Location window is not made. NOTE: You can add multiple location settings for each location in other countries. You can use the modem. Selecting a location ...setting 5 Adding new locations when traveling By default, the only location setting available to save your new location setting. (The Phone and Modem Options window is displayed.) 9. To enable modem use in which you are using , click Tone or Pulse. 8. Then click the Dialing Rules tab. ...
...configuration, add a new configuration for any time. To add a location setting for the new location setting. 5. Click New. (The New Location window is not made. NOTE: You can add multiple location settings for each location in other countries. You can use the modem. Selecting a location ...setting 5 Adding new locations when traveling By default, the only location setting available to save your new location setting. (The Phone and Modem Options window is displayed.) 9. To enable modem use in which you are using , click Tone or Pulse. 8. Then click the Dialing Rules tab. ...
Backup and Recovery - Windows Vista
Page 2
The only warranties for technical or editorial errors or omissions contained herein. Nothing herein should be liable for HP products and services are set forth in the express warranty statements accompanying such products and services. Windows is subject to change without notice. HP shall not be construed as constituting an additional warranty. registered trademark of Microsoft Corporation. © Copyright 2007 Hewlett-Packard Development Company, L.P. First Edition: June 2007 Document Part Number: 448223-001 The information contained herein is a U.S.
The only warranties for technical or editorial errors or omissions contained herein. Nothing herein should be liable for HP products and services are set forth in the express warranty statements accompanying such products and services. Windows is subject to change without notice. HP shall not be construed as constituting an additional warranty. registered trademark of Microsoft Corporation. © Copyright 2007 Hewlett-Packard Development Company, L.P. First Edition: June 2007 Document Part Number: 448223-001 The information contained herein is a U.S.
Backup and Recovery - Windows Vista
Page 9
...additional restore points to provide increased protection for your system, you are creating a system restore point. Copy the screen: To copy only the active window, press alt+fn+prt sc. To copy the entire screen, press fn+prt sc. Backing up your information When to back up ● On..., whenever the system is repaired or restored ● Before you want to reverse subsequent changes made to your hard drive at a specific point in a window, toolbar, or menu bar by taking a screen shot of your system. c. To copy the screen and paste it into a word-processing document, follow...
...additional restore points to provide increased protection for your system, you are creating a system restore point. Copy the screen: To copy only the active window, press alt+fn+prt sc. To copy the entire screen, press fn+prt sc. Backing up your information When to back up ● On..., whenever the system is repaired or restored ● Before you want to reverse subsequent changes made to your hard drive at a specific point in a window, toolbar, or menu bar by taking a screen shot of your system. c. To copy the screen and paste it into a word-processing document, follow...
Backup and Recovery - Windows Vista
Page 10
... > System and Maintenance > System. 2. Click the System Restore button, and then click Next. In the left pane, click System protection. 3. The System Protection window opens. 6. The System Restore window opens. 5. Select Start > Control Panel > System and Maintenance > System. 2. Follow the on -screen instructions. Click Create. In the left pane, click System protection...
... > System and Maintenance > System. 2. Click the System Restore button, and then click Next. In the left pane, click System protection. 3. The System Protection window opens. 6. The System Restore window opens. 5. Select Start > Control Panel > System and Maintenance > System. 2. Follow the on -screen instructions. Click Create. In the left pane, click System protection...
Backup and Recovery - Windows Vista
Page 11
HP recommends that you create or from recovery discs that you use Recovery Manager to repair or restore the system if you have previously backed up ... the partition on the hard drive from the recovery discs: 1. To restore the system from the disc provided by the manufacturer. Click Advanced Options. 3. NOTE: Windows has its own built-in either the Start button or f11. Click System recovery, and then click Next. 4. If you experience system failure or instability.
HP recommends that you create or from recovery discs that you use Recovery Manager to repair or restore the system if you have previously backed up ... the partition on the hard drive from the recovery discs: 1. To restore the system from the disc provided by the manufacturer. Click Advanced Options. 3. NOTE: Windows has its own built-in either the Start button or f11. Click System recovery, and then click Next. 4. If you experience system failure or instability.

Drives - Windows Vista
Page 2
Windows is subject to change without notice. registered trademark of Microsoft Corporation. © Copyright 2007 Hewlett-Packard Development Company, L.P. Nothing herein should be liable for HP products and services are set forth in the express warranty statements accompanying such products and services. Third Edition: November 2007 First Edition: ... Document Part Number: 438935-003 The information contained herein is a U.S. The only warranties for technical or editorial errors or omissions contained herein. HP shall not be construed as constituting an additional warranty.
Windows is subject to change without notice. registered trademark of Microsoft Corporation. © Copyright 2007 Hewlett-Packard Development Company, L.P. Nothing herein should be liable for HP products and services are set forth in the express warranty statements accompanying such products and services. Third Edition: November 2007 First Edition: ... Document Part Number: 438935-003 The information contained herein is a U.S. The only warranties for technical or editorial errors or omissions contained herein. HP shall not be construed as constituting an additional warranty.
Drives - Windows Vista
Page 7
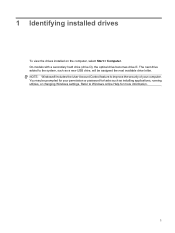
On models with a secondary hard drive (drive D), the optical drive becomes drive E. NOTE: Windows® includes the User Account Control feature to Windows online Help for tasks such as a new USB drive, will be prompted for your computer. You may be assigned the next available drive letter. ... security of your permission or password for more information. 1 The next drive added to the system, such as installing applications, running utilities, or changing Windows settings. 1 Identifying installed drives To view the drives installed on the computer, select Start > Computer.
On models with a secondary hard drive (drive D), the optical drive becomes drive E. NOTE: Windows® includes the User Account Control feature to Windows online Help for tasks such as a new USB drive, will be prompted for your computer. You may be assigned the next available drive letter. ... security of your permission or password for more information. 1 The next drive added to the system, such as installing applications, running utilities, or changing Windows settings. 1 Identifying installed drives To view the drives installed on the computer, select Start > Computer.
Drives - Windows Vista
Page 14
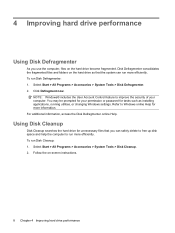
Select Start > All Programs > Accessories > System Tools > Disk Defragmenter. 2. Refer to Windows online Help for tasks such as installing applications, running utilities, or changing Windows settings. Follow the on the hard drive become fragmented. NOTE: Windows® includes the User Account Control feature to run more efficiently. To run Disk Defragmenter: 1. Click Defragment now...
Select Start > All Programs > Accessories > System Tools > Disk Defragmenter. 2. Refer to Windows online Help for tasks such as installing applications, running utilities, or changing Windows settings. Follow the on the hard drive become fragmented. NOTE: Windows® includes the User Account Control feature to run more efficiently. To run Disk Defragmenter: 1. Click Defragment now...
External Media Cards - Windows Vista
Page 9
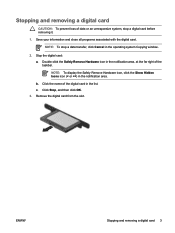
Stop the digital card: a. Double-click the Safely Remove Hardware icon in the notification area, at the far right of data or an unresponsive system, stop a data transfer, click Cancel in the operating system Copying window. 2. Stopping and removing a digital card CAUTION: To prevent loss of the taskbar. Save your information and close all programs associated with the digital card. NOTE: To display the Safely Remove Hardware icon, click the Show Hidden Icons icon (< or NOTE: To stop a digital card before removing it. 1.
Stop the digital card: a. Double-click the Safely Remove Hardware icon in the notification area, at the far right of data or an unresponsive system, stop a data transfer, click Cancel in the operating system Copying window. 2. Stopping and removing a digital card CAUTION: To prevent loss of the taskbar. Save your information and close all programs associated with the digital card. NOTE: To display the Safely Remove Hardware icon, click the Show Hidden Icons icon (< or NOTE: To stop a digital card before removing it. 1.
External Media Cards - Windows Vista
Page 12
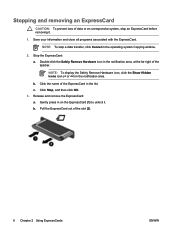
Save your information and close all programs associated with the ExpressCard. NOTE: To display the Safely Remove Hardware icon, click the Show Hidden Icons icon (< or Stop the ExpressCard: a. Stopping and removing an ExpressCard CAUTION: To prevent loss of data or an unresponsive system, stop a data transfer, click Cancel in the notification area, at the far right of the taskbar. NOTE: To stop an ExpressCard before removing it. 1. Double-click the Safely Remove Hardware icon in the operating system Copying window. 2.
Save your information and close all programs associated with the ExpressCard. NOTE: To display the Safely Remove Hardware icon, click the Show Hidden Icons icon (< or Stop the ExpressCard: a. Stopping and removing an ExpressCard CAUTION: To prevent loss of data or an unresponsive system, stop a data transfer, click Cancel in the notification area, at the far right of the taskbar. NOTE: To stop an ExpressCard before removing it. 1. Double-click the Safely Remove Hardware icon in the operating system Copying window. 2.


