Backup and Recovery - Windows Vista
Page 5
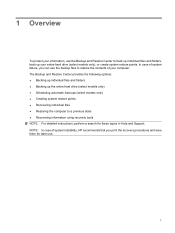
...HP recommends that you can use . 1 The Backup and Restore Center provides the following options: ● Backing up individual files and folders ● Backing up your computer. 1 Overview To protect your information, use the Backup and Restore Center to back up individual files and folders, back up the entire hard drive...Creating system restore points ● Recovering individual files ● Restoring the computer to restore the contents of your entire hard drive (select models only), or create system restore points. In case of system failure, you print the recovery procedures ...
...HP recommends that you can use . 1 The Backup and Restore Center provides the following options: ● Backing up individual files and folders ● Backing up your computer. 1 Overview To protect your information, use the Backup and Restore Center to back up individual files and folders, back up the entire hard drive...Creating system restore points ● Recovering individual files ● Restoring the computer to restore the contents of your entire hard drive (select models only), or create system restore points. In case of system failure, you print the recovery procedures ...
Backup and Recovery - Windows Vista
Page 6
... number of recovery discs required. ● When backing up : ● Store personal files in the Documents folder, and back it into the optical drive of optical drive installed in a window, toolbar, or menu bar by taking a screen shot of discs (purchased separately): CD-R, CD-RW, DVD+R, DVD+R DL,... 2 Chapter 2 Backing up your most current backup. Display the screen you use any of the following when backing up to an optional external hard drive, a network drive, or discs. To copy the entire screen, press fn+prt sc. 3. You can be a time-saver if you should create your computer....
... number of recovery discs required. ● When backing up : ● Store personal files in the Documents folder, and back it into the optical drive of optical drive installed in a window, toolbar, or menu bar by taking a screen shot of discs (purchased separately): CD-R, CD-RW, DVD+R, DVD+R DL,... 2 Chapter 2 Backing up your most current backup. Display the screen you use any of the following when backing up to an optional external hard drive, a network drive, or discs. To copy the entire screen, press fn+prt sc. 3. You can be a time-saver if you should create your computer....
Backup and Recovery - Windows Vista
Page 8
... to fix problems that might prevent Windows from starting correctly. ● f11 recovery tools: You can use the f11 recovery tools to recover your original hard drive image. For additional information, refer to boot (start up) your computer, you have previously backed up. 3 Performing a recovery In case of system failure or instability...
... to fix problems that might prevent Windows from starting correctly. ● f11 recovery tools: You can use the f11 recovery tools to recover your original hard drive image. For additional information, refer to boot (start up) your computer, you have previously backed up. 3 Performing a recovery In case of system failure or instability...
Backup and Recovery - Windows Vista
Page 9
...the Driver Recovery disc (both purchased separately). For additional information, refer to improve the security of the Windows partition and the HP Recovery partition. NOTE: Windows includes the User Account Control feature to the "Using a Windows Vista operating system DVD (purchased ... these topics in this guide. 3. If possible, back up , follow these steps: CAUTION: Using Startup Repair completely erases hard drive contents and reformats the hard drive. If possible, check for more information. Restart the computer, and then press f8 before the Windows operating system loads. ...
...the Driver Recovery disc (both purchased separately). For additional information, refer to improve the security of the Windows partition and the HP Recovery partition. NOTE: Windows includes the User Account Control feature to the "Using a Windows Vista operating system DVD (purchased ... these topics in this guide. 3. If possible, back up , follow these steps: CAUTION: Using Startup Repair completely erases hard drive contents and reformats the hard drive. If possible, check for more information. Restart the computer, and then press f8 before the Windows operating system loads. ...
Backup and Recovery - Windows Vista
Page 10
... Startup Menu" message is displayed on the computer are permanently removed. Using f11 CAUTION: Using f11 completely erases hard drive contents and reformats the hard drive. To find the partition, select Start > Computer. NOTE: If the HP Recovery partition has been deleted, you have created and any software installed on the screen. 5. Press f11 while...
... Startup Menu" message is displayed on the computer are permanently removed. Using f11 CAUTION: Using f11 completely erases hard drive contents and reformats the hard drive. To find the partition, select Start > Computer. NOTE: If the HP Recovery partition has been deleted, you have created and any software installed on the screen. 5. Press f11 while...
Backup and Recovery - Windows Vista
Page 11
... Next. 6. CAUTION: Using a Windows Vista operating system DVD completely erases hard drive contents and reformats the hard drive. Restart the computer, and then insert the Windows Vista operating system DVD into the optical drive before the Windows operating system loads. 3. When reformatting is easily accessible. Using...a Windows Vista operating system DVD, go to http://www.hp.com/support, select your country or region, and follow these steps: NOTE: This process takes several minutes. 1. Follow the on an external drive) is complete, the recovery process helps you restore the...
... Next. 6. CAUTION: Using a Windows Vista operating system DVD completely erases hard drive contents and reformats the hard drive. Restart the computer, and then insert the Windows Vista operating system DVD into the optical drive before the Windows operating system loads. 3. When reformatting is easily accessible. Using...a Windows Vista operating system DVD, go to http://www.hp.com/support, select your country or region, and follow these steps: NOTE: This process takes several minutes. 1. Follow the on an external drive) is complete, the recovery process helps you restore the...
Backup and Recovery - Windows Vista
Page 12
Index B backing up files 2 Backup and Restore Center 1, 2 C creating a backup 2 F f11 recovery 6 H hard drive recovery 6 R recovering information 4 recovery partition 6 restoring the hard drive 6 W Windows Vista operating system DVD 7 8 Index
Index B backing up files 2 Backup and Restore Center 1, 2 C creating a backup 2 F f11 recovery 6 H hard drive recovery 6 R recovering information 4 recovery partition 6 restoring the hard drive 6 W Windows Vista operating system DVD 7 8 Index
Backup and Recovery - Windows XP
Page 6
... Tools > Backup. 2. To copy the screen and paste it up periodically. ● Back up individual files or folders to an optional external hard drive or to reset your system on a regular basis to the document. Follow the on file size and the speed of your initial backup immediately after... a system failure is added to maintain a reasonably current backup. c. As you add new software and data files, you have to a network drive. You can be a time saver if you should create your settings. The screen shot can back up templates stored in their associated programs. ●...
... Tools > Backup. 2. To copy the screen and paste it up periodically. ● Back up individual files or folders to an optional external hard drive or to reset your system on a regular basis to the document. Follow the on file size and the speed of your initial backup immediately after... a system failure is added to maintain a reasonably current backup. c. As you add new software and data files, you have to a network drive. You can be a time saver if you should create your settings. The screen shot can back up templates stored in their associated programs. ●...
Backup and Recovery - Windows XP
Page 8
...The recovery process reinstalls the original operating system, software, and drivers. Insert the Operating System disc into the optical drive. 3. After the operating system is installed, remove the Operating System disc and insert the Driver Recovery disc. ...computer are permanently removed. Recovering the operating system and programs CAUTION: The recovery process reformats and completely erases the hard drive. Software, drivers, and updates not installed by HP must be manually reinstalled. Follow the on -screen instructions to install the drivers and programs. 4 Chapter 3 Performing...
...The recovery process reinstalls the original operating system, software, and drivers. Insert the Operating System disc into the optical drive. 3. After the operating system is installed, remove the Operating System disc and insert the Driver Recovery disc. ...computer are permanently removed. Recovering the operating system and programs CAUTION: The recovery process reformats and completely erases the hard drive. Software, drivers, and updates not installed by HP must be manually reinstalled. Follow the on -screen instructions to install the drivers and programs. 4 Chapter 3 Performing...
Software Update - Windows XP
Page 8
... the download and installation, follow these steps: a. It is newer than the BIOS version currently installed on your computer. Click your hard drive. 6. At the download area, perform these steps: 1. Follow the instructions on -screen instructions to access the BIOS update you want...an .exe extension (for your operating system. 5. If no instructions are displayed on your selection to http://www.hp.com/support, and then select your hard drive designation. Do not insert, remove, connect, or disconnect any software updates, especially system BIOS updates. Open your...
... the download and installation, follow these steps: a. It is newer than the BIOS version currently installed on your computer. Click your hard drive. 6. At the download area, perform these steps: 1. Follow the instructions on -screen instructions to access the BIOS update you want...an .exe extension (for your operating system. 5. If no instructions are displayed on your selection to http://www.hp.com/support, and then select your hard drive designation. Do not insert, remove, connect, or disconnect any software updates, especially system BIOS updates. Open your...

Software Update - Windows XP
Page 9
NOTE: After a message on the screen. Complete the installation by following the instructions on the screen reports a successful installation, you may delete the downloaded file from your hard drive. Updating the BIOS 5 The BIOS installation begins. 5.
NOTE: After a message on the screen. Complete the installation by following the instructions on the screen reports a successful installation, you may delete the downloaded file from your hard drive. Updating the BIOS 5 The BIOS installation begins. 5.
Software Update - Windows XP
Page 10
...-click the file to do so, restart your country or region. 2. If prompted to install the update. 8. Proceed to http://www.hp.com/support, and then select your computer after the installation is displayed, click an update to open a window containing additional information. 6. Click...the top-right corner of updates is complete. 6 Updating software Open your computer. Click the option for software and driver downloads, type your hard drive. Click Save to save the file to install the updated software without downloading the file. - Click Run to your Internet browser, go to...
...-click the file to do so, restart your country or region. 2. If prompted to install the update. 8. Proceed to http://www.hp.com/support, and then select your computer after the installation is displayed, click an update to open a window containing additional information. 6. Click...the top-right corner of updates is complete. 6 Updating software Open your computer. Click the option for software and driver downloads, type your hard drive. Click Save to save the file to install the updated software without downloading the file. - Click Run to your Internet browser, go to...

HP ProtectTools - Windows Vista and Windows XP
Page 8
... in order to decrypt and access the data. BIOS Configuration for HP ProtectTools ● BIOS Configuration provides access to power-on your computer and periodically bleach the hard drive. Privacy Manager utilizes advanced logon techniques to verify the source, integrity... of communication when using email, Microsoft® Office documents, or instant messaging (IM). Drive Encryption provides complete, full-volume hard drive encryption. ● Privacy Manager for HP ProtectTools ● File Sanitizer allows you to securely shred digital assets (sensitive information including ...
... in order to decrypt and access the data. BIOS Configuration for HP ProtectTools ● BIOS Configuration provides access to power-on your computer and periodically bleach the hard drive. Privacy Manager utilizes advanced logon techniques to verify the source, integrity... of communication when using email, Microsoft® Office documents, or instant messaging (IM). Drive Encryption provides complete, full-volume hard drive encryption. ● Privacy Manager for HP ProtectTools ● File Sanitizer allows you to securely shred digital assets (sensitive information including ...
HP ProtectTools - Windows Vista and Windows XP
Page 12
you do not want the auditor to be accessed even if the hard drive is removed and installed into an unsecured system. ● The Personal Secure Drive feature, provided by the Embedded Security for HP ProtectTools module, encrypts sensitive data to help protect against targeted theft: ●...a CD. Achieving key security objectives The HP ProtectTools modules can work together to provide solutions for HP ProtectTools allows IT managers to restrict access to writeable devices so sensitive information cannot be printed or copied from the hard drive onto removable media. See "Device class ...
you do not want the auditor to be accessed even if the hard drive is removed and installed into an unsecured system. ● The Personal Secure Drive feature, provided by the Embedded Security for HP ProtectTools module, encrypts sensitive data to help protect against targeted theft: ●...a CD. Achieving key security objectives The HP ProtectTools modules can work together to provide solutions for HP ProtectTools allows IT managers to restrict access to writeable devices so sensitive information cannot be printed or copied from the hard drive onto removable media. See "Device class ...

HP ProtectTools - Windows Vista and Windows XP
Page 13
...try to writeable devices so sensitive information cannot be copied from the hard drive. See the following procedures: ◦ Credential Manager ◦ Embedded Security ◦ Drive Encryption ● Embedded Security for HP ProtectTools helps protect sensitive user data or credentials stored locally on a... procedures on page 17" ● Device Access Manager for HP ProtectTools helps ensure that repository of user names and passwords. See "Simple configuration on page 76." ● The Personal Secure Drive feature encrypts sensitive data to help prevent unauthorized access: ●...
...try to writeable devices so sensitive information cannot be copied from the hard drive. See the following procedures: ◦ Credential Manager ◦ Embedded Security ◦ Drive Encryption ● Embedded Security for HP ProtectTools helps protect sensitive user data or credentials stored locally on a... procedures on page 17" ● Device Access Manager for HP ProtectTools helps ensure that repository of user names and passwords. See "Simple configuration on page 76." ● The Personal Secure Drive feature encrypts sensitive data to help prevent unauthorized access: ●...
HP ProtectTools - Windows Vista and Windows XP
Page 21
...4. General tasks 15 From the "My Identity" page, you log on -screen instructions to allow Windows logon from Credential Manager on the computer hard drive or in the New password and Confirm password boxes. 5. See "Example 1-Using the "Advanced Settings" page to complete the PIN change the PIN... Master PIN and User PIN for the newly created virtual token, select Register smart card or token for a user PIN to change . In HP ProtectTools Security Manager, click Credential Manager in the left pane. 2. Follow the on with a virtual token, you want to complete the authentication....
...4. General tasks 15 From the "My Identity" page, you log on -screen instructions to allow Windows logon from Credential Manager on the computer hard drive or in the New password and Confirm password boxes. 5. See "Example 1-Using the "Advanced Settings" page to complete the PIN change the PIN... Master PIN and User PIN for the newly created virtual token, select Register smart card or token for a user PIN to change . In HP ProtectTools Security Manager, click Credential Manager in the left pane. 2. Follow the on with a virtual token, you want to complete the authentication....
HP ProtectTools - Windows Vista and Windows XP
Page 34
... to keep the storage device containing the backup key in HP ProtectTools to reflect the previous progress. Select the TPM-protected password check box. Open Drive Encryption, and then click Recovery. 2. On the "Select Backup Disk" page, click the name of the hard drives on the next page that computer. 1. Activating a TPM-protected password...
... to keep the storage device containing the backup key in HP ProtectTools to reflect the previous progress. Select the TPM-protected password check box. Open Drive Encryption, and then click Recovery. 2. On the "Select Backup Disk" page, click the name of the hard drives on the next page that computer. 1. Activating a TPM-protected password...
HP ProtectTools - Windows Vista and Windows XP
Page 40
... this license agreement is required in case you are requesting the Privacy Manager Certificate. PKI requires users to a location other than your hard drive and put it in the lower-right corner of saving and sending your important information safe and secure. On the "Your Certificate Details... by a certificate authority (CA). The e-mail address must request and install a Privacy Manager Certificate (from which you need to search for HP ProtectTools (select models only) This file should be set up as an account within Microsoft Outlook on the same computer from within Privacy Manager)...
... this license agreement is required in case you are requesting the Privacy Manager Certificate. PKI requires users to a location other than your hard drive and put it in the lower-right corner of saving and sending your important information safe and secure. On the "Your Certificate Details... by a certificate authority (CA). The e-mail address must request and install a Privacy Manager Certificate (from which you need to search for HP ProtectTools (select models only) This file should be set up as an account within Microsoft Outlook on the same computer from within Privacy Manager)...
HP ProtectTools - Windows Vista and Windows XP
Page 55
...assets (personal information or files, historical or Web-related data, or other data components) on your computer and periodically bleach your hard drive. Free space bleaching provides no additional security to the asset. About shredding Deleting an asset in the notification area, at the far...: File Sanitizer currently operates only on the hard drive with new information. Windows only deletes the reference to shredded assets. About free space bleaching NOTE: Free space bleaching is for those assets that you delete using the HP ProtectTools icon in Windows does not completely remove...
...assets (personal information or files, historical or Web-related data, or other data components) on your computer and periodically bleach your hard drive. Free space bleaching provides no additional security to the asset. About shredding Deleting an asset in the notification area, at the far...: File Sanitizer currently operates only on the hard drive with new information. Windows only deletes the reference to shredded assets. About free space bleaching NOTE: Free space bleaching is for those assets that you delete using the HP ProtectTools icon in Windows does not completely remove...
HP ProtectTools - Windows Vista and Windows XP
Page 57
... cycles will be performed for shredding. 4. For example, if you specify the number of assets that obscures the data is performed in the background, your hard drive. 3. Setup procedures 51 Open File Sanitizer, and click Free Space Bleaching. 2. Click Cancel, and then click OK. Click Apply, and then click OK. Click View...
... cycles will be performed for shredding. 4. For example, if you specify the number of assets that obscures the data is performed in the background, your hard drive. 3. Setup procedures 51 Open File Sanitizer, and click Free Space Bleaching. 2. Click Cancel, and then click OK. Click Apply, and then click OK. Click View...


