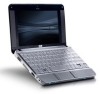
Modem and Local Area Network - Windows Vista and Windows XP
Page 5
Table of contents 1 Using the modem (select models only) Connecting a modem cable ...2 Connecting a country-specific modem cable adapter 3 Selecting a location setting ...4 Viewing the current location selection 4 Adding new locations when traveling 5 Solving travel connection problems 6 2 Connecting to a local area network Index ...8 v
Modem and Local Area Network - Windows Vista and Windows XP
Page 10
Click Clock, Language, and Region. 3. Click Regional and Language Options. 4. Your location is displayed under Location. 4 Chapter 1 Using the modem (select models only) Select Start > Control Panel. 2. Selecting a location setting Viewing the current location selection To view the current location setting for the modem, follow these steps: 1.
Management and Printing User Guide - Windows XP and Windows Vista
Page 8
...HP devices: ● Detailed views of hardware inventory for managing and updating software on your organization's technology environment and processes. The initial software image is shipped with optional Altiris Solutions software (purchased separately). 2 Chapter 1 Using Client Management Solutions Managing and updating software HP...Configuring and deploying a software image The computer is configured during the first-time setup of the computer. NOTE: The HP Backup & Recovery Manager, Computer Setup utility, and other system features provide further assistance with a customized ...
Computer Setup - Windows Vista and Windows XP
Page 8
.... ● To select an item, press enter. ● To close open dialog boxes and return to the main Computer Setup screen, press esc. ● To view navigation information, press f1. ● To change the language, press f2. 2. Your preferences go into effect when the computer restarts. 2 Chapter 2 Using Computer Setup To...
Computer Setup - Windows Vista and Windows XP
Page 10
...exit and restart the computer. Then exit and restart the computer. NOTE: Some of Computer Setup options. Save any changes entered during the ...System information Restore defaults Ignore changes and exit Save changes and exit To do this ● View identification information for the computer and the batteries in this section provide an overview of the Computer ...Setup menu items listed in the system. ● View specification information for the processor, cache and memory size, system ROM, video revision, and keyboard controller...
Drives - Linux
Page 7
Look under Status for a list of installed drives. 1 1 Identifying installed drives ▲ To view the drives installed on the computer, select Computer.
Drives - Windows Vista
Page 7
Refer to improve the security of your permission or password for more information. 1 You may be prompted for your computer. NOTE: Windows® includes the User Account Control feature to Windows Help for tasks such as installing applications, running utilities, or changing Windows settings. 1 Identifying installed drives To view the drives installed on the computer, select Start > Computer.
Drives - Windows XP
Page 7
1 Identifying installed drives To view the drives installed on the computer, select Start > My Computer. 1
External Devices - Linux
Page 8
Connecting a USB device CAUTION: To prevent damage to a USB connector, use minimal force to the USB port. To connect a USB device to the computer: ▲ Connect the USB cable for a list of installed USB devices. 2 Chapter 1 Using a USB device NOTE: To view the USB devices installed on the computer, select Computer > View. Look under Status for the device to connect a USB device.
Notebook Tour - Windows Vista
Page 10
Functions like the right button on an external mouse. *This table describes factory settings. Top components TouchPad Component Description (1) TouchPad on an external mouse. To view or change pointing device preferences, select Start > Control Panel > Hardware and Sound > Mouse. 4 Chapter 2 Components Moves the pointer and selects or activates items on the screen. (4) TouchPad scroll zone Scrolls up or down. (5) Right TouchPad button* Functions like the left button on /off button (2) Left TouchPad button* (3) TouchPad* Enables/disables the TouchPad.
Notebook Tour - Windows XP
Page 7
Select Start > My Computer. 2. 1 Identifying hardware To see a list of the System Tasks window, select View system information. 3. You can also add hardware or modify device configurations using Device Manager. 1 Select Hardware tab > Device Manager. In the left pane of hardware installed in the computer, follow these steps: 1.
Notebook Tour - Windows XP
Page 9
Moves the pointer and selects or activates items on the screen. (4) TouchPad scroll zone Scrolls up or down. (5) Right TouchPad button* Functions like the left button on an external mouse. Top components TouchPad Component Description (1) TouchPad on an external mouse. *This table describes factory settings. Top components 3 To view or change pointing device preferences, select Start > Control Panel > Printers and Other Hardware > Mouse. Functions like the right button on /off button (2) Left TouchPad button* (3) TouchPad* Enables/disables the TouchPad.
Pointing Devices and Keyboard - Windows Vista
Page 7
... pointing device preferences Use Mouse Properties in Windows® to customize settings for pointing devices, such as button configuration, click speed, and pointer options. To view and change TouchPad preferences, select Start > Control Panel > Hardware and Sound > Mouse. Functions like the left button on an external mouse. (3) TouchPad* Moves the pointer...
Pointing Devices and Keyboard - Windows XP
Page 7
Setting pointing device preferences 1 To view and change TouchPad preferences, select Start > Control Panel > Printers and Other Hardware > Mouse. To access Mouse Properties, select Start > Control Panel > Printers and Other Hardware > ...
Security - Windows XP and Windows Vista
Page 5
... protection 16 3 Using Computer Setup security features Securing system devices ...17 Using Computer Setup stringent security 18 Setting stringent security 19 Removing stringent security 20 Viewing Computer Setup System Information 21 4 Using antivirus software 5 Using firewall software 6 Installing critical security updates 7 Installing a security cable Index ...26 v
Security - Windows XP and Windows Vista
Page 27
Use the arrow keys to this general system information, follow these steps: 1. NOTE: To prevent unauthorized access to select File > System Information, and then press enter. Viewing Computer Setup System Information 21 Open Computer Setup by turning on or restarting the computer,... information about the processor, cache, memory, ROM, video revision, and keyboard controller revision. To view this information, you must create a setup password in Computer Setup. Viewing Computer Setup System Information The System Information feature in Computer Setup provides 2 types of the screen....
Wireless (Select Models Only) - Windows Vista
Page 10
To view the state of the wireless devices, click the Wireless Assistant icon Mobility Center. in the Windows Mobility Center. 2. Using Wireless Assistant software (select models only) A ... Wireless Assistant by Computer Setup before it can be turned on a wireless device does not automatically connect the computer to the Wireless Assistant online Help: 1. NOTE: Enabling or turning on or off using Wireless Assistant. If a wireless device is disabled by Computer Setup, it must be reenabled by clicking the icon...
Wireless (Select Models Only) - Windows XP
Page 10
Open Wireless Assistant by double-clicking the icon in the notification area. 2. NOTE: Enabling or turning on a wireless device does not automatically connect the computer to the Wireless Assistant online Help: 1. Click the Help button. 4 Chapter 2 Using the ... device is disabled by Computer Setup, it must be reenabled by Computer Setup before it can be turned on or off using Wireless Assistant. To view the state of the wireless devices, place the pointer over the Wireless Assistant icon in the notification area (at the far right of the taskbar...
HP 2133 Mini-Note PC and HP 2140 Mini-Note PC - Maintenance and Service Guide
Page 15
Functions like the right button on an external mouse. *This table describes factory settings. Moves the pointer and selects or activates items on the screen. (4) TouchPad scroll zone Scrolls up or down. (5) Right TouchPad button* Functions like the left button on /off button (2) Left TouchPad button* (3) TouchPad* Enables/disables the TouchPad. TouchPad Item Component Function (1) TouchPad on an external mouse. Model 2133 7 To view or change pointing device preferences, select Start > Control Panel > Hardware and Sound > Mouse.
HP 2133 Mini-Note PC and HP 2140 Mini-Note PC - Maintenance and Service Guide
Page 83
...factory settings in Computer Setup To return all settings in Computer Setup to the main Computer Setup screen, press esc. ● To view navigation information, press f1. ● To change the language, press f2. 2. Using Computer Setup 75 When the confirmation dialog box opens, press ...f10. 4. NOTE: Your password settings and security settings are accessed from the File, Security, Diagnostics, and System Configuration menus. 1. To exit Computer Setup, choose ...