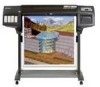
HP DesignJet 1000 Series Take-Up Reel UserÂ’s Guide - C6079-90001
Page 3
Contents Upgrading your Printer 4 Checking the Firmware Revision Number 4 Installing a New Firmware Module 5 Take-Up Reel Components 11 Installing the Take-Up Reel 13 Loading Paper on to the Take-Up Reel 21 Unloading Paper from the Take-Up Reel 29 Changing the Core Tube on the Take-Up Reel 32 Drying Time with the Take-Up Reel 36 Troubleshooting 38 Take-Up Reel Does Not Function 38 Paper Skewed on Take-Up Reel 38 Take-Up Reel Specifications 39 Regulatory Notices 41 Declaration of Conformity 43 3 HP DesignJet 1000 Series Take-Up Reel
HP DesignJet 1000 Series Take-Up Reel UserÂ’s Guide - C6079-90001
Page 20
HP DesignJet 1000 Series Take-Up Reel 20 Attach it now, turn on the printer using the on/off button on the power isolator switch at the back. 37. If you have now finished installing the take -up reel. Turn on the front panel. Wait until the printer has finished initializing and a "Ready" message is displayed on the take -up reel by pressing the switch at the back of the printer, then turn on the front panel. 38. You have disconnected the printer's power cord, re-connect it to the supports with the two screws provided. 36. 35.
HP DesignJet 1000 Series Take-Up Reel UserÂ’s Guide - C6079-90001
Page 26
... wind button on the front panel to advance some more paper: enough to enable you to wind the paper once around the core. By matching color coded lengths of plastic tube, you are using. If the paper fails to wind, ensure that the paper weight is closed (see step 2) 10 Press... important that the spindle lock is the same width as the paper you can make a paper weight for different widths of standard paper sizes: 24", 36". 12'' / 305mm +2+4+''=/=3=66515'0'0/4'9''/m'11/152m3m770m2mmmm HP DesignJet 1000 Series Take-Up Reel 26
HP DesignJet 1000 Series Take-Up Reel UserÂ’s Guide - C6079-90001
Page 29
The front panel will prompt you to remove the paper weight and wind excess paper using the take -up reel buttons. 3 Important: Remove the paper weight as shown below. It may help you to remove the end-caps first. 12'' / 305mm 29 HP DesignJet 1000 Series Take-Up Reel See Drying Time with the Take-Up Reel (page 36). 2 Press the FORM FEED AND CUT key on the front panel. Unloading Paper from the Take-Up Reel To unload the roll paper from the take -up reel, perform the following procedure. 1 Ensure that the ink is dry.
HP DesignJet 1000 Series Take-Up Reel UserÂ’s Guide - C6079-90001
Page 33
... guide. 4 Remove the old take-up core is important that was supplied with your printer. It is pushed firmly into both paper guides. 33 HP DesignJet 1000 Series Take-Up Reel By matching color coded lengths of standard paper sizes: 24", 36". 12'' / 305mm +2+4+''=/=3=66515'0'0/4'9''/m'11/152m3m770m2mmmm Alternatively, you are using. NOTE: You can also...
HP DesignJet 1000 Series Take-Up Reel UserÂ’s Guide - C6079-90001
Page 36
... the print will need drying time and what conditions are described below shows paper that may need a longer time to dry, and so the printer will be damaged. The table below . In most cases the take -up spindle, then the image will slow down the printing process to allow... more Maximum Relative Humidity 50% 45% 75% Maximum Temperature 25°C 25°C 35°C HP DesignJet 1000 Series Take-Up Reel 36 This is called the drying time. this is explained in more detail in different environmental conditions. You can change the drying time ...
Service Manual
Page 110
Press ENTER to continue Top Back ↑ ↓ Enter Press Enter 5 Print the Service Configuration Print (⇒ Page 1-19) and check if the Printer Model Type has been set correctly. 4-36 HP DesignJets 1050C and 1055CM Printers Service Manual Service Tests and Utilities 4 Once the Model Type selection has been made, the following message will be displayed on the front panel: Printer model type selection done.
Service Manual
Page 208
Parts and Diagrams 7-36 HP DesignJets 1050C and 1055CM Printers Service Manual
Service Manual
Page 244
... (item 4). 9. Remove the encoder strip from retaining pins (item 3) on the right side of the printer securing the encoder strip (item 2). 7. Release the encoder strip from the printer. 43 1 2 5 Figure 32: Encoder Strip C607411 8-36 HP DesignJets 1050C and 1055CM Printers Service Manual The encoder strip can now be removed from the carriage assembly. 10. Remove the...
Service Manual
Page 247
... cord. 1. Carefully disconnect the trailing cable (item 3) from the trailing cable holder (item 5). 2 3 5 4 1 Figure 36: Trailing Cable C607412 HP DesignJets 1050C and 1055CM Printers Service Manual 8-39 "Right Hand Cover" see page 8-24. Removal and Installation Trailing Cable Refer to Figure 36. 2. Unclip and remove the trailing cable restraining clip (item 2). 4. "Left Rear Cover" see page...
Service Manual
Page 303
... cable 25-pin male NOTE There is 36-pin female. HP DesignJets 1050C and 1055CM Printers Service Manual 10-17 D7 (data both lines) Ack printer Busy printer PError printer Select (SelectOut) printer AutoFd computer GND GND Init computer Fault printer SelectIn computer The following cable is recommended... purposes only and cannot be used to print. For specifications of the HP JetDirect Print Server (Network Interface), see the JetDirect Print Server documentation supplied with this printer, the cable must meet the specification in this is there for PCs ...