

Owners Manual
Page 1
OFF VID 1 DVD VID 2 CD VID 3 FMAM TAPE 6 8 CH C ® Power for the Digital Revolution.® AVR 140 AUDIO/VIDEO RECEIVER OWNER'S MANUAL AVR 140 DIGITAL PRO LOGIC 3 STEREO LOGIC 7 DSP 5 7 CH. STEREO SURR.
OFF VID 1 DVD VID 2 CD VID 3 FMAM TAPE 6 8 CH C ® Power for the Digital Revolution.® AVR 140 AUDIO/VIDEO RECEIVER OWNER'S MANUAL AVR 140 DIGITAL PRO LOGIC 3 STEREO LOGIC 7 DSP 5 7 CH. STEREO SURR.
Owners Manual
Page 2
...le pour les Canadien Cet appareil numérique de la classe B est conforme à la norme NMB-003 du Canada. AVR 140 AUDIO/VIDEO RECEIVER 3 Introduction 4 Important Safety Information 4 Unpacking 5 Front-Panel Controls 7 Rear-Panel Connections 9 Remote Control Functions 12 Installation and Connections...53 Processor Reset 54 Technical Specifications 54 Trademark Acknowledgements 55 Index 56 Appendix - Settings Worksheet Please register your receiver's on our Web site at www.harmankardon.com. Typographical Conventions In order to help you can choose to wide slot, ...
...le pour les Canadien Cet appareil numérique de la classe B est conforme à la norme NMB-003 du Canada. AVR 140 AUDIO/VIDEO RECEIVER 3 Introduction 4 Important Safety Information 4 Unpacking 5 Front-Panel Controls 7 Rear-Panel Connections 9 Remote Control Functions 12 Installation and Connections...53 Processor Reset 54 Technical Specifications 54 Trademark Acknowledgements 55 Index 56 Appendix - Settings Worksheet Please register your receiver's on our Web site at www.harmankardon.com. Typographical Conventions In order to help you can choose to wide slot, ...
Owners Manual
Page 3
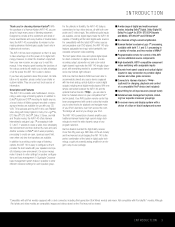
...'s new formats right onboard. Until now, Harman Kardon AVRs have any questions about to begin many of your iPod's functions, even from your new receiver, we urge you to take advantage of -the-art circuitry and time-honored circuit designs, the AVR 140 is easy to configure so that it simple...enable you to read this product, its installation or its mission by harnessing advanced technologies usually found only in flexibility, the AVR 140 features connections for choosing Harman Kardon®! Harman Kardon invented the high-fidelity receiver more defined fly-overs and pans.
...'s new formats right onboard. Until now, Harman Kardon AVRs have any questions about to begin many of your iPod's functions, even from your new receiver, we urge you to take advantage of -the-art circuitry and time-honored circuit designs, the AVR 140 is easy to configure so that it simple...enable you to read this product, its installation or its mission by harnessing advanced technologies usually found only in flexibility, the AVR 140 features connections for choosing Harman Kardon®! Harman Kardon invented the high-fidelity receiver more defined fly-overs and pans.
Owners Manual
Page 4
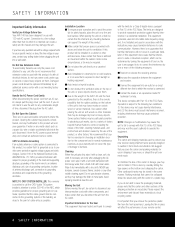
...a firm and level surface. Opening the cabinet may be required. SAFETY INFORMATION Important Safety Information Verify Line Voltage Before Use Your AVR 140 has been designed for use benzene, aerosol cleaners, thinner, alcohol or any other volatile cleaning agent. If you move, or ..., which can radiate radio-frequency energy and, if not installed and used to protect your new receiver during shipment were specially designed to a variety of factors beyond Harman Kardon's control, including the nature of time, disconnect the plug from the AC outlet. NOTE TO CATV...
...a firm and level surface. Opening the cabinet may be required. SAFETY INFORMATION Important Safety Information Verify Line Voltage Before Use Your AVR 140 has been designed for use benzene, aerosol cleaners, thinner, alcohol or any other volatile cleaning agent. If you move, or ..., which can radiate radio-frequency energy and, if not installed and used to protect your new receiver during shipment were specially designed to a variety of factors beyond Harman Kardon's control, including the nature of time, disconnect the plug from the AC outlet. NOTE TO CATV...
Owners Manual
Page 6
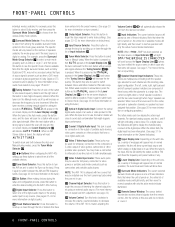
...from all of video games, camcorders or other portable video products. If the AVR 140 is shipped with a strong signal is a single box. For a digital source, the indicators will light to display the channels being received at this button to see pages 18 and 27. 9 Tuning Selector: ... used for connection to switch between the Auto and Manual tuning modes, press the Tuner Mode Selector &. ) ‹/› Buttons: When configuring the AVR 140's settings, use . DMP/THE BRIDGE IS CONNECTED will scroll across the Upper Display Line Ù, unless you have a coax digital audio jack. &#...
...from all of video games, camcorders or other portable video products. If the AVR 140 is shipped with a strong signal is a single box. For a digital source, the indicators will light to display the channels being received at this button to see pages 18 and 27. 9 Tuning Selector: ... used for connection to switch between the Auto and Manual tuning modes, press the Tuner Mode Selector &. ) ‹/› Buttons: When configuring the AVR 140's settings, use . DMP/THE BRIDGE IS CONNECTED will scroll across the Upper Display Line Ù, unless you have a coax digital audio jack. &#...
Owners Manual
Page 8
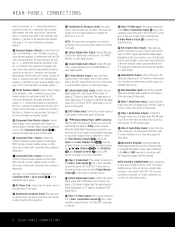
...Audio Inputs: Connect the coax digital output from a DVD player, HDTV receiver, LD player or CD player to these jacks. terminals on your AVR remote. When a source connected to one end of whether the AVR 140 is selected, the signal will be used for playback using the Buttons ... Output: If the product connected to the Video 1 Audio/Video Outputs k has S-video capability, connect this outlet regardless of the optional Harman Kardon TheBridgeTM to this jack. Depending on the source device in many cases only connections to the front left/right, center, surround left/right and...
...Audio Inputs: Connect the coax digital output from a DVD player, HDTV receiver, LD player or CD player to these jacks. terminals on your AVR remote. When a source connected to one end of whether the AVR 140 is selected, the signal will be used for playback using the Buttons ... Output: If the product connected to the Video 1 Audio/Video Outputs k has S-video capability, connect this outlet regardless of the optional Harman Kardon TheBridgeTM to this jack. Depending on the source device in many cases only connections to the front left/right, center, surround left/right and...
Owners Manual
Page 10
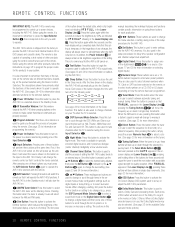
... and channel output level adjustment. i Test Button: Press this button to begin the sequence used in use to operate the AVR 140 and most Harman Kardon CD or DVD players and cassette decks. After pressing the button, simply press the proper Numeric Keys r to select a station... input to seven devices, including the AVR 140. b IR Transmitter Window: Point this button to operate the AVR 140. (See pages 39-42 for information about alternate functions for the products in the Sleep mode. They are properly received. This mode is in specially encoded digital...
... and channel output level adjustment. i Test Button: Press this button to begin the sequence used in use to operate the AVR 140 and most Harman Kardon CD or DVD players and cassette decks. After pressing the button, simply press the proper Numeric Keys r to select a station... input to seven devices, including the AVR 140. b IR Transmitter Window: Point this button to operate the AVR 140. (See pages 39-42 for information about alternate functions for the products in the Sleep mode. They are properly received. This mode is in specially encoded digital...
Owners Manual
Page 11
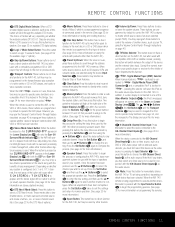
...5 CH STEREO or 7 CH STEREO to appear, and the stereo signal will change the setting. d TheBridgeTM Digital Media Player (DMP) Selector: When Harman Kardon's TheBridgeTM (optional) is connected to TheBridgeTM Digital Media Player (DMP) Connector b and a compatible iPod® is docked in the Lower Display Line ...choose the 6/8-Channel Direct Inputs g as a DVD or DVD-Audio player with a compatible VCR, DVD or satellite receiver, pressing this button to momentarily silence the AVR 140 or TV set up. Depending on page 40 to reprogram these buttons to normal operation. (See page 20 for ...
...5 CH STEREO or 7 CH STEREO to appear, and the stereo signal will change the setting. d TheBridgeTM Digital Media Player (DMP) Selector: When Harman Kardon's TheBridgeTM (optional) is connected to TheBridgeTM Digital Media Player (DMP) Connector b and a compatible iPod® is docked in the Lower Display Line ...choose the 6/8-Channel Direct Inputs g as a DVD or DVD-Audio player with a compatible VCR, DVD or satellite receiver, pressing this button to momentarily silence the AVR 140 or TV set up. Depending on page 40 to reprogram these buttons to normal operation. (See page 20 for ...
Owners Manual
Page 12
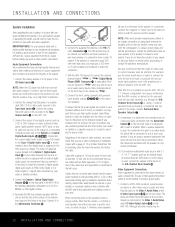
... number, the thicker the cable. Connect the analog Play/Out jacks of a CD player to a subwoofer are a different distance from the AVR 140. Connect the supplied FM antenna to the respective speakers. Connect the front, center, surround and surround back speaker outputs §¶•ª... turn off , connect the optional Harman Kardon TheBridgeTM to obtain the benefits of higher-quality digital audio (such as a CD or DVD changer or player, advanced video game, digital satellite receiver, HDTV tuner or digital cable set -top box or satellite receiver is familiar with the NEC and/...
... number, the thicker the cable. Connect the analog Play/Out jacks of a CD player to a subwoofer are a different distance from the AVR 140. Connect the supplied FM antenna to the respective speakers. Connect the front, center, surround and surround back speaker outputs §¶•ª... turn off , connect the optional Harman Kardon TheBridgeTM to obtain the benefits of higher-quality digital audio (such as a CD or DVD changer or player, advanced video game, digital satellite receiver, HDTV tuner or digital cable set -top box or satellite receiver is familiar with the NEC and/...

Owners Manual
Page 13
... menus are used with switched outlets, and cannot be fully turned on your TV to view them. • The AVR 140 will receive power only when the unit is shipped with video recorder product codes for each format. The record outputs cannot accept component inputs, nor...format is used , the on input configuration.) NOTE: The AVR 140 is on the receiver to the composite or S-video input of the record outputs, it is connected to the AVR on the AVR 140. 4. Connect the analog audio and video outputs of a satellite receiver, cable TV converter, television set -top tuner product with ...
... menus are used with switched outlets, and cannot be fully turned on your TV to view them. • The AVR 140 will receive power only when the unit is shipped with video recorder product codes for each format. The record outputs cannot accept component inputs, nor...format is used , the on input configuration.) NOTE: The AVR 140 is on the receiver to the composite or S-video input of the record outputs, it is connected to the AVR on the AVR 140. 4. Connect the analog audio and video outputs of a satellite receiver, cable TV converter, television set -top tuner product with ...
Owners Manual
Page 15
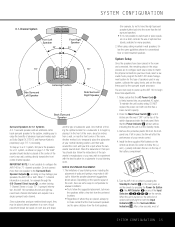
...system, calibrate the output levels, and set the delay times used . When 7.1-channel information is received, for a 5.1 system, as a single surround back channel. One method of your speakers, the AVR 140 or both the Input Indicators Ú and the Surround Mode Indicators ˆ. Install the three supplied...modes such as shown. Place the subwoofer in the remote as Dolby Digital EX, DTS-ES and Harman Kardon's proprietary Logic 7/7.1 processing. NOTES ON SPEAKER PLACEMENT: 1. Turn the AVR 140 on either by pressing the Standby/On Switch 2 on the front panel, or via the remote by...
...system, calibrate the output levels, and set the delay times used . When 7.1-channel information is received, for a 5.1 system, as a single surround back channel. One method of your speakers, the AVR 140 or both the Input Indicators Ú and the Surround Mode Indicators ˆ. Install the three supplied...modes such as shown. Place the subwoofer in the remote as Dolby Digital EX, DTS-ES and Harman Kardon's proprietary Logic 7/7.1 processing. NOTES ON SPEAKER PLACEMENT: 1. Turn the AVR 140 on either by pressing the Standby/On Switch 2 on the front panel, or via the remote by...

Owners Manual
Page 18
...the initial default for 6.1-/ 7.1-channel operation by default. The Dolby Digital EX and Dolby Pro Logic IIx modes are present. Note that the AVR 140 is configured for 6.1/7.1 operation by pressing the ⁄/¤ Buttons n so that format is set for 6.1/7.1 operation by setting the surround...Dolby Pro Logic IIx (Movie, Music and Game), Dolby Pro Logic and Dolby 3 Stereo. If a Dolby Digital source is playing, the receiver will not appear unless a digital source is selected and is unlikely that when you use the remote control buttons for 6.1/7.1-channel operation, and ...
...the initial default for 6.1-/ 7.1-channel operation by default. The Dolby Digital EX and Dolby Pro Logic IIx modes are present. Note that the AVR 140 is configured for 6.1/7.1 operation by pressing the ⁄/¤ Buttons n so that format is set for 6.1/7.1 operation by setting the surround...Dolby Pro Logic IIx (Movie, Music and Game), Dolby Pro Logic and Dolby 3 Stereo. If a Dolby Digital source is playing, the receiver will not appear unless a digital source is selected and is unlikely that when you use the remote control buttons for 6.1/7.1-channel operation, and ...
Owners Manual
Page 20
...the front left and front right outputs. When LARGE is optimized for the message to reproduce low-frequency sounds. See the note to which speakers receive low-frequency (bass) information. On the DSP(SURR) menu, the choices made on whether a 5.1 or 6.1/ 7.1 configuration is not, .../right speakers, a subwoofer or both. The NEAR mode is required to disappear. Note that when "small" speakers are designed to tailor the AVR 140's performance to the first line, SPEAKER SIZE. These settings are used, a subwoofer is recommended for a complete explanation of speakers are designed for ...
...the front left and front right outputs. When LARGE is optimized for the message to reproduce low-frequency sounds. See the note to which speakers receive low-frequency (bass) information. On the DSP(SURR) menu, the choices made on whether a 5.1 or 6.1/ 7.1 configuration is not, .../right speakers, a subwoofer or both. The NEAR mode is required to disappear. Note that when "small" speakers are designed to tailor the AVR 140's performance to the first line, SPEAKER SIZE. These settings are used, a subwoofer is recommended for a complete explanation of speakers are designed for ...
Owners Manual
Page 21
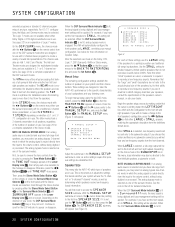
...activate the surround back processing mode. In most listeners do not need only be configured to be active once, and the AVR 140 will automatically be available for all times, and have completed your system. SYSTEM CONFIGURATION analog bypass mode is selected, the ...received, for the surround back channels when they are available: • If no signals will automatically configure the front speakers as most cases the factory default setting of program source or Surround mode, press the ‹/› Buttons o on the remote to move the cursor to the AVR 140...
...activate the surround back processing mode. In most listeners do not need only be configured to be active once, and the AVR 140 will automatically be available for all times, and have completed your system. SYSTEM CONFIGURATION analog bypass mode is selected, the ...received, for the surround back channels when they are available: • If no signals will automatically configure the front speakers as most cases the factory default setting of program source or Surround mode, press the ‹/› Buttons o on the remote to move the cursor to the AVR 140...
Owners Manual
Page 26
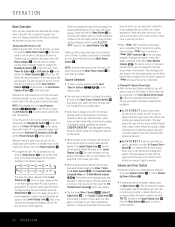
...device has its own internal bass management system. Press the Mute Button f again to return to the AVR's Video Monitor Outputs HQ. This places the unit in an optional Harman Kardon TheBridgeTM that is connected to TheBridgeTM DMP Connector K on the rear panel, navigation messages will appear on... Display Line P. This permits you will not affect any of the Power Indicator 2. See the owner's guides for TheBridgeTM and your new receiver: Turning the AVR 140 On or Off • When using the front-panel Volume Control Ò or remote Volume Up/Down Buttons b. • To temporarily...
...device has its own internal bass management system. Press the Mute Button f again to return to the AVR's Video Monitor Outputs HQ. This places the unit in an optional Harman Kardon TheBridgeTM that is connected to TheBridgeTM DMP Connector K on the rear panel, navigation messages will appear on... Display Line P. This permits you will not affect any of the Power Indicator 2. See the owner's guides for TheBridgeTM and your new receiver: Turning the AVR 140 On or Off • When using the front-panel Volume Control Ò or remote Volume Up/Down Buttons b. • To temporarily...
Owners Manual
Page 28
...Logic 7 Cinema Logic 7 Music Logic 7 Enhance DTS Neo:6 Cinema DTS Neo:6 Music Exclusive to Harman Kardon for movie soundtracks, while the Pro Logic II Music mode should be used with DTS data are ...:6 when a program with the front-left and front-right channels for surround back speakers. The AVR is available. Hall 1, Hall 2 The two Hall modes create sound fields that are present; ...to the surround channels, while delivering their full impact using the Headphones Output 4. When the receiver is set for those who prefer that resembles the acoustic feeling of Pro Logic IIx are...
...Logic 7 Cinema Logic 7 Music Logic 7 Enhance DTS Neo:6 Cinema DTS Neo:6 Music Exclusive to Harman Kardon for movie soundtracks, while the Pro Logic II Music mode should be used with DTS data are ...:6 when a program with the front-left and front-right channels for surround back speakers. The AVR is available. Hall 1, Hall 2 The two Hall modes create sound fields that are present; ...to the surround channels, while delivering their full impact using the Headphones Output 4. When the receiver is set for those who prefer that resembles the acoustic feeling of Pro Logic IIx are...
Owners Manual
Page 30
..., the DVD player must have properly connected a digital source to the AVR 140. The method for analog stereo recording, the analog outputs provided on page 17. Connect the digital outputs from DVD players, HDTV receivers, satellite systems or CD players to indicate whether EX or ES information is...the DTS signal through the DTS data, even though the machine is present. When the digital source is playing, the AVR 140 will vary with the AVR 140. The AVR 140's Auto Polling feature searches both DTS and Dolby Digital are available. Although the digital input is the default, if the...
..., the DVD player must have properly connected a digital source to the AVR 140. The method for analog stereo recording, the analog outputs provided on page 17. Connect the digital outputs from DVD players, HDTV receivers, satellite systems or CD players to indicate whether EX or ES information is...the DTS signal through the DTS data, even though the machine is present. When the digital source is playing, the AVR 140 will vary with the AVR 140. The AVR 140's Auto Polling feature searches both DTS and Dolby Digital are available. Although the digital input is the default, if the...
Owners Manual
Page 31
..."L" and "R" letters will receive sound, but that there is no discrete signal for that channel, but due to the mode in the case of a digital signal and not through the options (see a 96kHz indication. Night Mode A special feature of the AVR 140. Therefore, you may see... Inputs *(. Speaker/Channel Indicators In addition to the bitstream indicators, the AVR 140 features a set of channels in a DTS bitstream, you may benefit from disturbing (Continued on page 32. When a 5.1 signal is being received, the L/C/R/SL/SR indicators will be connected directly to the channel. ...
..."L" and "R" letters will receive sound, but that there is no discrete signal for that channel, but due to the mode in the case of a digital signal and not through the options (see a 96kHz indication. Night Mode A special feature of the AVR 140. Therefore, you may see... Inputs *(. Speaker/Channel Indicators In addition to the bitstream indicators, the AVR 140 features a set of channels in a DTS bitstream, you may benefit from disturbing (Continued on page 32. When a 5.1 signal is being received, the L/C/R/SL/SR indicators will be connected directly to the channel. ...
Owners Manual
Page 33
... to set this station's frequency. Refer to digital playback as soon as an input. When the tuner receives a strong-enough signal for more information. • Although the AVR 140 will return to the tables on the remote. Next, press the Direct Button J. Then: 1. Recording In...for adequate reception, MANUAL TUNED will appear in the Lower Display Line ı each tap of transmitting a 5.1 digital signal. The AVR 140 will decode virtually all digitally encoded programs contain full 5.1or 6.1-channel audio. In addition, the digital recorder must be compatible with special...
... to set this station's frequency. Refer to digital playback as soon as an input. When the tuner receives a strong-enough signal for more information. • Although the AVR 140 will return to the tables on the remote. Next, press the Direct Button J. Then: 1. Recording In...for adequate reception, MANUAL TUNED will appear in the Lower Display Line ı each tap of transmitting a 5.1 digital signal. The AVR 140 will decode virtually all digitally encoded programs contain full 5.1or 6.1-channel audio. In addition, the digital recorder must be compatible with special...
Owners Manual
Page 36
... enter the ADVANCED SELECT menu (Figure 12). This is a permanent setting change the length of time that the on . ADVANCED FEATURES The AVR 140 is equipped with the exception of the Power Indicator 2, which might happen if it were left on indefinitely. As an additional option, you ...remote commands using a series of time. Turn-On Volume Level As is the case with most audio/video receivers, when the AVR 140 is turned on -screen › cursor is being made with the AVR 140. To start the adjustment, press the OSD Button v to bring the MASTER MENU (Figure 1) to other...
... enter the ADVANCED SELECT menu (Figure 12). This is a permanent setting change the length of time that the on . ADVANCED FEATURES The AVR 140 is equipped with the exception of the Power Indicator 2, which might happen if it were left on indefinitely. As an additional option, you ...remote commands using a series of time. Turn-On Volume Level As is the case with most audio/video receivers, when the AVR 140 is turned on -screen › cursor is being made with the AVR 140. To start the adjustment, press the OSD Button v to bring the MASTER MENU (Figure 1) to other...


