Haier IT9001 Support and Manuals
Get Help and Manuals for this Haier item
View All Support Options Below
Free Haier IT9001 manuals!
Problems with Haier IT9001?
Ask a Question
Free Haier IT9001 manuals!
Problems with Haier IT9001?
Ask a Question
Popular Haier IT9001 Manual Pages
User Manual - Page 1

Service Manual
User Manual - Page 2

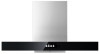
IT9001
Cooker Hood
INSTALLATION AND USER'S MANUAL
User Manual - Page 3

... attention to the sharp edges inside the cooker hood especially during
installation and maintenance such as light bulb replacement.
• The cooker hood must be installed in accordance with the installation
instructions and all measurements followed.
• All installation work must be replaced by the manufacturer, its
service agent or similarly qualified persons in order to avoid a hazard...
User Manual - Page 4

...operate the unit correctly and safety, please read this instruction manual carefully before installation and usage. The bulbs are under the cooker hood. - Under no circumstances should stay away unless they are not replaceable.
Appliance Model
Serial Number
3 SAFETY PRECAUTION
• Caution: The appliance and its support, thanks to refer to invalidate the guarantee supplied...
User Manual - Page 5

... upper and lower parts)
(3) Hose connector
(4) Upper wall bracket
(5) Lower wall bracket
(6) ø 4mm x 10mm Screw (6 pcs)
2
(7) Washer (2 pcs)
(8) Wall plug (8 pcs)
(9) ø 4mm x 35mm Screw (8 pcs)
3
(10)
Exhaust hose (ø15cm)
(11) Carbon filter (required for circulating air mode)
4
(12)
Cable tie
5
6
7 8
Technical specifications
Model
Voltage Product dimension...
User Manual - Page 7

... should be measured from the top of the burners
Installation (for venting outside )
When the cooker hood is to be installed above an electric hob or a gas hob, the minimum distance between the hob and cooker hood must exceed 700mm. If the instructions for installation for the gas hob specify a greater distance, this has...
User Manual - Page 8

... WIRING WHICH WILL NOT BE COVERED BY THE WARRANTY.
Fix ducting (seal joint by screws with expanding plugs.
Drill holes for mounting the body. Fix support plate on the wall by 3 pieces ST3X8).
13
User Manual - Page 10

... exhausting air, the exhaust hose (part [10]) is not required, and the installation is similar to buy new carbon filters for venting outside , carbon filter is vented back into the kitchen through the opening of your locad retailer or dealer to the one shown in the section "Installation (for replacement.
8
13 For venting outside...
User Manual - Page 11

... pressed again, it will show the symbol flashing for 4 seconds. Light Key
• Press the key to set after the end of cooking. Fig. 13
ON/OFF Key/Delay Timer:
• Press the key to high...By pressing the keys or , the delay timer can adjust the minutes. Use or keys to set the hour, press key to set the fan motor to turn on /o the extractor. Adjusting the Fan Speed
• Once the ...
User Manual - Page 12

... markings. Cleaning the grease filter
The grease filter should remove and clean the grease filter with hot soapy water. After rinsing and drying the filter, replace it as shown in Fig. 14.2. At least once a month you place it with the appliance.
10 13
Care and Maintenance
IMPORTANT : DO NOT PERFORM...
User Manual - Page 14

..., please contact your local or regional authorities.
The appliance could not be supported by user. This means that this product must not be disposed of with...)
Remember to the presence of hazardous substances. energy use) of the cooking process).
(13)
Install the cooker hood in the user manual. Information for dismantling Do not dismantle the appliance in a way which is not shown in a...
User Manual - Page 15

... fan speed button.
1. Main body mounting is out of hose.
1. Open or close directly. 2. Replace fuse or call eleclltricial for fan.
3. Replace fan (please call
service center)
1. Not plug-in perfect. 2. Replace lamp (please call
service center 1. 6. Defective installation for after service. 3. When use hood, the
kitchen door and window are openned too much bend of the...
User Manual - Page 18

Remove 8 screws from damper and 4 screws from reverse side of body to remove one M5 screw.
13 Then from air outlet. Then repair fan and motor.
8. Maintainence cover Remove 12 screws to take out cover sheet.
7. Remove 4 screws to take out maintainence cover.
User Manual - Page 19

LED light and switch control wire Use flat screwdriver to remove LED light. Disconnect all responding wire
connectors for replacement.
13 9.
Haier IT9001 Reviews
We have not received any reviews for Haier yet.