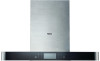
Haier HH-DTB1 Support and Manuals
Get Help and Manuals for this Haier item
View All Support Options Below
Free Haier HH-DTB1 manuals!
Problems with Haier HH-DTB1?
Ask a Question
Free Haier HH-DTB1 manuals!
Problems with Haier HH-DTB1?
Ask a Question
Popular Haier HH-DTB1 Manual Pages
HH-TDS1 HH-TDB1 Manual - Page 3

Any attempt to provide service or repair products based on this manual will result in order to avoid a hazard.
The pipe bore and hole must be executed by professional person based Execution on or just close in repair technology, not for ordinary users. If the supply cord is damaged, it must be replaced by professional Prohibit...
HH-TDS1 HH-TDB1 Manual - Page 4

..., electric shock, drop or
fire accident.
Strict Execution
2 It should be exhaust to outside. Replace or check gas pipe regularly, since gas alarm Strict Execution device can 't exceed 40℃. When installation, the related
regulation, standard or instruction on fire must be connect with required qualification. The outlet must be wear avoiding from...
HH-TDS1 HH-TDB1 Manual - Page 5

... ceiling. Execution
The wall of such waste separately for special treatment is necessary. Accessible parts may become hot when used with the domestic waste. This product has to ensure good...Execution
When range hood is using in an environmental friendly and healthy way.
3
Collection of installing range hood needs enough strength. This product must not be disposed at an authorized place for...
HH-TDS1 HH-TDB1 Manual - Page 6

2.Product Overview
2.1 Product Parameter
Model Power Supply Total Pressure Efficiency Nominal Wind Pressure Turbo Airflow Max static pressure
HH-DTS1/HH-DTB1
Noise
220-240V~ 50Hz
Rated Power Input
≥23%
Rated Main Motor Power Input
350Pa
Lamp Power(max)... ,Size in the bracket is the height of Drawing panel.(Unit: mm)
380
320
580-980
895
450
(HH-DTB1)
405
312
650-1030
898
505...
HH-TDS1 HH-TDB1 Manual - Page 7

... between the bearing surface of cooking appliance and the lowest part of hood is 650mm (larger space specified in mm. 3.Installation
3.1 Preparation Before Installation ●Surrounding environment Range hood shall be avoided to be installed at the place where there are expressed in the installation instruction of the following diagram are many doors and windows since...
HH-TDS1 HH-TDB1 Manual - Page 8

Name Operation Manual
Outer outlet Oil Cup
Quantity 1 piece 1 pair 1 piece
3.4 Installation Notice
● Installation and circuit setting must be well earthed.(Water pipe grounding is not reliable.The grounding of gas piping may cause the danger of range hood and the surface will not be influenced. ●Please retain installation space for hood while fabricating...
HH-TDS1 HH-TDB1 Manual - Page 9

... slow speed key will flash to enter the clock adjustment state. The function now is for setting time. (HHTBDB1) 8. Fast speed: from right to left to right, one minute Fast ... is for setting time, and the slow speed key is setting hour/ minute. Delay: touch this again Key to enter the 60 second delay. Under working state. 4. 3.5 Use Instruction
(HH-DTB1)
(HH-DTS1)
Note...
HH-TDS1 HH-TDB1 Manual - Page 10

4. Disassembly guide
Range Hood
HH-DTS1
4-1. Oil cup Remove the oil cup from the slot in the horizontal direction.
8
HH-TDS1 HH-TDB1 Manual - Page 13

4-6.The propellor Take out the Propellor.
4-7.Glass panel & LED light Push the glass panel horizontally, disconnect all the corresponding wire connectors, and remove the LED light from the inside and out with your handsfor replacement.
11
HH-TDS1 HH-TDB1 Manual - Page 15

4-9.Motor Disassemblethe screw ( the backside of the blower case and the exhaust position), then take out the plastic blower box, then can arrange repair / replace the motor.
13
HH-TDS1 HH-TDB1 Manual - Page 16

Disassembly guide
HH-DTB1
5-1.Oil cup Remove the oil cup from the slot in the horizontal direction.
14 5.
HH-TDS1 HH-TDB1 Manual - Page 19

Glass plate & LED light Two hands holding the glass plate, then pull it out forward or backward slightly, disconnect all the corresponding wire connectors, and remove the LED light from the inside and out with your hands for replacement.
17 5-6.
HH-TDS1 HH-TDB1 Manual - Page 20

5-7.Butterfly valve Disassemble the screw,then can take out the butterfly valve.
5-8.Motor Disassemblethe screw ( the backside of the blower case and the exhaust position), then take out the plastic blower box, then can arrange repair / replace the motor.
18
HH-TDS1 HH-TDB1 Manual - Page 21

6.General Troubleshooting
No. impeller does not rotate,
lighting lamp is not on)
or power outage
Well connect the power plug
Press the lighting switch but
Lighting lamp is broken or power Replace lighting lamp or well
2
the lighting is off
plug is not well connected
connect the power plug
There is induced electricity...
Haier HH-DTB1 Reviews
We have not received any reviews for Haier yet.