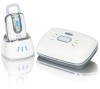
Instruction Manual
Page 1
...battery. 3 Charge battery... BUTTON R SOUND LIGHTS imonitor™ mini MODEL# 2M13 3 different battery doors for carrying unit ...SPEAKER CHARGER PORT ARM BELT NECK pf *PARENT UNIT FINDER ch ON/OFF **CHANNEL SPEAKER/LIGHTS 6G0S0Pm5A2h3 0 4 0 3.7V Docking Station Nursery Unit 7V 40 3. 6G0S0P 5m2A3h0 Parent Unit GSP523040 600mAh 3.7V Docking Station 1 Remove battery door. 2 Plug battery... in dock to of the docking station. Make sure to help find the best signal. Charge battery...
Instruction Manual
Page 12
You can be used on the parent unit. 9 All 3 choices can carry the parent unit around your preference in carrying the parent unit. Battery Door Options 1 ARM BELT NECK Select one of 3 battery doors according to your arm, belt, or neck.
Instruction Manual
Page 13
Remove battery door. 2 GSP523040 600mAh 3.7V GSP523040 600mAh 3.7V Replace battery door with 3 one of the 2 other door selections. 10
Instruction Manual
Page 14
Installing Battery Remove battery door. 4 Plug battery in. Make sure to 5 push the connector tight. 11
Instruction Manual
Page 15
Re-attach battery door. 6 GSP523040 600mAh 3.7V Battery installation is 7 complete. 12
Instruction Manual
Page 17
Charge battery for 5 hours before use while charging, press the power 11 button to charge 10 battery. To use . Adjust volume by pressing + or -. 14 The dock light will turn off when fully charged. Make sure unit charges for 5 hours before removing from docking station. Volume is amplified while in the dock to activate unit. Light will illuminate while unit charges. Place parent unit in docking station.
Instruction Manual
Page 22
batteries intended for normal power usage - 184 pf ch Connect AC adapter to activate. 19 Use AC adapter for power outage. 19 pf ch Press the ON/OFF button to nursery unit and plug into wall.
Instruction Manual
Page 23
SPEAKER Optional Battery Back-up 21 CHA Unfasten both screws on the back of the Nursery Unit as shown. 20 20 VIBE LINK LIGHTS Parent/nursery units will locate each other. Green "LINK" icon indicates that you are connected to nursery unit.
Instruction Manual
Page 24
22 Remove Battery Cover. 23 You will need 3 AAA (LR03) batteries (Not included). 21
Instruction Manual
Page 25
24 Insert batteries as shown. 25 Replace battery lid and fasten both screws. 22
Instruction Manual
Page 28
... have a simple solution. First, check that: • Power is turned ON for both units • Both units are plugged in (or batteries are fresh and fully charged). • Electrical outlet works • Volume is turned up on Parent Unit • Parent Unit is in dock...adapter not properly connected - check the connections. • Nursery Unit covered or blocked - recharge in range of the Nursery Unit No Sound • Battery dead or weak - remove the obstruction. 25 Trouble Shooting DO NOT ATTEMPT to operate the equipment. Any modifications to the transmitter and/or receiver can...