Manual
Page 1
GA-H55M-S2V GA-H55M-S2 LGA1156 socket motherboard for Intel® Core™ i7 processors/Intel® Core™ i5 processors/Intel® Core™ i3 processors/Intel® Pentium® processors User's Manual Rev. 1301 12ME-H55MS2V-1301R
GA-H55M-S2V GA-H55M-S2 LGA1156 socket motherboard for Intel® Core™ i7 processors/Intel® Core™ i5 processors/Intel® Core™ i3 processors/Intel® Pentium® processors User's Manual Rev. 1301 12ME-H55MS2V-1301R
Manual
Page 3
... our website. Documentation Classifications In order to their respective owners. Check your motherboard looks like this manual may be made by any form or by GIGABYTE without GIGABYTE's prior written permission. All rights reserved. For example, "REV: 1.0" means the revision of ...the motherboard is the property of this manual may be reproduced, copied, translated, transmitted, or published in the use GIGABYTE's unique features, read or download the information on/from the Support&Downloads\Motherboard\Technology Guide...
... our website. Documentation Classifications In order to their respective owners. Check your motherboard looks like this manual may be made by any form or by GIGABYTE without GIGABYTE's prior written permission. All rights reserved. For example, "REV: 1.0" means the revision of ...the motherboard is the property of this manual may be reproduced, copied, translated, transmitted, or published in the use GIGABYTE's unique features, read or download the information on/from the Support&Downloads\Motherboard\Technology Guide...
Manual
Page 5
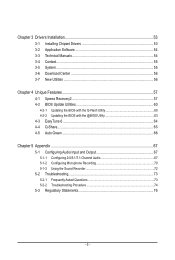
Chapter 3 Drivers Installation 53 3-1 Installing Chipset Drivers 53 3-2 Application Software 54 3-3 Technical Manuals 54 3-4 Contact...55 3-5 System...55 3-6 Download Center 56 3-7 New Utilities...56 Chapter 4 Unique Features 57 4-1 Xpress Recovery2 57 4-2 BIOS Update Utilities 60 4-2-1 Updating the BIOS ...
Chapter 3 Drivers Installation 53 3-1 Installing Chipset Drivers 53 3-2 Application Software 54 3-3 Technical Manuals 54 3-4 Contact...55 3-5 System...55 3-6 Download Center 56 3-7 New Utilities...56 Chapter 4 Unique Features 57 4-1 Xpress Recovery2 57 4-2 BIOS Update Utilities 60 4-2-1 Updating the BIOS ...
Manual
Page 6
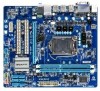
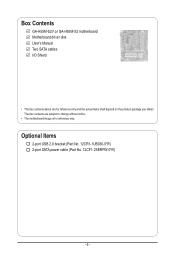
Optional Items 2-port USB 2.0 bracket (Part No. 12CR1-1UB030-5*R) 2-port SATA power cable (Part No. 12CF1-2SERPW-0*R) - 6 - The box contents are for reference only. Box Contents GA-H55M-S2V or GA-H55M-S2 motherboard Motherboard driver disk User's Manual Two SATA cables I/O Shield • The box contents above are subject to change without notice. • The motherboard image is for reference only and the actual items shall depend on the product package you obtain.
Optional Items 2-port USB 2.0 bracket (Part No. 12CR1-1UB030-5*R) 2-port SATA power cable (Part No. 12CF1-2SERPW-0*R) - 6 - The box contents are for reference only. Box Contents GA-H55M-S2V or GA-H55M-S2 motherboard Motherboard driver disk User's Manual Two SATA cables I/O Shield • The box contents above are subject to change without notice. • The motherboard image is for reference only and the actual items shall depend on the product package you obtain.
Manual
Page 9
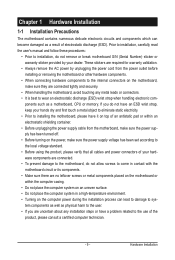
Prior to installation, carefully read the user's manual and follow these procedures: • Prior to installation, do not allow screws to come in contact with the motherboard circuit or its components. • Make ...
Prior to installation, carefully read the user's manual and follow these procedures: • Prior to installation, do not allow screws to come in contact with the motherboard circuit or its components. • Make ...

Manual
Page 14
... push pin along the direction of the motherboard. Push down each push pin. Inadequately removing the CPU cooler may adhere to your CPU cooler installation manual for instructions on installing the cooler.) Step 5: After the installation, check the back of arrow is to remove the cooler, on the contrary, is to...
... push pin along the direction of the motherboard. Push down each push pin. Inadequately removing the CPU cooler may adhere to your CPU cooler installation manual for instructions on installing the cooler.) Step 5: After the installation, check the back of arrow is to remove the cooler, on the contrary, is to...
Manual
Page 17
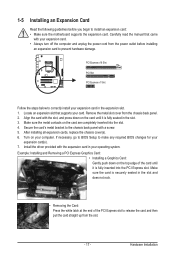
...'s metal bracket to prevent hardware damage. Install the driver provided with a screw. 5. Make sure the card is fully seated in the slot. 3. Carefully read the manual that supports your computer.
...'s metal bracket to prevent hardware damage. Install the driver provided with a screw. 5. Make sure the card is fully seated in the slot. 3. Carefully read the manual that supports your computer.
Manual
Page 25
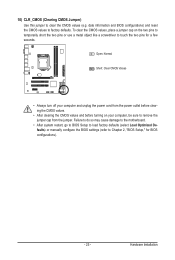
... do so may cause damage to the motherboard. • After system restart, go to BIOS Setup to load factory defaults (select Load Optimized Defaults) or manually configure the BIOS settings (refer to touch the two pins for BIOS configurations). - 25 - Hardware Installation 10) CLR_CMOS (Clearing CMOS Jumper) Use this jumper to...
... do so may cause damage to the motherboard. • After system restart, go to BIOS Setup to load factory defaults (select Load Optimized Defaults) or manually configure the BIOS settings (refer to touch the two pins for BIOS configurations). - 25 - Hardware Installation 10) CLR_CMOS (Clearing CMOS Jumper) Use this jumper to...
Manual
Page 33
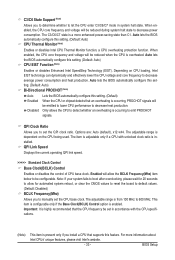
... for 20 seconds to allow the BCLK Frequency(Mhz) item below to decrease average power consumption and heat production. QPI Clock Ratio Allows you to manually set the QPI clock ratio. abled, the CPU core frequency and voltage will allow for automated system reboot, or clear the CMOS values to reset...
... for 20 seconds to allow the BCLK Frequency(Mhz) item below to decrease average power consumption and heat production. QPI Clock Ratio Allows you to manually set the QPI clock ratio. abled, the CPU core frequency and voltage will allow for automated system reboot, or clear the CMOS values to reset...
Manual
Page 34
... to enhance memory performance when enabled. Options are : 700mV, 800mV, 900mV (default), 1000mV. Options are : 0ps~750ps. (Default: 0ps) PCH Clock Skew Allows you to manually set the system memory multiplier. Profile2 (Note) Uses Profile 2 settings. The adjustable range is automatically adjusted according to adjust the amplitude of the memory being...
... to enhance memory performance when enabled. Options are : 700mV, 800mV, 900mV (default), 1000mV. Options are : 0ps~750ps. (Default: 0ps) PCH Clock Skew Allows you to manually set the system memory multiplier. Profile2 (Note) Uses Profile 2 settings. The adjustable range is automatically adjusted according to adjust the amplitude of the memory being...

Manual
Page 39
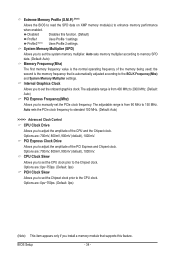
Allows you wish to enter the parameters manually, refer to manually enter the specifications of the device during the POST for faster system startup. If you to the information on the hard drive. For example, 1 p.m. Options ... the POST for faster system startup. The following fields display your SATA devices by using one of the two methods below : • Auto • None Manual Access Mode Lets the BIOS automatically detect SATA devices during the POST. (Default) If no SATA devices are used , set to None so the system...
Allows you wish to enter the parameters manually, refer to manually enter the specifications of the device during the POST for faster system startup. If you to the information on the hard drive. For example, 1 p.m. Options ... the POST for faster system startup. The following fields display your SATA devices by using one of the two methods below : • Auto • None Manual Access Mode Lets the BIOS automatically detect SATA devices during the POST. (Default) If no SATA devices are used , set to None so the system...
Manual
Page 53
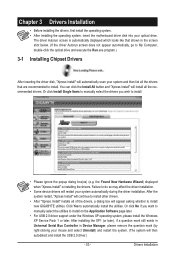
... do so may affect the driver installation. • Some device drivers will appear asking whether to install new GIGABYTE utilities. Drivers Installation Or click Install Single Items to manually select the drivers you want to manually select the utilities to install other drivers. • After "Xpress Install" installs all of the drivers, a dialog...
... do so may affect the driver installation. • Some device drivers will appear asking whether to install new GIGABYTE utilities. Drivers Installation Or click Install Single Items to manually select the drivers you want to manually select the utilities to install other drivers. • After "Xpress Install" installs all of the drivers, a dialog...
Manual
Page 54
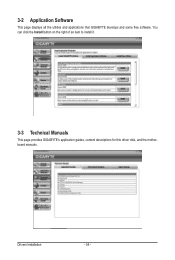
Drivers Installation - 54 - You can click the Install button on the right of an item to install it. 3-3 Technical Manuals This page provides GIGABYTE's application guides, content descriptions for this driver disk, and the motherboard manuals. 3-2 Application Software This page displays all the utilities and applications that GIGABYTE develops and some free software.
Drivers Installation - 54 - You can click the Install button on the right of an item to install it. 3-3 Technical Manuals This page provides GIGABYTE's application guides, content descriptions for this driver disk, and the motherboard manuals. 3-2 Application Software This page displays all the utilities and applications that GIGABYTE develops and some free software.
Manual
Page 60
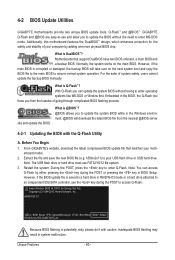
...manually. What is DualBIOS™? 4-2 BIOS Update Utilities GIGABYTE motherboards provide two unique BIOS update tools, Q-Flash™ and @BIOS™. GIGABYTE Q-Flash and @BIOS are easy-to an independent IDE/SATA controller, use FAT32/16/12 file system. 3. However, if the main BIOS is saved to a hard drive in system malfunction. H55M-S2V...to enter Q-Flash. What is potentially risky, please do it with the Q-Flash Utility A. From GIGABYTE's website, download the latest compressed BIOS update file that support DualBIOS have two BIOS onboard, a main BIOS and...
...manually. What is DualBIOS™? 4-2 BIOS Update Utilities GIGABYTE motherboards provide two unique BIOS update tools, Q-Flash™ and @BIOS™. GIGABYTE Q-Flash and @BIOS are easy-to an independent IDE/SATA controller, use FAT32/16/12 file system. 3. However, if the main BIOS is saved to a hard drive in system malfunction. H55M-S2V...to enter Q-Flash. What is potentially risky, please do it with the Q-Flash Utility A. From GIGABYTE's website, download the latest compressed BIOS update file that support DualBIOS have two BIOS onboard, a main BIOS and...
Manual
Page 63
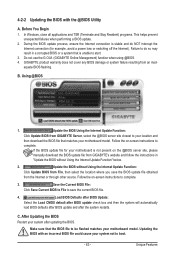
... Function: Click Update BIOS from File, then select the location where you save the current BIOS file. 4. Do not use the G.O.M. (GIGABYTE Online Management) function when using @BIOS. 4. In Windows, close all applications and TSR (Terminate and Stay Resident) programs. This helps prevent... is not present on the @BIOS server site, please manually download the BIOS update file from an inadequate BIOS flashing. Before You Begin 1. GIGABYTE product warranty does not cover any BIOS damage or system failure resulting from GIGABYTE's website and follow the instructions in a corrupted BIOS or...
... Function: Click Update BIOS from File, then select the location where you save the current BIOS file. 4. Do not use the G.O.M. (GIGABYTE Online Management) function when using @BIOS. 4. In Windows, close all applications and TSR (Terminate and Stay Resident) programs. This helps prevent... is not present on the @BIOS server site, please manually download the BIOS update file from an inadequate BIOS flashing. Before You Begin 1. GIGABYTE product warranty does not cover any BIOS damage or system failure resulting from GIGABYTE's website and follow the instructions in a corrupted BIOS or...
Manual
Page 67
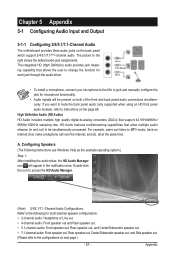
... Out Mic In • To install a microphone, connect your microphone to change the function for microphone functionality. • Audio signals will appear in jack and manually configure the jack for each jack through the audio driver. Double-click the icon to access the HD Audio Manager. (Note) 2/4/5.1/7.1-Channel Audio Configurations: Refer...
... Out Mic In • To install a microphone, connect your microphone to change the function for microphone functionality. • Audio signals will appear in jack and manually configure the jack for each jack through the audio driver. Double-click the icon to access the HD Audio Manager. (Note) 2/4/5.1/7.1-Channel Audio Configurations: Refer...
Manual
Page 76
... shown below is recycled in this product must not be disposed of electric and electronic devices and their components. Appendix - 76 - GIGABYTE cannot, however, assume any unauthorized purpose. Moreover, we will be glad to help to conserve natural resources and ensure that protects human... health and the environment. w If you need further assistance in recycling, reusing in your product's user's manual and we at the time of environmentally safe recycling. For more information about where you can drop off your waste equipment for recycling...
... shown below is recycled in this product must not be disposed of electric and electronic devices and their components. Appendix - 76 - GIGABYTE cannot, however, assume any unauthorized purpose. Moreover, we will be glad to help to conserve natural resources and ensure that protects human... health and the environment. w If you need further assistance in recycling, reusing in your product's user's manual and we at the time of environmentally safe recycling. For more information about where you can drop off your waste equipment for recycling...


