Manual
Page 5
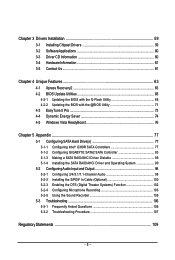
... ReadyBoost 76 Chapter 5 Appendix ...77 5-1 Configuring SATA Hard Drive(s 77 5-1-1 Configuring Intel® ICH9R SATA Controllers 77 5-1-2 Configuring GIGABYTE SATA2 SATA Controller 83 5-1-3 Making a SATA RAID/AHCI Driver Diskette 89 5-1-4 Installing the SATA RAID/AHCI Driver and Operating System 90 5-2 ConfiguringAudio Input and Output 98 5-2-1 5-2-2 5-2-3 5-2-4 Configuring 2/4/5.1/7.1-Channel Audio 98 Installing the S/PDIF In...
... ReadyBoost 76 Chapter 5 Appendix ...77 5-1 Configuring SATA Hard Drive(s 77 5-1-1 Configuring Intel® ICH9R SATA Controllers 77 5-1-2 Configuring GIGABYTE SATA2 SATA Controller 83 5-1-3 Making a SATA RAID/AHCI Driver Diskette 89 5-1-4 Installing the SATA RAID/AHCI Driver and Operating System 90 5-2 ConfiguringAudio Input and Output 98 5-2-1 5-2-2 5-2-3 5-2-4 Configuring 2/4/5.1/7.1-Channel Audio 98 Installing the S/PDIF In...

Manual
Page 43
... the SATA controllers to install operating systems that do not support Native mode, e.g. Set this option to Disabled if you wish to AHCI mode. USB Controller Enables or disables the integrated USB controller. (Default: Enabled) Disabled will turn off all of the integrated SATA ...Select F5: Previous Values +/-/PU/PD: Value F10: Save F6: Fail-Safe Defaults ESC: Exit F1: General Help F7: Optimized Defaults SATA RAID/AHCI Mode (Intel ICH9R Southbridge) Enables or disables RAID for the SATA controllers integrated in MS-DOS. (Default: Disabled) - 43 - USB 2.0 ...
... the SATA controllers to install operating systems that do not support Native mode, e.g. Set this option to Disabled if you wish to AHCI mode. USB Controller Enables or disables the integrated USB controller. (Default: Enabled) Disabled will turn off all of the integrated SATA ...Select F5: Previous Values +/-/PU/PD: Value F10: Save F6: Fail-Safe Defaults ESC: Exit F1: General Help F7: Optimized Defaults SATA RAID/AHCI Mode (Intel ICH9R Southbridge) Enables or disables RAID for the SATA controllers integrated in MS-DOS. (Default: Disabled) - 43 - USB 2.0 ...

Manual
Page 45
... the SATA controller to AHCI mode. Options are : Auto, 3F8/IRQ4 (default), 2F8/IRQ3, 3E8/IRQ4, 2E8/IRQ3, Disabled. Parallel Port Mode Selects an operating mode for the SATA controller integrated in the GIGABYTE SATA 2 chip or configures the SATA controller to the fault or short. Example: Part1-2 Status... = Short / Length = 2m Explanation: A fault or short might occur at about 2m on a specified pair of wires, the Status field will be the approximate distance to AHCI mode. Options...
... the SATA controller to AHCI mode. Options are : Auto, 3F8/IRQ4 (default), 2F8/IRQ3, 3E8/IRQ4, 2E8/IRQ3, Disabled. Parallel Port Mode Selects an operating mode for the SATA controller integrated in the GIGABYTE SATA 2 chip or configures the SATA controller to the fault or short. Example: Part1-2 Status... = Short / Length = 2m Explanation: A fault or short might occur at about 2m on a specified pair of wires, the Status field will be the approximate distance to AHCI mode. Options...

Manual
Page 63
... example, a backup file created with Xpress Recovery cannot be restored using Xpress Recovery2. • USB hard drives are not supported. • Hard drives in RAID/AHCI mode are installed. • The amount of data and hard drive access speed may affect the speed at the end of system memory • VESA...
... example, a backup file created with Xpress Recovery cannot be restored using Xpress Recovery2. • USB hard drives are not supported. • Hard drives in RAID/AHCI mode are installed. • The amount of data and hard drive access speed may affect the speed at the end of system memory • VESA...

Manual
Page 68
... or Window first. For the sake of your computer by either pressing the key during the POST to access Q-Flash. Embedded in RAID/AHCI mode or a hard drive attached to an independent IDE/SATA controller, use the key during the POST or pressing the key in BIOS ...you from the nearest @BIOS server site and update the BIOS. 4-2-1 Updating the BIOS with caution. GA-EP35-DS4 Motherboard - 68 - 4-2 BIOS Update Utilities GIGABYTE motherboards provide two unique BIOS update tools, Q-FlashTM and @BIOS .TM GIGABYTE Q-Flash and @BIOS are easy-to-use FAT32/16/12 file system. 3. With Q-Flash you...
... or Window first. For the sake of your computer by either pressing the key during the POST to access Q-Flash. Embedded in RAID/AHCI mode or a hard drive attached to an independent IDE/SATA controller, use the key during the POST or pressing the key in BIOS ...you from the nearest @BIOS server site and update the BIOS. 4-2-1 Updating the BIOS with caution. GA-EP35-DS4 Motherboard - 68 - 4-2 BIOS Update Utilities GIGABYTE motherboards provide two unique BIOS update tools, Q-FlashTM and @BIOS .TM GIGABYTE Q-Flash and @BIOS are easy-to-use FAT32/16/12 file system. 3. With Q-Flash you...

Manual
Page 69
... 2: The process of Q- In the main menu of the system reading the BIOS file from the floppy disk is saved to a hard drive in RAID/AHCI mode or a hard drive attached to an independent IDE/SATA controller, use the up or down arrow key to access Q-Flash. 2. Make sure the BIOS...
... 2: The process of Q- In the main menu of the system reading the BIOS file from the floppy disk is saved to a hard drive in RAID/AHCI mode or a hard drive attached to an independent IDE/SATA controller, use the up or down arrow key to access Q-Flash. 2. Make sure the BIOS...

Manual
Page 77
...- 77 - Chapter 5 Appendix 5-1 Configuring SATA Hard Drive(s) To configure SATA hard drive(s), follow the steps below: A. Install the SATA RAID/AHCI driver and operating system. (Note 2) Before you begin Please prepare: • At least two SATA hard drives (to ensure optimal performance, it...your motherboard, refer to "Chapter 1," "Hardware Installation," to identify the SATA controller for the SATA port. (For example, on the GA-EP35-DS4 motherboard, the SATAII0, SATAII1, SATAII2, SATAII3, SATAII4 and SATAII5 ports are supported by ICH9R Southbridge.) Then connect the power connector from ...
...- 77 - Chapter 5 Appendix 5-1 Configuring SATA Hard Drive(s) To configure SATA hard drive(s), follow the steps below: A. Install the SATA RAID/AHCI driver and operating system. (Note 2) Before you begin Please prepare: • At least two SATA hard drives (to ensure optimal performance, it...your motherboard, refer to "Chapter 1," "Hardware Installation," to identify the SATA controller for the SATA port. (For example, on the GA-EP35-DS4 motherboard, the SATAII0, SATAII1, SATAII2, SATAII3, SATAII4 and SATAII5 ports are supported by ICH9R Southbridge.) Then connect the power connector from ...

Manual
Page 78
... changes and exit BIOS Setup. Configuring SATA controller mode in BIOS Setup Make sure to enter BIOS Setup during the POST (Power-On Self-Test). GA-EP35-DS4 Motherboard - 78 - B. The BIOS Setup menus described in system BIOS Setup . Step 1: Turn on the motherboard you do not want to create RAID..., set SATA RAID/AHCI Mode under the Integrated Peripherals menu to Disabled or AHCI. The actual BIOS Setup menu options you will see shall depend on your motherboard. If you have and the BIOS...
... changes and exit BIOS Setup. Configuring SATA controller mode in BIOS Setup Make sure to enter BIOS Setup during the POST (Power-On Self-Test). GA-EP35-DS4 Motherboard - 78 - B. The BIOS Setup menus described in system BIOS Setup . Step 1: Turn on the motherboard you do not want to create RAID..., set SATA RAID/AHCI Mode under the Integrated Peripherals menu to Disabled or AHCI. The actual BIOS Setup menu options you will see shall depend on your motherboard. If you have and the BIOS...

Manual
Page 81
... v7.5.0.1017 ICH9R wRAID5 Copyright(C) 2003-07 Intel Corporation. Delete RAID Volume 3. Appendix Finally press on the Create Volume item to create the SATA RAID/AHCI driver diskette and the installation of the SATA RAID/ACHI driver and operating system. - 81 - Reset Disks to cancel (Figure 6).
... v7.5.0.1017 ICH9R wRAID5 Copyright(C) 2003-07 Intel Corporation. Delete RAID Volume 3. Appendix Finally press on the Create Volume item to create the SATA RAID/AHCI driver diskette and the installation of the SATA RAID/ACHI driver and operating system. - 81 - Reset Disks to cancel (Figure 6).

Manual
Page 83
...(s) in this section may differ from your motherboard. Appendix B. CMOS Setup Utility-Copyright (C) 1984-2007 Award Software Integrated Peripherals SATA RAID/AHCI Mode SATA Port0-3 Native Mode USB Controller USB 2.0 Controller USB Keyboard Support USB Mouse Support Legacy USB storage detect Azalia Codec Onboard ...actual BIOS Setup menu options you have and the BIOS version. - 83 - Then set the device boot order. 5-1-2 Configuring GIGABYTE SATA2 SATA Controller A. If you do not want to create RAID, set this motherboard, the GSATAII0 and GSATAII1 ports are supported by...
...(s) in this section may differ from your motherboard. Appendix B. CMOS Setup Utility-Copyright (C) 1984-2007 Award Software Integrated Peripherals SATA RAID/AHCI Mode SATA Port0-3 Native Mode USB Controller USB 2.0 Controller USB Keyboard Support USB Mouse Support Legacy USB storage detect Azalia Codec Onboard ...actual BIOS Setup menu options you have and the BIOS version. - 83 - Then set the device boot order. 5-1-2 Configuring GIGABYTE SATA2 SATA Controller A. If you do not want to create RAID, set this motherboard, the GSATAII0 and GSATAII1 ports are supported by...

Manual
Page 88
...create the SATA RAID/AHCI driver diskette and the installation of the SATA RAID/AHCI driver and operating system. ARE YOU SURE TO DELETE (Y/N)? Press the space bar on the array to cancel. Press . GIGABYTE Technology Corp. N RAID... Level Capacity Status 0-Stripe 240 GB Normal Members(HDDx) 01 [KL]-Select RAID [SPACE]-Mark Delete [DEL]-Confirm Figure 11 GA-EP35-DS4 Motherboard - 88 - [ESC]-Abort GIGABYTE...
...create the SATA RAID/AHCI driver diskette and the installation of the SATA RAID/AHCI driver and operating system. ARE YOU SURE TO DELETE (Y/N)? Press the space bar on the array to cancel. Press . GIGABYTE Technology Corp. N RAID... Level Capacity Status 0-Stripe 240 GB Normal Members(HDDx) 01 [KL]-Select RAID [SPACE]-Mark Delete [DEL]-Confirm Figure 11 GA-EP35-DS4 Motherboard - 88 - [ESC]-Abort GIGABYTE...

Manual
Page 89
... or 8) Intel Matrix Storage Manager 64 bit for Windows 64-bit. • For GIGABYTE SATA2 SATA controller, select E) GIGABYTE SATA-RAID Driver 32Bit for Windows 32-bit operating system or F) GIGABYTE SATA-RAID Driver 64Bit for the SATA controller from the menu in MS-DOS mode(Note...the SATA controller driver during the Windows setup process. From your system. Figure 3 - 89 - Prepare a startup disk that is/are configured to RAID/AHCI mode, you need to a floppy disk. At the D:\> prompt, type the following two commands. Press to your optical drive (example: D:\>). Appendix Step...
... or 8) Intel Matrix Storage Manager 64 bit for Windows 64-bit. • For GIGABYTE SATA2 SATA controller, select E) GIGABYTE SATA-RAID Driver 32Bit for Windows 32-bit operating system or F) GIGABYTE SATA-RAID Driver 64Bit for the SATA controller from the menu in MS-DOS mode(Note...the SATA controller driver during the Windows setup process. From your system. Figure 3 - 89 - Prepare a startup disk that is/are configured to RAID/AHCI mode, you need to a floppy disk. At the D:\> prompt, type the following two commands. Press to your optical drive (example: D:\>). Appendix Step...

Manual
Page 90
...specify an adapter. S=Specify Additional Device ENTER=Continue F3=Exit Figure 2 GA-EP35-DS4 Motherboard - 90 - 5-1-4 Installing the SATA RAID/AHCI Driver and Operating System Now that below appears, insert the floppy disk containing the SATA RAID/AHCI driver and press (Figure 2). Figure 1 Step 2: When a screen ...similar to that you are ready to install Windows Vista/XP/2000 onto your system, or you have prepared the SATA RAID/AHCI driver diskette and configured the required BIOS settings, you have chosen to install a 3rd party SCSI or RAID driver" (Figure 1). Windows...
...specify an adapter. S=Specify Additional Device ENTER=Continue F3=Exit Figure 2 GA-EP35-DS4 Motherboard - 90 - 5-1-4 Installing the SATA RAID/AHCI Driver and Operating System Now that below appears, insert the floppy disk containing the SATA RAID/AHCI driver and press (Figure 2). Figure 1 Step 2: When a screen ...similar to that you are ready to install Windows Vista/XP/2000 onto your system, or you have prepared the SATA RAID/AHCI driver diskette and configured the required BIOS settings, you have chosen to install a 3rd party SCSI or RAID driver" (Figure 1). Windows...

Manual
Page 91
...be finished in the floppy disk, a controller menu similar to RAID mode, select Intel(R) ICH8R/ICH9R SATA RAID Controller. (Select ICH9 SATA AHCI Controller (Desktop ICH9R) for AHCI mode.) Windows Setup You have any device support disks from a mass storage device manufacturer, press S. * If you have a device support ...ENTER=Select F3=Exit Figure 3 If a message appears saying one of the items displayed and press . If you set the SATA RAID/AHCI Mode item in BIOS Setup to Figure 3 below appears, press to the previous screen. The driver installation will be found, please check the...
...be finished in the floppy disk, a controller menu similar to RAID mode, select Intel(R) ICH8R/ICH9R SATA RAID Controller. (Select ICH9 SATA AHCI Controller (Desktop ICH9R) for AHCI mode.) Windows Setup You have any device support disks from a mass storage device manufacturer, press S. * If you have a device support ...ENTER=Select F3=Exit Figure 3 If a message appears saying one of the items displayed and press . If you set the SATA RAID/AHCI Mode item in BIOS Setup to Figure 3 below appears, press to the previous screen. The driver installation will be found, please check the...

Manual
Page 92
..., using a device support disk provided by an adapter manufacturer. S=Specify Additional Device ENTER=Continue F3=Exit Figure 6 GA-EP35-DS4 Motherboard - 92 - Step 3: For GIGABYTE SATA2 SATA controller: When Setup correctly recognizes the GIGABYTE SATA2 SATA RAID/AHCI driver in the floppy disk, a controller menu similar to Figure 5 below appears, press to continue the driver installation...
..., using a device support disk provided by an adapter manufacturer. S=Specify Additional Device ENTER=Continue F3=Exit Figure 6 GA-EP35-DS4 Motherboard - 92 - Step 3: For GIGABYTE SATA2 SATA controller: When Setup correctly recognizes the GIGABYTE SATA2 SATA RAID/AHCI driver in the floppy disk, a controller menu similar to Figure 5 below appears, press to continue the driver installation...

Manual
Page 93
To quit Setup without installing Windows XP, press F3. Enter= Continue R=Repair F3=Exit Figure 7 - 93 - This port of the Setup program prepares Microsoft(R) Windows (R) XP to Setup. Step 4: After the SATA RAID/AHCI driver installation is completed, you can proceed with the Windows XP installation. To set up Windows XP now, press ENTER. Appendix To repair a Windows XP installation using Recovery Console, press R. WindowsXP Professional Setup Welcome to run on your computer.
To quit Setup without installing Windows XP, press F3. Enter= Continue R=Repair F3=Exit Figure 7 - 93 - This port of the Setup program prepares Microsoft(R) Windows (R) XP to Setup. Step 4: After the SATA RAID/AHCI driver installation is completed, you can proceed with the Windows XP installation. To set up Windows XP now, press ENTER. Appendix To repair a Windows XP installation using Recovery Console, press R. WindowsXP Professional Setup Welcome to run on your computer.

Manual
Page 95
Appendix Step 3: When a screen as shown in Figure 10 will be shown as Intel(R) ICH9 SATA AHCI Controller when the SATA controllers are set to continue the OS installation (Figure 11). Figure 11 (Note) The item displayed in Figure 10 appears, select Intel(R) ICH8R/ICH9R SATA RAID Controller (Note) and press Next. Figure 10 Step 4: After the driver is loaded, select the RAID/AHCI drive(s) where you want to install the operating system and then press Next to AHCI mode. - 95 -
Appendix Step 3: When a screen as shown in Figure 10 will be shown as Intel(R) ICH9 SATA AHCI Controller when the SATA controllers are set to continue the OS installation (Figure 11). Figure 11 (Note) The item displayed in Figure 10 appears, select Intel(R) ICH8R/ICH9R SATA RAID Controller (Note) and press Next. Figure 10 Step 4: After the driver is loaded, select the RAID/AHCI drive(s) where you want to install the operating system and then press Next to AHCI mode. - 95 -

Manual
Page 96
Figure 12 Step 2: Specify the location where the driver is saved, such as your system to that below appears (RAID/AHCI hard drive(s) will not be detected at this stage), select Load Driver. (Figure 12). Figure 13 GA-EP35-DS4 Motherboard - 96 - When a screen similar to boot from the Windows Vista setup disk and perform standard OS installation steps. GIGABYTE SATA2 controllers: Step 1: Restart your floppy disk (Figure 13).
Figure 12 Step 2: Specify the location where the driver is saved, such as your system to that below appears (RAID/AHCI hard drive(s) will not be detected at this stage), select Load Driver. (Figure 12). Figure 13 GA-EP35-DS4 Motherboard - 96 - When a screen similar to boot from the Windows Vista setup disk and perform standard OS installation steps. GIGABYTE SATA2 controllers: Step 1: Restart your floppy disk (Figure 13).

Manual
Page 97
Figure 15 - 97 - Appendix Step 3: When a screen as shown in Figure 14 appears, select GIGABYTE GBB36X Controller and press Next. Figure 14 Step 4: After the driver is loaded, select the RAID/AHCI drive(s) where you want to install the operating system and then press Next to continue the OS installation (Figure 15).
Figure 15 - 97 - Appendix Step 3: When a screen as shown in Figure 14 appears, select GIGABYTE GBB36X Controller and press Next. Figure 14 Step 4: After the driver is loaded, select the RAID/AHCI drive(s) where you want to install the operating system and then press Next to continue the OS installation (Figure 15).

