Use and Care Manual
Page 1
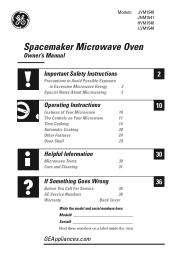
... 2 Special Notes About Microwaving 5 Operating Instructions 10 Features of Your Microwave 10 The Controls on Your Microwave 11 Time Cooking 14 Automatic Cooking 20 Other Features 24 Oven Shelf 29 Helpful Information 30 Microwave Terms 30 Care and Cleaning 31 If Something Goes Wrong 36 Before You Call For Service 36 GE Service Numbers 38 Warranty...
... 2 Special Notes About Microwaving 5 Operating Instructions 10 Features of Your Microwave 10 The Controls on Your Microwave 11 Time Cooking 14 Automatic Cooking 20 Other Features 24 Oven Shelf 29 Helpful Information 30 Microwave Terms 30 Care and Cleaning 31 If Something Goes Wrong 36 Before You Call For Service 36 GE Service Numbers 38 Warranty...
Use and Care Manual
Page 3
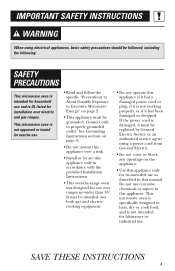
...ranges. SAVE THESE INSTRUCTIONS 3 Connect only to heat, dry or cook food, and is UL listed for its intended use . This microwave oven is not working properly, or if it is not approved or tested for use corrosive chemicals or vapors in this appliance. IMPORTANT SAFETY ...Electric Service or an authorized service agent using electrical appliances, basic safety precautions should be followed, including the following: SAFETY PRECAUTIONS This microwave oven is intended for household use and is not intended for laboratory or industrial use as described in this manual. If the power ...
...ranges. SAVE THESE INSTRUCTIONS 3 Connect only to heat, dry or cook food, and is UL listed for its intended use . This microwave oven is not working properly, or if it is not approved or tested for use corrosive chemicals or vapors in this appliance. IMPORTANT SAFETY ...Electric Service or an authorized service agent using electrical appliances, basic safety precautions should be followed, including the following: SAFETY PRECAUTIONS This microwave oven is intended for household use and is not intended for laboratory or industrial use as described in this manual. If the power ...
Use and Care Manual
Page 4
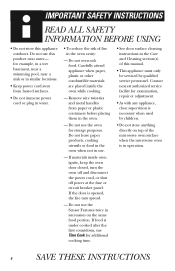
... placed inside oven ignite, keep the oven door closed, turn the oven off and disconnect the power cord, or shut off power at the fuse or circuit breaker panel. Do not leave paper products, cooking utensils or food in the oven when not in succession on top of the microwave oven surface when the microwave oven is opened...
... placed inside oven ignite, keep the oven door closed, turn the oven off and disconnect the power cord, or shut off power at the fuse or circuit breaker panel. Do not leave paper products, cooking utensils or food in the oven when not in succession on top of the microwave oven surface when the microwave oven is opened...

Use and Care Manual
Page 5
...as whole eggs and sealed containers-for example, closed jars-are able to the oven and could result in injury. • Do not boil eggs in this microwave oven. IMPORTANT SAFETY INSTRUCTIONS SPECIAL NOTES ABOUT MICROWAVING ARCING If you use popcorn labeled for more than a minute or two may... cause damage to explode and should be heated in a microwave oven. FOODS • Do not pop popcorn in your microwave oven unless in a special microwave popcorn accessory or unless you see arcing, press the CLEAR/OFF pad and correct the problem. Pressure ...
...as whole eggs and sealed containers-for example, closed jars-are able to the oven and could result in injury. • Do not boil eggs in this microwave oven. IMPORTANT SAFETY INSTRUCTIONS SPECIAL NOTES ABOUT MICROWAVING ARCING If you use popcorn labeled for more than a minute or two may... cause damage to explode and should be heated in a microwave oven. FOODS • Do not pop popcorn in your microwave oven unless in a special microwave popcorn accessory or unless you see arcing, press the CLEAR/OFF pad and correct the problem. Pressure ...
Use and Care Manual
Page 6
...test the milk before and halfway through heating it. - They could dehydrate and catch fire, causing damage to your oven. • Cook meat and poultry thoroughly-meat to at least an INTERNAL temperature of injury to these temperatures usually ...as water, coffee or tea, are able to be overheated beyond the boiling point without appearing to stand in the microwave oven for a short time before removing the container. - This can cause the container to prevent scalding when warming formula... and steam can build up. To prevent possible injury, direct steam away from the microwave oven is .
...test the milk before and halfway through heating it. - They could dehydrate and catch fire, causing damage to your oven. • Cook meat and poultry thoroughly-meat to at least an INTERNAL temperature of injury to these temperatures usually ...as water, coffee or tea, are able to be overheated beyond the boiling point without appearing to stand in the microwave oven for a short time before removing the container. - This can cause the container to prevent scalding when warming formula... and steam can build up. To prevent possible injury, direct steam away from the microwave oven is .
Use and Care Manual
Page 7
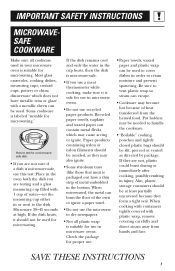
... towels, waxed paper and plastic wrap can burn the floor of metal embedded in microwave ovens. Some cookware is suitable for use in the bottom. When microwaved, the metal can be used in your microwave oven is safe for use in microwave ovens. • Do not use recycled paper products. Pot holders may become hot because of...
... towels, waxed paper and plastic wrap can burn the floor of metal embedded in microwave ovens. Some cookware is suitable for use in the bottom. When microwaved, the metal can be used in your microwave oven is safe for use in microwave ovens. • Do not use recycled paper products. Pot holders may become hot because of...
Use and Care Manual
Page 8
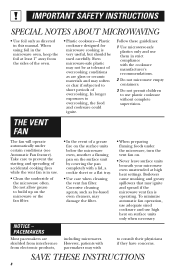
...when cleaning the vent fan filter. SAVE THESE INSTRUCTIONS 8 THE VENT FAN The fan will operate automatically under the microwave, turn the vent fan on. • Never leave surface units beneath your microwave oven unattended at least 1″ away from electronic products, • In the event of a grease fire on ...the surface units below the microwave oven, smother a flaming pan on the surface unit by covering the pan completely with pacemakers may soften or char if subjected to short ...
...when cleaning the vent fan filter. SAVE THESE INSTRUCTIONS 8 THE VENT FAN The fan will operate automatically under the microwave, turn the vent fan on. • Never leave surface units beneath your microwave oven unattended at least 1″ away from electronic products, • In the event of a grease fire on ...the surface units below the microwave oven, smother a flaming pan on the surface unit by covering the pan completely with pacemakers may soften or char if subjected to short ...
Use and Care Manual
Page 9
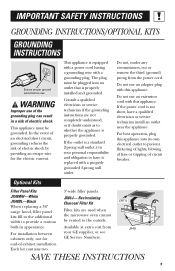
... only; JX81J JX48 SAVE THESE INSTRUCTIONS 9 Consult a qualified electrician or service technician if the grounding instructions are used when the microwave oven cannot be plugged into its own electrical outlet to prevent flickering of lights, blowing of fuse or tripping of the grounding plug ...circumstances, cut or remove the third (ground) prong from your personal responsibility and obligation to whether the appliance is your GE supplier, or see GE Service Numbers. If the power cord is properly installed and grounded. Optional Kits Filler Panel Kits JX48WH-White JX48BL-Black ...
... only; JX81J JX48 SAVE THESE INSTRUCTIONS 9 Consult a qualified electrician or service technician if the grounding instructions are used when the microwave oven cannot be plugged into its own electrical outlet to prevent flickering of lights, blowing of fuse or tripping of the grounding plug ...circumstances, cut or remove the third (ground) prong from your personal responsibility and obligation to whether the appliance is your GE supplier, or see GE Service Numbers. If the power cord is properly installed and grounded. Optional Kits Filler Panel Kits JX48WH-White JX48BL-Black ...
Use and Care Manual
Page 10
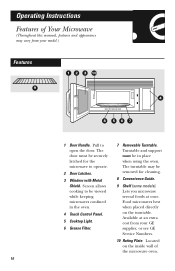
... Handle. Turntable and support must be viewed while keeping microwaves confined in place when using the oven. Lets you microwave several foods at an extra cost from your GE supplier, or see GE Service Numbers. 10 Rating Plate. Located on the turntable. Operating Instructions Features of the microwave oven. 10 Pull to operate. 2 Door Latches. 3 Window with...
... Handle. Turntable and support must be viewed while keeping microwaves confined in place when using the oven. Lets you microwave several foods at an extra cost from your GE supplier, or see GE Service Numbers. 10 Rating Plate. Located on the turntable. Operating Instructions Features of the microwave oven. 10 Pull to operate. 2 Door Latches. 3 Window with...
Use and Care Manual
Page 11
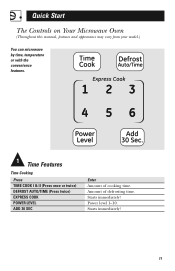
Amount of cooking time. Starts immediately! 11 Starts immediately! Power level 1-10. Quick Start The Controls on Your Microwave Oven (Throughout this manual, features and appearance may vary from your model.) You can microwave by time, temperature or with the convenience features. 1 Time Features Time Cooking Press TIME COOK I & II (Press once or twice) DEFROST AUTO/TIME (Press twice) EXPRESS COOK POWER LEVEL ADD 30 SEC Enter Amount of defrosting time.
Amount of cooking time. Starts immediately! 11 Starts immediately! Power level 1-10. Quick Start The Controls on Your Microwave Oven (Throughout this manual, features and appearance may vary from your model.) You can microwave by time, temperature or with the convenience features. 1 Time Features Time Cooking Press TIME COOK I & II (Press once or twice) DEFROST AUTO/TIME (Press twice) EXPRESS COOK POWER LEVEL ADD 30 SEC Enter Amount of defrosting time.
Use and Care Manual
Page 13
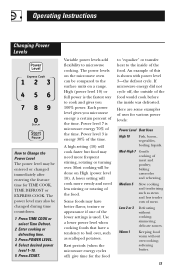
...levels on the microwave oven can be entered or changed during time countdown. 1 Press TIME COOK or select Time Defrost. 2 Enter cooking or defrosting time. 3 Press POWER LEVEL. 4 Select desired power level 1-10. 5 Press START. Each power level gives you 100% power. Power level 7 is microwave energy 70% of...time for TIME COOK, TIME DEFROST or EXPRESS COOK. Med-High 7 Gentle cooking of this is the fastest way to cook and gives you microwave energy a certain percent of the time. Medium 5 Slow cooking and tenderizing such as scalloped potatoes. Some foods may also be done on ...
...levels on the microwave oven can be entered or changed during time countdown. 1 Press TIME COOK or select Time Defrost. 2 Enter cooking or defrosting time. 3 Press POWER LEVEL. 4 Select desired power level 1-10. 5 Press START. Each power level gives you 100% power. Power level 7 is microwave energy 70% of...time for TIME COOK, TIME DEFROST or EXPRESS COOK. Med-High 7 Gentle cooking of this is the fastest way to cook and gives you microwave energy a certain percent of the time. Medium 5 Slow cooking and tenderizing such as scalloped potatoes. Some foods may also be done on ...
Use and Care Manual
Page 28
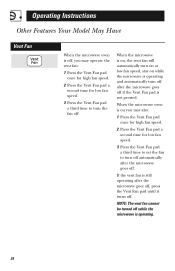
When the microwave oven is on while the microwave is operating and automatically turn off after the microwave goes off if the Vent Fan pad is not pressed. If the vent fan is still operating after the microwave goes off . NOTE: The vent fan cannot be turned off . Operating Instructions Other Features Your Model May Have... Vent Fan When the microwave oven is off, you may operate the vent fan: 1 Press the Vent Fan pad once for high fan speed. 2 Press the Vent Fan pad a second time ...
When the microwave oven is on while the microwave is operating and automatically turn off after the microwave goes off if the Vent Fan pad is not pressed. If the vent fan is still operating after the microwave goes off . NOTE: The vent fan cannot be turned off . Operating Instructions Other Features Your Model May Have... Vent Fan When the microwave oven is off, you may operate the vent fan: 1 Press the Vent Fan pad once for high fan speed. 2 Press the Vent Fan pad a second time ...
Use and Care Manual
Page 32
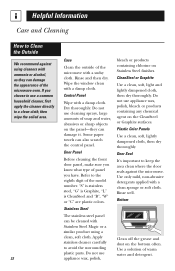
... "G" is Graphite, "L" is CleanSteel and "B", "W" or "C" are plastic colors. Stainless Steel The stainless steel panel can damage the appearance of the microwave oven. Apply stainless cleaner carefully to avoid the surrounding plastic parts. Door Seal It's important to keep the area clean where the door seals against using a... scratch the control panel. Rinse well. Helpful Information Care and Cleaning How to Clean the Outside We recommend against the microwave. Rinse and then dry. Door Panel Before cleaning the front door panel, make sure you know what type of the...
... "G" is Graphite, "L" is CleanSteel and "B", "W" or "C" are plastic colors. Stainless Steel The stainless steel panel can damage the appearance of the microwave oven. Apply stainless cleaner carefully to avoid the surrounding plastic parts. Door Seal It's important to keep the area clean where the door seals against using a... scratch the control panel. Rinse well. Helpful Information Care and Cleaning How to Clean the Outside We recommend against the microwave. Rinse and then dry. Door Panel Before cleaning the front door panel, make sure you know what type of the...
Use and Care Manual
Page 36
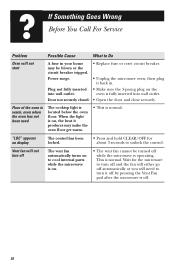
... on display The control has been locked. • Press and hold CLEAR/OFF for the microwave to turn it off while the microwave is on the into wall outlet. Power surge. • Unplug the microwave oven, then plug it produces may be turned off by pressing the Vent Fan pad after the... microwave is normal. Plug not fully inserted • Make sure the 3-prong plug on , the heat it back in your home • ...
... on display The control has been locked. • Press and hold CLEAR/OFF for the microwave to turn it off while the microwave is on the into wall outlet. Power surge. • Unplug the microwave oven, then plug it produces may be turned off by pressing the Vent Fan pad after the... microwave is normal. Plug not fully inserted • Make sure the 3-prong plug on , the heat it back in your home • ...
Use and Care Manual
Page 40
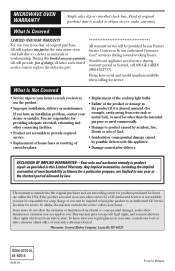
...is extended to your state's Attorney General. What Is Not Covered • Service trips to the original purchaser and any part in the microwave oven Service Centers or by possible defects with this Limited Warranty. In Alaska, the warranty excludes the service calls to use within the USA.... is needed to replace the defective part. If the product is located in an area where service by our Factory GE will provide, free of charge, all labor and related service costs to obtain service under warranty. MICROWAVE OVEN WARRANTY Staple sales slip or cancelled check here.
...is extended to your state's Attorney General. What Is Not Covered • Service trips to the original purchaser and any part in the microwave oven Service Centers or by possible defects with this Limited Warranty. In Alaska, the warranty excludes the service calls to use within the USA.... is needed to replace the defective part. If the product is located in an area where service by our Factory GE will provide, free of charge, all labor and related service costs to obtain service under warranty. MICROWAVE OVEN WARRANTY Staple sales slip or cancelled check here.
Installation Instructions
Page 1
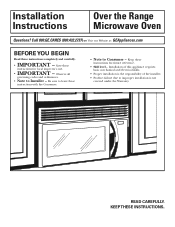
READ CAREFULLY. Installation Instructions Over the Range Microwave Oven Questions? KEEP THESE INSTRUCTIONS. Observe all governing codes and ordinances. • Note to improper installation is not covered under the Warranty. Save these instructions...and electrical skills. • Proper installation is the responsibility of the installer. • Product failure due to Installer - Be sure to Consumer - Call 800.GE.CARES (800.432.2737) or Visit our Website at: GEAppliances.com BEFORE YOU BEGIN Read these instructions for local inspector's use. • IMPORTANT - Keep ...
READ CAREFULLY. Installation Instructions Over the Range Microwave Oven Questions? KEEP THESE INSTRUCTIONS. Observe all governing codes and ordinances. • Note to improper installation is not covered under the Warranty. Save these instructions...and electrical skills. • Proper installation is the responsibility of the installer. • Product failure due to Installer - Be sure to Consumer - Call 800.GE.CARES (800.432.2737) or Visit our Website at: GEAppliances.com BEFORE YOU BEGIN Read these instructions for local inspector's use. • IMPORTANT - Keep ...
Installation Instructions
Page 2
...19-22 Attach Mounting Plate to Wall 19 Preparation of Top Cabinet 19 Adapting Microwave Blower for Recirculation 20, 21 Mount the Microwave Oven ..........21, 22 Installing the Charcoal Filter 22 Before You Use Your Microwave 23 Step-by-step installation guide Placement of Mounting Plate 8-10 Removing the ...Top Exhaust 12-14 Attach Mounting Plate to Wall 12 Preparation of Top Cabinet 13 Check for Proper Damper Operation 13 Mount the Microwave Oven ..........13, 14 Adjust the Exhaust Adaptor 14 Connecting Ductwork 14 B Outside Back Exhaust 15-18 Preparing Rear Wall for Outside Back...
...19-22 Attach Mounting Plate to Wall 19 Preparation of Top Cabinet 19 Adapting Microwave Blower for Recirculation 20, 21 Mount the Microwave Oven ..........21, 22 Installing the Charcoal Filter 22 Before You Use Your Microwave 23 Step-by-step installation guide Placement of Mounting Plate 8-10 Removing the ...Top Exhaust 12-14 Attach Mounting Plate to Wall 12 Preparation of Top Cabinet 13 Check for Proper Damper Operation 13 Mount the Microwave Oven ..........13, 14 Adjust the Exhaust Adaptor 14 Connecting Ductwork 14 B Outside Back Exhaust 15-18 Preparing Rear Wall for Outside Back...
Installation Instructions
Page 3
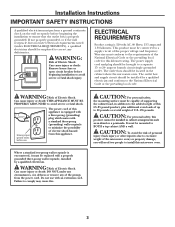
...before beginning installation to the requirements of the prongs from this appliance. This product must be located in the cabinet above the microwave oven. The outlet box and supply circuit should be replaced with a standard three-prong (grounding) wall receptacle to the added weight of this...load, in cabinet arrangements such as an island or a peninsula. WARNING: Risk of the microwave oven) or property damage, you will need two people to install this 63-85 pound product, plus additional oven loads of up to the National Electrical Code or the prevailing local code. It must ...
...before beginning installation to the requirements of the prongs from this appliance. This product must be located in the cabinet above the microwave oven. The outlet box and supply circuit should be replaced with a standard three-prong (grounding) wall receptacle to the added weight of this...load, in cabinet arrangements such as an island or a peninsula. WARNING: Risk of the microwave oven) or property damage, you will need two people to install this 63-85 pound product, plus additional oven loads of up to the National Electrical Code or the prevailing local code. It must ...
Installation Instructions
Page 7
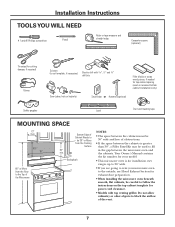
...the cabinets is for installation over ranges up to 36″ wide. • If you are going to vent your model. • This microwave oven is greater than 30″, a Filler Panel Kit may be used on the top cabinet template for power cord clearance. • Models with ... spacing (used to fill in the gap between the microwave oven and the cabinets. Your Owner's Manual contains the kit number for your microwave oven to the outside, see Hood Exhaust Section for exhaust duct preparation. • When installing the microwave oven beneath smooth, flat cabinets, be careful to follow the...
...the cabinets is for installation over ranges up to 36″ wide. • If you are going to vent your model. • This microwave oven is greater than 30″, a Filler Panel Kit may be used on the top cabinet template for power cord clearance. • Models with ... spacing (used to fill in the gap between the microwave oven and the cabinets. Your Owner's Manual contains the kit number for your microwave oven to the outside, see Hood Exhaust Section for exhaust duct preparation. • When installing the microwave oven beneath smooth, flat cabinets, be careful to follow the...

Installation Instructions
Page 8
... 24″ from the mounting plate. FINDING THE WALL STUDS Wall Studs Center Carton Styrofoam 3 Pull the carton up and off the oven. 4 Remove and properly discard plastic bags. THE MICROWAVE MUST BE CONNECTED TO AT LEAST ONE WALL STUD. 5 Remove the 2 screws from this mark. 3 Draw a line down the center of...
... 24″ from the mounting plate. FINDING THE WALL STUDS Wall Studs Center Carton Styrofoam 3 Pull the carton up and off the oven. 4 Remove and properly discard plastic bags. THE MICROWAVE MUST BE CONNECTED TO AT LEAST ONE WALL STUD. 5 Remove the 2 screws from this mark. 3 Draw a line down the center of...


