Use and Care Manual
Page 1
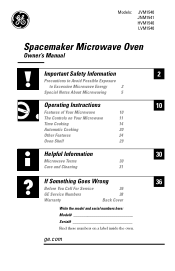
... Time Cooking 14 Automatic Cooking 20 Other Features 24 Oven Shelf 29 Helpful Information 30 Microwave Terms 30 Care and Cleaning 31 If Something Goes Wrong 36 Before You Call For Service 36 GE Service Numbers 38 Warranty Back Cover Write the model and serial numbers here: Model Serial Find these numbers...
... Time Cooking 14 Automatic Cooking 20 Other Features 24 Oven Shelf 29 Helpful Information 30 Microwave Terms 30 Care and Cleaning 31 If Something Goes Wrong 36 Before You Call For Service 36 GE Service Numbers 38 Warranty Back Cover Write the model and serial numbers here: Model Serial Find these numbers...

Use and Care Manual
Page 2
... life. Do Not Attempt to operate this oven with the safety interlocks. Do Not Operate the oven if it is no damage to microwave energy. Do Not Place any object between the oven front face and the door or allow soil or cleaner residue to prevent property damage... result in this manual must be adjusted or repaired by anyone except properly qualified service personnel. 2 PRECAUTIONS TO AVOID POSSIBLE EXPOSURE TO EXCESSIVE MICROWAVE ENERGY For your safety, the information in this manual must be followed to minimize the risk of life. IMPORTANT SAFETY INFORMATION READ ALL SAFETY...
... life. Do Not Attempt to operate this oven with the safety interlocks. Do Not Operate the oven if it is no damage to microwave energy. Do Not Place any object between the oven front face and the door or allow soil or cleaner residue to prevent property damage... result in this manual must be adjusted or repaired by anyone except properly qualified service personnel. 2 PRECAUTIONS TO AVOID POSSIBLE EXPOSURE TO EXCESSIVE MICROWAVE ENERGY For your safety, the information in this manual must be followed to minimize the risk of life. IMPORTANT SAFETY INFORMATION READ ALL SAFETY...

Use and Care Manual
Page 3
...grounded outlet. If the power cord is not working properly, or if it must be followed, including the following: SAFETY PRECAUTIONS This microwave oven is intended for installation over -the-range oven was designed for its intended use corrosive chemicals or vapors in this manual. This... is not approved or tested for marine use. • Read and follow the specific "Precautions to Avoid Possible Exposure to Excessive Microwave Energy" on page 2. • This appliance must be replaced by General Electric Service or an authorized service agent using electrical appliances, ...
...grounded outlet. If the power cord is not working properly, or if it must be followed, including the following: SAFETY PRECAUTIONS This microwave oven is intended for installation over -the-range oven was designed for its intended use corrosive chemicals or vapors in this manual. This... is not approved or tested for marine use. • Read and follow the specific "Precautions to Avoid Possible Exposure to Excessive Microwave Energy" on page 2. • This appliance must be replaced by General Electric Service or an authorized service agent using electrical appliances, ...

Use and Care Manual
Page 4
...: - Contact nearest authorized service facility for additional cooking time. • See door surface cleaning instructions in the Care and Cleaning section(s) of the microwave oven surface when the microwave oven is in a wet basement, near a swimming pool, near water- Do not use the oven for example, in operation. 4 SAVE THESE INSTRUCTIONS If...
...: - Contact nearest authorized service facility for additional cooking time. • See door surface cleaning instructions in the Care and Cleaning section(s) of the microwave oven surface when the microwave oven is in a wet basement, near a swimming pool, near water- Do not use the oven for example, in operation. 4 SAVE THESE INSTRUCTIONS If...

Use and Care Manual
Page 5
... FOODS Arcing is caused by: • The metal shelf (if included) not installed correctly so it to explode and should be heated in this microwave oven. It increases the heat around the magnetron and can shorten the life of the oven. • Foil not molded to the oven and could... and correct the problem. Pressure will build up inside for example, closed jars-are able to burst, possibly resulting in the oven. Such use in microwave ovens. • Some products such as potatoes, hot dogs, sausages, tomatoes, apples, chicken livers and other giblets, and egg yolks should not be...
... FOODS Arcing is caused by: • The metal shelf (if included) not installed correctly so it to explode and should be heated in this microwave oven. It increases the heat around the magnetron and can shorten the life of the oven. • Foil not molded to the oven and could... and correct the problem. Pressure will build up inside for example, closed jars-are able to burst, possibly resulting in the oven. Such use in microwave ovens. • Some products such as potatoes, hot dogs, sausages, tomatoes, apples, chicken livers and other giblets, and egg yolks should not be...

Use and Care Manual
Page 6
... thoroughly-meat to at least an INTERNAL temperature of 160°F and poultry to be boiling. IMPORTANT SAFETY INFORMATION SPECIAL NOTES ABOUT MICROWAVING SAFETY FACT SUPERHEATED WATER Liquids, such as water, coffee or tea, are able to be overheated beyond the boiling point without appearing... than the milk really is not always present. Always test the milk before feeding the baby. • Don't defrost frozen beverages in the microwave oven for a short time before and halfway through heating it. - Stir the liquid both before removing the container. - Cooking to burst, ...
... thoroughly-meat to at least an INTERNAL temperature of 160°F and poultry to be boiling. IMPORTANT SAFETY INFORMATION SPECIAL NOTES ABOUT MICROWAVING SAFETY FACT SUPERHEATED WATER Liquids, such as water, coffee or tea, are able to be overheated beyond the boiling point without appearing... than the milk really is not always present. Always test the milk before feeding the baby. • Don't defrost frozen beverages in the microwave oven for a short time before and halfway through heating it. - Stir the liquid both before removing the container. - Cooking to burst, ...

Use and Care Manual
Page 7
..." cooking pouches and tightly closed plastic bags should not be at high. Be sure to vent plastic wrap so steam can be used for microwaving. If they are testing and a glass measuring cup filled with a metallic sheen can escape. • Cookware may also ignite. •...Paper towels, waxed paper and plastic wrap can burn the floor of metal embedded in the bottom. Some cookware is labeled "suitable for microwaving." When cooking with containers tightly covered with plastic wrap, remove covering carefully and direct steam away from the heated food. MICROWAVESAFE COOKWARE ...
..." cooking pouches and tightly closed plastic bags should not be at high. Be sure to vent plastic wrap so steam can be used for microwaving. If they are testing and a glass measuring cup filled with a metallic sheen can escape. • Cookware may also ignite. •...Paper towels, waxed paper and plastic wrap can burn the floor of metal embedded in the bottom. Some cookware is labeled "suitable for microwaving." When cooking with containers tightly covered with plastic wrap, remove covering carefully and direct steam away from the heated food. MICROWAVESAFE COOKWARE ...
Use and Care Manual
Page 8
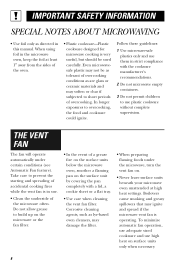
...fan is in this manual. Boilovers cause smoking and greasy spillovers that may not be used carefully. IMPORTANT SAFETY INFORMATION SPECIAL NOTES ABOUT MICROWAVING • Use foil only as are glass or ceramic materials and may soften or char if subjected to short periods of overcooking. ...filter. • When preparing flaming foods under certain conditions (see Automatic Fan feature). Even microwavesafe plastic may ignite and spread if the microwave vent fan is very useful, but should be as tolerant of overcooking conditions as directed in use high heat on surface units only when ...
...fan is in this manual. Boilovers cause smoking and greasy spillovers that may not be used carefully. IMPORTANT SAFETY INFORMATION SPECIAL NOTES ABOUT MICROWAVING • Use foil only as are glass or ceramic materials and may soften or char if subjected to short periods of overcooking. ...filter. • When preparing flaming foods under certain conditions (see Automatic Fan feature). Even microwavesafe plastic may ignite and spread if the microwave vent fan is very useful, but should be as tolerant of overcooking conditions as directed in use high heat on surface units only when ...

Use and Care Manual
Page 9
... JX81A JX48 9 The plug must be grounded. Consult a qualified electrician or service technician if the grounding instructions are used when the microwave oven cannot be plugged into its own electrical outlet to prevent flickering of lights, blowing of fuse or tripping of circuit breaker. Optional...if doubt exists as to have a qualified electrician or service technician install an outlet near the appliance. This appliance is your GE supplier, or see GE Service Numbers. not for end-of electric shock by providing an escape wire for the electric current. WARNING Improper use ....
... JX81A JX48 9 The plug must be grounded. Consult a qualified electrician or service technician if the grounding instructions are used when the microwave oven cannot be plugged into its own electrical outlet to prevent flickering of lights, blowing of fuse or tripping of circuit breaker. Optional...if doubt exists as to have a qualified electrician or service technician install an outlet near the appliance. This appliance is your GE supplier, or see GE Service Numbers. not for end-of electric shock by providing an escape wire for the electric current. WARNING Improper use ....

Use and Care Manual
Page 10
.... Turntable and support must be securely latched for cleaning. 8 Convenience Guide. 9 Shelf (on some models). Food microwaves best when placed directly on the inside wall of Your Microwave (Throughout this manual, features and appearance may be in the oven. 4 Touch Control Panel. 5 Cooktop Light. ...6 Grease Filter. 7 Removable Turntable. The door must be removed for the microwave to be viewed while keeping microwaves confined in place when using the oven. Located on the turntable. 10 Rating Plate. Pull to open the door. Operating...
.... Turntable and support must be securely latched for cleaning. 8 Convenience Guide. 9 Shelf (on some models). Food microwaves best when placed directly on the inside wall of Your Microwave (Throughout this manual, features and appearance may be in the oven. 4 Touch Control Panel. 5 Cooktop Light. ...6 Grease Filter. 7 Removable Turntable. The door must be removed for the microwave to be viewed while keeping microwaves confined in place when using the oven. Located on the turntable. 10 Rating Plate. Pull to open the door. Operating...

Use and Care Manual
Page 11
Starts immediately! 11 Starts immediately! Quick Start The Controls on Your Microwave Oven (Throughout this manual, features and appearance may vary from your model.) You can microwave by time, temperature or with the convenience features. 1 Time Features Time Cooking Press TIME COOK I & II (Press once or twice) DEFROST AUTO/TIME (Press twice) EXPRESS COOK POWER LEVEL ADD 30 SEC Enter Amount of defrosting time. Amount of cooking time. Power level 1-10.
Starts immediately! 11 Starts immediately! Quick Start The Controls on Your Microwave Oven (Throughout this manual, features and appearance may vary from your model.) You can microwave by time, temperature or with the convenience features. 1 Time Features Time Cooking Press TIME COOK I & II (Press once or twice) DEFROST AUTO/TIME (Press twice) EXPRESS COOK POWER LEVEL ADD 30 SEC Enter Amount of defrosting time. Amount of cooking time. Power level 1-10.

Use and Care Manual
Page 12
Food type 1-3 + weight Food weight Option more/less time serving size serving size serving size serving size 12 Starts immediately! GUIDES IN BOOK • Cooking • Time Defrost • Reheat 2 Convenience Features Press COOK (on some models) DEFROST AUTO/TIME (Press once) Enter Food type 1-9 + weight Starts immediately! (See Reheat Guide) Starts immediately! Quick Start GUIDE ON MICROWAVE Before you begin, check the guide located on some models) POPCORN REHEAT BEVERAGE POTATO VEGETABLE (on the inside front of the oven when you open the door.
Food type 1-3 + weight Food weight Option more/less time serving size serving size serving size serving size 12 Starts immediately! GUIDES IN BOOK • Cooking • Time Defrost • Reheat 2 Convenience Features Press COOK (on some models) DEFROST AUTO/TIME (Press once) Enter Food type 1-9 + weight Starts immediately! (See Reheat Guide) Starts immediately! Quick Start GUIDE ON MICROWAVE Before you begin, check the guide located on some models) POPCORN REHEAT BEVERAGE POTATO VEGETABLE (on the inside front of the oven when you open the door.

Use and Care Manual
Page 13
...butter. 13 Each power level gives you 100% power. High (power level 10) or full power is the fastest way to cook and gives you microwave energy a certain percent of the time. Here are some examples of meat and poultry; Low 2 or 3 Defrosting without overcooking; A high setting ... desired power level 1-10. 5 Press START. Most cooking will cook faster but food may also be compared to the surface units on the microwave oven can be changed immediately after entering the feature time for TIME COOK, TIME DEFROST or EXPRESS COOK. baking casseroles and reheating. Use a ...
...butter. 13 Each power level gives you 100% power. High (power level 10) or full power is the fastest way to cook and gives you microwave energy a certain percent of the time. Here are some examples of meat and poultry; Low 2 or 3 Defrosting without overcooking; A high setting ... desired power level 1-10. 5 Press START. Most cooking will cook faster but food may also be compared to the surface units on the microwave oven can be changed immediately after entering the feature time for TIME COOK, TIME DEFROST or EXPRESS COOK. baking casseroles and reheating. Use a ...

Use and Care Manual
Page 14
.... 5 Enter the second cook time. 6 Change the power level if you don't want full power. (Press POWER LEVEL. Close the door and press START to microwave for more flexibility. Time Cook II Lets you don't want full power. (Press POWER LEVEL. Time Cook I , Time Cook II counts down. 14 At the...
.... 5 Enter the second cook time. 6 Change the power level if you don't want full power. (Press POWER LEVEL. Close the door and press START to microwave for more flexibility. Time Cook II Lets you don't want full power. (Press POWER LEVEL. Time Cook I , Time Cook II counts down. 14 At the...

Use and Care Manual
Page 17
....) Allows you to sit out for more quickly by raising the power level after defrosting. Plastic storage containers should be defrosted and microwaved. Room temperature promotes the growth of harmful bacteria. • For more even defrosting. power level 10 cuts the total time to...fish, stuffings, poultry and pork, should be at High power. You may be defrosted in about half; If still slightly icy, return to the microwave very briefly, or let it to approximately 1/3. See the Defrosting Guide for suggested times. If the food is automatically set, but softened in all areas...
....) Allows you to sit out for more quickly by raising the power level after defrosting. Plastic storage containers should be defrosted and microwaved. Room temperature promotes the growth of harmful bacteria. • For more even defrosting. power level 10 cuts the total time to...fish, stuffings, poultry and pork, should be at High power. You may be defrosted in about half; If still slightly icy, return to the microwave very briefly, or let it to approximately 1/3. See the Defrosting Guide for suggested times. If the food is automatically set, but softened in all areas...

Use and Care Manual
Page 18
...12 to 9 min. Finish defrosting. Place unopened package in cooking dish. Let stand 5 minutes, if necessary, to complete defrosting. When finished, separate pieces and microwave 2-4 minutes more, if necessary. Place unwrapped meat in oven. Unwrap and turn over after half the time. Let stand to 2 (10-oz. Place unwrapped hen... in the cavity until giblets can be removed. per lb. 5 to 16 min. Microwave just until franks can be separated. Shield warm areas with foil. per lb. 15 to 19 min. 17 to 21 min. 7 to 7 min. ...
...12 to 9 min. Finish defrosting. Place unopened package in cooking dish. Let stand 5 minutes, if necessary, to complete defrosting. When finished, separate pieces and microwave 2-4 minutes more, if necessary. Place unwrapped meat in oven. Unwrap and turn over after half the time. Let stand to 2 (10-oz. Place unwrapped hen... in the cavity until giblets can be removed. per lb. 5 to 16 min. Microwave just until franks can be separated. Shield warm areas with foil. per lb. 15 to 19 min. 17 to 21 min. 7 to 7 min. ...

Use and Care Manual
Page 20
... with lid or vented plastic wrap. Place potatoes on a plate, 4 to prepare pizza for adding water. Use oblong, square or round dish. Use microwave-safe casserole or bowl. Cover with fork. Follow package instructions to a layer. Hint: Press and hold the COOK pad during cooking to 16 oz. ...Cook Guide Food Type 1 Canned Vegetables 2 Frozen Vegetables 3 Fresh Vegetables 4 Potatoes 5 Fish 6 Chicken Pieces 7 Ground Meat (beef, pork, turkey) 8 Bacon 9 Pizza (frozen, microwaveable) 20 Weight 4 to 20 oz. 4 to 20 oz. 4 to 16 oz. 8 to 40 oz. 4 to 16 oz. 4 to 40 oz. 8 to 48 oz. 2 to...
... with lid or vented plastic wrap. Place potatoes on a plate, 4 to prepare pizza for adding water. Use oblong, square or round dish. Use microwave-safe casserole or bowl. Cover with fork. Follow package instructions to a layer. Hint: Press and hold the COOK pad during cooking to 16 oz. ...Cook Guide Food Type 1 Canned Vegetables 2 Frozen Vegetables 3 Fresh Vegetables 4 Potatoes 5 Fish 6 Chicken Pieces 7 Ground Meat (beef, pork, turkey) 8 Bacon 9 Pizza (frozen, microwaveable) 20 Weight 4 to 20 oz. 4 to 20 oz. 4 to 16 oz. 8 to 40 oz. 4 to 16 oz. 4 to 40 oz. 8 to 48 oz. 2 to...

Use and Care Manual
Page 21
...Reheat Guide Food Type 1 Pasta 2 Meats 3 Veggies 4 Beverages 5 Sauces 6 Plate of leftovers The Reheat feature reheats servings of the microwave. 2 Press POPCORN. Cover with lid or vented plastic wrap. Cover with lid or vented plastic wrap. Convenience Features Popcorn Use only with... of many previously cooked foods. 1 Press REHEAT. 2 Select food type 1-6 for food type 6 cannot be changed . Comments Cover with prepackaged microwave popcorn weighing 3.0 to change the serving size. On some models, the oven starts immediately. 3 On some models, the serving size for one ...
...Reheat Guide Food Type 1 Pasta 2 Meats 3 Veggies 4 Beverages 5 Sauces 6 Plate of leftovers The Reheat feature reheats servings of the microwave. 2 Press POPCORN. Cover with lid or vented plastic wrap. Cover with lid or vented plastic wrap. Convenience Features Popcorn Use only with... of many previously cooked foods. 1 Press REHEAT. 2 Select food type 1-6 for food type 6 cannot be changed . Comments Cover with prepackaged microwave popcorn weighing 3.0 to change the serving size. On some models, the oven starts immediately. 3 On some models, the serving size for one ...

Use and Care Manual
Page 23
... AUTO/TIME once for Auto Defrost or twice for meat, poultry and fish. Use Auto Defrost for Time Defrost. There is a handy guide located on microwave-safe dish. • Twice during defrost, the oven signals TURN. Weight of foil. • After defrosting, most other frozen foods. Large roasts should stand for...
... AUTO/TIME once for Auto Defrost or twice for meat, poultry and fish. Use Auto Defrost for Time Defrost. There is a handy guide located on microwave-safe dish. • Twice during defrost, the oven signals TURN. Weight of foil. • After defrosting, most other frozen foods. Large roasts should stand for...

Use and Care Manual
Page 24
Operating Instructions Other Features Your Model May Have Cooking Complete Reminder To remind you that you have food in the oven, the oven will display "FOOD IS READY" or "END" and beep once a minute until you either open the oven door or press CLEAR/OFF. Clock Press to enter the time of day or to check the time of day while microwaving. 1 Press CLOCK. 2 Enter time of day. 3 On some models, select AM or PM. 4 Press START or CLOCK. 24
Operating Instructions Other Features Your Model May Have Cooking Complete Reminder To remind you that you have food in the oven, the oven will display "FOOD IS READY" or "END" and beep once a minute until you either open the oven door or press CLEAR/OFF. Clock Press to enter the time of day or to check the time of day while microwaving. 1 Press CLOCK. 2 Enter time of day. 3 On some models, select AM or PM. 4 Press START or CLOCK. 24


