Installation Instructions
Page 1
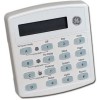
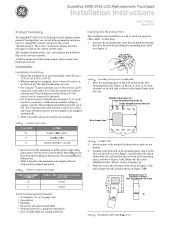
... all software versions and Concord Express version 4) up to 4 bus devices can be connected to the panel. or dual-gang. 1. For Concord systems (all programming and operation of the mounting...touchpad, allow for the Quick Guide slide-out card. • For Concord™ Express systems, up to 16 bus devices can be connected to leave a 4¼-inch clearance on the left (see Figure 2). Place the mounting plate on back of a compatible security...Quick Guide slideout card. The SuperBus® 2000 2x16 LCD (liquid crystal display) Alphanumeric Touchpad lets you . 5.
... all software versions and Concord Express version 4) up to 4 bus devices can be connected to the panel. or dual-gang. 1. For Concord systems (all programming and operation of the mounting...touchpad, allow for the Quick Guide slide-out card. • For Concord™ Express systems, up to 16 bus devices can be connected to leave a 4¼-inch clearance on the left (see Figure 2). Place the mounting plate on back of a compatible security...Quick Guide slideout card. The SuperBus® 2000 2x16 LCD (liquid crystal display) Alphanumeric Touchpad lets you . 5.
Installation Instructions
Page 2
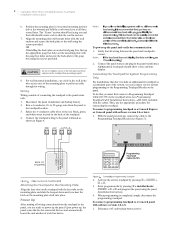
...bottom) and fold the card toward you must first connect a Programming Touchpad Cable (60-791) to the gang box using the screws provided. For ... the panel. Enter program mode by pressing 8 + CODE + 0 + 2. 3. Verify that don't include an alphanumeric touchpad as shown in Figure 4. Alphanumeric touchpads should create a tab...touchpad. 4. Then, use the appropriate procedure for system programming to the wall using the screws provided. To connect a programming touchpad to a Concord Express or Concord panel with the wall anchors and secure the back-plate to the Programming Touchpad...
...bottom) and fold the card toward you must first connect a Programming Touchpad Cable (60-791) to the gang box using the screws provided. For ... the panel. Enter program mode by pressing 8 + CODE + 0 + 2. 3. Verify that don't include an alphanumeric touchpad as shown in Figure 4. Alphanumeric touchpads should create a tab...touchpad. 4. Then, use the appropriate procedure for system programming to the wall using the screws provided. To connect a programming touchpad to a Concord Express or Concord panel with the wall anchors and secure the back-plate to the Programming Touchpad...
Installation Instructions
Page 3
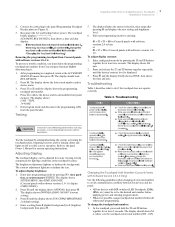
...setting and brightness level. 6. Refer to the panel Programming Touchpad Header pins (see Figure 5). 3. The contrast adjustment lightens or darkens the text. The display shows SYSTEM MENU, then TIME AND DATE (Concord panels with software versions 1.0- 1.6. The display shows ...(current setting). 3. Enter a setting from the panel header. 5. Removing the programming touchpad from Concord panels with DIP switches (LED Touchpads, ESMs, HIMs, etc.) must delete the programming touchpad unit number from panel memory. To adjust display contrast: 1. Troubleshooting CAUTION Contact ...
...setting and brightness level. 6. Refer to the panel Programming Touchpad Header pins (see Figure 5). 3. The contrast adjustment lightens or darkens the text. The display shows SYSTEM MENU, then TIME AND DATE (Concord panels with software versions 1.0- 1.6. The display shows ...(current setting). 3. Enter a setting from the panel header. 5. Removing the programming touchpad from Concord panels with DIP switches (LED Touchpads, ESMs, HIMs, etc.) must delete the programming touchpad unit number from panel memory. To adjust display contrast: 1. Troubleshooting CAUTION Contact ...


