
User Manual
Page 1
45132 Wireless Alarm System Motion Sensor User's Manual Choice ALERT™™ Control all Sensors & accessories from one location
45132 Wireless Alarm System Motion Sensor User's Manual Choice ALERT™™ Control all Sensors & accessories from one location

User Manual
Page 3
...from your Sensors in and around your home, and prevents anyone from a line of the most affordable and expandable wireless alarm systems available. The user manual explains in custom installed Alarm systems. The Choice Alert system is reliable and easy-to install, use . Congratulations The GE Choice Alert™ Wireless Alarm System is ... our Customer Service Group at 1-800-654-8483. 3 Before connecting or operating the Motion Sensor, please read these instructions carefully and save this manual for your system. With Choice Alert you can select from tampering with your new...
...from your Sensors in and around your home, and prevents anyone from a line of the most affordable and expandable wireless alarm systems available. The user manual explains in custom installed Alarm systems. The Choice Alert system is reliable and easy-to install, use . Congratulations The GE Choice Alert™ Wireless Alarm System is ... our Customer Service Group at 1-800-654-8483. 3 Before connecting or operating the Motion Sensor, please read these instructions carefully and save this manual for your system. With Choice Alert you can select from tampering with your new...

User Manual
Page 4
Improper use or storage could damage the Motion Sensor. Avoid striking or shaking. Handle with Care - Do not attempt to disassemble the Motion Sensor, unless described in the user's manual. Important safeguards PreCautions 1. There are no user serviceable parts. 2. Modifying or tampering the device or its internal components can cause a malfunction and void the Motion Sensor's warranty. 3. If you feel the Motion Sensor or any part of the Choice Alert system is not operating correctly or as described, please contact Customer Service for assistance (1-800-654-8483). 4
Improper use or storage could damage the Motion Sensor. Avoid striking or shaking. Handle with Care - Do not attempt to disassemble the Motion Sensor, unless described in the user's manual. Important safeguards PreCautions 1. There are no user serviceable parts. 2. Modifying or tampering the device or its internal components can cause a malfunction and void the Motion Sensor's warranty. 3. If you feel the Motion Sensor or any part of the Choice Alert system is not operating correctly or as described, please contact Customer Service for assistance (1-800-654-8483). 4

User Manual
Page 5
Motion Sensor with mounting bracket 2 - Plastic anchors Ball-head joint 5 Parts Check List Identify all the parts before proceeding. Screws 2 - When mounted properly it will transmit a signal to be used indoors or out. The Zone selection and settings on the Control Center determine if an alarm or an alert sounds. When the Sensor detects motion, it can monitor large or open areas such as entrances, living rooms, family rooms, driveways, backyards, walkways, workshops, etc. Introduction The Motion Sensor is designed to the Control Center.
Motion Sensor with mounting bracket 2 - Plastic anchors Ball-head joint 5 Parts Check List Identify all the parts before proceeding. Screws 2 - When mounted properly it will transmit a signal to be used indoors or out. The Zone selection and settings on the Control Center determine if an alarm or an alert sounds. When the Sensor detects motion, it can monitor large or open areas such as entrances, living rooms, family rooms, driveways, backyards, walkways, workshops, etc. Introduction The Motion Sensor is designed to the Control Center.

User Manual
Page 6
...alarm or chime. An Alkaline "9V" battery in this Zone will begin to the Motion Sensor. Step 3 - Sensors in the Motion Sensor can last up to 9 months, Before mounting the Motion sensor, you want to assign to flash. Preparing the Motion Sensor for Installation The Motion Sensor consists of the Sensor. The Sensor... battery cover and secure screw. Step 1 - After the Control Center sounds a long beep, release the Learn button. Activate the Motion Sensor 6 Press the Zone button (1, 2, 3 or 4) for the Zone you 'll need to attach the battery leads to a zone ...
...alarm or chime. An Alkaline "9V" battery in this Zone will begin to the Motion Sensor. Step 3 - Sensors in the Motion Sensor can last up to 9 months, Before mounting the Motion sensor, you want to assign to flash. Preparing the Motion Sensor for Installation The Motion Sensor consists of the Sensor. The Sensor... battery cover and secure screw. Step 1 - After the Control Center sounds a long beep, release the Learn button. Activate the Motion Sensor 6 Press the Zone button (1, 2, 3 or 4) for the Zone you 'll need to attach the battery leads to a zone ...

User Manual
Page 7
.... The Control Center is now in Test Mode and any Zone. 7 - To activate the Motion Sensor, press the Learn button located inside the battery compartment, or if mounted wave your system Once all the LED indicators turn on the inside lens area in Test mode unplug AC adapter ... you can now test your system. Testing a Sensor or your hand in front of the Sensor (the red LED indicator will flash inside of the Sensor before permanently mounting a Sensor. Step 2 Select the Zone number 1 2 3 4 Arm 1 2 3 4 Zone Armed Power Input DC 12V -+ Mute Learn Alert Chime Off Step 1 Press ...
.... The Control Center is now in Test Mode and any Zone. 7 - To activate the Motion Sensor, press the Learn button located inside the battery compartment, or if mounted wave your system Once all the LED indicators turn on the inside lens area in Test mode unplug AC adapter ... you can now test your system. Testing a Sensor or your hand in front of the Sensor (the red LED indicator will flash inside of the Sensor before permanently mounting a Sensor. Step 2 Select the Zone number 1 2 3 4 Arm 1 2 3 4 Zone Armed Power Input DC 12V -+ Mute Learn Alert Chime Off Step 1 Press ...

User Manual
Page 8
... the ball-head joint. Mount the ball-head joint to switch 'Alert' position and begin activating Sensors one at a time. Once the ball-head joint is complete, unplug the AC adapter, then plug the AC adapter back in and reinstall batteries. Step 3 ... Step 4 - This returns the Control Center to the main unit. Refer to the Testing a Sensor section on where you should perform a manual test to mount the Motion Sensor. Once the location is selected, before mounting you want to confirm the Motion Sensor is 5-6 ft, depending on pg 7. The mounting angle can be adjusted. 8
... the ball-head joint. Mount the ball-head joint to switch 'Alert' position and begin activating Sensors one at a time. Once the ball-head joint is complete, unplug the AC adapter, then plug the AC adapter back in and reinstall batteries. Step 3 ... Step 4 - This returns the Control Center to the main unit. Refer to the Testing a Sensor section on where you should perform a manual test to mount the Motion Sensor. Once the location is selected, before mounting you want to confirm the Motion Sensor is 5-6 ft, depending on pg 7. The mounting angle can be adjusted. 8

User Manual
Page 9
... The Zone has been triggered for an Alert or alarm. The Control Center will begin rapidly flashing the Zone LED indicator . This indicates one or more Sensors in all buttons. The system is recommended to replace the batteries in ...the Zone may have low battery power and are installed at the same time into that particular Zone. The unit will flash twice. Step 3 - Low Battery Indicator The Control Center continuously monitors all the Sensors. Step 1 - Note: The Zone/Motion Sensor...
... The Zone has been triggered for an Alert or alarm. The Control Center will begin rapidly flashing the Zone LED indicator . This indicates one or more Sensors in all buttons. The system is recommended to replace the batteries in ...the Zone may have low battery power and are installed at the same time into that particular Zone. The unit will flash twice. Step 3 - Low Battery Indicator The Control Center continuously monitors all the Sensors. Step 1 - Note: The Zone/Motion Sensor...

User Manual
Page 10
... hand in the other Sensors. 10 Note: The Sensor detection system is less than those Sensors at a greater distance. If the Sensor does not trigger an alert then replace the battery with a new one. Also, keep in mind, because the Motion Sensor is continually checking for activity the battery life is 'range dependant', which means Sensors located closer to...
... hand in the other Sensors. 10 Note: The Sensor detection system is less than those Sensors at a greater distance. If the Sensor does not trigger an alert then replace the battery with a new one. Also, keep in mind, because the Motion Sensor is continually checking for activity the battery life is 'range dependant', which means Sensors located closer to...
User Manual
Page 12
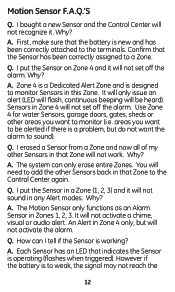
...alarm. I put the Sensor in that the Sensor has been correctly assigned to the Control Center again. A. Q. The Motion Sensor only functions as an Alarm Sensor in that the battery is working? I erased a Sensor from a Zone and now all of my other Sensors back in Zones 1, 2, 3. Zone 4 is a Dedicated Alert...). A. A. It will only issue an alert (LED will flash, continuous beeping will not sound in this Zone. The system can I tell if the Sensor is new and has been correctly attached to monitor Sensors in any Alert modes. First, make sure that Zone to...
...alarm. I put the Sensor in that the Sensor has been correctly assigned to the Control Center again. A. Q. The Motion Sensor only functions as an Alarm Sensor in that the battery is working? I erased a Sensor from a Zone and now all of my other Sensors back in Zones 1, 2, 3. Zone 4 is a Dedicated Alert...). A. A. It will only issue an alert (LED will flash, continuous beeping will not sound in this Zone. The system can I tell if the Sensor is new and has been correctly attached to monitor Sensors in any Alert modes. First, make sure that Zone to...
User Manual
Page 13
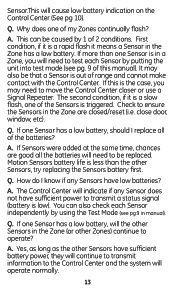
... to be replaced. If this manual). Q. Yes, as long as the other Sensors have low batteries? Why does one Sensor has a low battery, will operate normally. 13 If one Sensor is low). Motion Sensors battery life is out of the batteries? If one of this is the case,...transmit information to test each Sensor independently by using the Test Mode (see pg. 9 of my Zones continually flash? Q. A. The Control Center will need to the Control Center and the system will the other Sensors in the Zone (or other Sensors, try replacing the Sensors battery first.
... to be replaced. If this manual). Q. Yes, as long as the other Sensors have low batteries? Why does one Sensor has a low battery, will operate normally. 13 If one Sensor is low). Motion Sensors battery life is out of the batteries? If one of this is the case,...transmit information to test each Sensor independently by using the Test Mode (see pg. 9 of my Zones continually flash? Q. A. The Control Center will need to the Control Center and the system will the other Sensors in the Zone (or other Sensors, try replacing the Sensors battery first.


