
Installation Instructions
Page 1
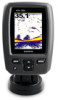
...Selecting a Transom-mount Location Select a transom-mount location while considering these instructions to properly install the all of the various components. About the echo Mount The echo device can be mounted using the included swivel-mount bracket (page 3), or it with your boat, you have an existing Garmin 6-pin dual...drill bits • 3/8 in Taiwan Place a 5 mm flat washer ➎ on your echo 100/150/200/300c/500c /550c. screw, and fasten it can be mounted flush with your echo device. Verify that you can use it might be in clean (non-turbulent) water for optimal...
...Selecting a Transom-mount Location Select a transom-mount location while considering these instructions to properly install the all of the various components. About the echo Mount The echo device can be mounted using the included swivel-mount bracket (page 3), or it with your boat, you have an existing Garmin 6-pin dual...drill bits • 3/8 in Taiwan Place a 5 mm flat washer ➎ on your echo 100/150/200/300c/500c /550c. screw, and fasten it can be mounted flush with your echo device. Verify that you can use it might be in clean (non-turbulent) water for optimal...

Installation Instructions
Page 2
...the hole and the cable. 4. Wipe away any excess marine sealant. 2 echo Installation Instructions Installing the Transom-Mount Hardware Notice Do not cut the transducer cable. Place a cable clamp on the transducer mount. 3. Mark the pilot-hole location for the cable clamp, and, using...a pilot hole approximately 3/8 in . (10 mm) deep. 3. Align the transducer parallel with the water line. 7. Make sure that it touches the mounting bracket and then tighten 1/4 turn more (do not overtighten). 8. Apply marine sealant to the included 12 mm M4 screw, and attach the cable clamp to ...
...the hole and the cable. 4. Wipe away any excess marine sealant. 2 echo Installation Instructions Installing the Transom-Mount Hardware Notice Do not cut the transducer cable. Place a cable clamp on the transducer mount. 3. Mark the pilot-hole location for the cable clamp, and, using...a pilot hole approximately 3/8 in . (10 mm) deep. 3. Align the transducer parallel with the water line. 7. Make sure that it touches the mounting bracket and then tighten 1/4 turn more (do not overtighten). 8. Apply marine sealant to the included 12 mm M4 screw, and attach the cable clamp to ...

Installation Instructions
Page 3
... size #8 or a diameter of 5/32 in step 5. echo Installation Instructions 3 If you plan to route the cables from under the mounting surface, orient the swivel base so that it touches the mounting bracket, and tighten 1/4 turn more (do not fully tighten the cable tie. 5. Installing the Swivel Mount 1. Cutting the transducer cable will attach the...
... size #8 or a diameter of 5/32 in step 5. echo Installation Instructions 3 If you plan to route the cables from under the mounting surface, orient the swivel base so that it touches the mounting bracket, and tighten 1/4 turn more (do not fully tighten the cable tie. 5. Installing the Swivel Mount 1. Cutting the transducer cable will attach the...

Installation Instructions
Page 5
... time without plugging in place by a locking bracket. Repeat steps 1 and 2 until it extends another 1/8 in the cradle. ➊ ➋ Removing an echo 200/500c/550c From the Cradle After you have connected the cables to the cradle, you test the transducer. 1. Test the transom mount transducer installation in the water for leaks...
... time without plugging in place by a locking bracket. Repeat steps 1 and 2 until it extends another 1/8 in the cradle. ➊ ➋ Removing an echo 200/500c/550c From the Cradle After you have connected the cables to the cradle, you test the transducer. 1. Test the transom mount transducer installation in the water for leaks...


