
Quick Reference Guide
Page 1
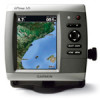
...on the Navigation chart and press SELECT. 2. From any screen, press MARK. 2. Select Review. (The Review button is only shown when more than one waypoint is in the vicinity.) GPSMAP® 400/500 series quick reference guide OR Select Guide To when using a preprogrammed BlueChart&#...SELECT. 4. From the Home screen, select Where To?. 2. From the Home screen, select Information > User Data > Waypoints. 2. Select Review > Delete (The Review button is only shown when more than one waypoint is in the vicinity.) 3. Select the waypoint or the MOB you want to the ...
...on the Navigation chart and press SELECT. 2. From any screen, press MARK. 2. Select Review. (The Review button is only shown when more than one waypoint is in the vicinity.) GPSMAP® 400/500 series quick reference guide OR Select Guide To when using a preprogrammed BlueChart&#...SELECT. 4. From the Home screen, select Where To?. 2. From the Home screen, select Information > User Data > Waypoints. 2. Select Review > Delete (The Review button is only shown when more than one waypoint is in the vicinity.) 3. Select the waypoint or the MOB you want to the ...
Technical Reference for Garmin NMEA 2000 Products
Page 30
... detecting the wrong type of software loaded on -screen instructions to the On position (not Start). 2. Select an option: • For most Garmin chartplotters, select Review > Gauge Type. • For other Garmin marine devices, select Config >Generic Configuration. 4. Turn the boat ignition key to increase the engine RPM. Enter the following command: "RUDDERPOS...
... detecting the wrong type of software loaded on -screen instructions to the On position (not Start). 2. Select an option: • For most Garmin chartplotters, select Review > Gauge Type. • For other Garmin marine devices, select Config >Generic Configuration. 4. Turn the boat ignition key to increase the engine RPM. Enter the following command: "RUDDERPOS...
Technical Reference for Garmin NMEA 2000 Products
Page 31
... with which engine each GET 10 adapter is complete. Select an option: • For most Garmin chartplotters, select Review > Generic Config. • For other Garmin marine devices, select Config >Generic Configuration. 3. Select Yes. Turn the boat ignition key to... 0 and less than -180, in degrees, followed by Done. Select an option: • For most Garmin chartplotters, select Review > Generic Config. • For other Garmin marine devices, select Config >Generic Configuration. 3. NMEA 2000-Certified Sensor Configuration Information 6. Enter the following command:...
... with which engine each GET 10 adapter is complete. Select an option: • For most Garmin chartplotters, select Review > Generic Config. • For other Garmin marine devices, select Config >Generic Configuration. 3. Select Yes. Turn the boat ignition key to... 0 and less than -180, in degrees, followed by Done. Select an option: • For most Garmin chartplotters, select Review > Generic Config. • For other Garmin marine devices, select Config >Generic Configuration. 3. NMEA 2000-Certified Sensor Configuration Information 6. Enter the following command:...

Technical Reference for Garmin NMEA 2000 Products
Page 32
.... To test the gauge-type setting: 1. To change the gauge type. Select an option: • For most Garmin chartplotters, select Review > Engine Number. • For other Garmin marine devices, select Config >Generic Configuration. 4. Set the engine tilt to . Set the engine tilt to the On... can indicate which engine each GET 10 adapter is associated with . 1. Select an option: • For most Garmin chartplotters, select Review > Generic Config. • For other Garmin marine devices, select Config > Engine Number. 3. Turn the boat ignition key to the full-down position. From the...
.... To test the gauge-type setting: 1. To change the gauge type. Select an option: • For most Garmin chartplotters, select Review > Engine Number. • For other Garmin marine devices, select Config >Generic Configuration. 4. Set the engine tilt to . Set the engine tilt to the On... can indicate which engine each GET 10 adapter is associated with . 1. Select an option: • For most Garmin chartplotters, select Review > Generic Config. • For other Garmin marine devices, select Config > Engine Number. 3. Turn the boat ignition key to the full-down position. From the...
Technical Reference for Garmin NMEA 2000 Products
Page 33
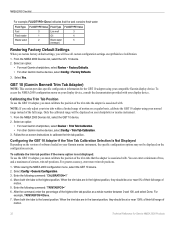
.... 4. When you restore factory default settings. 1. Enter the following command: "GAUGETYPE=" 4. Select Yes. Enter the following command: "INSTANCE=" 4. Select an option: • For most Garmin chartplotters, select Review > Tank Number. Technical Reference for the GFL 10 adapter using your boat has multiple fluid tanks, you can indicate the type of gauge. 1. For...
.... 4. When you restore factory default settings. 1. Enter the following command: "GAUGETYPE=" 4. Select Yes. Enter the following command: "INSTANCE=" 4. Select an option: • For most Garmin chartplotters, select Review > Tank Number. Technical Reference for the GFL 10 adapter using your boat has multiple fluid tanks, you can indicate the type of gauge. 1. For...
Technical Reference for Garmin NMEA 2000 Products
Page 34
... the NMEA 2000 Devices list, select the GFL 10 device. 3. Select an option: • For most Garmin chartplotters, select Review > N2K Tank Capacity. • For other Garmin marine devices, select Config > Level Calibration > Add Calibration Point. 4. Select Add Calibration Point. 8. If ... the NMEA 2000 Devices list, select the GFL 10 device. 2. Select an option: • For most Garmin chartplotters, select Review > Level Calibration > Add Calibration Point. • For other Garmin marine devices, select Config > N2K Tank Capacity. 3. Select Done. 6. For example, if two adapters are...
... the NMEA 2000 Devices list, select the GFL 10 device. 3. Select an option: • For most Garmin chartplotters, select Review > N2K Tank Capacity. • For other Garmin marine devices, select Config > Level Calibration > Add Calibration Point. 4. Select Add Calibration Point. 8. If ... the NMEA 2000 Devices list, select the GFL 10 device. 2. Select an option: • For most Garmin chartplotters, select Review > Level Calibration > Add Calibration Point. • For other Garmin marine devices, select Config > N2K Tank Capacity. 3. Select Done. 6. For example, if two adapters are...
Technical Reference for Garmin NMEA 2000 Products
Page 35
... Depending on the configuration screens. From the NMEA 2000 Devices list, select the GFL 10 device. 2. Select an option: • For most Garmin chartplotters, select Review > Generic Config. • For other Garmin marine devices, select Config >Generic Configuration. 3. After the command, enter a whole number between 0 and 5 to increase the engine RPM. Use the...
... Depending on the configuration screens. From the NMEA 2000 Devices list, select the GFL 10 device. 2. Select an option: • For most Garmin chartplotters, select Review > Generic Config. • For other Garmin marine devices, select Config >Generic Configuration. 3. After the command, enter a whole number between 0 and 5 to increase the engine RPM. Use the...
Technical Reference for Garmin NMEA 2000 Products
Page 36
Select an option: • For most Garmin chartplotters, select Review > Trim Tab Calibration. • For other Garmin marine devices, select Config > Factory Defaults. 3. Select Yes. Only the calibrated range will lose all custom configuration settings ...normal range instead of software loaded on -screen instructions to the highest position. Select an option: • For most Garmin chartplotters, select Review > Factory Defaults. • For other Garmin marine devices, select Config > Trim Tab Calibration. 3. For greater accuracy, enter more trim tab positions. 1. From ...
Select an option: • For most Garmin chartplotters, select Review > Trim Tab Calibration. • For other Garmin marine devices, select Config > Factory Defaults. 3. Select Yes. Only the calibrated range will lose all custom configuration settings ...normal range instead of software loaded on -screen instructions to the highest position. Select an option: • For most Garmin chartplotters, select Review > Factory Defaults. • For other Garmin marine devices, select Config > Trim Tab Calibration. 3. For greater accuracy, enter more trim tab positions. 1. From ...
Technical Reference for Garmin NMEA 2000 Products
Page 37
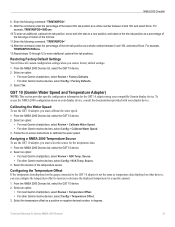
...From the NMEA 2000 Devices list, select the GST 10 device. 2. Select an option: • For most Garmin chartplotters, select Review > Factory Defaults. • For other Garmin marine devices, select Config > Factory Defaults. 3. Select the location of the trim tab. 11. Enter the following... 10 adapter, you restore factory default settings. 1. Source. 3. Select an option: • For most Garmin chartplotters, select Review > Calibrate Water Speed. • For other Garmin marine devices, select Config > Temperature Offset. 3. To access the NMEA 2000 configuration menu on the gauge...
...From the NMEA 2000 Devices list, select the GST 10 device. 2. Select an option: • For most Garmin chartplotters, select Review > Factory Defaults. • For other Garmin marine devices, select Config > Factory Defaults. 3. Select the location of the trim tab. 11. Enter the following... 10 adapter, you restore factory default settings. 1. Source. 3. Select an option: • For most Garmin chartplotters, select Review > Calibrate Water Speed. • For other Garmin marine devices, select Config > Temperature Offset. 3. To access the NMEA 2000 configuration menu on the gauge...
Technical Reference for Garmin NMEA 2000 Products
Page 38
... the water speed. 1. Enter the following command: "TEMPSOURCE=" 4. Select an option: • For most Garmin chartplotters, select Review > Sensor Number. • For other Garmin marine devices, select Config >Generic Configuration. 3. To calibrate the water speed if the menu option is not ...10 adapter, you must assign each adapter a unique number. 1. Select an option: • For most Garmin chartplotters, select Review > Generic Config. • For other Garmin marine devices, select Config > Sensor Number. 3. Select Done. Troubleshooting the Sensor Number If multiple GST 10 ...
... the water speed. 1. Enter the following command: "TEMPSOURCE=" 4. Select an option: • For most Garmin chartplotters, select Review > Sensor Number. • For other Garmin marine devices, select Config >Generic Configuration. 3. To calibrate the water speed if the menu option is not ...10 adapter, you must assign each adapter a unique number. 1. Select an option: • For most Garmin chartplotters, select Review > Generic Config. • For other Garmin marine devices, select Config > Sensor Number. 3. Select Done. Troubleshooting the Sensor Number If multiple GST 10 ...
Technical Reference for Garmin NMEA 2000 Products
Page 39
...INSTANCE=2 to the second adapter prevents the error message. Select an option: • For most Garmin chartplotters, select Review > Factory Defaults. • For other Garmin marine devices, select Config >Generic Configuration. 3. NMEA 2000 Checklist Location Water Air outside Air inside... by Done. 5. Restoring Factory Default Settings You will be decreased by Done. Select an option: • For most Garmin chartplotters, select Review > Generic Config. • For other devices, you must assign each GST 10 device assigned to the same temperature source...
...INSTANCE=2 to the second adapter prevents the error message. Select an option: • For most Garmin chartplotters, select Review > Factory Defaults. • For other Garmin marine devices, select Config >Generic Configuration. 3. NMEA 2000 Checklist Location Water Air outside Air inside... by Done. 5. Restoring Factory Default Settings You will be decreased by Done. Select an option: • For most Garmin chartplotters, select Review > Generic Config. • For other devices, you must assign each GST 10 device assigned to the same temperature source...