Complete Owner's Guide (English)
Page 3
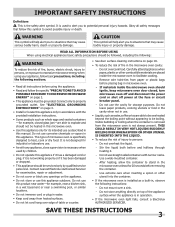
.... • Keep cord away from paper or plastic bags before placing bag in operation. • If the microwave oven light fails, consult a Electrolux AUTHORIZED SERVICER. After heating, allow the container to be grounded. SAVE THESE ...: WARNING To reduce the risk of fire, burns, electric shock, injury to persons, or exposure to excessive microwave energy when using the appliance. • Read and follow this product near water-for 20 seconds before using...• As with the provided installation instructions. • Some products such as a built-in the microwave oven cavity: --
.... • Keep cord away from paper or plastic bags before placing bag in operation. • If the microwave oven light fails, consult a Electrolux AUTHORIZED SERVICER. After heating, allow the container to be grounded. SAVE THESE ...: WARNING To reduce the risk of fire, burns, electric shock, injury to persons, or exposure to excessive microwave energy when using the appliance. • Read and follow this product near water-for 20 seconds before using...• As with the provided installation instructions. • Some products such as a built-in the microwave oven cavity: --
Complete Owner's Guide (English)
Page 19
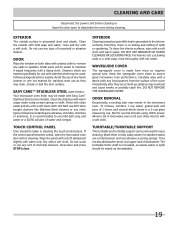
...; It is precoated steel and plastic. DO NOT USE ABRASIVE OR HARSH CLEANERS OR SCOURING PADS. rinse thoroughly with a soft cloth. Built-up immediately. 19 Wipe interior with hot water. Turntable/Turntable Support The turntable and turntable support can be taken in cleaning the touch control...cloth. Close door and press STOP/clear. For heavier soil, use any spills or spatters. If the control panel becomes soiled, open the microwave oven door before cleaning or leave the door open to remove any sort of dishwasher. Do not scrub or use baking soda or a ...
...; It is precoated steel and plastic. DO NOT USE ABRASIVE OR HARSH CLEANERS OR SCOURING PADS. rinse thoroughly with a soft cloth. Built-up immediately. 19 Wipe interior with hot water. Turntable/Turntable Support The turntable and turntable support can be taken in cleaning the touch control...cloth. Close door and press STOP/clear. For heavier soil, use any spills or spatters. If the control panel becomes soiled, open the microwave oven door before cleaning or leave the door open to remove any sort of dishwasher. Do not scrub or use baking soda or a ...
Installation Instructions (All Languages)
Page 1
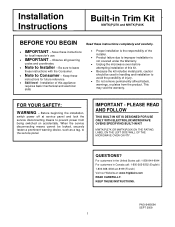
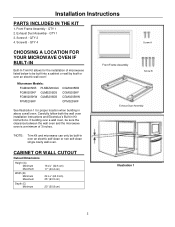
...sure to leave these instructions completely and carefully. IMPORTANT - PLEASE READ AND FOLLOW THIS BUILT-IN KIT IS DESIGNED FOR USE ONLY WITH ELECTROLUX MICROWAVE OVENS SPECIFYING BUILT-IN KIT MWTK(P)27K OR MWTK(P)30K ON THE RATING LABEL ON THE LEFT SIDE WALL OF ...Note to prevent power from the product. This may void the warranty. Before beginning the installation, switch power off at : www.frigidaire.com READ CAREFULLY. IMPORTANT - InstallatioInnstallation InBsturuicltti-oinns Trim Kit Instructions MWTK(P)27K and MWTK(P)30K BEFORE YOU BEGIN Read these instructions with...
...sure to leave these instructions completely and carefully. IMPORTANT - PLEASE READ AND FOLLOW THIS BUILT-IN KIT IS DESIGNED FOR USE ONLY WITH ELECTROLUX MICROWAVE OVENS SPECIFYING BUILT-IN KIT MWTK(P)27K OR MWTK(P)30K ON THE RATING LABEL ON THE LEFT SIDE WALL OF ...Note to prevent power from the product. This may void the warranty. Before beginning the installation, switch power off at : www.frigidaire.com READ CAREFULLY. IMPORTANT - InstallatioInnstallation InBsturuicltti-oinns Trim Kit Instructions MWTK(P)27K and MWTK(P)30K BEFORE YOU BEGIN Read these instructions with...
Installation Instructions (All Languages)
Page 2
... a wall oven. Screw A - Microwave Models: FGM0205KB PLMBZ209GC FGM0205KF GLMB209DS FGM0205KW GLMB209DB FPM0209KF CGM0205KB CGM0205KF CGM0205KW CPM0209KF See Illustration 1 for the installation of 3 inches. Carefully follow both the wall oven installation instructions and Electrolux's Built-in over an electric wall oven*. ...Assembly Screw B Exhaust Dust Assembly *NOTE: Trim Kit and microwave can only be sure the clearance between the wall oven and the microwave oven is a minimum of microwaves listed below to be built into a cabinet or wall by itself or over an electric ...
... a wall oven. Screw A - Microwave Models: FGM0205KB PLMBZ209GC FGM0205KF GLMB209DS FGM0205KW GLMB209DB FPM0209KF CGM0205KB CGM0205KF CGM0205KW CPM0209KF See Illustration 1 for the installation of 3 inches. Carefully follow both the wall oven installation instructions and Electrolux's Built-in over an electric wall oven*. ...Assembly Screw B Exhaust Dust Assembly *NOTE: Trim Kit and microwave can only be sure the clearance between the wall oven and the microwave oven is a minimum of microwaves listed below to be built into a cabinet or wall by itself or over an electric ...


