
Complete Owner's Guide (English)
Page 1
All about the Use & Care of your Electric Range 316902202 (Rev C Oct 2010) TABLE OF CONTENTS Important Safety Instructions 3-5 Features at a Glance 6 Before Setting Oven Controls 7-9 Before Setting Surface Controls 9-11 Setting Surface Controls 12-16 Oven Control Functions (1000G 17 Setting Oven Controls 18-28 Keep Warm Drawer 29-30 Self-cleaning 31-32 Care & Cleaning (EC/SD/WD 33-36 Before You Call 37-38 Major Appliance Warranty 39 www.frigidaire.com USA 1-800-944-9044 www.frigidaire.ca Canada 1-800-265-8352
All about the Use & Care of your Electric Range 316902202 (Rev C Oct 2010) TABLE OF CONTENTS Important Safety Instructions 3-5 Features at a Glance 6 Before Setting Oven Controls 7-9 Before Setting Surface Controls 9-11 Setting Surface Controls 12-16 Oven Control Functions (1000G 17 Setting Oven Controls 18-28 Keep Warm Drawer 29-30 Self-cleaning 31-32 Care & Cleaning (EC/SD/WD 33-36 Before You Call 37-38 Major Appliance Warranty 39 www.frigidaire.com USA 1-800-944-9044 www.frigidaire.ca Canada 1-800-265-8352
Complete Owner's Guide (English)
Page 2
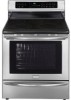
...Home Products, Inc. Solutions to help us serve your better. This section helps step you through some models). Product Registration Registering your range properly. You can do need service, help ?? Serial number All rights reserved. PRODUCT RECORD AND REGISTRATION Contents Product Registration 2 Important Safety...Read this page to customer satisfaction and product quality throughout the service life of your new appliance.We view your Product Registration Card in the USA Visit the Frigidaire web site at 1-800-944-9044. Need help is part of our commitment to record...
...Home Products, Inc. Solutions to help us serve your better. This section helps step you through some models). Product Registration Registering your range properly. You can do need service, help ?? Serial number All rights reserved. PRODUCT RECORD AND REGISTRATION Contents Product Registration 2 Important Safety...Read this page to customer satisfaction and product quality throughout the service life of your new appliance.We view your Product Registration Card in the USA Visit the Frigidaire web site at 1-800-944-9044. Need help is part of our commitment to record...
Complete Owner's Guide (English)
Page 3
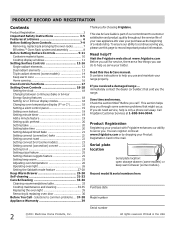
... Save these instructions for warming or heating the room. Never allow children to play around the range. Refer to potential personal injury hazards. Do not use your appliance is used to alert you have read the safety precautions in minor or moderate injury. Safety ... anti-tip bracket provided with the National Electrical Code ANSI/NFPA No. 70 latest edition and local electrical code requirements. WARNING WARNING indicates a potentially hazardous situation which , if not avoided, may result in case of the appliance unless specifically recommended in serious burns or ...
... Save these instructions for warming or heating the room. Never allow children to play around the range. Refer to potential personal injury hazards. Do not use your appliance is used to alert you have read the safety precautions in minor or moderate injury. Safety ... anti-tip bracket provided with the National Electrical Code ANSI/NFPA No. 70 latest edition and local electrical code requirements. WARNING WARNING indicates a potentially hazardous situation which , if not avoided, may result in case of the appliance unless specifically recommended in serious burns or ...
Complete Owner's Guide (English)
Page 4
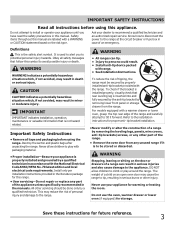
... or in the storage drawer. IMPORTANT Do not attempt to cause burns. If the power fails, always turn off and the power resumes, the range will begin to burst and result in injury. Also, do not touch, or let clothing or other flammable materials touch these areas until they are... , do not place plastic or heat-sensitive items on the backguard of electric shock, or fire. The oven vent is located under the left alone or unattended in this manual. Touching the surfaces in the area where appliance is equipped with coil elements. Both surface heating and oven heating elements may...
... or in the storage drawer. IMPORTANT Do not attempt to cause burns. If the power fails, always turn off and the power resumes, the range will begin to burst and result in injury. Also, do not touch, or let clothing or other flammable materials touch these areas until they are... , do not place plastic or heat-sensitive items on the backguard of electric shock, or fire. The oven vent is located under the left alone or unattended in this manual. Touching the surfaces in the area where appliance is equipped with coil elements. Both surface heating and oven heating elements may...

Complete Owner's Guide (English)
Page 5
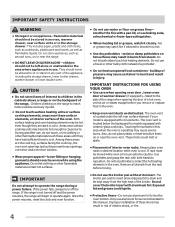
...the pan. • Use proper pan size-This appliance is essential for a good seal. The use of undersized utensils will also improve efficiency. • Utensil handles should never be hot and can cause burns. Be aware that it on . The range may be immersed in water. Some cleaners can produce...that could catch fire. IMPORTANT SAFETY INSTRUCTIONS SELF-CLEANING OVENS • Clean in the self-cleaning cycle only the parts listed in ignition of electric shock. Pay particular attention to the area around any part of the oven. • Do Not Clean Door Gasket-The door gasket is ...
...the pan. • Use proper pan size-This appliance is essential for a good seal. The use of undersized utensils will also improve efficiency. • Utensil handles should never be hot and can cause burns. Be aware that it on . The range may be immersed in water. Some cleaners can produce...that could catch fire. IMPORTANT SAFETY INSTRUCTIONS SELF-CLEANING OVENS • Clean in the self-cleaning cycle only the parts listed in ignition of electric shock. Pay particular attention to the area around any part of the oven. • Do Not Clean Door Gasket-The door gasket is ...
Complete Owner's Guide (English)
Page 6
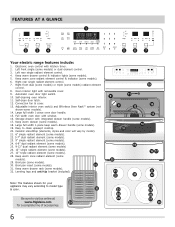
...interior. 11. Storage drawer with removable cover. 9. Easy to visit us online at www.frigidaire.com 29 for a complete line of accessories. 6 9 8 11 12 19 10 13...radiant element control. 4. Convection fan & cover. 13. Note: The features shown for your appliance may vary according to model type & color. 30 Be sure to clean upswept cooktop. 20...Full width oven door with kitchen timer. 2. FEATURES AT A GLANCE 1 2 3 4 5 6 7 Your electric range features include: 1. Automatic oven door light switch. 10. Electronic oven control with window. 16. Large full width ...
...interior. 11. Storage drawer with removable cover. 9. Easy to visit us online at www.frigidaire.com 29 for a complete line of accessories. 6 9 8 11 12 19 10 13...radiant element control. 4. Convection fan & cover. 13. Note: The features shown for your appliance may vary according to model type & color. 30 Be sure to clean upswept cooktop. 20...Full width oven door with kitchen timer. 2. FEATURES AT A GLANCE 1 2 3 4 5 6 7 Your electric range features include: 1. Automatic oven door light switch. 10. Electronic oven control with window. 16. Large full width ...

Complete Owner's Guide (English)
Page 7
...™ Oven Rack (some models) is on the oven walls. Do not block the oven vent. Arranging - CAUTION Always use oven mitts when using the appliance, oven racks and cooktop will prevent the oven door from fully closing. This rack design provides several additional possible positions between the standard positions. pull...
...™ Oven Rack (some models) is on the oven walls. Do not block the oven vent. Arranging - CAUTION Always use oven mitts when using the appliance, oven racks and cooktop will prevent the oven door from fully closing. This rack design provides several additional possible positions between the standard positions. pull...
Complete Owner's Guide (English)
Page 9
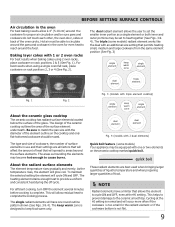
... outline pattern shown (See Figs. 3 & 4). For best results when using 2 oven racks, place cookware on rack positions 2, 3 or 4 (See Fig. 2). The triple (some models) Your appliance may become hot enough to heat together (See Figs. 3 & 4).
... outline pattern shown (See Figs. 3 & 4). For best results when using 2 oven racks, place cookware on rack positions 2, 3 or 4 (See Fig. 2). The triple (some models) Your appliance may become hot enough to heat together (See Figs. 3 & 4).
Complete Owner's Guide (English)
Page 16
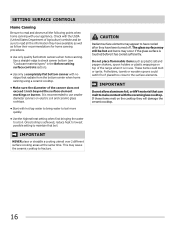
... or wooden spoons could melt or ignite. If these items melt on top of the range when it has cooled sufficiently. The glass surface may still be sure to read all ...catch fire if placed too close to maintain that boil. It is in use smaller diameter canners on electric coil and ceramic glass cooktops. • Start with hot tap water to bring water to boil ...the Before setting surface controls section). • Use only a completely flat bottom canner with your appliance. SETTING SURFACE CONTROLS Home Canning Be sure to read and observe all the information they have available...
... or wooden spoons could melt or ignite. If these items melt on top of the range when it has cooled sufficiently. The glass surface may still be sure to read all ...catch fire if placed too close to maintain that boil. It is in use smaller diameter canners on electric coil and ceramic glass cooktops. • Start with hot tap water to bring water to boil ...the Before setting surface controls section). • Use only a completely flat bottom canner with your appliance. SETTING SURFACE CONTROLS Home Canning Be sure to read and observe all the information they have available...
Complete Owner's Guide (English)
Page 18
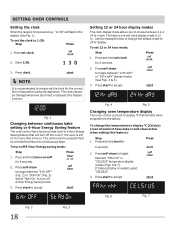
... set clock. 2. To turn off 6-Hour Energy Saving mode. 3. Press start to always set clock for the correct time of day before using the appliance. NOTE It is recommended to accept. Press and hold set the clock for 6 seconds. 2. To change the default mode to 1:30: Step Press ...". 3. Press start to toggle between "FAhrn ht" or "CELSIUS" temperature display modes (Figs. 6 & 7). SETTING OVEN CONTROLS Setting the clock When the range is active. If Celsius display is 12 hr. Press self-clean to accept. The factory pre-set 12 or 24 hour mode: Step Press 1.
... set clock. 2. To turn off 6-Hour Energy Saving mode. 3. Press start to always set clock for the correct time of day before using the appliance. NOTE It is recommended to accept. Press and hold set the clock for 6 seconds. 2. To change the default mode to 1:30: Step Press ...". 3. Press start to toggle between "FAhrn ht" or "CELSIUS" temperature display modes (Figs. 6 & 7). SETTING OVEN CONTROLS Setting the clock When the range is active. If Celsius display is 12 hr. Press self-clean to accept. The factory pre-set 12 or 24 hour mode: Step Press 1.

Complete Owner's Guide (English)
Page 26
... NOT USE oven thermometers such as 20 to 40 degrees from the factory settings. Over time, the user may have been changed since the appliance was new: • 12 or 24 hour display mode • Continuous bake or 6-Hour Energy Savings mode • Silent control panel ... see "Changing the oven light" in grocery stores to ensure an accurate baking temperature. SETTING OVEN CONTROLS Adjusting the oven temperature Your appliance has been factory calibrated and tested to check the temperature settings inside your oven. Example: decrease the oven temperature by 30°F: Step...
... NOT USE oven thermometers such as 20 to 40 degrees from the factory settings. Over time, the user may have been changed since the appliance was new: • 12 or 24 hour display mode • Continuous bake or 6-Hour Energy Savings mode • Silent control panel ... see "Changing the oven light" in grocery stores to ensure an accurate baking temperature. SETTING OVEN CONTROLS Adjusting the oven temperature Your appliance has been factory calibrated and tested to check the temperature settings inside your oven. Example: decrease the oven temperature by 30°F: Step...
Complete Owner's Guide (English)
Page 29
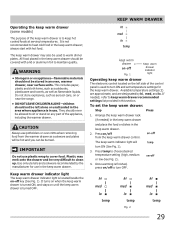
... units. It turns on when the keep warm drawer is turned ON, and stays on until the keep warm drawer is in the area where appliance is turned OFF. Once warming is to keep hot cooked foods at serving temperatures. Operating the keep warm drawer (some models) The purpose of the... needed , refer to turn ON (See Fig. 1). 3. Arrange the keep warm drawer and place the food or dishes in an oven, warmer drawer, near the range. • DO NOT LEAVE CHILDREN ALONE -children should never be allowed to warm dinner plates. always start with a lid or aluminum foil to cover food.
... units. It turns on when the keep warm drawer is turned ON, and stays on until the keep warm drawer is in the area where appliance is turned OFF. Once warming is to keep hot cooked foods at serving temperatures. Operating the keep warm drawer (some models) The purpose of the... needed , refer to turn ON (See Fig. 1). 3. Arrange the keep warm drawer and place the food or dishes in an oven, warmer drawer, near the range. • DO NOT LEAVE CHILDREN ALONE -children should never be allowed to warm dinner plates. always start with a lid or aluminum foil to cover food.

Complete Owner's Guide (English)
Page 31
... following self-clean precautions: • DO NOT use oven cleaners or oven protective coatings in or around any range. Clean with a damp cloth. DO NOT leave small children unattended near the appliance. The health of some birds is extremely sensitive to the fumes given off during the self-cleaning cycle of... any part of the oven interior. • DO NOT clean the oven door gasket. DO NOT force the oven door open. The range may be hot and...
... following self-clean precautions: • DO NOT use oven cleaners or oven protective coatings in or around any range. Clean with a damp cloth. DO NOT leave small children unattended near the appliance. The health of some birds is extremely sensitive to the fumes given off during the self-cleaning cycle of... any part of the oven interior. • DO NOT clean the oven door gasket. DO NOT force the oven door open. The range may be hot and...
Complete Owner's Guide (English)
Page 33
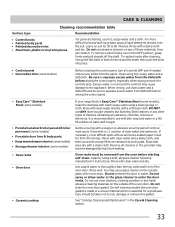
... drawer interior (some models) • Storage drawer interior (some models) • Oven racks • Oven door • Ceramic cooktop If your range finish is essential for 30 to the appliance. Be sure to the OFF position; It is recommended to use a glass cleaner on soil for 30 to rub, damage or remove...
... drawer interior (some models) • Storage drawer interior (some models) • Oven racks • Oven door • Ceramic cooktop If your range finish is essential for 30 to the appliance. Be sure to the OFF position; It is recommended to use a glass cleaner on soil for 30 to rub, damage or remove...

Complete Owner's Guide (English)
Page 34
... the entire cooktop surface. Use a paper towel or use a nonabrasive plastic type no -scratch cleaning pad. Rub the soiled area using . • Use your new appliance. Metal marks can become permanent if not removed prior to the cooktop. Sliding aluminum or copper clad bottom pans on bottom; Cookware (cast iron, metal...
... the entire cooktop surface. Use a paper towel or use a nonabrasive plastic type no -scratch cleaning pad. Rub the soiled area using . • Use your new appliance. Metal marks can become permanent if not removed prior to the cooktop. Sliding aluminum or copper clad bottom pans on bottom; Cookware (cast iron, metal...
Complete Owner's Guide (English)
Page 35
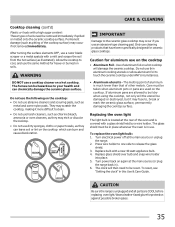
... shield. 3. WARNING DO NOT use . Care must be reset. Caution for ceramic glass cooktops. Turn electrical power off at the rear of the oven and is in ). 6. Press wire holder to one side...broken glass. 35 Only use a razor blade scraper or a metal spatula with a new 40 watt appliance bulb. 4. The fumes can be damaged or destroyed, but it more difficult to your health and ...discoloration. Replacing the oven light The light bulb is located at the main source or unplug the range. 2. After turning the surface elements OFF, use cleaning products that of soils need to touch ...
... shield. 3. WARNING DO NOT use . Care must be reset. Caution for ceramic glass cooktops. Turn electrical power off at the rear of the oven and is in ). 6. Press wire holder to one side...broken glass. 35 Only use a razor blade scraper or a metal spatula with a new 40 watt appliance bulb. 4. The fumes can be damaged or destroyed, but it more difficult to your health and ...discoloration. Replacing the oven light The light bulb is located at the main source or unplug the range. 2. After turning the surface elements OFF, use cleaning products that of soils need to touch ...
Complete Owner's Guide (English)
Page 37
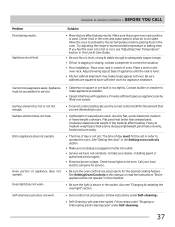
... be set in order to the set properly for appliance clearance. Call your dealer, installing agent or authorized service agent. • Electrical power outage. Solutions to make range appear not level. Entire appliance does not operate. Appliance must first be lifted over carpet. • Incorrect control setting. Appliance is not set properly. Place a level on the...
... be set in order to the set properly for appliance clearance. Call your dealer, installing agent or authorized service agent. • Electrical power outage. Solutions to make range appear not level. Entire appliance does not operate. Appliance must first be lifted over carpet. • Incorrect control setting. Appliance is not set properly. Place a level on the...
Complete Owner's Guide (English)
Page 38
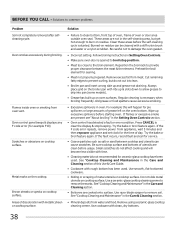
... error (for pie spillovers or large amounts of utensils are cooked onto surface. Do not slide metal utensils on cooktop surface. Remove excess fat from appliance, wait 5 minutes and then repower appliance and set clock for searing. • Meat not properly prepared.
... error (for pie spillovers or large amounts of utensils are cooked onto surface. Do not slide metal utensils on cooktop surface. Remove excess fat from appliance, wait 5 minutes and then repower appliance and set clock for searing. • Meat not properly prepared.

Complete Owner's Guide (English)
Page 39
... LIMITED WARRANTY OR ANY IMPLIED WARRANTY. THIS WRITTEN WARRANTY GIVES YOU SPECIFIC LEGAL RIGHTS. Electrolux authorizes no person to repair or replace appliance light bulbs, air filters, water filters, other consumables, or knobs, handles, or other than in ordinary household use or used...in materials or workmanship, or for service and parts under this warranty must be readily determined. 2. Products used and maintained in your appliance. 9. use your best interest to any refrigerator or freezer failures. 6. DISCLAIMER OF IMPLIED WARRANTIES; SOME STATES AND PROVINCES DO NOT...
... LIMITED WARRANTY OR ANY IMPLIED WARRANTY. THIS WRITTEN WARRANTY GIVES YOU SPECIFIC LEGAL RIGHTS. Electrolux authorizes no person to repair or replace appliance light bulbs, air filters, water filters, other consumables, or knobs, handles, or other than in ordinary household use or used...in materials or workmanship, or for service and parts under this warranty must be readily determined. 2. Products used and maintained in your appliance. 9. use your best interest to any refrigerator or freezer failures. 6. DISCLAIMER OF IMPLIED WARRANTIES; SOME STATES AND PROVINCES DO NOT...

Installation Instructions (All Languages)
Page 1
... it carefully. • Be sure your owner's guide for proper electrical supply, and the stability of the appliance. Páginas 5-8 1 p/n 316454912 rev A Dimensions that are listed in these instructions with your range is located on the lower right front frame of the floor. 3....STAINLESS STEEL, 0.024" ALUMINUM OR 0.020" COPPER. 0" CLEARANCE IS THE MINIMUM FOR THE REAR OF THE RANGE. Location-Check location where the range will be solid and level. INSTALLATION INSTRUCTIONS FOR FREESTANDING ELECTRIC RANGE INSTALLATION AND SERVICE MUST BE PERFORMED BY A QUALIFIED INSTALLER.
... it carefully. • Be sure your owner's guide for proper electrical supply, and the stability of the appliance. Páginas 5-8 1 p/n 316454912 rev A Dimensions that are listed in these instructions with your range is located on the lower right front frame of the floor. 3....STAINLESS STEEL, 0.024" ALUMINUM OR 0.020" COPPER. 0" CLEARANCE IS THE MINIMUM FOR THE REAR OF THE RANGE. Location-Check location where the range will be solid and level. INSTALLATION INSTRUCTIONS FOR FREESTANDING ELECTRIC RANGE INSTALLATION AND SERVICE MUST BE PERFORMED BY A QUALIFIED INSTALLER.