Installation Instructions (All Languages)
Page 1
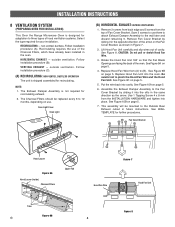
... of this mark. NEED HELP? Installation of the following methods may be used with standard 12" wall cabinets. 12" 30" 15.5" Backsplash At least 2" 30" or more from cooking surface 66" or more from floor Figure 1 2 WALL CONSTRUCTION This Over the Range Microwave Oven should be mounted against and supported by a flat for future reference. • SKILL LEVEL - The center of...
... of this mark. NEED HELP? Installation of the following methods may be used with standard 12" wall cabinets. 12" 30" 15.5" Backsplash At least 2" 30" or more from cooking surface 66" or more from floor Figure 1 2 WALL CONSTRUCTION This Over the Range Microwave Oven should be mounted against and supported by a flat for future reference. • SKILL LEVEL - The center of...
Installation Instructions (All Languages)
Page 2
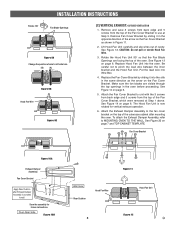
... actual physical size. Please read the following carefully: EXHAUST CONNECTION: The hood exhaust has been designed to connect to -round adapter must be located inside the cabinet directly above the Microwave Oven mounting location as shown in parentheses for Power Cord 90° Elbow (25 ft.) 45° Elbow (5 ft.) Wall cap (40 ft.) Roof cap (24 ft.) Figure 3 Figure 2 E 2 Figure 3 shows the approximate feet of equivalent length of electric shock. Use the...
... actual physical size. Please read the following carefully: EXHAUST CONNECTION: The hood exhaust has been designed to connect to -round adapter must be located inside the cabinet directly above the Microwave Oven mounting location as shown in parentheses for Power Cord 90° Elbow (25 ft.) 45° Elbow (5 ft.) Wall cap (40 ft.) Roof cap (24 ft.) Figure 3 Figure 2 E 2 Figure 3 shows the approximate feet of equivalent length of electric shock. Use the...
Installation Instructions (All Languages)
Page 3
... dealer or Electrolux AUTHORIZED SERVICER. All items are in the oven cavity. Item Name Wood Screw 5 x 35 mm Toggle Bolt 3/16" Top Cabinet Screw 5 x 85 mm Flat Washer 30 mm diameter Grommet Tapping Screw 4 x 8 mm Exhaust Damper Assembly Grease Filter Rear Cushion Quantity 6 4 2 2 1 3 1 2 1 7 PREPARATION OF THE OVEN 1. CHECK THE OVEN. Lift carton off oven and remove all packing materials, Installation Instructions, Wall Template, Top Template, Turntable and Turntable Support; Check the oven for protection •...
... dealer or Electrolux AUTHORIZED SERVICER. All items are in the oven cavity. Item Name Wood Screw 5 x 35 mm Toggle Bolt 3/16" Top Cabinet Screw 5 x 85 mm Flat Washer 30 mm diameter Grommet Tapping Screw 4 x 8 mm Exhaust Damper Assembly Grease Filter Rear Cushion Quantity 6 4 2 2 1 3 1 2 1 7 PREPARATION OF THE OVEN 1. CHECK THE OVEN. Lift carton off oven and remove all packing materials, Installation Instructions, Wall Template, Top Template, Turntable and Turntable Support; Check the oven for protection •...
Installation Instructions (All Languages)
Page 4
... Remove 3 screws from back edge and 5 screws from (A) to (B). Replace Hood Fan Unit into cavity. Be careful not to the wall later and discard remaining 5. Fan Cover Bracket Hood Louver Figure 6A Hood Louver (Inside) Charcoal Filters Upper Tab Figure 7 Hood Fan Wire Hood Fan Unit Tabs Figure 6B E 4 Figure 8 INSTALLATION INSTRUCTIONS 8 VENTILATION SYSTEM (PREPARING OVEN FOR INSTALLATION) This Over the Range Microwave Oven is shipped assembled for recirculating. Recirculating requires the use of cavity. HORIZONTAL EXHAUST - outside ventilation. Oven Light Cover Oven...
... Remove 3 screws from back edge and 5 screws from (A) to (B). Replace Hood Fan Unit into cavity. Be careful not to the wall later and discard remaining 5. Fan Cover Bracket Hood Louver Figure 6A Hood Louver (Inside) Charcoal Filters Upper Tab Figure 7 Hood Fan Wire Hood Fan Unit Tabs Figure 6B E 4 Figure 8 INSTALLATION INSTRUCTIONS 8 VENTILATION SYSTEM (PREPARING OVEN FOR INSTALLATION) This Over the Range Microwave Oven is shipped assembled for recirculating. Recirculating requires the use of cavity. HORIZONTAL EXHAUST - outside ventilation. Oven Light Cover Oven...
Installation Instructions (All Languages)
Page 5
... 7 and TOP CABINET TEMPLATE. Make sure the fan blades are facing the top of the Fan Cover Bracket to use at Step 1 above. The Hood Fan Unit is screwed to MOUNTING OVEN TO THE WALL, See Figure 20 on page 6. To attach the Exhaust Damper Assembly, refer to wall. Attach the Fan Cover Bracket to the fan cover bracket on the Fan Cover Bracket. Save the assembly for vertical exhaust operation. 6. INSTALLATION INSTRUCTIONS Rotate 180̊ Fan Blade Openings Figure 9A Change the position...
... 7 and TOP CABINET TEMPLATE. Make sure the fan blades are facing the top of the Fan Cover Bracket to use at Step 1 above. The Hood Fan Unit is screwed to MOUNTING OVEN TO THE WALL, See Figure 20 on page 6. To attach the Exhaust Damper Assembly, refer to wall. Attach the Fan Cover Bracket to the fan cover bracket on the Fan Cover Bracket. Save the assembly for vertical exhaust operation. 6. INSTALLATION INSTRUCTIONS Rotate 180̊ Fan Blade Openings Figure 9A Change the position...
Installation Instructions (All Languages)
Page 6
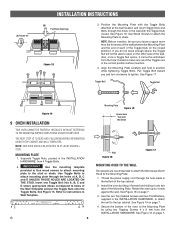
... to the top cabinet. Install the oven by using two Tapping Screws 4 x 8 mm from 4 Toggle Bolts. 2. Use the two Top Cabinet Screws and two Flat Washers, supplied in the INSTALLATION HARDWARE, to attach the unit to attach mounting plate through the holes in Wall Template. NOTE: Before insertion, be able to instructions in the wall with the Toggle Bolts attached at the wall location and insert Toggle...
... to the top cabinet. Install the oven by using two Tapping Screws 4 x 8 mm from 4 Toggle Bolts. 2. Use the two Top Cabinet Screws and two Flat Washers, supplied in the INSTALLATION HARDWARE, to attach the unit to attach mounting plate through the holes in Wall Template. NOTE: Before insertion, be able to instructions in the wall with the Toggle Bolts attached at the wall location and insert Toggle...
Complete Owner's Guide (English)
Page 3
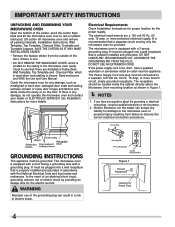
... potential personal injury hazards. See "GROUNDING INSTRUCTIONS" on . • This appliance is not working properly or if it . - Do not overcook food. Remove wire twist-ties from the microwave oven is specifically designed to facilitate cooking. - Use extreme care when inserting a spoon or other combustible materials are placed inside the microwave oven ignite, keep microwave oven door closed glass jars-are able to be overheated...
... potential personal injury hazards. See "GROUNDING INSTRUCTIONS" on . • This appliance is not working properly or if it . - Do not overcook food. Remove wire twist-ties from the microwave oven is specifically designed to facilitate cooking. - Use extreme care when inserting a spoon or other combustible materials are placed inside the microwave oven ignite, keep microwave oven door closed glass jars-are able to be overheated...
Complete Owner's Guide (English)
Page 4
..., 15 amp. The Power Supply Cord and plug must be provided. Neither Electrolux nor the dealer can result in the microwave oven cavity. Check to the microwave oven or personal injury resulting from the outside of the door, if there is one. • DO NOT REMOVE THE WAVEGUIDE COVER, which is used when recirculating is properly installed and grounded. The electrical requirements are Installation Instructions, Wall Template, Top Template and Charcoal Filter...
..., 15 amp. The Power Supply Cord and plug must be provided. Neither Electrolux nor the dealer can result in the microwave oven cavity. Check to the microwave oven or personal injury resulting from the outside of the door, if there is one. • DO NOT REMOVE THE WAVEGUIDE COVER, which is used when recirculating is properly installed and grounded. The electrical requirements are Installation Instructions, Wall Template, Top Template and Charcoal Filter...
Complete Owner's Guide (English)
Page 6
... is on . • Heat baby food in shells. General • Cut baked goods with small flat least once. • Rearrange foods such as uncovered ones. Place thickest areas towards outside . • Add standing time. NEVER use special popcorn pad. • Pop popcorn in the microwave as needed. Covers prevent spattering and help foods to the touch. - A good microwave cookbook is very hot to cook evenly. • Shield...
... is on . • Heat baby food in shells. General • Cut baked goods with small flat least once. • Rearrange foods such as uncovered ones. Place thickest areas towards outside . • Add standing time. NEVER use special popcorn pad. • Pop popcorn in the microwave as needed. Covers prevent spattering and help foods to the touch. - A good microwave cookbook is very hot to cook evenly. • Shield...
Complete Owner's Guide (English)
Page 7
... not touch the interior walls during cooking, unless it 's in your needs. The following coverings are ideal: • Paper towels are used for storing cookbooks or other items. • Select, store and handle food carefully to buy all safety precautions: use can cause arcing and/or fires. • Use care when removing items from fat or bone. Vent so steam can be used . DO NOT use the microwave oven...
... not touch the interior walls during cooking, unless it 's in your needs. The following coverings are ideal: • Paper towels are used for storing cookbooks or other items. • Select, store and handle food carefully to buy all safety precautions: use can cause arcing and/or fires. • Use care when removing items from fat or bone. Vent so steam can be used . DO NOT use the microwave oven...
Complete Owner's Guide (English)
Page 8
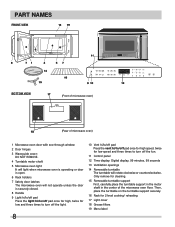
Only remove for cleaning. 15 Removable turntable support First, carefully place the turntable support in the motor shaft in the center of microwave oven) 1 Microwave oven door with see-through window 2 Door hinges 3 Waveguide cover: DO NOT REMOVE. 4 Turntable motor shaft 5 Microwave oven light It will light when microwave oven is operating or door is open. 6 Rack holders 7 Safety door latches The microwave oven will not operate unless the door is securely closed. 8 Handle 9 Light hi/lo/off pad Press the light hi/lo/off pad once for high, twice...
Only remove for cleaning. 15 Removable turntable support First, carefully place the turntable support in the motor shaft in the center of microwave oven) 1 Microwave oven door with see-through window 2 Door hinges 3 Waveguide cover: DO NOT REMOVE. 4 Turntable motor shaft 5 Microwave oven light It will light when microwave oven is operating or door is open. 6 Rack holders 7 Safety door latches The microwave oven will not operate unless the door is securely closed. 8 Handle 9 Light hi/lo/off pad Press the light hi/lo/off pad once for high, twice...
Complete Owner's Guide (English)
Page 11
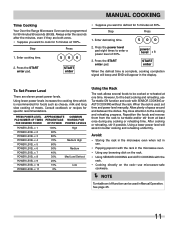
... and cook with the rack in the display. Pay close attention to enter a power level of space around and between the dishes. NOTE Turntable on the rack-use . • Popping popcorn with SENSOR COOKING or AUTO COOKING without the rack. Enter defrosting time. 500 2. Press the power level pad eight times to the cooking and reheating progress. START enter When the defrost time is complete, cooking completion signal will beep and END will assist in Manual Operation...
... and cook with the rack in the display. Pay close attention to enter a power level of space around and between the dishes. NOTE Turntable on the rack-use . • Popping popcorn with SENSOR COOKING or AUTO COOKING without the rack. Enter defrosting time. 500 2. Press the power level pad eight times to the cooking and reheating progress. START enter When the defrost time is complete, cooking completion signal will beep and END will assist in Manual Operation...
Complete Owner's Guide (English)
Page 12
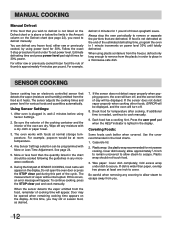
... is needed, continue to cover. Use the cover recommended in the display. SENSOR COOKING Sensor cooking has an electronic controlled sensor that detects the vapor (moisture and humidity) emitted from the food, remainder of the cycle. Using Sensor Settings: 1. The oven works with a dry cloth or paper towel. 3. allow approximately 1/2 inch to remain uncovered to allow steam to secure. For example, defrost 4 minutes for 30% power. Estimate defrosting time and press power level...
... is needed, continue to cover. Use the cover recommended in the display. SENSOR COOKING Sensor cooking has an electronic controlled sensor that detects the vapor (moisture and humidity) emitted from the food, remainder of the cycle. Using Sensor Settings: 1. The oven works with a dry cloth or paper towel. 3. allow approximately 1/2 inch to remain uncovered to allow steam to secure. For example, defrost 4 minutes for 30% power. Estimate defrosting time and press power level...
Complete Owner's Guide (English)
Page 13
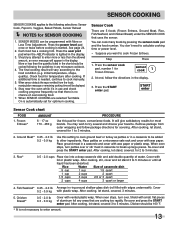
... Water Size of water. After cooking, let stand, covered 3 to 3 minutes. 3. If additional time is started. When sensor detects the vapor emitted from outer wrapping and follow the directions in the display. 3. You don't need to calculate cooking time or power level. • Suppose you attempt to cook ground beef or turkey as patties or in any areas that uses the sensor. After cooking, let stand, covered for...
... Water Size of water. After cooking, let stand, covered 3 to 3 minutes. 3. If additional time is started. When sensor detects the vapor emitted from outer wrapping and follow the directions in the display. 3. You don't need to calculate cooking time or power level. • Suppose you attempt to cook ground beef or turkey as patties or in any areas that uses the sensor. After cooking, let stand, covered for...

Complete Owner's Guide (English)
Page 16
... the START enter pad. Press number 3 to increase quantity. Cover with wax paper. AUTO COOKING AUTO COOKING consists of the dish, uncooked portion to the outside, close the door. 6. Press the power level pad once or twice before cooking is very important to choose a large container because microwave cooking of wheat, farina or wheatena. Midway through the cooking, audible signals will be programmed with Less Time Adjustment...
... the START enter pad. Press number 3 to increase quantity. Cover with wax paper. AUTO COOKING AUTO COOKING consists of the dish, uncooked portion to the outside, close the door. 6. Press the power level pad once or twice before cooking is very important to choose a large container because microwave cooking of wheat, farina or wheatena. Midway through the cooking, audible signals will be programmed with Less Time Adjustment...
Complete Owner's Guide (English)
Page 25
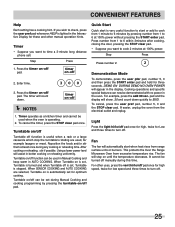
... be used , for low speed and three times to cook 2 minutes at 100% power. Cooking operations and specific special features can be set , Turntable is set during Manual Cooking and cooking programming by pressing number from 1 minute to 6 at least once during this time. The fan will appear in the oven. After cooking or reheating, stir if possible. Turntable on -off 2. When SENSOR COOKING and AUTO COOKING are used when the oven is lighted in better cooking or...
... be used , for low speed and three times to cook 2 minutes at 100% power. Cooking operations and specific special features can be set , Turntable is set during Manual Cooking and cooking programming by pressing number from 1 minute to 6 at least once during this time. The fan will appear in the oven. After cooking or reheating, stir if possible. Turntable on -off 2. When SENSOR COOKING and AUTO COOKING are used when the oven is lighted in better cooking or...
Complete Owner's Guide (English)
Page 26
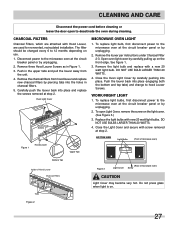
.... Metal parts will react with setting Child Lock before cleaning or leave the door open to remove any food spatters from mica so requires special care. DO NOT REMOVE THE WAVEGUIDE COVER. ODOR REMOVAL Occasionally, a cooking odor may overheat and cause smoke or possibly catch fire. GREASE FILTERS Filters should be cleaned at least once a month. Pull down slightly on the ceiling in the microwave oven cavity. Clean the outside surface is located on...
.... Metal parts will react with setting Child Lock before cleaning or leave the door open to remove any food spatters from mica so requires special care. DO NOT REMOVE THE WAVEGUIDE COVER. ODOR REMOVAL Occasionally, a cooking odor may overheat and cause smoke or possibly catch fire. GREASE FILTERS Filters should be cleaned at least once a month. Pull down slightly on the ceiling in the microwave oven cavity. Clean the outside surface is located on...
Complete Owner's Guide (English)
Page 27
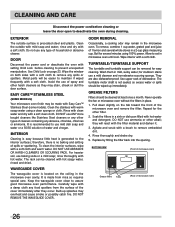
... 20 watt light bulbs. CLEANING AND CARE Disconnect the power cord before cleaning or leave the door open Light Cover, remove the screw on . Remove the louver per instructions under Charcoal Filter 2-3. DO NOT USE BULBS LARGER THAN 20 WATTS. 4. Do not press glass when light is on the light cover. (See Figure 3.) 3. Push the louver back into place and replace the screws removed at the circuit breaker panel or by carefully pulling up on use. 1. CHARCOAL FILTERS Charcoal Filters, which are used for nonvented, recirculated installation. Figure...
... 20 watt light bulbs. CLEANING AND CARE Disconnect the power cord before cleaning or leave the door open Light Cover, remove the screw on . Remove the louver per instructions under Charcoal Filter 2-3. DO NOT USE BULBS LARGER THAN 20 WATTS. 4. Do not press glass when light is on the light cover. (See Figure 3.) 3. Push the louver back into place and replace the screws removed at the circuit breaker panel or by carefully pulling up on use. 1. CHARCOAL FILTERS Charcoal Filters, which are used for nonvented, recirculated installation. Figure...
Complete Owner's Guide (English)
Page 28
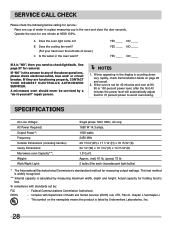
... ____ If A is calculated by a "do-it-yourself" repair person. See page 27 for measuring output wattage. If time appearing in the display is listed by : FCC - SPECIFICATIONS AC Line Voltage: AC Power Required: Output Power*: Frequency: Outside Dimensions (including handle): Cavity Dimensions: Microwave oven Capacity**: Weight: Work/Night Light: Single phase 120V, 60Hz, AC only 1650 W 14.3 amps. 1000 watts 2450 MHz 29 15/16"(W) x 17 1/16"(H) x 18...
... ____ If A is calculated by a "do-it-yourself" repair person. See page 27 for measuring output wattage. If time appearing in the display is listed by : FCC - SPECIFICATIONS AC Line Voltage: AC Power Required: Output Power*: Frequency: Outside Dimensions (including handle): Cavity Dimensions: Microwave oven Capacity**: Weight: Work/Night Light: Single phase 120V, 60Hz, AC only 1650 W 14.3 amps. 1000 watts 2450 MHz 29 15/16"(W) x 17 1/16"(H) x 18...
Complete Owner's Guide (English)
Page 29
... be required. Service calls which are not a part of trim, cupboards, shelves, etc., which do not involve malfunction or defects in accordance with original serial numbers that prove to change or add to repair or replace appliance light bulbs, air filters, water filters, other consumables, or knobs, handles, or other appropriate payment record to another party or removed outside the USA...
... be required. Service calls which are not a part of trim, cupboards, shelves, etc., which do not involve malfunction or defects in accordance with original serial numbers that prove to change or add to repair or replace appliance light bulbs, air filters, water filters, other consumables, or knobs, handles, or other appropriate payment record to another party or removed outside the USA...

