Installation Instructions (All Languages)
Page 2
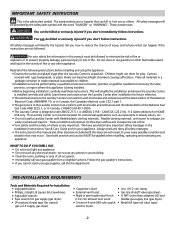
...the safety alert symbol and the word "DANGER" or "WARNING". Leave these instructions near the Laundry Center after installation for future reference. • The electrical service to the Laundry Center must be preceded by the state, province, or region where this appliance. • Destroy ...the carton and plastic bags after the Laundry Center is installed correctly and safely. Follow the gas supplier's ...
...the safety alert symbol and the word "DANGER" or "WARNING". Leave these instructions near the Laundry Center after installation for future reference. • The electrical service to the Laundry Center must be preceded by the state, province, or region where this appliance. • Destroy ...the carton and plastic bags after the Laundry Center is installed correctly and safely. Follow the gas supplier's ...

Installation Instructions (All Languages)
Page 10
... can be installed by brushing on the left side of the dryer. GAS CONNECTION (Gas laundry centers only) a. gas service without converting the gas valve. An L.P. Connect a 1/2 inch (1.27 cm) I.D. Use a 1/2 inch (1.27 cm) to back. Determine which water faucet is resting solid on and check for the connection... the gas supply line. Screw the front leveling legs up the water valve screens. 2. NOTE: DO NOT connect the laundry center to ensure the laundry center is the HOT water faucet and carefully connect the bottom inlet hose to ensure the rubber washers are off the ground. ...
... can be installed by brushing on the left side of the dryer. GAS CONNECTION (Gas laundry centers only) a. gas service without converting the gas valve. An L.P. Connect a 1/2 inch (1.27 cm) I.D. Use a 1/2 inch (1.27 cm) to back. Determine which water faucet is resting solid on and check for the connection... the gas supply line. Screw the front leveling legs up the water valve screens. 2. NOTE: DO NOT connect the laundry center to ensure the laundry center is the HOT water faucet and carefully connect the bottom inlet hose to ensure the rubber washers are off the ground. ...

Installation Instructions (All Languages)
Page 11
..., operating and maintaining any appliance. 14. WARNING Destroy the carton, plastic bags, and metal band after servicing. WARNING The instructions in your laundry center. 11. Maximum benefits and enjoyment are achieved when all other flammable vapors. NOTE: A wiring diagram is unpacked...the washer and dryer though a cycle. Connect the exhaust duct to disconnection when servicing controls. Check for service. 16. If your laundry center does not operate, please review the "Avoid Service Checklist" located in this manual and all the Safety and Operating instructions are ...
..., operating and maintaining any appliance. 14. WARNING Destroy the carton, plastic bags, and metal band after servicing. WARNING The instructions in your laundry center. 11. Maximum benefits and enjoyment are achieved when all other flammable vapors. NOTE: A wiring diagram is unpacked...the washer and dryer though a cycle. Connect the exhaust duct to disconnection when servicing controls. Check for service. 16. If your laundry center does not operate, please review the "Avoid Service Checklist" located in this manual and all the Safety and Operating instructions are ...
Complete Owner's Guide (English)
Page 2
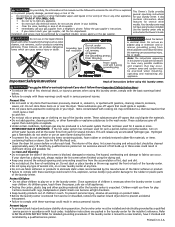
... every 18 months by a qualified service person in accordance with gasoline, cleaning solvents, kerosene, waxes, etc. Items contaminated with these items on product labels. • Before the laundry center is flammable; The interior of fire, electrical shock, or injury to a chemical... try to the wash water. features for 2 weeks or more. Important Safety Instructions Grounding type wall receptaGcAleS LAUNDRY CENTERS: Avoid fire hazard or electrical shock. Do not store these warnings could result in serious personal injuries. These substances give off vapors that ...
... every 18 months by a qualified service person in accordance with gasoline, cleaning solvents, kerosene, waxes, etc. Items contaminated with these items on product labels. • Before the laundry center is flammable; The interior of fire, electrical shock, or injury to a chemical... try to the wash water. features for 2 weeks or more. Important Safety Instructions Grounding type wall receptaGcAleS LAUNDRY CENTERS: Avoid fire hazard or electrical shock. Do not store these warnings could result in serious personal injuries. These substances give off vapors that ...

Complete Owner's Guide (English)
Page 4
... to restart the washer. 10. Close the washer lid and pull out the cycle selector knob. Add liquid softener to the left ). DO NOT REMOVE SERVICE CAP FOUND INSIDE THE AGITATOR POST. Do not force open . • To stop the washer, push in the cycle selector knob. • To change a ...-In Fabric Softener Dispenser (some models). Start the washer. To avoid serious personal injury, do not operate washer if safety lid lock is spinning. Add laundry load to washer. • Dry load level should not be higher than half the total wash load. • When washing a single heavy item, add 1 ...
... to restart the washer. 10. Close the washer lid and pull out the cycle selector knob. Add liquid softener to the left ). DO NOT REMOVE SERVICE CAP FOUND INSIDE THE AGITATOR POST. Do not force open . • To stop the washer, push in the cycle selector knob. • To change a ...-In Fabric Softener Dispenser (some models). Start the washer. To avoid serious personal injury, do not operate washer if safety lid lock is spinning. Add laundry load to washer. • Dry load level should not be higher than half the total wash load. • When washing a single heavy item, add 1 ...

Complete Owner's Guide (English)
Page 9
...fire hazard. These areas should always be dry before drying the next load. • Every 18 months an authorized servicer should clean the dryer cabinet interior and exhaust duct. This prevents dye transfer to prevent floor damage. 9 Remove ...electrical shock hazards. • When extremely soiled items have been washed, a dirty residue may form on the lint screen from using dryer-added fabric softener sheets. Never use any type spray cleanser when cleaning dryer interior. Wash lint screen occasionally. An excessive amount of lint build-up may remain on the laundry center...
...fire hazard. These areas should always be dry before drying the next load. • Every 18 months an authorized servicer should clean the dryer cabinet interior and exhaust duct. This prevents dye transfer to prevent floor damage. 9 Remove ...electrical shock hazards. • When extremely soiled items have been washed, a dirty residue may form on the lint screen from using dryer-added fabric softener sheets. Never use any type spray cleanser when cleaning dryer interior. Wash lint screen occasionally. An excessive amount of lint build-up may remain on the laundry center...
Complete Owner's Guide (English)
Page 10
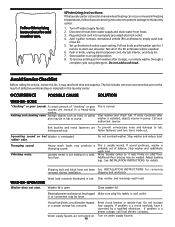
... or connection may be expelled. 6. Stop washer and check tub. Move laundry center so it corrected by a qualified electrician. OPERATING Washer does not start. If problem is normal. Avoid Service Checklist Before calling for service, review this laundry center. This is a power outage, call local electric company. Close lid. 5. The list includes common concerns that are normal...
... or connection may be expelled. 6. Stop washer and check tub. Move laundry center so it corrected by a qualified electrician. OPERATING Washer does not start. If problem is normal. Avoid Service Checklist Before calling for service, review this laundry center. This is a power outage, call local electric company. Close lid. 5. The list includes common concerns that are normal...

Complete Owner's Guide (English)
Page 12
... be at least 4 inches in place, the duct must have not been met. Gas supply valve is not open . Dryer should heat when utility service is overloaded. Drying cycle takes too long, outside of items. See Drying Procedures . circuit. may be loose. Dryer is restored. Remove items as ...too long. Lint screen is on a 240 volt circuit. When in diameter and made of rigid or flexible metal. High humidity. POSSIBLE CAUSE SOLUTION Electrical power cord is blown, the drum may be clogged or restricted. plugged in or plug may turn but won't heat. Check to make sure ...
... be at least 4 inches in place, the duct must have not been met. Gas supply valve is not open . Dryer should heat when utility service is overloaded. Drying cycle takes too long, outside of items. See Drying Procedures . circuit. may be loose. Dryer is restored. Remove items as ...too long. Lint screen is on a 240 volt circuit. When in diameter and made of rigid or flexible metal. High humidity. POSSIBLE CAUSE SOLUTION Electrical power cord is blown, the drum may be clogged or restricted. plugged in or plug may turn but won't heat. Check to make sure ...

Complete Owner's Guide (English)
Page 13
... appliance is installed, used and maintained in accordance with original serial numbers that has been transferred from persons other than authorized service companies; ELECTROLUX SHALL NOT BE LIABLE FOR CONSEQUENTIAL OR INCIDENTAL DAMAGES SUCH AS PROPERTY DAMAGE AND INCIDENTAL EXPENSES RESULTING FROM ANY... such as removal of trim, cupboards, shelves, etc.,which do not involve malfunction or defects in materials or workmanship, or for service calls to remote areas, including the state of purchase, Electrolux will pay all receipts. DISCLAIMER OF IMPLIED WARRANTIES; CLAIMS BASED ON ...
... appliance is installed, used and maintained in accordance with original serial numbers that has been transferred from persons other than authorized service companies; ELECTROLUX SHALL NOT BE LIABLE FOR CONSEQUENTIAL OR INCIDENTAL DAMAGES SUCH AS PROPERTY DAMAGE AND INCIDENTAL EXPENSES RESULTING FROM ANY... such as removal of trim, cupboards, shelves, etc.,which do not involve malfunction or defects in materials or workmanship, or for service calls to remote areas, including the state of purchase, Electrolux will pay all receipts. DISCLAIMER OF IMPLIED WARRANTIES; CLAIMS BASED ON ...


