

User Manual
Page 3
Installing and Replacing Paper page 1-7 How to correct problems. i Solving Problems page 3-1 How to load or change the paper roll. Setting Up the Printer page 1-1 How to order paper. Printer Parts and Labels inside front cover Ordering Paper page ix Where to set up the printer. For a complete listing of this Operator's Manual. Quick Reference This Quick Reference will direct you to key areas of topics, see the Contents.
Installing and Replacing Paper page 1-7 How to correct problems. i Solving Problems page 3-1 How to load or change the paper roll. Setting Up the Printer page 1-1 How to order paper. Printer Parts and Labels inside front cover Ordering Paper page ix Where to set up the printer. For a complete listing of this Operator's Manual. Quick Reference This Quick Reference will direct you to key areas of topics, see the Contents.
User Manual
Page 9
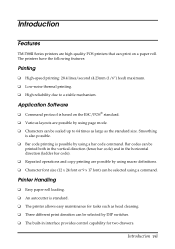
Printer Handling ❏ Easy paper roll loading. ❏ An autocutter is standard. ❏ The printer allows easy maintenance for two drawers. Bar codes can be printed both in the vertical direction (fence bar code) and in the horizontal direction (ladder bar code). ❏... a paper roll. The printers have the following features: Printing ❏ High-speed printing: 28.4 lines/second (4.23mm (1/6") feed) maximum. ❏ Low-noise thermal printing. ❏ High reliability due to 64 times as large as the standard size. Introduction Features TM-T88II Series printers are ...
Printer Handling ❏ Easy paper roll loading. ❏ An autocutter is standard. ❏ The printer allows easy maintenance for two drawers. Bar codes can be printed both in the vertical direction (fence bar code) and in the horizontal direction (ladder bar code). ❏... a paper roll. The printers have the following features: Printing ❏ High-speed printing: 28.4 lines/second (4.23mm (1/6") feed) maximum. ❏ Low-noise thermal printing. ❏ High reliability due to 64 times as large as the standard size. Introduction Features TM-T88II Series printers are ...

User Manual
Page 11
Balakong Industrial Area, 43200 Cheras. Cheras Jaya,. Specified Thermal Roll Paper: NTP080-80 In Japan: Nakagawa Seisakujo 2-5-21 Nishiki-Cho Warabi-Shi Saitama-Ken 335 Japan In U.S.A.: Tel: (048) 444-8211 Fax: (048) 443-6652 Nakagawa ...: (510) 782-7124 Nakagawa Mfg (Europe) GmbH. Selangor Darul Ehsan, Malaysia Tel: 03-9047896, 9047900, 9047691 Fax: 03-9047889 Introduction ix Ordering Paper and Supplies You can order thermal roll paper from the supplier in your area. Mfg (Malaysia) SDN BHD Lot 19-11, Bersatu Industrial Complexs, Jalan Satu, Kaw Per. Krützpoort...
Balakong Industrial Area, 43200 Cheras. Cheras Jaya,. Specified Thermal Roll Paper: NTP080-80 In Japan: Nakagawa Seisakujo 2-5-21 Nishiki-Cho Warabi-Shi Saitama-Ken 335 Japan In U.S.A.: Tel: (048) 444-8211 Fax: (048) 443-6652 Nakagawa ...: (510) 782-7124 Nakagawa Mfg (Europe) GmbH. Selangor Darul Ehsan, Malaysia Tel: 03-9047896, 9047900, 9047691 Fax: 03-9047889 Introduction ix Ordering Paper and Supplies You can order thermal roll paper from the supplier in your area. Mfg (Malaysia) SDN BHD Lot 19-11, Bersatu Industrial Complexs, Jalan Satu, Kaw Per. Krützpoort...

User Manual
Page 13
Contents Chapter 1 Setting Up the Printer Unpacking 1-1 Connecting the Cables and Grounding the Printer 1-2 Connecting the Drawer 1-3 Grounding the Printer 1-5 Connecting the Power Supply 1-5 Installing or Replacing the Paper Roll 1-7 Using the Power Switch Cover 1-10 Self Test 1-10 Running the self test 1-10 Adjustments and Settings 1-12 Chapter 2 Using the Printer Operating the Control Panel 2-1 Control...
Contents Chapter 1 Setting Up the Printer Unpacking 1-1 Connecting the Cables and Grounding the Printer 1-2 Connecting the Drawer 1-3 Grounding the Printer 1-5 Connecting the Power Supply 1-5 Installing or Replacing the Paper Roll 1-7 Using the Power Switch Cover 1-10 Self Test 1-10 Running the self test 1-10 Adjustments and Settings 1-12 Chapter 2 Using the Printer Operating the Control Panel 2-1 Control...

User Manual
Page 15
Printer FOEEUPDTAPEERRRPOORWER Paper roll Hexagonal Switch cover lock screws (only for the serial interface) See the note on page 1-3 for the standard specification printer. Setting Up the Printer 1-1 Chapter 1 Setting Up the Printer Unpacking The illustration below shows the items included for information about the hexagonal lock screws.
Printer FOEEUPDTAPEERRRPOORWER Paper roll Hexagonal Switch cover lock screws (only for the serial interface) See the note on page 1-3 for the standard specification printer. Setting Up the Printer 1-1 Chapter 1 Setting Up the Printer Unpacking The illustration below shows the items included for information about the hexagonal lock screws.

User Manual
Page 21
Installing or Replacing the Paper Roll Note: Be sure to the core, because the printer cannot detect the paper end correctly. 1. FFEOEEEUPDDTAPEERRRPOORWER 3. If the cover-open button will not open button. Remove the used paper roll core, if there is not receiving data; Make sure the printer is one. Open the paper roll cover by pressing the cover-open the cover, see page 3-4 or 3-6 in Troubleshooting. otherwise, data may be lost. 2. Setting Up the Printer 1-7 Do not use paper rolls that have the paper glued to use paper rolls that meet the specifications.
Installing or Replacing the Paper Roll Note: Be sure to the core, because the printer cannot detect the paper end correctly. 1. FFEOEEEUPDDTAPEERRRPOORWER 3. If the cover-open button will not open button. Remove the used paper roll core, if there is not receiving data; Make sure the printer is one. Open the paper roll cover by pressing the cover-open the cover, see page 3-4 or 3-6 in Troubleshooting. otherwise, data may be lost. 2. Setting Up the Printer 1-7 Do not use paper rolls that have the paper glued to use paper rolls that meet the specifications.

User Manual
Page 22
Insert the paper roll as shown. FOEEUPDTAPEERRRPOORWER 5. Be sure to note the correct direction that the paper comes off the roll. 1-8 Setting Up the Printer 4.
Insert the paper roll as shown. FOEEUPDTAPEERRRPOORWER 5. Be sure to note the correct direction that the paper comes off the roll. 1-8 Setting Up the Printer 4.
User Manual
Page 26
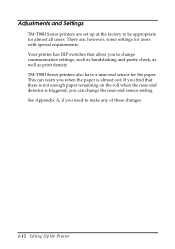
... triggered, you to change the near -end detector is almost out. Your printer has DIP switches that there is not enough paper remaining on the roll when the near -end sensor setting. Adjustments and Settings TM-T88II Series printers are , however, some settings for users with special requirements. If you find that allow you can warn...
... triggered, you to change the near -end detector is almost out. Your printer has DIP switches that there is not enough paper remaining on the roll when the near -end sensor setting. Adjustments and Settings TM-T88II Series printers are , however, some settings for users with special requirements. If you find that allow you can warn...

User Manual
Page 28
PAPER OUT This light indicates the near end of the paper roll. Install a new paper roll, and the printer will continue printing. When the light blinks, it indicates the self-test printing standby state or macro execution standby state when the macro execution command is on . ERROR This indicates an error. See Chapter 3 for information on what to do when this light comes on . Panel lights POWER The POWER light is on whenever the printer is used. 2-2 Using the Printer
PAPER OUT This light indicates the near end of the paper roll. Install a new paper roll, and the printer will continue printing. When the light blinks, it indicates the self-test printing standby state or macro execution standby state when the macro execution command is on . ERROR This indicates an error. See Chapter 3 for information on what to do when this light comes on . Panel lights POWER The POWER light is on whenever the printer is used. 2-2 Using the Printer

User Manual
Page 29
... power outlet. First, turn off , make sure the printer cover is at or near the end. General problems The lights on the control panel do not come on , the paper roll is not installed or is properly closed. See Chapter 1 for a paper jam. (See the paper jam description on (not blinking) and nothing is on...
... power outlet. First, turn off , make sure the printer cover is at or near the end. General problems The lights on the control panel do not come on , the paper roll is not installed or is properly closed. See Chapter 1 for a paper jam. (See the paper jam description on (not blinking) and nothing is on...

User Manual
Page 32
To clear a paper jam, follow the steps below . Remove the jammed paper, put the roll back in the automatic cutter and the printer cover cannot be opened, open the cover. 2. FFEOEEEUPDDTAPEERRRPOORWER 3-4 Troubleshooting If paper is caught in the printer, and close the cover. 3. Turn the printer off and press the cover open button to open the cutter cover as shown below : 1.
To clear a paper jam, follow the steps below . Remove the jammed paper, put the roll back in the automatic cutter and the printer cover cannot be opened, open the cover. 2. FFEOEEEUPDDTAPEERRRPOORWER 3-4 Troubleshooting If paper is caught in the printer, and close the cover. 3. Turn the printer off and press the cover open button to open the cutter cover as shown below : 1.

User Manual
Page 39
... Line * Space between characters is not included * Characters can be pasted to 64 times as large as the standard sizes. Paper Specifications Paper roll (single-ply): Size: Maximum outside diameter: Paper roll spool diameter: Take up paper roll width: Width: 79.5 mm ± 0.5 mm (3.13" ± 0.02") 83 mm (3.27") Inside: 12 mm (0.47") Outside: 18 mm...
... Line * Space between characters is not included * Characters can be pasted to 64 times as large as the standard sizes. Paper Specifications Paper roll (single-ply): Size: Maximum outside diameter: Paper roll spool diameter: Take up paper roll width: Width: 79.5 mm ± 0.5 mm (3.13" ± 0.02") 83 mm (3.27") Inside: 12 mm (0.47") Outside: 18 mm...

User Manual
Page 49
...paper roll with a core with an outside diameter of the paper roll. Open the printer cover, and remove the paper roll. 2. Loosen the adjusting screw and move the tab up to measure the exact length of the paper left , change to be sure that the detecting lever moves freely. 4. Tab Screw FOEEUPDTAPEERRRPOORWER 3. DIP Switch and Paper... below . 1. Adjusting the Paper Near End Detector The paper near end detector detects when paper is triggered. Of the two settings, the factory setting (lower) leaves the least amount of paper on a paper roll core with an outside diameter ...
...paper roll with a core with an outside diameter of the paper roll. Open the printer cover, and remove the paper roll. 2. Loosen the adjusting screw and move the tab up to measure the exact length of the paper left , change to be sure that the detecting lever moves freely. 4. Tab Screw FOEEUPDTAPEERRRPOORWER 3. DIP Switch and Paper... below . 1. Adjusting the Paper Near End Detector The paper near end detector detects when paper is triggered. Of the two settings, the factory setting (lower) leaves the least amount of paper on a paper roll core with an outside diameter ...

Technical Reference
Page 6
... off before touching them. ❏ To avoid injury, take care not to the printer is installed. ❏ Do not open the roll paper cover without taking the necessary precautions, as this equipment. Modular Connectors The printer uses the modular connectors specifically designed for supplying ink to insert fingers or any part ... iv Rev. A Inserting your fingers inside the ink cartridge holder. ❏ Do not place heavy objects on top of the hand in the roll paper opening where the manual cutter is located inside the ink cartridge holder may become hot during operation.
... off before touching them. ❏ To avoid injury, take care not to the printer is installed. ❏ Do not open the roll paper cover without taking the necessary precautions, as this equipment. Modular Connectors The printer uses the modular connectors specifically designed for supplying ink to insert fingers or any part ... iv Rev. A Inserting your fingers inside the ink cartridge holder. ❏ Do not place heavy objects on top of the hand in the roll paper opening where the manual cutter is located inside the ink cartridge holder may become hot during operation.
Technical Reference
Page 9
... 1-1 Accessories 1-1 Options 1-1 Consumable products 1-1 TM-T88II/TM-88III Comparison Table 1-2 Part Names and Basic Operation 1-3 Part Names 1-3 Control Panel 1-3 Power Switch 1-4 Connectors 1-5 Handling the Printer 1-5 Installing and Replacing Roll Paper 1-6 Power Switch Cover 1-7 Shipping Procedures 1-8 Chapter 2 Setup Installing the Printer 2-2 Precautions for Horizontal Installation 2-2 Precautions for... 2-16 Chapter 3 Application Development Information Introducing the Control Methods 3-1 Windows Driver (EPSON Advanced Printer Driver 3-1 EPSON OPOS ADK 3-3 Contents vii
... 1-1 Accessories 1-1 Options 1-1 Consumable products 1-1 TM-T88II/TM-88III Comparison Table 1-2 Part Names and Basic Operation 1-3 Part Names 1-3 Control Panel 1-3 Power Switch 1-4 Connectors 1-5 Handling the Printer 1-5 Installing and Replacing Roll Paper 1-6 Power Switch Cover 1-7 Shipping Procedures 1-8 Chapter 2 Setup Installing the Printer 2-2 Precautions for Horizontal Installation 2-2 Precautions for... 2-16 Chapter 3 Application Development Information Introducing the Control Methods 3-1 Windows Driver (EPSON Advanced Printer Driver 3-1 EPSON OPOS ADK 3-3 Contents vii
Technical Reference
Page 10
... Specifications (TM-T88II/TM-T88III 5-7 Appendix A Interfaces and Connectors RS-232 Serial Interface A-1 Interface Board Specifications (RS-232-compliant A-1 Functions of Page 0 in Visual Basic. ESC/POS Commands 3-5 Various Utilities 3-6 Switches and Buttons 3-6 Paper FEED Button 3-6 Panel LEDs and Error Status 3-7 Power LED 3-7 No Roll Paper (PAPER OUT) LED 3-7 Error LED 3-7 Sensors 3-10 Paper Sensors 3-10 Printer Cover Sensor...
... Specifications (TM-T88II/TM-T88III 5-7 Appendix A Interfaces and Connectors RS-232 Serial Interface A-1 Interface Board Specifications (RS-232-compliant A-1 Functions of Page 0 in Visual Basic. ESC/POS Commands 3-5 Various Utilities 3-6 Switches and Buttons 3-6 Paper FEED Button 3-6 Panel LEDs and Error Status 3-7 Power LED 3-7 No Roll Paper (PAPER OUT) LED 3-7 Error LED 3-7 Sensors 3-10 Paper Sensors 3-10 Printer Cover Sensor...
Technical Reference
Page 13
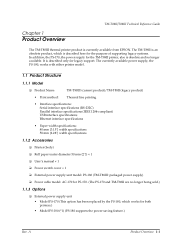
...; Product Name TM-T88III (current product)/TM-T88II (legacy product) • Print method: Thermal line printing • Interface specifications: Serial interface specifications (RS-232C) Parallel interface specifications (IEEE 1284-compliant) USB interface specifications Ethernet interface specifications • Paper width specifications: 80 mm {3.15"} width specifications 58 mm {2.28"} width specifications 1.1.2 Accessories ❏ Printer (body) ❏ Roll paper (outer...
...; Product Name TM-T88III (current product)/TM-T88II (legacy product) • Print method: Thermal line printing • Interface specifications: Serial interface specifications (RS-232C) Parallel interface specifications (IEEE 1284-compliant) USB interface specifications Ethernet interface specifications • Paper width specifications: 80 mm {3.15"} width specifications 58 mm {2.28"} width specifications 1.1.2 Accessories ❏ Printer (body) ❏ Roll paper (outer...
Technical Reference
Page 16
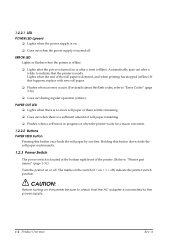
.... 1.2.3 Power Switch The power switch is located at the bottom right front of roll paper remaining. ❏ Flashes when a self-test is in progress or when the printer waits for a macro execution. 1.2.2.2 Buttons PAPER FEED button Pressing this happens, replace with new roll paper. ❏ Flashes when an error occurs. (For details about the flash codes...
.... 1.2.3 Power Switch The power switch is located at the bottom right front of roll paper remaining. ❏ Flashes when a self-test is in progress or when the printer waits for a macro execution. 1.2.2.2 Buttons PAPER FEED button Pressing this happens, replace with new roll paper. ❏ Flashes when an error occurs. (For details about the flash codes...
Technical Reference
Page 17
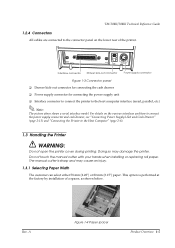
...with your hands when installing or replacing roll paper. This option is sharp and may damage the printer. Doing so may cause an injury. 1.3.1 Selecting Paper Width The customer can select either 58 mm {2.28"} or 80 mm {3.15"} paper. The manual cutter is performed at the... unit ❏ Interface connector to connect the printer to the Host Computer" (page 2-8). 1.3 Handling the Printer WARNING: Do not open the printer cover during printing. For details on the lower rear of a spacer, as shown below. Rev. TM-T88II/T88III Technical Reference Guide 1.2.4 Connectors All cables ...
...with your hands when installing or replacing roll paper. This option is sharp and may damage the printer. Doing so may cause an injury. 1.3.1 Selecting Paper Width The customer can select either 58 mm {2.28"} or 80 mm {3.15"} paper. The manual cutter is performed at the... unit ❏ Interface connector to connect the printer to the Host Computer" (page 2-8). 1.3 Handling the Printer WARNING: Do not open the printer cover during printing. For details on the lower rear of a spacer, as shown below. Rev. TM-T88II/T88III Technical Reference Guide 1.2.4 Connectors All cables ...

Technical Reference
Page 27
... the detection lever operates smoothly. 5. Load the roll paper. 6. Rev. Follow the procedure below to detect the remaining paper exactly. Loosen the adjustment screw fastening the detector, and align the upper edge of paper. Open the roll paper cover, and remove the roll paper. 2. TM-T88II/T88III Technical Reference Guide 2.3 Adjusting the Roll Paper Near-End Detector Below are as possible. A Setup...
... the detection lever operates smoothly. 5. Load the roll paper. 6. Rev. Follow the procedure below to detect the remaining paper exactly. Loosen the adjustment screw fastening the detector, and align the upper edge of paper. Open the roll paper cover, and remove the roll paper. 2. TM-T88II/T88III Technical Reference Guide 2.3 Adjusting the Roll Paper Near-End Detector Below are as possible. A Setup...
