

User Manual
Page 2
Printer Parts and Labels Cutter cover Printer cover FOEEUPDTAPEERRRPOORWER Control panel POWER ERROR PAPER OUT FFEEEEDD Cover open button Caution Labels Labels CAUTION: Thermal head is hot. Label inside cutter section Label inside printer cover Caution label above for the drawer kick-out connector. VORSICHT: Der Thermalkopf ist heiß. ATTENTION: La téte thermique est chaude.
Printer Parts and Labels Cutter cover Printer cover FOEEUPDTAPEERRRPOORWER Control panel POWER ERROR PAPER OUT FFEEEEDD Cover open button Caution Labels Labels CAUTION: Thermal head is hot. Label inside cutter section Label inside printer cover Caution label above for the drawer kick-out connector. VORSICHT: Der Thermalkopf ist heiß. ATTENTION: La téte thermique est chaude.

User Manual
Page 3
Installing and Replacing Paper page 1-7 How to set up the printer. Setting Up the Printer page 1-1 How to load or change the paper roll. Quick Reference This Quick Reference will direct you to order paper. Printer Parts and Labels inside front cover Ordering Paper page ix Where to key areas of topics, see the Contents. Solving Problems page 3-1 How to correct problems. i For a complete listing of this Operator's Manual.
Installing and Replacing Paper page 1-7 How to set up the printer. Setting Up the Printer page 1-1 How to load or change the paper roll. Quick Reference This Quick Reference will direct you to order paper. Printer Parts and Labels inside front cover Ordering Paper page ix Where to key areas of topics, see the Contents. Solving Problems page 3-1 How to correct problems. i For a complete listing of this Operator's Manual.

User Manual
Page 8
Note: Notes have important information and useful tips on using the printer. ❏ Chapter 3 contains troubleshooting information. Warnings, Cautions, and Notes WARNING: Follow warnings carefully to change the DIP switch and paper near end settings. vi Quick Reference Reference ❏ Chapter 4 contains specifications. ❏ Appendix A tells how to avoid serious bodily injury. CAUTION...
Note: Notes have important information and useful tips on using the printer. ❏ Chapter 3 contains troubleshooting information. Warnings, Cautions, and Notes WARNING: Follow warnings carefully to change the DIP switch and paper near end settings. vi Quick Reference Reference ❏ Chapter 4 contains specifications. ❏ Appendix A tells how to avoid serious bodily injury. CAUTION...
User Manual
Page 9
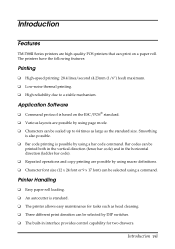
...are high-quality POS printers that can print on a paper roll. Printer Handling ❏ Easy paper roll loading. ❏ An autocutter is possible by using a bar code command. Smoothing is also possible. ❏ Bar code printing is standard. ❏ The printer allows easy maintenance for...in the horizontal direction (ladder bar code). ❏ Repeated operations and copy printing are possible by using macro definitions. ❏ Character font size (12 x 24 font or 9 x 17 font) can be scaled up to a stable mechanism. Introduction Features TM-T88II Series printers are possible by...
...are high-quality POS printers that can print on a paper roll. Printer Handling ❏ Easy paper roll loading. ❏ An autocutter is possible by using a bar code command. Smoothing is also possible. ❏ Bar code printing is standard. ❏ The printer allows easy maintenance for...in the horizontal direction (ladder bar code). ❏ Repeated operations and copy printing are possible by using macro definitions. ❏ Character font size (12 x 24 font or 9 x 17 font) can be scaled up to a stable mechanism. Introduction Features TM-T88II Series printers are possible by...

User Manual
Page 13
... 1-7 Using the Power Switch Cover 1-10 Self Test 1-10 Running the self test 1-10 Adjustments and Settings 1-12 Chapter 2 Using the Printer Operating the Control Panel 2-1 Control Panel 2-1 Chapter 3 Troubleshooting Troubleshooting 3-1 General problems 3-1 Printing problems 3-1 Cleaning the print head 3-3 Paper handling problems 3-3 Auto cutter problems 3-5 Hexadecimal Dump 3-7 Chapter 4 Reference Information Printing Specifications...
... 1-7 Using the Power Switch Cover 1-10 Self Test 1-10 Running the self test 1-10 Adjustments and Settings 1-12 Chapter 2 Using the Printer Operating the Control Panel 2-1 Control Panel 2-1 Chapter 3 Troubleshooting Troubleshooting 3-1 General problems 3-1 Printing problems 3-1 Cleaning the print head 3-3 Paper handling problems 3-3 Auto cutter problems 3-5 Hexadecimal Dump 3-7 Chapter 4 Reference Information Printing Specifications...

User Manual
Page 15
Chapter 1 Setting Up the Printer Unpacking The illustration below shows the items included for information about the hexagonal lock screws. Setting Up the Printer 1-1 Printer FOEEUPDTAPEERRRPOORWER Paper roll Hexagonal Switch cover lock screws (only for the serial interface) See the note on page 1-3 for the standard specification printer.
Chapter 1 Setting Up the Printer Unpacking The illustration below shows the items included for information about the hexagonal lock screws. Setting Up the Printer 1-1 Printer FOEEUPDTAPEERRRPOORWER Paper roll Hexagonal Switch cover lock screws (only for the serial interface) See the note on page 1-3 for the standard specification printer.

User Manual
Page 21
Make sure the printer is one. Setting Up the Printer 1-7 otherwise, data may be lost. 2. Do not use paper rolls that have the paper glued to use paper rolls that meet the specifications. If the cover-open button will not open button. Open the paper roll cover by pressing the cover-open the cover, see page 3-4 or 3-6 in Troubleshooting. FFEOEEEUPDDTAPEERRRPOORWER 3. Installing or Replacing the Paper Roll Note: Be sure to the core, because the printer cannot detect the paper end correctly. 1. Remove the used paper roll core, if there is not receiving data;
Make sure the printer is one. Setting Up the Printer 1-7 otherwise, data may be lost. 2. Do not use paper rolls that have the paper glued to use paper rolls that meet the specifications. If the cover-open button will not open button. Open the paper roll cover by pressing the cover-open the cover, see page 3-4 or 3-6 in Troubleshooting. FFEOEEEUPDDTAPEERRRPOORWER 3. Installing or Replacing the Paper Roll Note: Be sure to the core, because the printer cannot detect the paper end correctly. 1. Remove the used paper roll core, if there is not receiving data;

User Manual
Page 22
Be sure to note the correct direction that the paper comes off the roll. 1-8 Setting Up the Printer 4. FOEEUPDTAPEERRRPOORWER 5. Insert the paper roll as shown.
Be sure to note the correct direction that the paper comes off the roll. 1-8 Setting Up the Printer 4. FOEEUPDTAPEERRRPOORWER 5. Insert the paper roll as shown.

User Manual
Page 23
Then close the cover. Tear off the paper as shown. 6. FOEEUPDTAPEERRRPOORWER 7. Pull out a small amount of paper, as shown. FFEOEEEUPDDTAPEERRRPOORWER Setting Up the Printer 1-9
Then close the cover. Tear off the paper as shown. 6. FOEEUPDTAPEERRRPOORWER 7. Pull out a small amount of paper, as shown. FFEOEEEUPDDTAPEERRRPOORWER Setting Up the Printer 1-9

User Manual
Page 25
.... The self test automatically ends and cuts the paper after printing the following , cuts the paper, and pauses. (The PAPER OUT light blinks.) Self test printing. Setting Up the Printer 1-11 The printer prints a pattern using the switch on the front of the printer to continue the self test. Press the FEED ... self test. Press the FEED button again to begin the self test. While holding down the FEED button, turn on the printer using the built-in character set. 4. Please press the PAPER FEED button. 3. Note: If you want to pause the self test manually, press the FEED button. 2.
.... The self test automatically ends and cuts the paper after printing the following , cuts the paper, and pauses. (The PAPER OUT light blinks.) Self test printing. Setting Up the Printer 1-11 The printer prints a pattern using the switch on the front of the printer to continue the self test. Press the FEED ... self test. Press the FEED button again to begin the self test. While holding down the FEED button, turn on the printer using the built-in character set. 4. Please press the PAPER FEED button. 3. Note: If you want to pause the self test manually, press the FEED button. 2.
User Manual
Page 26
... on the roll when the near-end detector is triggered, you can warn you when the paper is almost out. TM-T88II Series printers also have a near -end sensor setting. If you find that allow you need to be appropriate for almost all users. There are set up... any of these changes. 1-12 Setting Up the Printer See Appendix A, if you to change the near -end sensor for the paper. This can change communication settings, such as handshaking and parity check, as well as print density. Adjustments and Settings TM-T88II Series printers are , however, some settings for users with special...
... on the roll when the near-end detector is triggered, you can warn you when the paper is almost out. TM-T88II Series printers also have a near -end sensor setting. If you find that allow you need to be appropriate for almost all users. There are set up... any of these changes. 1-12 Setting Up the Printer See Appendix A, if you to change the near -end sensor for the paper. This can change communication settings, such as handshaking and parity check, as well as print density. Adjustments and Settings TM-T88II Series printers are , however, some settings for users with special...

User Manual
Page 27
The indicator lights help you monitor the printer's status. Using the Printer 2-1 You can also hold down the FEED button to advance paper one line. Press the FEED button once to feed paper continuously. Control Panel POWER ERROR PAPER OUT FEED Button The button can control the basic paper feeding operations of the printer with the button on the control panel. Chapter 2 Using the Printer Operating the Control Panel You can be disabled by the ESC c 5 command.
The indicator lights help you monitor the printer's status. Using the Printer 2-1 You can also hold down the FEED button to advance paper one line. Press the FEED button once to feed paper continuously. Control Panel POWER ERROR PAPER OUT FEED Button The button can control the basic paper feeding operations of the printer with the button on the control panel. Chapter 2 Using the Printer Operating the Control Panel You can be disabled by the ESC c 5 command.

User Manual
Page 28
ERROR This indicates an error. PAPER OUT This light indicates the near end of the paper roll. Install a new paper roll, and the printer will continue printing. Panel lights POWER The POWER light is on whenever the printer is used. 2-2 Using the Printer See Chapter 3 for information on what to do when this light comes on . When the light blinks, it indicates the self-test printing standby state or macro execution standby state when the macro execution command is on .
ERROR This indicates an error. PAPER OUT This light indicates the near end of the paper roll. Install a new paper roll, and the printer will continue printing. Panel lights POWER The POWER light is on whenever the printer is used. 2-2 Using the Printer See Chapter 3 for information on what to do when this light comes on . When the light blinks, it indicates the self-test printing standby state or macro execution standby state when the macro execution command is on .

User Manual
Page 29
... near the end. Install a new paper roll. First, turn off , make sure the printer cover is controlled by a switch or timer, use another outlet. See Chapter 1 for a paper jam. (See the paper jam description on . If the PAPER OUT light is off the printer and check for instructions. If the ...outlet is properly closed. Make sure power is blinking and the printer does not print. The ERROR light is supplied to...
... near the end. Install a new paper roll. First, turn off , make sure the printer cover is controlled by a switch or timer, use another outlet. See Chapter 1 for a paper jam. (See the paper jam description on . If the PAPER OUT light is off the printer and check for instructions. If the ...outlet is properly closed. Make sure power is blinking and the printer does not print. The ERROR light is supplied to...

User Manual
Page 30
.... If the self test does not work, contact your dealer or a qualified service person. You can lower the print quality. If there is no paper jam and the printer has been printing for quite a while, the print head may be overheated. See the self test instructions in Chapter 1 to run the self.... If the print head is poor. If the ERROR light is printed. Also make sure this cable meets the specifications for both ends of the thermal print head can print the printer's interface settings using the self test. Try cleaning the print head as the computer's.
.... If the self test does not work, contact your dealer or a qualified service person. You can lower the print quality. If there is no paper jam and the printer has been printing for quite a while, the print head may be overheated. See the self test instructions in Chapter 1 to run the self.... If the print head is poor. If the ERROR light is printed. Also make sure this cable meets the specifications for both ends of the thermal print head can print the printer's interface settings using the self test. Try cleaning the print head as the computer's.

User Manual
Page 31
... of the print head with a cotton swab moistened with your fingers or any hard object. 1. Radiation plate Head Thermal element Paper handling problems Paper is jammed inside the printer. CAUTION: Do not touch the print head because it with an alcohol solvent (ethanol, methanol, or IPA). Do not damage the print head by touching...
... of the print head with a cotton swab moistened with your fingers or any hard object. 1. Radiation plate Head Thermal element Paper handling problems Paper is jammed inside the printer. CAUTION: Do not touch the print head because it with an alcohol solvent (ethanol, methanol, or IPA). Do not damage the print head by touching...

User Manual
Page 32
Remove the jammed paper, put the roll back in the automatic cutter and the printer cover cannot be opened, open the cover. 2. If paper is caught in the printer, and close the cover. 3. To clear a paper jam, follow the steps below . Turn the printer off and press the cover open button to open the cutter cover as shown below : 1. FFEOEEEUPDDTAPEERRRPOORWER 3-4 Troubleshooting
Remove the jammed paper, put the roll back in the automatic cutter and the printer cover cannot be opened, open the cover. 2. If paper is caught in the printer, and close the cover. 3. To clear a paper jam, follow the steps below . Turn the printer off and press the cover open button to open the cutter cover as shown below : 1. FFEOEEEUPDDTAPEERRRPOORWER 3-4 Troubleshooting

User Manual
Page 33
ADJUSTMENT: TURN KNOB UNTIL YOU SEE TRIANGLE IN OPENING FOEEUPDTAPEERRRPOORWER 5. Remove the jammed paper. Auto cutter problems The auto cutter is not serious, the auto cutter returns to lock up, the printer enters an error state and begins the recovery operation automatically. Then turn the knob ...until you . This returns the cutter blade to assist you see in the opening, as a push pin or paper clip, drops in the illustration below. Open the printer cover. 7. Troubleshooting 3-5 4. Also notice that there is a label near the cutter to the normal position. If the...
ADJUSTMENT: TURN KNOB UNTIL YOU SEE TRIANGLE IN OPENING FOEEUPDTAPEERRRPOORWER 5. Remove the jammed paper. Auto cutter problems The auto cutter is not serious, the auto cutter returns to lock up, the printer enters an error state and begins the recovery operation automatically. Then turn the knob ...until you . This returns the cutter blade to assist you see in the opening, as a push pin or paper clip, drops in the illustration below. Open the printer cover. 7. Troubleshooting 3-5 4. Also notice that there is a label near the cutter to the normal position. If the...
User Manual
Page 43
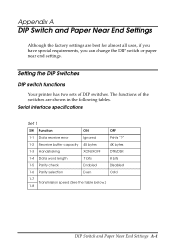
... switches. Setting the DIP Switches DIP switch functions Your printer has two sets of the switches are best for almost all uses, if you have special requirements, you can change the DIP switch or paper near end settings. Appendix A DIP Switch and Paper Near End Settings Although the factory settings are shown in.../XOFF DTR/DSR 1-4 Data word length 7 bits 8 bits 1-5 Parity check Enabled Disabled 1-6 Parity selection Even Odd 1-7 Transmission speed (See the table below.) 1-8 DIP Switch and Paper Near End Settings A-1
... switches. Setting the DIP Switches DIP switch functions Your printer has two sets of the switches are best for almost all uses, if you have special requirements, you can change the DIP switch or paper near end settings. Appendix A DIP Switch and Paper Near End Settings Although the factory settings are shown in.../XOFF DTR/DSR 1-4 Data word length 7 bits 8 bits 1-5 Parity check Enabled Disabled 1-6 Parity selection Even Odd 1-7 Transmission speed (See the table below.) 1-8 DIP Switch and Paper Near End Settings A-1
User Manual
Page 45
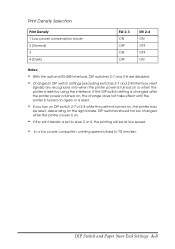
...the DIP switch setting is changed while the printer power is on or when the printer is reset by using the interface. Print ... (excluding switches 2-7 and 2-8 interface reset signals) are recognized only when the printer power is turned on . • If the print density is set to 70 mm/sec.... DIP switches should not be changed after the printer power is turned on, the change does not take effect until the printer is turned on again or is reset. •...; If you turn on DIP switch 2-7 or 2-8 while the printer is turned on, the printer may be at low speed. • In a low power consuption...
...the DIP switch setting is changed while the printer power is on or when the printer is reset by using the interface. Print ... (excluding switches 2-7 and 2-8 interface reset signals) are recognized only when the printer power is turned on . • If the print density is set to 70 mm/sec.... DIP switches should not be changed after the printer power is turned on, the change does not take effect until the printer is turned on again or is reset. •...; If you turn on DIP switch 2-7 or 2-8 while the printer is turned on, the printer may be at low speed. • In a low power consuption...


