

User Manual
Page 2
Label inside cutter section Label inside printer cover Caution label above for the drawer kick-out connector. ATTENTION: La téte thermique est chaude. Printer Parts and Labels Cutter cover Printer cover FOEEUPDTAPEERRRPOORWER Control panel POWER ERROR PAPER OUT FFEEEEDD Cover open button Caution Labels Labels CAUTION: Thermal head is hot. VORSICHT: Der Thermalkopf ist heiß.
Label inside cutter section Label inside printer cover Caution label above for the drawer kick-out connector. ATTENTION: La téte thermique est chaude. Printer Parts and Labels Cutter cover Printer cover FOEEUPDTAPEERRRPOORWER Control panel POWER ERROR PAPER OUT FFEEEEDD Cover open button Caution Labels Labels CAUTION: Thermal head is hot. VORSICHT: Der Thermalkopf ist heiß.

User Manual
Page 3
Installing and Replacing Paper page 1-7 How to order paper. Printer Parts and Labels inside front cover Ordering Paper page ix Where to load or change the paper roll. Solving Problems page 3-1 How to set up the printer. Setting Up the Printer page 1-1 How to correct problems. i Quick Reference This Quick Reference will direct you to key areas of topics, see the Contents. For a complete listing of this Operator's Manual.
Installing and Replacing Paper page 1-7 How to order paper. Printer Parts and Labels inside front cover Ordering Paper page ix Where to load or change the paper roll. Solving Problems page 3-1 How to set up the printer. Setting Up the Printer page 1-1 How to correct problems. i Quick Reference This Quick Reference will direct you to key areas of topics, see the Contents. For a complete listing of this Operator's Manual.

User Manual
Page 8
... Note: Notes have important information and useful tips on using the printer. ❏ Chapter 3 contains troubleshooting information. Warnings, Cautions, and Notes WARNING: Follow warnings carefully to change the DIP switch and paper near end settings. CAUTION: Observe cautions to avoid minor injury to... yourself or damage to your printer. About This Manual Setting Up and Using ❏ Chapter 1 contains information on unpacking the printer and setting it up. ❏ ...
... Note: Notes have important information and useful tips on using the printer. ❏ Chapter 3 contains troubleshooting information. Warnings, Cautions, and Notes WARNING: Follow warnings carefully to change the DIP switch and paper near end settings. CAUTION: Observe cautions to avoid minor injury to... yourself or damage to your printer. About This Manual Setting Up and Using ❏ Chapter 1 contains information on unpacking the printer and setting it up. ❏ ...
User Manual
Page 9
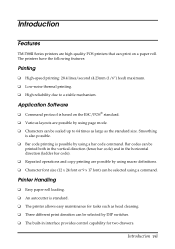
... ESC/POS® standard. ❏ Various layouts are high-quality POS printers that can be selected using a command. Introduction vii Application Software ❏ Command protocol is standard. ❏ The printer allows easy maintenance for two drawers. Bar codes can print on a paper roll. Introduction Features TM-T88II Series printers are possible by using a bar code command.
... ESC/POS® standard. ❏ Various layouts are high-quality POS printers that can be selected using a command. Introduction vii Application Software ❏ Command protocol is standard. ❏ The printer allows easy maintenance for two drawers. Bar codes can print on a paper roll. Introduction Features TM-T88II Series printers are possible by using a bar code command.

User Manual
Page 11
Balakong Industrial Area, 43200 Cheras. Specified Thermal Roll Paper: NTP080-80 In Japan: Nakagawa Seisakujo 2-5-21 Nishiki-Cho Warabi-Shi Saitama-Ken 335 Japan In U.S.A.: Tel: (048) 444-8211 Fax: (048) 443-6652 Nakagawa ... Tel: 03-9047896, 9047900, 9047691 Fax: 03-9047889 Introduction ix Mfg (Malaysia) SDN BHD Lot 19-11, Bersatu Industrial Complexs, Jalan Satu, Kaw Per. Ordering Paper and Supplies You can order thermal roll paper from the supplier in your area. Cheras Jaya,.
Balakong Industrial Area, 43200 Cheras. Specified Thermal Roll Paper: NTP080-80 In Japan: Nakagawa Seisakujo 2-5-21 Nishiki-Cho Warabi-Shi Saitama-Ken 335 Japan In U.S.A.: Tel: (048) 444-8211 Fax: (048) 443-6652 Nakagawa ... Tel: 03-9047896, 9047900, 9047691 Fax: 03-9047889 Introduction ix Mfg (Malaysia) SDN BHD Lot 19-11, Bersatu Industrial Complexs, Jalan Satu, Kaw Per. Ordering Paper and Supplies You can order thermal roll paper from the supplier in your area. Cheras Jaya,.

User Manual
Page 12
... Finland Tel: 38-3932900 Fax: 38-3932419 Original paper: P350(F380) P310, P300 Kanzaki Specialty Papers, Inc. 1500 Main Street Springfield, MA 01115 U.S.A. Other Qualified Suppliers for information. Contact each company for Thermal Paper The following suppliers sell thermal paper that may be used if desired. Original paper: TF50KS-E Nippon Paper Industry Co., Ltd. 1-12-1, Yuraku-Cho, Chiyoda...
... Finland Tel: 38-3932900 Fax: 38-3932419 Original paper: P350(F380) P310, P300 Kanzaki Specialty Papers, Inc. 1500 Main Street Springfield, MA 01115 U.S.A. Other Qualified Suppliers for information. Contact each company for Thermal Paper The following suppliers sell thermal paper that may be used if desired. Original paper: TF50KS-E Nippon Paper Industry Co., Ltd. 1-12-1, Yuraku-Cho, Chiyoda...

User Manual
Page 13
... 1-7 Using the Power Switch Cover 1-10 Self Test 1-10 Running the self test 1-10 Adjustments and Settings 1-12 Chapter 2 Using the Printer Operating the Control Panel 2-1 Control Panel 2-1 Chapter 3 Troubleshooting Troubleshooting 3-1 General problems 3-1 Printing problems 3-1 Cleaning the print head 3-3 Paper handling problems 3-3 Auto cutter problems 3-5 Hexadecimal Dump 3-7 Chapter 4 Reference Information Printing Specifications...
... 1-7 Using the Power Switch Cover 1-10 Self Test 1-10 Running the self test 1-10 Adjustments and Settings 1-12 Chapter 2 Using the Printer Operating the Control Panel 2-1 Control Panel 2-1 Chapter 3 Troubleshooting Troubleshooting 3-1 General problems 3-1 Printing problems 3-1 Cleaning the print head 3-3 Paper handling problems 3-3 Auto cutter problems 3-5 Hexadecimal Dump 3-7 Chapter 4 Reference Information Printing Specifications...

User Manual
Page 14
Appendix A DIP Switch and Paper Near End Settings Setting the DIP Switches A-1 DIP switch functions A-1 Changing the DIP switch settings A-6 Adjusting the Paper Near End Detector A-7 xii
Appendix A DIP Switch and Paper Near End Settings Setting the DIP Switches A-1 DIP switch functions A-1 Changing the DIP switch settings A-6 Adjusting the Paper Near End Detector A-7 xii

User Manual
Page 15
Setting Up the Printer 1-1 Printer FOEEUPDTAPEERRRPOORWER Paper roll Hexagonal Switch cover lock screws (only for the serial interface) See the note on page 1-3 for the standard specification printer. Chapter 1 Setting Up the Printer Unpacking The illustration below shows the items included for information about the hexagonal lock screws.
Setting Up the Printer 1-1 Printer FOEEUPDTAPEERRRPOORWER Paper roll Hexagonal Switch cover lock screws (only for the serial interface) See the note on page 1-3 for the standard specification printer. Chapter 1 Setting Up the Printer Unpacking The illustration below shows the items included for information about the hexagonal lock screws.

User Manual
Page 21
If the cover-open button will not open button. FFEOEEEUPDDTAPEERRRPOORWER 3. Open the paper roll cover by pressing the cover-open the cover, see page 3-4 or 3-6 in Troubleshooting. Do not use paper rolls that have the paper glued to the core, because the printer cannot detect the paper end correctly. 1. Remove the used paper roll core, if there is not receiving data; Setting Up the Printer 1-7 Installing or Replacing the Paper Roll Note: Be sure to use paper rolls that meet the specifications. Make sure the printer is one. otherwise, data may be lost. 2.
If the cover-open button will not open button. FFEOEEEUPDDTAPEERRRPOORWER 3. Open the paper roll cover by pressing the cover-open the cover, see page 3-4 or 3-6 in Troubleshooting. Do not use paper rolls that have the paper glued to the core, because the printer cannot detect the paper end correctly. 1. Remove the used paper roll core, if there is not receiving data; Setting Up the Printer 1-7 Installing or Replacing the Paper Roll Note: Be sure to use paper rolls that meet the specifications. Make sure the printer is one. otherwise, data may be lost. 2.

User Manual
Page 22
Be sure to note the correct direction that the paper comes off the roll. 1-8 Setting Up the Printer Insert the paper roll as shown. FOEEUPDTAPEERRRPOORWER 5. 4.
Be sure to note the correct direction that the paper comes off the roll. 1-8 Setting Up the Printer Insert the paper roll as shown. FOEEUPDTAPEERRRPOORWER 5. 4.

User Manual
Page 23
Then close the cover. FFEOEEEUPDDTAPEERRRPOORWER Setting Up the Printer 1-9 FOEEUPDTAPEERRRPOORWER 7. Tear off the paper as shown. Pull out a small amount of paper, as shown. 6.
Then close the cover. FFEOEEEUPDDTAPEERRRPOORWER Setting Up the Printer 1-9 FOEEUPDTAPEERRRPOORWER 7. Tear off the paper as shown. Pull out a small amount of paper, as shown. 6.

User Manual
Page 25
... and then prints the following : *** completed *** The printer is ready to continue the self test. Setting Up the Printer 1-11 Please press the PAPER FEED button. 3. The self test automatically ends and cuts the paper after printing the following , cuts the paper, and pauses. (The PAPER OUT light blinks.) Self test printing. 2. Press the FEED button...
... and then prints the following : *** completed *** The printer is ready to continue the self test. Setting Up the Printer 1-11 Please press the PAPER FEED button. 3. The self test automatically ends and cuts the paper after printing the following , cuts the paper, and pauses. (The PAPER OUT light blinks.) Self test printing. 2. Press the FEED button...
User Manual
Page 26
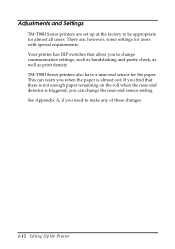
... handshaking and parity check, as well as print density. Adjustments and Settings TM-T88II Series printers are , however, some settings for users with special requirements. Your printer has DIP switches that there is not enough paper remaining on the roll when the near -end sensor for the paper. If you find that allow you when the...
... handshaking and parity check, as well as print density. Adjustments and Settings TM-T88II Series printers are , however, some settings for users with special requirements. Your printer has DIP switches that there is not enough paper remaining on the roll when the near -end sensor for the paper. If you find that allow you when the...

User Manual
Page 27
Chapter 2 Using the Printer Operating the Control Panel You can be disabled by the ESC c 5 command. Using the Printer 2-1 You can also hold down the FEED button to advance paper one line. Press the FEED button once to feed paper continuously. The indicator lights help you monitor the printer's status. Control Panel POWER ERROR PAPER OUT FEED Button The button can control the basic paper feeding operations of the printer with the button on the control panel.
Chapter 2 Using the Printer Operating the Control Panel You can be disabled by the ESC c 5 command. Using the Printer 2-1 You can also hold down the FEED button to advance paper one line. Press the FEED button once to feed paper continuously. The indicator lights help you monitor the printer's status. Control Panel POWER ERROR PAPER OUT FEED Button The button can control the basic paper feeding operations of the printer with the button on the control panel.

User Manual
Page 28
ERROR This indicates an error. See Chapter 3 for information on what to do when this light comes on . Panel lights POWER The POWER light is on whenever the printer is used. 2-2 Using the Printer Install a new paper roll, and the printer will continue printing. PAPER OUT This light indicates the near end of the paper roll. When the light blinks, it indicates the self-test printing standby state or macro execution standby state when the macro execution command is on .
ERROR This indicates an error. See Chapter 3 for information on what to do when this light comes on . Panel lights POWER The POWER light is on whenever the printer is used. 2-2 Using the Printer Install a new paper roll, and the printer will continue printing. PAPER OUT This light indicates the near end of the paper roll. When the light blinks, it indicates the self-test printing standby state or macro execution standby state when the macro execution command is on .

User Manual
Page 29
... (not blinking) and nothing is at or near the end. Install a new paper roll. See Chapter 1 for a paper jam. (See the paper jam description on . General problems The lights on the control panel do not come on page 3-3.) Troubleshooting 3-1 Press the printer cover until the cover audibly clicks into the power outlet. First, turn...
... (not blinking) and nothing is at or near the end. Install a new paper roll. See Chapter 1 for a paper jam. (See the paper jam description on . General problems The lights on the control panel do not come on page 3-3.) Troubleshooting 3-1 Press the printer cover until the cover audibly clicks into the power outlet. First, turn...

User Manual
Page 30
...self test does not work, contact your dealer or a qualified service person. Paper dust on after about 10 seconds. The ERROR light is off the printer and turn it back on the heating element of the interface cable between the printer and computer. If the self test works properly, check the following: 1. ... may be overheated. See the self test instructions in Chapter 1 to run the self test to run the self test. If there is no paper jam and the printer has been printing for both ends of the thermal print head can print the printer's interface settings using the self test.
...self test does not work, contact your dealer or a qualified service person. Paper dust on after about 10 seconds. The ERROR light is off the printer and turn it back on the heating element of the interface cable between the printer and computer. If the self test works properly, check the following: 1. ... may be overheated. See the self test instructions in Chapter 1 to run the self test to run the self test. If there is no paper jam and the printer has been printing for both ends of the thermal print head can print the printer's interface settings using the self test.

User Manual
Page 31
... time. Also let it cool before you clean it with an alcohol solvent (ethanol, methanol, or IPA). Radiation plate Head Thermal element Paper handling problems Paper is jammed inside the printer. Clean the thermal element of the print head with a cotton swab moistened with your fingers or any hard object. 1. Cleaning the print head CAUTION...
... time. Also let it cool before you clean it with an alcohol solvent (ethanol, methanol, or IPA). Radiation plate Head Thermal element Paper handling problems Paper is jammed inside the printer. Clean the thermal element of the print head with a cotton swab moistened with your fingers or any hard object. 1. Cleaning the print head CAUTION...

User Manual
Page 32
FFEOEEEUPDDTAPEERRRPOORWER 3-4 Troubleshooting Remove the jammed paper, put the roll back in the automatic cutter and the printer cover cannot be opened, open the cover. 2. To clear a paper jam, follow the steps below . Turn the printer off and press the cover open button to open the cutter cover as shown below : 1. If paper is caught in the printer, and close the cover. 3.
FFEOEEEUPDDTAPEERRRPOORWER 3-4 Troubleshooting Remove the jammed paper, put the roll back in the automatic cutter and the printer cover cannot be opened, open the cover. 2. To clear a paper jam, follow the steps below . Turn the printer off and press the cover open button to open the cutter cover as shown below : 1. If paper is caught in the printer, and close the cover. 3.
