User Manual
Page 3
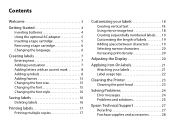
... characters 20 Increasing print density 20 Adjusting the Display 20 Applying Iron-On labels 21 Attaching your labels 21 Label usage tips 22 Cleaning the Printer 23 Cleaning the print head 23 Solving Problems 24 Error messages 24 Problems and solutions 25 Epson Technical Support 27 Recycling 27 Purchase supplies and accessories 28
... characters 20 Increasing print density 20 Adjusting the Display 20 Applying Iron-On labels 21 Attaching your labels 21 Label usage tips 22 Cleaning the Printer 23 Cleaning the print head 23 Solving Problems 24 Error messages 24 Problems and solutions 25 Epson Technical Support 27 Recycling 27 Purchase supplies and accessories 28
User Manual
Page 5
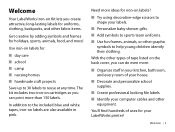
...file labels. ■ Identify your computer cables and other equipment. Welcome Your LabelWorks Iron-on Kit lets you create attractive, long-lasting labels for uniforms, clothing, backpacks, and... other fabric items. Get creative by adding symbols and frames for holidays, sports, animals, food, and more : ■ Organize stuff in pink. Welcome | 3 Use iron... of tape listed on the back cover, you can print more ideas for iron-on labels? ■ Try using decorative-edge scissors to shape your labels...
...file labels. ■ Identify your computer cables and other equipment. Welcome Your LabelWorks Iron-on Kit lets you create attractive, long-lasting labels for uniforms, clothing, backpacks, and... other fabric items. Get creative by adding symbols and frames for holidays, sports, animals, food, and more : ■ Organize stuff in pink. Welcome | 3 Use iron... of tape listed on the back cover, you can print more ideas for iron-on labels? ■ Try using decorative-edge scissors to shape your labels...

User Manual
Page 6
Inserting batteries 1. ends as shown. 3. Getting Started Your Label Works printer requires 6 AAA batteries (not included). Remove the rear cover. 2. An optional AC adapter is also available (APT0615Z1-1). Insert 6 AAA alkaline batteries, positioning the + and - Follow the instructions in this section to insert the batteries and tape cartridge, and change the language if necessary. Replace the cover and snap it into place. 4 | Getting Started
Inserting batteries 1. ends as shown. 3. Getting Started Your Label Works printer requires 6 AAA batteries (not included). Remove the rear cover. 2. An optional AC adapter is also available (APT0615Z1-1). Insert 6 AAA alkaline batteries, positioning the + and - Follow the instructions in this section to insert the batteries and tape cartridge, and change the language if necessary. Replace the cover and snap it into place. 4 | Getting Started

User Manual
Page 7
Plug the other end of the AC adapter into the product. 2. Caution: Make sure you use only the AC adapter designed for your LabelWorks printer (APT0615Z1-1) or damage may occur. 3. Inserting a tape cartridge 1. Insert the tape cartridge and press it down firmly until it snaps into a wall outlet. Remove the rear cover. Plug one end of the AC adapter into place. Using the optional AC adapter 1. Remove any slack from the ink ribbon. 2. Getting Started | 5
Plug the other end of the AC adapter into the product. 2. Caution: Make sure you use only the AC adapter designed for your LabelWorks printer (APT0615Z1-1) or damage may occur. 3. Inserting a tape cartridge 1. Insert the tape cartridge and press it down firmly until it snaps into a wall outlet. Remove the rear cover. Plug one end of the AC adapter into place. Using the optional AC adapter 1. Remove any slack from the ink ribbon. 2. Getting Started | 5

User Manual
Page 8
... be damaged. 6 | Getting Started Changing the language If you want to select it . Press to highlight Language, then press to change the language on the printer. 7. Press to highlight your language, then press to turn on the display, follow these steps: 1. 4. If there is excess tape, feed the end of the...
... be damaged. 6 | Getting Started Changing the language If you want to select it . Press to highlight Language, then press to change the language on the printer. 7. Press to highlight your language, then press to turn on the display, follow these steps: 1. 4. If there is excess tape, feed the end of the...

User Manual
Page 25
This could damage your product. Cleaning the print head If the print becomes faint or distorted, the print head may need cleaning. Remove the tape cartridge and clean the print head using a cotton swab moistened with rubbing alcohol, as benzine, thinner, or alcohol, or use chemicals or solvents such as shown below: Cleaning the Printer | 23 Cleaning the Printer Use a dry, soft cloth or, for stubborn stains, a moist cloth that has been wrung dry. Caution: Never use a chemical duster.
This could damage your product. Cleaning the print head If the print becomes faint or distorted, the print head may need cleaning. Remove the tape cartridge and clean the print head using a cotton swab moistened with rubbing alcohol, as benzine, thinner, or alcohol, or use chemicals or solvents such as shown below: Cleaning the Printer | 23 Cleaning the Printer Use a dry, soft cloth or, for stubborn stains, a moist cloth that has been wrung dry. Caution: Never use a chemical duster.


