Users Guide
Page 3
...30 Projector Parts - Control Panel ...29 Projector Parts - Front/Side ...23 Projector Parts - Contents BrightLink Pro 1450Ui/1460Ui User's Guide 13 Introduction to Your Projector ...14 Projector Features...14 Product Box Contents...16 Additional ...Components ...18 Optional Equipment and Replacement Parts 19 Warranty and Registration Information 20 Notations Used in the Documentation 21 Where to a Computer for Additional Information 21 Additional Projector Software...
...30 Projector Parts - Control Panel ...29 Projector Parts - Front/Side ...23 Projector Parts - Contents BrightLink Pro 1450Ui/1460Ui User's Guide 13 Introduction to Your Projector ...14 Projector Features...14 Product Box Contents...16 Additional ...Components ...18 Optional Equipment and Replacement Parts 19 Warranty and Registration Information 20 Notations Used in the Documentation 21 Where to a Computer for Additional Information 21 Additional Projector Software...

Users Guide
Page 12
Restriction of Use ...366 List of Safety Symbols (corresponding to IEC60950-1 A2 366 FCC Compliance Statement...370 Open Source Software License...371 Binding Arbitration and Class Waiver 581 Trademarks ...584 Copyright Notice...585 A Note Concerning Responsible Use of Copyrighted Materials 585 Copyright Attribution ...585 12
Restriction of Use ...366 List of Safety Symbols (corresponding to IEC60950-1 A2 366 FCC Compliance Statement...370 Open Source Software License...371 Binding Arbitration and Class Waiver 581 Trademarks ...584 Copyright Notice...585 A Note Concerning Responsible Use of Copyrighted Materials 585 Copyright Attribution ...585 12
Users Guide
Page 14
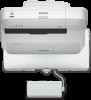
...to Go for fast, low-cost installations • Reduced shadow interference and glare Bright, high-resolution images • BrightLink Pro 1450Ui: Up to learn more about your projector and this manual. Introduction to Your Projector Refer to these special features: ...on a wall or table (with the optional table projection mount) for Additional Information Additional Projector Software and Manuals Projector Part Locations Projector Features The BrightLink Pro 1450Ui and 1460Ui projectors include these sections to 3800 lumens of color brightness (color light output) and white ...
...to Go for fast, low-cost installations • Reduced shadow interference and glare Bright, high-resolution images • BrightLink Pro 1450Ui: Up to learn more about your projector and this manual. Introduction to Your Projector Refer to these special features: ...on a wall or table (with the optional table projection mount) for Additional Information Additional Projector Software and Manuals Projector Part Locations Projector Features The BrightLink Pro 1450Ui and 1460Ui projectors include these sections to 3800 lumens of color brightness (color light output) and white ...

Users Guide
Page 18
Unless listed as available from Epson in this table, see your device manufacturer for compatible adapter options. Signal or connection type Composite video Additional component necessary RCA-style video or A/V cable ... to the projector. 9 Power cord 10 Touch Unit connection cable 11 Control Pad connection cable 12 Projector manuals and software links CD 13 Projector software for Easy Interactive Function CD 14 Projector software CD 15 Touch Unit 16 Markers for Touch Unit setup 17 Touch Unit bracket 18 Labels (4) 19 Tape for securing...
Unless listed as available from Epson in this table, see your device manufacturer for compatible adapter options. Signal or connection type Composite video Additional component necessary RCA-style video or A/V cable ... to the projector. 9 Power cord 10 Touch Unit connection cable 11 Control Pad connection cable 12 Projector manuals and software links CD 13 Projector software for Easy Interactive Function CD 14 Projector software CD 15 Touch Unit 16 Markers for Touch Unit setup 17 Touch Unit bracket 18 Labels (4) 19 Tape for securing...
Users Guide
Page 21
... references Where to Get Help Additional Projector Software and Manuals After connecting and setting up the projector, install the projector software from the included software CD, or download the software and manuals as you can install the projector software programs listed here and view their manuals... for help: • Built-in these notations as necessary. You can use the Epson PrivateLine Support ...
... references Where to Get Help Additional Projector Software and Manuals After connecting and setting up the projector, install the projector software from the included software CD, or download the software and manuals as you can install the projector software programs listed here and view their manuals... for help: • Built-in these notations as necessary. You can use the Epson PrivateLine Support ...

Users Guide
Page 22
... use your computer to interactively draw on your projector through the network. You can download the latest software and documentation from the Epson web site. Front/Side Projector Parts - EasyMP Multi PC Projection EasyMP Multi PC Projection Operation Guide Lets... you monitor and control your projector. Visit epson.com/iprojection (U.S.) or epson.ca/iprojection (Canada) for a projector over a network. Projector Parts - Top/Side 22 Projector software Manual Description EasyMP Monitor (Windows only) EasyMP Monitor Operation Guide Lets...
... use your computer to interactively draw on your projector through the network. You can download the latest software and documentation from the Epson web site. Front/Side Projector Parts - EasyMP Multi PC Projection EasyMP Multi PC Projection Operation Guide Lets... you monitor and control your projector. Visit epson.com/iprojection (U.S.) or epson.ca/iprojection (Canada) for a projector over a network. Projector Parts - Top/Side 22 Projector software Manual Description EasyMP Monitor (Windows only) EasyMP Monitor Operation Guide Lets...

Users Guide
Page 42
Turn on your computer. 5. Set the USB Type B setting in the dialog box that appears to install the Epson USB Display software. • Windows 7/Windows Vista: Select Run EMP_UDSE.exe in the External menu to your presentation contains audio. Connect the cable to one of ...the USB Display options. 3. Connect the other end to any on -screen instructions to install the Epson USB Display software. • Mac: The USB Display setup folder appears on your computer. 2. Select USB Display Installer and follow the on -screen instructions. The ...
Turn on your computer. 5. Set the USB Type B setting in the dialog box that appears to install the Epson USB Display software. • Windows 7/Windows Vista: Select Run EMP_UDSE.exe in the External menu to your presentation contains audio. Connect the cable to one of ...the USB Display options. 3. Connect the other end to any on -screen instructions to install the Epson USB Display software. • Mac: The USB Display setup folder appears on your computer. 2. Select USB Display Installer and follow the on -screen instructions. The ...

Users Guide
Page 46
To use USB Display, do one of the control pad and any available USB port on your computer. 5. Connect another USB cable to install the Epson USB Display software. 46 3. Connect a USB cable to the USB-B port on the projector and to the USB-A port on the bottom of the following: • Windows 10/Windows 8.x: Click EPSON_PJ_UD in the upper right-corner, then select Run EMP_UDSe.exe in the dialog box that appears to the USB port on the control pad. 4.
To use USB Display, do one of the control pad and any available USB port on your computer. 5. Connect another USB cable to install the Epson USB Display software. 46 3. Connect a USB cable to the USB-B port on the projector and to the USB-A port on the bottom of the following: • Windows 10/Windows 8.x: Click EPSON_PJ_UD in the upper right-corner, then select Run EMP_UDSe.exe in the dialog box that appears to the USB port on the control pad. 4.

Users Guide
Page 47
... your laptop's headphone or audio-out jack, or your screen. Connect the other end to the Audio port that appears to install the Epson USB Display software. • Mac: The USB Display setup folder appears on your desktop's speaker or audio-out port. 2. Select USB Display Installer and... follow the on -screen instructions. Parent topic: Connecting to install the Epson USB Display software. • Windows 7/Windows Vista: Select Run EMP_UDSE.exe in the dialog box that corresponds to the Computer port you are using.
... your laptop's headphone or audio-out jack, or your screen. Connect the other end to the Audio port that appears to install the Epson USB Display software. • Mac: The USB Display setup folder appears on your desktop's speaker or audio-out port. 2. Select USB Display Installer and... follow the on -screen instructions. Parent topic: Connecting to install the Epson USB Display software. • Windows 7/Windows Vista: Select Run EMP_UDSE.exe in the dialog box that corresponds to the Computer port you are using.

Users Guide
Page 60
... camera manual for details. • For the Epson DC-21 document camera, connect it to the projector's HDMI, Computer, or Video port and to the corresponding port on the document camera. Note: For additional features supported by software, connect your document camera to your projected and ...annotated content from the whiteboard. See the document camera manual for details. • For the Epson DC-20 document camera, connect it to the projector's HDMI, ...
... camera manual for details. • For the Epson DC-21 document camera, connect it to the projector's HDMI, Computer, or Video port and to the corresponding port on the document camera. Note: For additional features supported by software, connect your document camera to your projected and ...annotated content from the whiteboard. See the document camera manual for details. • For the Epson DC-20 document camera, connect it to the projector's HDMI, ...

Users Guide
Page 67
...a wired network. Connecting to a Wired Network Selecting Wired Network Settings Parent topic: Using the Projector on a Network Related references Additional Projector Software and Manuals Connecting to a Wired Network To connect the projector to a wired local area network (LAN), use a Category 5 shielded cable... or better. 67 To do this, you can project through the access point using the Epson network software. To ensure proper data transmission, use a 100Base-TX or 10Base-T network cable. Note: If your projector is connected via a LAN ...
...a wired network. Connecting to a Wired Network Selecting Wired Network Settings Parent topic: Using the Projector on a Network Related references Additional Projector Software and Manuals Connecting to a Wired Network To connect the projector to a wired local area network (LAN), use a Category 5 shielded cable... or better. 67 To do this, you can project through the access point using the Epson network software. To ensure proper data transmission, use a 100Base-TX or 10Base-T network cable. Note: If your projector is connected via a LAN ...

Users Guide
Page 70
... access the projector. • Display LAN Info lets you quickly connect your iOS or Android devices using the EasyMP Multi PC Projection software to the projector by anyone not in Epson Web Control. (Default user name is EPSONWEB; default password is guest.) • Web Control Password lets you enter a password up to...
... access the projector. • Display LAN Info lets you quickly connect your iOS or Android devices using the EasyMP Multi PC Projection software to the projector by anyone not in Epson Web Control. (Default user name is EPSONWEB; default password is guest.) • Web Control Password lets you enter a password up to...
Users Guide
Page 71
...• Creating a Quick Wireless Connection USB Key (Windows only) using the Easy MP Multi PC Projection software • Configuring the connection manually using the Epson network software. Installing the Wireless LAN Module Connecting Directly to the projector wirelessly through the access point using the projector's ... turn off DHCP and enter the projector's IP Address, Subnet Mask, and Gateway Address as described here, install the network software from the displayed keyboard, press the arrow buttons on the remote control while entering the desired numbers. 10. Note: To ...
...• Creating a Quick Wireless Connection USB Key (Windows only) using the Easy MP Multi PC Projection software • Configuring the connection manually using the Epson network software. Installing the Wireless LAN Module Connecting Directly to the projector wirelessly through the access point using the projector's ... turn off DHCP and enter the projector's IP Address, Subnet Mask, and Gateway Address as described here, install the network software from the displayed keyboard, press the arrow buttons on the remote control while entering the desired numbers. 10. Note: To ...

Users Guide
Page 72
You may damage the module or lose data. 1. Caution: Never remove the module while its indicator light is blue or flashing, or while you are projecting wirelessly. Parent topic: Using the Projector on a Network Related references Additional Projector Software and Manuals Optional Equipment and Replacement Parts Installing the Wireless LAN Module To use the projector over a wireless network, install the Epson 802.11b/g/n wireless module in the projector. Turn off the projector and unplug the power cord. 72 Do not install any other type of wireless module.
You may damage the module or lose data. 1. Caution: Never remove the module while its indicator light is blue or flashing, or while you are projecting wirelessly. Parent topic: Using the Projector on a Network Related references Additional Projector Software and Manuals Optional Equipment and Replacement Parts Installing the Wireless LAN Module To use the projector over a wireless network, install the Epson 802.11b/g/n wireless module in the projector. Turn off the projector and unplug the power cord. 72 Do not install any other type of wireless module.

Users Guide
Page 77
1. Insert the USB key into the projector's USB-A port. 77 Turn on the projector. 3. Create a Quick Wireless Connection USB Key with a USB flash drive and the EasyMP Multi PC Projection software. Note: See the EasyMP Multi PC Projection Operation Guide for instructions. 2.
1. Insert the USB key into the projector's USB-A port. 77 Turn on the projector. 3. Create a Quick Wireless Connection USB Key with a USB flash drive and the EasyMP Multi PC Projection software. Note: See the EasyMP Multi PC Projection Operation Guide for instructions. 2.

Users Guide
Page 78
... the USB key into a USB port on the next screen. 6. You need administrator authority to install the EasyMP Multi PC Projection software. Note: In Windows Vista, if you see the AutoPlay window, select Run MPPLaunch.exe, then select Allow on your computer image is...complete. 4. Remove the USB key. 5. After a few minutes, your computer. Run your computer. 7. Follow the on-screen instructions to install the software. Note: If you see a projected message that the network information update is displayed by the projector. You see a Windows Firewall message, click Yes to...
... the USB key into a USB port on the next screen. 6. You need administrator authority to install the EasyMP Multi PC Projection software. Note: In Windows Vista, if you see the AutoPlay window, select Run MPPLaunch.exe, then select Allow on your computer image is...complete. 4. Remove the USB key. 5. After a few minutes, your computer. Run your computer. 7. Follow the on-screen instructions to install the software. Note: If you see a projected message that the network information update is displayed by the projector. You see a Windows Firewall message, click Yes to...

Users Guide
Page 80
...the Remote or Basic Control screen in the room with EasyMP Multi PC Projection or the Epson iProjection app. • Projector Keyword lets you enter a password up to the projector by anyone not in the Epson Web Control. (Default user name is guest.) • Web Control Password lets you... must enter from a computer using the EasyMP Multi PC Projection software or an iOS or Android device using the PJLink protocol for projector control...
...the Remote or Basic Control screen in the room with EasyMP Multi PC Projection or the Epson iProjection app. • Projector Keyword lets you enter a password up to the projector by anyone not in the Epson Web Control. (Default user name is guest.) • Web Control Password lets you... must enter from a computer using the EasyMP Multi PC Projection software or an iOS or Android device using the PJLink protocol for projector control...
Users Guide
Page 84
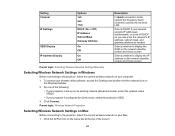
To access your wireless utility software, access the Desktop and double-click the network icon on an existing network (Advanced mode), select the network name (SSID). • If your projector is ...
To access your wireless utility software, access the Desktop and double-click the network icon on an existing network (Advanced mode), select the network name (SSID). • If your projector is ...

Users Guide
Page 86
...with Miracast Parent topic: Using the Projector on a Network Screen Mirroring Restrictions Note the following when using Screen Mirroring features (BrightLink 1460Ui): • You cannot play audio with more than 3 channels. • You cannot project images with copyright protection ...• You cannot project 3D video. • You cannot use extended Miracast features on -screen instructions to install any additional software. Parent topic: Wireless Network Projection Wireless Network Projection from mobile devices such as laptops, smartphones, and tablets using a Miracast connection...
...with Miracast Parent topic: Using the Projector on a Network Screen Mirroring Restrictions Note the following when using Screen Mirroring features (BrightLink 1460Ui): • You cannot play audio with more than 3 channels. • You cannot project images with copyright protection ...• You cannot project 3D video. • You cannot use extended Miracast features on -screen instructions to install any additional software. Parent topic: Wireless Network Projection Wireless Network Projection from mobile devices such as laptops, smartphones, and tablets using a Miracast connection...

Users Guide
Page 91
... topic: Setting Up Projector Network E-Mail Alerts Setting Up Monitoring Using SNMP Network administrators can install SNMP (Simple Network Management Protocol) software on the subject line • The name of the projector experiencing a problem • The IP address of the affected projector ...to receive e-mail alerts, you receive an e-mail containing the following information: • The email address entered as the From setting • Epson Projector on network computers so they can set up the projector for SNMP monitoring. 1. Select the Network menu and press Enter. 3. Note: ...
... topic: Setting Up Projector Network E-Mail Alerts Setting Up Monitoring Using SNMP Network administrators can install SNMP (Simple Network Management Protocol) software on the subject line • The name of the projector experiencing a problem • The IP address of the affected projector ...to receive e-mail alerts, you receive an e-mail containing the following information: • The email address entered as the From setting • Epson Projector on network computers so they can set up the projector for SNMP monitoring. 1. Select the Network menu and press Enter. 3. Note: ...

