Users Guide
Page 3
...Remote Control 31 Projector Parts - Touch Unit ...34 Setting Up the Projector ...36 Projector Placement...36 Projector Setup and Installation Options 37 Projection Distance...39 Removing and Attaching the Cable Cover 39 Projector Connections...40 Connecting to Computer Sources 41 Connecting... Parts - Front/Side ...23 Projector Parts - Base...28 Projector Parts - Control Panel ...29 Projector Parts - Contents BrightLink Pro 1450Ui/1460Ui User's Guide 13 Introduction to Your Projector ...14 Projector Features...14 Product Box Contents...16 Additional Components ...18 Optional Equipment...
...Remote Control 31 Projector Parts - Touch Unit ...34 Setting Up the Projector ...36 Projector Placement...36 Projector Setup and Installation Options 37 Projection Distance...39 Removing and Attaching the Cable Cover 39 Projector Connections...40 Connecting to Computer Sources 41 Connecting... Parts - Front/Side ...23 Projector Parts - Base...28 Projector Parts - Control Panel ...29 Projector Parts - Contents BrightLink Pro 1450Ui/1460Ui User's Guide 13 Introduction to Your Projector ...14 Projector Features...14 Product Box Contents...16 Additional Components ...18 Optional Equipment...

Users Guide
Page 4
... Document Camera 59 Connecting a Printer to the Control Pad 60 Connecting Multiple Projectors of the Same Model 62 Installing Batteries in the Remote Control 63 Installing Batteries in the Pens ...64 Using the Projector on a Network ...67 Wired Network Projection...67 Connecting to a... Wired Network ...67 Selecting Wired Network Settings 68 Wireless Network Projection ...71 Installing the Wireless LAN Module 72 Connecting Directly to a Smartphone or Tablet 74 Using Quick Wireless Connection (Windows 76 Selecting Wireless Network Settings...
... Document Camera 59 Connecting a Printer to the Control Pad 60 Connecting Multiple Projectors of the Same Model 62 Installing Batteries in the Remote Control 63 Installing Batteries in the Pens ...64 Using the Projector on a Network ...67 Wired Network Projection...67 Connecting to a... Wired Network ...67 Selecting Wired Network Settings 68 Wireless Network Projection ...71 Installing the Wireless LAN Module 72 Connecting Directly to a Smartphone or Tablet 74 Using Quick Wireless Connection (Windows 76 Selecting Wireless Network Settings...

Users Guide
Page 7
... 165 Entering a Password to Use the Projector 166 Saving a User's Logo Image to Display 167 Locking the Projector's Buttons 170 Unlocking the Projector's Buttons 171 Installing a Security Cable ...171 Creating a User Pattern to Display 172 Copying Menu Settings Between Projectors 173 Saving Settings to a USB Flash Drive 173 Transferring Settings from...
... 165 Entering a Password to Use the Projector 166 Saving a User's Logo Image to Display 167 Locking the Projector's Buttons 170 Unlocking the Projector's Buttons 171 Installing a Security Cable ...171 Creating a User Pattern to Display 172 Copying Menu Settings Between Projectors 173 Saving Settings to a USB Flash Drive 173 Transferring Settings from...
Users Guide
Page 14
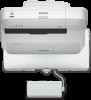
Projector Features Notations Used in the Documentation Where to Go for fast, low-cost installations • Reduced shadow interference and glare Bright, high-resolution images • BrightLink Pro 1450Ui: Up to learn more about your projector and this manual. Introduction to Your Projector...projection mount) for Additional Information Additional Projector Software and Manuals Projector Part Locations Projector Features The BrightLink Pro 1450Ui and 1460Ui projectors include these sections to 3800 lumens of color brightness (color light output) and white brightness (white light output)...
Projector Features Notations Used in the Documentation Where to Go for fast, low-cost installations • Reduced shadow interference and glare Bright, high-resolution images • BrightLink Pro 1450Ui: Up to learn more about your projector and this manual. Introduction to Your Projector...projection mount) for Additional Information Additional Projector Software and Manuals Projector Part Locations Projector Features The BrightLink Pro 1450Ui and 1460Ui projectors include these sections to 3800 lumens of color brightness (color light output) and white brightness (white light output)...
Users Guide
Page 21
...Help Additional Projector Software and Manuals After connecting and setting up the projector, install the projector software from the included software CD, or download the software and manuals as you can install the projector software programs listed here and view their manuals for Additional Information ...Need quick help on using them. 21 You can use the Epson PrivateLine Support service to your equipment. • Notes contain ...
...Help Additional Projector Software and Manuals After connecting and setting up the projector, install the projector software from the included software CD, or download the software and manuals as you can install the projector software programs listed here and view their manuals for Additional Information ...Need quick help on using them. 21 You can use the Epson PrivateLine Support service to your equipment. • Notes contain ...

Users Guide
Page 26
7 Control panel 8 Security cable installation slot 9 Air filter cover 10 Air intake vent (air filter) 11 Focus lever Parent topic: Projector Part Locations Related references Projector Light Status Projector Parts - Back Panel 1 Monitor Out port 2 Video port 26
7 Control panel 8 Security cable installation slot 9 Air filter cover 10 Air intake vent (air filter) 11 Focus lever Parent topic: Projector Part Locations Related references Projector Light Status Projector Parts - Back Panel 1 Monitor Out port 2 Video port 26

Users Guide
Page 33
27 LAN button (connects to whiteboard mode) 6 Source Search button (searches for connected sources) 7 USB-B port for connected sources) 29 Remote control emitter Parent topic: Projector Part Locations Projector Parts - Control Pad 1 Cable path (upper) 2 Cable path (rear) 3 Installation screw holes (4) 4 Power button 5 Whiteboard button (switches to a network source) 28 Source Search button (searches for connecting a computer (on bottom of control pad) 33
27 LAN button (connects to whiteboard mode) 6 Source Search button (searches for connected sources) 7 USB-B port for connected sources) 29 Remote control emitter Parent topic: Projector Part Locations Projector Parts - Control Pad 1 Cable path (upper) 2 Cable path (rear) 3 Installation screw holes (4) 4 Power button 5 Whiteboard button (switches to a network source) 28 Source Search button (searches for connecting a computer (on bottom of control pad) 33

Users Guide
Page 35
1 Dial cover 2 Touch unit (TCH) port 3 Security cable installation slot 4 Adjustment dials 5 Power light 6 Mounting holes Rear 1 Laser diffusion ports 2 Installation magnets Parent topic: Projector Part Locations 35
1 Dial cover 2 Touch unit (TCH) port 3 Security cable installation slot 4 Adjustment dials 5 Power light 6 Mounting holes Rear 1 Laser diffusion ports 2 Installation magnets Parent topic: Projector Part Locations 35
Users Guide
Page 36
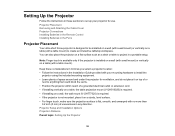
...also place the projector on a table (with a table mount). Note: Finger touch is available only if the projector is installed on a wall (with a table mount) to install the projector using the included mounting equipment. • Leave plenty of unevenness in these considerations in mind as a desk or... table to project in the Installation Guide provided with your projector for ventilation, and do not place it on a table (with a wall mount) or vertically on a flat ...
...also place the projector on a table (with a table mount). Note: Finger touch is available only if the projector is installed on a wall (with a table mount) to install the projector using the included mounting equipment. • Leave plenty of unevenness in these considerations in mind as a desk or... table to project in the Installation Guide provided with your projector for ventilation, and do not place it on a table (with a wall mount) or vertically on a flat ...

Users Guide
Page 37
Projector Setup and Installation Options You can set up or install your projector in the following ways: Mounted on the wall or ceiling Mounted vertically on a table to create an interactive workspace Mounted on the wall or ceiling and projecting from behind a translucent screen (interactive features not supported) 37
Projector Setup and Installation Options You can set up or install your projector in the following ways: Mounted on the wall or ceiling Mounted vertically on a table to create an interactive workspace Mounted on the wall or ceiling and projecting from behind a translucent screen (interactive features not supported) 37
Users Guide
Page 39
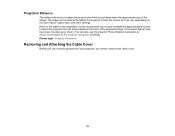
... projector from the screen based on the zoom factor, aspect ratio, and other settings. Projection Distance The distance at epson.com/support (U.S.) or epson.ca/support (Canada). Refer to the tables in the Installation Guide included with your projector, you place the projector from the screen, but can also use the projector Throw...
... projector from the screen based on the zoom factor, aspect ratio, and other settings. Projection Distance The distance at epson.com/support (U.S.) or epson.ca/support (Canada). Refer to the tables in the Installation Guide included with your projector, you place the projector from the screen, but can also use the projector Throw...

Users Guide
Page 42
.... 2. Follow any available USB port on -screen instructions to your presentation contains audio. Connect the cable to install the Epson USB Display software. You need to install this software only the first time you connect the projector to Computer Sources Related references Projector Setup Settings - Parent... topic: Connecting to the computer. 1. Set the USB Type B setting in the dialog box that appears to install the Epson USB Display software. • Windows 7/Windows Vista: Select Run EMP_UDSE.exe in the External menu to one of the USB Display options. ...
.... 2. Follow any available USB port on -screen instructions to your presentation contains audio. Connect the cable to install the Epson USB Display software. You need to install this software only the first time you connect the projector to Computer Sources Related references Projector Setup Settings - Parent... topic: Connecting to the computer. 1. Set the USB Type B setting in the dialog box that appears to install the Epson USB Display software. • Windows 7/Windows Vista: Select Run EMP_UDSE.exe in the External menu to one of the USB Display options. ...

Users Guide
Page 46
Connect a USB cable to the USB-B port on the projector and to install the Epson USB Display software. 46 To use USB Display, do one of the control pad and any available USB port on the control pad. 4. Connect another USB cable to the USB port on the bottom of the following: • Windows 10/Windows 8.x: Click EPSON_PJ_UD in the upper right-corner, then select Run EMP_UDSe.exe in the dialog box that appears to the USB-A port on your computer. 5. 3.
Connect a USB cable to the USB-B port on the projector and to install the Epson USB Display software. 46 To use USB Display, do one of the control pad and any available USB port on the control pad. 4. Connect another USB cable to the USB port on the bottom of the following: • Windows 10/Windows 8.x: Click EPSON_PJ_UD in the upper right-corner, then select Run EMP_UDSe.exe in the dialog box that appears to the USB-A port on your computer. 5. 3.

Users Guide
Page 47
Connect the other end to the Audio port that appears to install the Epson USB Display software. • Mac: The USB Display setup folder appears on your desktop's speaker or audio-out port. 2. The projector displays the ...audio. Connect the audio cable to your laptop's headphone or audio-out jack, or your screen. Select USB Display Installer and follow the on -screen instructions. Follow any on -screen instructions to install the Epson USB Display software. Parent topic: Connecting to Computer Sources Related references Projector Setup Settings - • Windows 7/Windows...
Connect the other end to the Audio port that appears to install the Epson USB Display software. • Mac: The USB Display setup folder appears on your desktop's speaker or audio-out port. 2. The projector displays the ...audio. Connect the audio cable to your laptop's headphone or audio-out jack, or your screen. Select USB Display Installer and follow the on -screen instructions. Follow any on -screen instructions to install the Epson USB Display software. Parent topic: Connecting to Computer Sources Related references Projector Setup Settings - • Windows 7/Windows...

Users Guide
Page 63
Remove the battery cover. 63 Caution: Use only the type of different types, or mix new and old batteries. 1. Do not install batteries of batteries specified in the Remote Control The remote control uses the two AA batteries that came with the projector. Extended Menu Installing Batteries in this manual. Related concepts Using Multiple Projectors (Duolink) Related references Projector Setup Settings -
Remove the battery cover. 63 Caution: Use only the type of different types, or mix new and old batteries. 1. Do not install batteries of batteries specified in the Remote Control The remote control uses the two AA batteries that came with the projector. Extended Menu Installing Batteries in this manual. Related concepts Using Multiple Projectors (Duolink) Related references Projector Setup Settings -

Users Guide
Page 64
Parent topic: Setting Up the Projector Installing Batteries in the Pens Each pen uses one AA battery. 64 Warning: Dispose of children; Keep batteries out of the reach of used batteries according to heat or flame. Do not expose batteries to local regulations. they are choking hazards and are very dangerous if swallowed. ends facing as shown. 3. Replace the battery cover and press it down until it clicks into place. 2. Insert the batteries with the + and -
Parent topic: Setting Up the Projector Installing Batteries in the Pens Each pen uses one AA battery. 64 Warning: Dispose of children; Keep batteries out of the reach of used batteries according to heat or flame. Do not expose batteries to local regulations. they are choking hazards and are very dangerous if swallowed. ends facing as shown. 3. Replace the battery cover and press it down until it clicks into place. 2. Insert the batteries with the + and -

Users Guide
Page 67
... to the projector wirelessly through a wired network. To do this, you can project through the access point using the Epson network software. After connecting and setting up the projector as described here, install the network software from a Mobile Device or Windows Computer (Screen Mirroring) Setting Up Projector Network E-Mail Alerts Setting Up...
... to the projector wirelessly through a wired network. To do this, you can project through the access point using the Epson network software. After connecting and setting up the projector as described here, install the network software from a Mobile Device or Windows Computer (Screen Mirroring) Setting Up Projector Network E-Mail Alerts Setting Up...
Users Guide
Page 71
... a Quick Wireless Connection USB Key (Windows only) using the Easy MP Multi PC Projection software • Configuring the connection manually using the Epson network software. To do this, you want from the included CD or download the software and manuals as needed. Or, press and hold ...to save your projector and computer for wireless projection. Note: To highlight the numbers you must set up the projector as described here, install the network software from the displayed keyboard, press the arrow buttons on the remote control while entering the desired numbers. 10. To select...
... a Quick Wireless Connection USB Key (Windows only) using the Easy MP Multi PC Projection software • Configuring the connection manually using the Epson network software. To do this, you want from the included CD or download the software and manuals as needed. Or, press and hold ...to save your projector and computer for wireless projection. Note: To highlight the numbers you must set up the projector as described here, install the network software from the displayed keyboard, press the arrow buttons on the remote control while entering the desired numbers. 10. To select...

Users Guide
Page 72
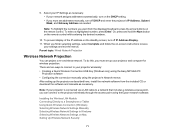
You may damage the module or lose data. 1. Turn off the projector and unplug the power cord. 72 Do not install any other type of wireless module. Parent topic: Using the Projector on a Network Related references Additional Projector Software and Manuals Optional Equipment and Replacement Parts Installing the Wireless LAN Module To use the projector over a wireless network, install the Epson 802.11b/g/n wireless module in the projector. Caution: Never remove the module while its indicator light is blue or flashing, or while you are projecting wirelessly.
You may damage the module or lose data. 1. Turn off the projector and unplug the power cord. 72 Do not install any other type of wireless module. Parent topic: Using the Projector on a Network Related references Additional Projector Software and Manuals Optional Equipment and Replacement Parts Installing the Wireless LAN Module To use the projector over a wireless network, install the Epson 802.11b/g/n wireless module in the projector. Caution: Never remove the module while its indicator light is blue or flashing, or while you are projecting wirelessly.

Users Guide
Page 74
Insert the wireless LAN module into the port shown here. 4. Download the latest version of Epson iProjection from the App Store or Google Play and install it to connect a single smartphone or tablet to a Smartphone or Tablet You can display a QR code on the screen and use it on your projector with the Epson iProjection app. 1. Replace the cable cover and tighten the screws. 5. Parent topic: Wireless Network Projection Connecting Directly to your smartphone or tablet. 2. 3. Press the Menu button on the projector. Plug in and turn on the projector or the remote control. 74
Insert the wireless LAN module into the port shown here. 4. Download the latest version of Epson iProjection from the App Store or Google Play and install it to connect a single smartphone or tablet to a Smartphone or Tablet You can display a QR code on the screen and use it on your projector with the Epson iProjection app. 1. Replace the cable cover and tighten the screws. 5. Parent topic: Wireless Network Projection Connecting Directly to your smartphone or tablet. 2. 3. Press the Menu button on the projector. Plug in and turn on the projector or the remote control. 74


