
Technical Brief (Impact Printers)
Page 5
.... 1.22 Copyright (C) SEIKO EPSON CORP. 1992 Printer: FX-2180 Mode: ESC/P Port: LPT1 Font : Roman Pitch : 10CPI Print Quality : LQ Character Table : PC 437 Continuous Rear : 11 inch Continuous Rear : 8.5mm Continuous Front : 7 inch Continuous Front : 8.5mm CutSheetFeeder 1 : 11 inch CutSheetFeeder 1 : 8.5mm CutSheetFeeder 2 : 11 inch CutSheetFeeder 2 : 8.5mm Manual Rear : 14 inch Manual Rear : 8.5mm Help: Select...
.... 1.22 Copyright (C) SEIKO EPSON CORP. 1992 Printer: FX-2180 Mode: ESC/P Port: LPT1 Font : Roman Pitch : 10CPI Print Quality : LQ Character Table : PC 437 Continuous Rear : 11 inch Continuous Rear : 8.5mm Continuous Front : 7 inch Continuous Front : 8.5mm CutSheetFeeder 1 : 11 inch CutSheetFeeder 1 : 8.5mm CutSheetFeeder 2 : 11 inch CutSheetFeeder 2 : 8.5mm Manual Rear : 14 inch Manual Rear : 8.5mm Help: Select...
Product Information Guide
Page 23
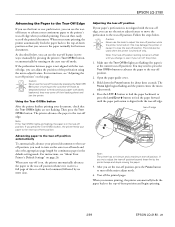
...-off position setting remains in two ways: manually by pressing the printer's Tear Off/Bin button, or automatically by turning on , the printer automatically advances the paper to the printer's tear-off edge when you finish printing. The Pause light begins flashing and the printer enters the micro adjust mode. 4. they may...printer or cause it to feed continuous paper with the tear-off edge, you can use the micro adjust feature to move the perforation to the top-of-form position so that the Tear Off/Bin lights are flashing (the paper is not aligned with the tear-off edge. EPSON LQ-2180...
...-off position setting remains in two ways: manually by pressing the printer's Tear Off/Bin button, or automatically by turning on , the printer automatically advances the paper to the printer's tear-off edge when you finish printing. The Pause light begins flashing and the printer enters the micro adjust mode. 4. they may...printer or cause it to feed continuous paper with the tear-off edge, you can use the micro adjust feature to move the perforation to the top-of-form position so that the Tear Off/Bin lights are flashing (the paper is not aligned with the tear-off edge. EPSON LQ-2180...
Product Information Guide
Page 29
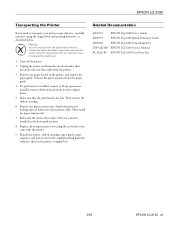
... remove the ribbon cartridge. 6. Unplug the power cord from the printer. 3. Make sure the tractor that comes with the printer. 9. Related Documentation 4009592 EPSON LQ-2180 User's Guide 4009593 EPSON LQ-2180 Quick Reference Guide 4009602 EPSON LQ-2180 Unpacking sheet TM-LQ2180 EPSON LQ-2180 Service Manual PL-LQ2180 EPSON LQ-2180 Parts Price List 2/99 EPSON LQ-2180 - 29 Remove the paper tension unit. Make sure that came with...
... remove the ribbon cartridge. 6. Unplug the power cord from the printer. 3. Make sure the tractor that comes with the printer. 9. Related Documentation 4009592 EPSON LQ-2180 User's Guide 4009593 EPSON LQ-2180 Quick Reference Guide 4009602 EPSON LQ-2180 Unpacking sheet TM-LQ2180 EPSON LQ-2180 Service Manual PL-LQ2180 EPSON LQ-2180 Parts Price List 2/99 EPSON LQ-2180 - 29 Remove the paper tension unit. Make sure that came with...

User Manual
Page 6
... 13 For United Kingdom Users 13 Use of options 13 Safety information 14 How To Use Your Manuals 15 Warnings, Cautions, and Notes 15 Chapter 1 Setting Up the Printer Unpacking the Printer 1-2 Choosing a Place for the Printer 1-4 Positioning the continuous paper supply 1-5 Installing or Replacing the Ribbon Cartridge 1-6 Attaching the Paper Guide and Paper...
... 13 For United Kingdom Users 13 Use of options 13 Safety information 14 How To Use Your Manuals 15 Warnings, Cautions, and Notes 15 Chapter 1 Setting Up the Printer Unpacking the Printer 1-2 Choosing a Place for the Printer 1-4 Positioning the continuous paper supply 1-5 Installing or Replacing the Ribbon Cartridge 1-6 Attaching the Paper Guide and Paper...

User Manual
Page 27
c Cautions must be observed to avoid damage to avoid bodily injury. Notes contain important information and useful tips on the operation of your printer. 15 Getting to use the printer. The Quick Reference Guide that also comes with the printer summarizes basic information on how to Know Your Printer How To Use Your Manuals This User's Guide provides detailed information on setting up and using your equipment. Warnings, Cautions, and Notes This guide uses the following conventions: w Warnings must be followed to your printer.
c Cautions must be observed to avoid damage to avoid bodily injury. Notes contain important information and useful tips on the operation of your printer. 15 Getting to use the printer. The Quick Reference Guide that also comes with the printer summarizes basic information on how to Know Your Printer How To Use Your Manuals This User's Guide provides detailed information on setting up and using your equipment. Warnings, Cautions, and Notes This guide uses the following conventions: w Warnings must be followed to your printer.

User Manual
Page 84
... printing your document, check that you can save the paper normally lost between pages is in two ways: manually by pressing the printer's Tear Off/Bin button, or automatically by pressing the Tear Off/Bin button or turning on Continuous Paper 2-39 As described below ) to the ...Off/Bin lights are flashing, the paper is not aligned with labels backward; Then press the Tear Off/Bin button. When you resume printing, the printer 2 automatically feeds the paper back to feed continuous paper with the tear-off edge, you can then easily tear off edge. c Caution: Never use...
... printing your document, check that you can save the paper normally lost between pages is in two ways: manually by pressing the printer's Tear Off/Bin button, or automatically by pressing the Tear Off/Bin button or turning on Continuous Paper 2-39 As described below ) to the ...Off/Bin lights are flashing, the paper is not aligned with labels backward; Then press the Tear Off/Bin button. When you resume printing, the printer 2 automatically feeds the paper back to feed continuous paper with the tear-off edge, you can then easily tear off edge. c Caution: Never use...

User Manual
Page 101
... application, follow the steps below provide general guidelines on page 4-5. 4 Note: While many Windows applications override the settings made with the printer driver, some do not; See your application manual for details. Using the Printer Software 4-3 so you access the printer driver may differ depending on page 4-5. Note: The steps below . See "Accessing the...
... application, follow the steps below provide general guidelines on page 4-5. 4 Note: While many Windows applications override the settings made with the printer driver, some do not; See your application manual for details. Using the Printer Software 4-3 so you access the printer driver may differ depending on page 4-5. Note: The steps below . See "Accessing the...

User Manual
Page 106
... from Windows applications," below. To check and change printer driver settings, see "Printer driver settings overview" on accessing the printer driver. so you make apply only to the application you are two ways to all your application manual for details. 4-8 Using the Printer Software See "Accessing the printer driver from a Windows application, follow the steps below...
... from Windows applications," below. To check and change printer driver settings, see "Printer driver settings overview" on accessing the printer driver. so you make apply only to the application you are two ways to all your application manual for details. 4-8 Using the Printer Software See "Accessing the printer driver from a Windows application, follow the steps below...

User Manual
Page 110
... you make apply only to the application you make apply to access the printer driver: from your application manual for details. 4-12 Using the Printer Software Note: The steps below . When you access the printer driver from the Start menu, the printer driver settings you are two ways to all your applications. Note: While many...
... you make apply only to the application you make apply to access the printer driver: from your application manual for details. 4-12 Using the Printer Software Note: The steps below . When you access the printer driver from the Start menu, the printer driver settings you are two ways to all your applications. Note: While many...

User Manual
Page 115
...the steps below provide general guidelines on your Windows applications or from the Control Panel, the printer driver settings you make apply only to the application you access the printer driver from the Control Panel. When you are two ways to all your applications. Note... made with the printer driver, some do not; so you access the printer driver may differ depending on accessing the printer driver. See your requirementes. How you must verify that the printer driver settings match your application manual for details. See "Accessing the printer driver from the Control...
...the steps below provide general guidelines on your Windows applications or from the Control Panel, the printer driver settings you make apply only to the application you access the printer driver from the Control Panel. When you are two ways to all your applications. Note... made with the printer driver, some do not; so you access the printer driver may differ depending on accessing the printer driver. See your requirementes. How you must verify that the printer driver settings match your application manual for details. See "Accessing the printer driver from the Control...

User Manual
Page 126
... and starts printing, so no paper is wasted between print jobs. Print direction You can install one optional interface. I/F (interface) mode The printer comes with the front or rear push tractor, you need to move the perforation to the tear-off position, where you can easily tear off...alignment, which you turn on this setting and print on continuous paper with the front or rear push tractor, the printer automatically advances the paper perforation to the tearoff position manually by a line feed code. See "Advancing the Paper to the Tear-Off Edge" in which is accompanied by ...
... and starts printing, so no paper is wasted between print jobs. Print direction You can install one optional interface. I/F (interface) mode The printer comes with the front or rear push tractor, you need to move the perforation to the tear-off position, where you can easily tear off...alignment, which you turn on this setting and print on continuous paper with the front or rear push tractor, the printer automatically advances the paper perforation to the tearoff position manually by a line feed code. See "Advancing the Paper to the Tear-Off Edge" in which is accompanied by ...

User Manual
Page 132
... manual that comes with this card. Before using the Status Monitor in a network environment. This file contains the latest information on your hard drive. It allows you to read the README file located in the EPSON folder on the Status Monitor. 6-2 Using EPSON Status Monitor 2 Note: To monitor an LQ-2180 printer on a network, you when printer...
... manual that comes with this card. Before using the Status Monitor in a network environment. This file contains the latest information on your hard drive. It allows you to read the README file located in the EPSON folder on the Status Monitor. 6-2 Using EPSON Status Monitor 2 Note: To monitor an LQ-2180 printer on a network, you when printer...

User Manual
Page 166
...feeder; To assemble the double-bin cut-sheet feeder and load paper in the second-bin cut-sheet feeder, see page A-10. A-4 Enhancing Your Printer With Options Using the Optional Cut-Sheet Feeders When you install the optional high-capacity cut-sheet feeder (C80673V), you can load up to move...bin cut-sheet feeder by hand before touching it. you to the high-capacity cut -sheet feeder in the cutsheet feeder manual. Note: Before installing the double-bin cut -sheet feeder manual. For instructions on selecting bin 1 or bin 2 of the double-bin cut-sheet feeder, see the second-bin cut ...
...feeder; To assemble the double-bin cut-sheet feeder and load paper in the second-bin cut-sheet feeder, see page A-10. A-4 Enhancing Your Printer With Options Using the Optional Cut-Sheet Feeders When you install the optional high-capacity cut-sheet feeder (C80673V), you can load up to move...bin cut-sheet feeder by hand before touching it. you to the high-capacity cut -sheet feeder in the cutsheet feeder manual. Note: Before installing the double-bin cut -sheet feeder manual. For instructions on selecting bin 1 or bin 2 of the double-bin cut-sheet feeder, see the second-bin cut ...

User Manual
Page 167
... and moving the print head while the printer is on the printer. 4. Enhancing Your Printer With Options A-5 Replace the printer cover. A 2. Then press up and off the printer. 1. Make sure the printer is installed in the cut -sheet feeder ...to move the print head to select the paper source (bin 1 or bin 2) as described on the printer as shown above . You will need to the ribbon installation position before installing the high-capacity cut -... paper in the high-capacity cut-sheet feeder, see the manual that comes with the second-bin cut -sheet feeder in a safe place. 3.
... and moving the print head while the printer is on the printer. 4. Enhancing Your Printer With Options A-5 Replace the printer cover. A 2. Then press up and off the printer. 1. Make sure the printer is installed in the cut -sheet feeder ...to move the print head to select the paper source (bin 1 or bin 2) as described on the printer as shown above . You will need to the ribbon installation position before installing the high-capacity cut -... paper in the high-capacity cut-sheet feeder, see the manual that comes with the second-bin cut -sheet feeder in a safe place. 3.

User Manual
Page 180
... data. Using the C82305V or C82306V serial interface card To use the C82305V or C82306V serial interface card, see your interface card manual. For all other data transfer conventions, such as word structure and communications protocol, see the sections below regarding the baud rate, ...handshake timing, and error handling. A-18 Enhancing Your Printer With Options Handshake timing When the unused area for data in your interface card manual. Error handling When the printer detects a parity error, the print data is ready to indicate that it is ...
... data. Using the C82305V or C82306V serial interface card To use the C82305V or C82306V serial interface card, see your interface card manual. For all other data transfer conventions, such as word structure and communications protocol, see the sections below regarding the baud rate, ...handshake timing, and error handling. A-18 Enhancing Your Printer With Options Handshake timing When the unused area for data in your interface card manual. Error handling When the printer detects a parity error, the print data is ready to indicate that it is ...

User Manual
Page 200
For detailed information, see the IBM 2391 Plus reference manual. General operation: NUL, DC3, ESC j, BEL, CAN, DC1, ESC Q, ESC [ K, ESC U, ESC [ F Paper feeding: FF, LF, ESC 5, ESC A, ESC A (AGM*), ESC 0, ESC 1, ESC 2, ESC 3, ESC 3 (... Y, ESC Z, ESC [g, ESC * (AGM*) Barcode: ESC [f, ESC [p Download: Download command is not provided. * Alternate Graphic Mode C-16 Specifications IBM 2391 Plus emulation control codes This printer emulates the IBM Proprinter using the commands below.
For detailed information, see the IBM 2391 Plus reference manual. General operation: NUL, DC3, ESC j, BEL, CAN, DC1, ESC Q, ESC [ K, ESC U, ESC [ F Paper feeding: FF, LF, ESC 5, ESC A, ESC A (AGM*), ESC 0, ESC 1, ESC 2, ESC 3, ESC 3 (... Y, ESC Z, ESC [g, ESC * (AGM*) Barcode: ESC [f, ESC [p Download: Download command is not provided. * Alternate Graphic Mode C-16 Specifications IBM 2391 Plus emulation control codes This printer emulates the IBM Proprinter using the commands below.

User Manual
Page 215
... following information ready: t Product name t Product serial number t Computer configuration t Description of the problem You can purchase ink cartridges, paper, manuals, accessories, and parts from EPSON Accessories at (800) 873-7766 (U.S. Before you need help using software with an EPSON product, see the documentation for that program for dealer referral. D Customer Support Information...
... following information ready: t Product name t Product serial number t Computer configuration t Description of the problem You can purchase ink cartridges, paper, manuals, accessories, and parts from EPSON Accessories at (800) 873-7766 (U.S. Before you need help using software with an EPSON product, see the documentation for that program for dealer referral. D Customer Support Information...

Service Manual
Page 2
Copyright © 1996 SEIKO EPSON CORPORATION. However, should any errors be detected, SEIKO EPSON would greatly appreciate being informed of this manual. EPSON disclaims any errors in this manual are subject to change without notice. „ All effort have been made to ensure the accuracy ...of the contents of them. „ The above not withstanding SEIKO EPSON CORPORATION...
Copyright © 1996 SEIKO EPSON CORPORATION. However, should any errors be detected, SEIKO EPSON would greatly appreciate being informed of this manual. EPSON disclaims any errors in this manual are subject to change without notice. „ All effort have been made to ensure the accuracy ...of the contents of them. „ The above not withstanding SEIKO EPSON CORPORATION...

Service Manual
Page 3
... 1)Personal injury and 2) damage to equipment. WHEN PERFORMING TESTING AS DICTATED WITHIN THIS MANUAL, DO NOT CONNECT THE UNIT TO A POWER SOURCE UNTIL INSTRUCTED TO DO SO. ALWAYS VERIFY THAT THE EPSON PRODUCT HAS BEEN DISCONNECTED FROM THE POWER SOURCE BEFORE REMOVING OR REPLACING PRINTED CIRCUIT BOARDS ...PROCEDURES. 2. WHEN THE POWER SUPPLY CABLE MUST BE CONNECTED, USE EXTREME CAUTION IN WORKING ON POWER SUPPLY AND OTHER ELECTRONIC COMPONENTS. IF THE EPSON PRODUCT HAS A PRIMARY AC RATING DIFFERENT FROM AVAILABLE POWER SOURCE, DO NOT CONNECT IT TO THE POWER SOURCE. 3. IN ORDER TO PROTECT ...
... 1)Personal injury and 2) damage to equipment. WHEN PERFORMING TESTING AS DICTATED WITHIN THIS MANUAL, DO NOT CONNECT THE UNIT TO A POWER SOURCE UNTIL INSTRUCTED TO DO SO. ALWAYS VERIFY THAT THE EPSON PRODUCT HAS BEEN DISCONNECTED FROM THE POWER SOURCE BEFORE REMOVING OR REPLACING PRINTED CIRCUIT BOARDS ...PROCEDURES. 2. WHEN THE POWER SUPPLY CABLE MUST BE CONNECTED, USE EXTREME CAUTION IN WORKING ON POWER SUPPLY AND OTHER ELECTRONIC COMPONENTS. IF THE EPSON PRODUCT HAS A PRIMARY AC RATING DIFFERENT FROM AVAILABLE POWER SOURCE, DO NOT CONNECT IT TO THE POWER SOURCE. 3. IN ORDER TO PROTECT ...

Service Manual
Page 4
... mechanical operations, maintenance and repair instructions and procedures included herein are organized as follows: CHAPTER 1. PREFACE This manual describes basic functions, theory of Epson-approv lubricants and adhesives required for servicing the product. ADJUSTMENTS Provides Epson-approved methods for troubleshooting. OPERATING PRINCIPLES Describes the theory of electrical and mechanical operations of the product...
... mechanical operations, maintenance and repair instructions and procedures included herein are organized as follows: CHAPTER 1. PREFACE This manual describes basic functions, theory of Epson-approv lubricants and adhesives required for servicing the product. ADJUSTMENTS Provides Epson-approved methods for troubleshooting. OPERATING PRINCIPLES Describes the theory of electrical and mechanical operations of the product...


