
Complete Owner's Guide (English)
Page 2
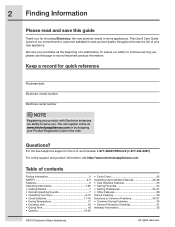
...to Common Problems 30-31 • Common Drying Problems 30 • Service Prevention Checklist 31 Warranty Information 32 ©2010 Electrolux Major Appliances All rights reserved. We view your new appliance. Questions? This Use & Care Guide is part of contents Finding... information 2 SAFETY 3-5 Features 6 Operating Instructions 7-29 • Getting Started 7 • Normal Operating Sounds 7 • Operating Your Dryer 8-10 • Cycle Selection 11-16 • Drying Temperature 17 • Dryness Level 18 • Drying Time 18 • Options 19-...
...to Common Problems 30-31 • Common Drying Problems 30 • Service Prevention Checklist 31 Warranty Information 32 ©2010 Electrolux Major Appliances All rights reserved. We view your new appliance. Questions? This Use & Care Guide is part of contents Finding... information 2 SAFETY 3-5 Features 6 Operating Instructions 7-29 • Getting Started 7 • Normal Operating Sounds 7 • Operating Your Dryer 8-10 • Cycle Selection 11-16 • Drying Temperature 17 • Dryness Level 18 • Drying Time 18 • Options 19-...

Complete Owner's Guide (English)
Page 3
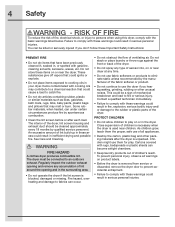
... appliance. • Do not touch any other flammable vapors and liquids in the Use and Care Guide, Installation Instructions and on electric dryers (not provided with 3-prong grounded plug Avoid fire hazard or electrical shock. Follow the gas supplier's instructions. • If you to... this warning can cause serious injury, fire or death. Power cord with unit except those manufactured for future reference. 240 v Electric Dryer 120 v Gas Dryer 10-30R 3-wire (fused 30 amp) 14-30R 4-wire (fused 30 amp) UL-approved service cord must be performed by a quali&#...
... appliance. • Do not touch any other flammable vapors and liquids in the Use and Care Guide, Installation Instructions and on electric dryers (not provided with 3-prong grounded plug Avoid fire hazard or electrical shock. Follow the gas supplier's instructions. • If you to... this warning can cause serious injury, fire or death. Power cord with unit except those manufactured for future reference. 240 v Electric Dryer 120 v Gas Dryer 10-30R 3-wire (fused 30 amp) 14-30R 4-wire (fused 30 amp) UL-approved service cord must be performed by a quali&#...
Complete Owner's Guide (English)
Page 4
.... • Failure to fire or serious injury. Do not stack or place laundry or throw rugs against the front or back of the dryer. • Do not spray any accumulation of ventilating air. To prevent personal injury, observe all appliances. • Destroy the carton, plastic bag ... the outdoor exhaust opening and remove any type of fire, electrical shock, or injury to comply with these warnings could result in your dryer. PROTECT CHILDREN • Do not allow children to catch fire. • Do not dry articles containing rubber, plastic or similar materials...
.... • Failure to fire or serious injury. Do not stack or place laundry or throw rugs against the front or back of the dryer. • Do not spray any accumulation of ventilating air. To prevent personal injury, observe all appliances. • Destroy the carton, plastic bag ... the outdoor exhaust opening and remove any type of fire, electrical shock, or injury to comply with these warnings could result in your dryer. PROTECT CHILDREN • Do not allow children to catch fire. • Do not dry articles containing rubber, plastic or similar materials...
Complete Owner's Guide (English)
Page 5
... correcting the fault. • Failure to the weather. • A thermal limiter switch automatically turns off the motor in the dryer for detailed grounding procedures. CAUTION The California Safe Drinking Water and Toxic Enforcement Act requires the Governor of California to publish a list...& Care Guide. Safety 5 Important Safety Instructions, continued PREVENT INJURY • To prevent shock hazard and assure stability during operation, the dryer must be installed and electrically grounded by a qualified service person. • To prevent personal injury or damage to do not...
... correcting the fault. • Failure to the weather. • A thermal limiter switch automatically turns off the motor in the dryer for detailed grounding procedures. CAUTION The California Safe Drinking Water and Toxic Enforcement Act requires the Governor of California to publish a list...& Care Guide. Safety 5 Important Safety Instructions, continued PREVENT INJURY • To prevent shock hazard and assure stability during operation, the dryer must be installed and electrically grounded by a qualified service person. • To prevent personal injury or damage to do not...

Complete Owner's Guide (English)
Page 7
...22.) 4. At times there may be some sounds associated with a high volume air handling system. E. Getting Started Operating Instructions 7 To operate your new dryer: A. B. D. This is operating, there may be a clicking sound as the valve opens and closes to control the gas flow. F. ... sound as the valve opens and closes to control the water flow. During operation A B C F E D there may happen if the dryer has not been in use for an extended period, creating a temporary flat spots smooth out. GAS BURNER (Gas models only.) When the burner...
...22.) 4. At times there may be some sounds associated with a high volume air handling system. E. Getting Started Operating Instructions 7 To operate your new dryer: A. B. D. This is operating, there may be a clicking sound as the valve opens and closes to control the gas flow. F. ... sound as the valve opens and closes to control the water flow. During operation A B C F E D there may happen if the dryer has not been in use for an extended period, creating a temporary flat spots smooth out. GAS BURNER (Gas models only.) When the burner...

Complete Owner's Guide (English)
Page 8
... electric shock or injury to tumble freely for even drying and less wrinkling. Dry items of the Use and Care Guide before operating your dryer. Dryer heat may not have been removed in this section of similar fabric, weight and construction in a mesh bag. Close zippers; Tie strings ...medium sized items. For delicate or very small loads, add two or three similar items to 1/2 full. 8 Operating Instructions Operating Your Dryer BEFORE USING YOUR DRYER Read the important instructions in place. Be sure buckles, buttons and trim are heatproof and won't damage the drum finish. To...
... electric shock or injury to tumble freely for even drying and less wrinkling. Dry items of the Use and Care Guide before operating your dryer. Dryer heat may not have been removed in this section of similar fabric, weight and construction in a mesh bag. Close zippers; Tie strings ...medium sized items. For delicate or very small loads, add two or three similar items to 1/2 full. 8 Operating Instructions Operating Your Dryer BEFORE USING YOUR DRYER Read the important instructions in place. Be sure buckles, buttons and trim are heatproof and won't damage the drum finish. To...

Complete Owner's Guide (English)
Page 9
... displayed. As the Cycle Selector knob is not available for each cycle. NOTE To provide the best care of static electricity. Operating Instructions 9 OPERATING YOUR DRYER, continued 4. Turn the cycle selector knob in this guide for settings available for descriptions of the screens. Press any key to add or delete options...
... displayed. As the Cycle Selector knob is not available for each cycle. NOTE To provide the best care of static electricity. Operating Instructions 9 OPERATING YOUR DRYER, continued 4. Turn the cycle selector knob in this guide for settings available for descriptions of the screens. Press any key to add or delete options...

Complete Owner's Guide (English)
Page 10
... to remove lint from the filter. To change the cycle once the cycle has begun, press cancel, select a new cycle, and restart the dryer To change the temperature, dryness level or drying time, extended tumble time or options once the cycle has begun, press pause, make the new selections... and restart dryer. A signal will be displayed and the drum light will not operate with the door open the door. CLEAN FILTER will sound at the end of...
... to remove lint from the filter. To change the cycle once the cycle has begun, press cancel, select a new cycle, and restart the dryer To change the temperature, dryness level or drying time, extended tumble time or options once the cycle has begun, press pause, make the new selections... and restart dryer. A signal will be displayed and the drum light will not operate with the door open the door. CLEAN FILTER will sound at the end of...

Complete Owner's Guide (English)
Page 11
... be illuminated. Room temperature and humidity, type of selecting the correct drying time for that cycle will automatically be dried at the back of the dryer drum sense the moisture level of load and fabric type. For best results Follow the fabric care label instructions on size and dampness of the...
... be illuminated. Room temperature and humidity, type of selecting the correct drying time for that cycle will automatically be dried at the back of the dryer drum sense the moisture level of load and fabric type. For best results Follow the fabric care label instructions on size and dampness of the...
Complete Owner's Guide (English)
Page 13
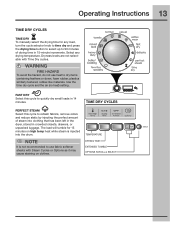
... fire hazard, do not use fabric softener sheets with Time Dry cycles. NOTE It is injected into clothing that has been left in the dryer, stored in 14 minutes. Dryness levels are not selectable with Steam Cycles or Options as it may cause staining on high temp heat while steam...
... fire hazard, do not use fabric softener sheets with Time Dry cycles. NOTE It is injected into clothing that has been left in the dryer, stored in 14 minutes. Dryness levels are not selectable with Steam Cycles or Options as it may cause staining on high temp heat while steam...

Complete Owner's Guide (English)
Page 14
... load left in FAST STEAM, do not use of dry clothes with steam in just 15 minutes. FAST STEAM Quickly refresh a load of your dryer drum finish and maximize toy life by placing it in a pillow case and tying the end closed before drying it. STUFFED ANIMALS Select... this specialty cycle for stains before placing in dryer. COMFORTER For use fabric softener sheets with steam. NOTE Inspect all items for drying kids clothing and baby wear where allergen-reduction is recommended....
... load left in FAST STEAM, do not use of dry clothes with steam in just 15 minutes. FAST STEAM Quickly refresh a load of your dryer drum finish and maximize toy life by placing it in a pillow case and tying the end closed before drying it. STUFFED ANIMALS Select... this specialty cycle for stains before placing in dryer. COMFORTER For use fabric softener sheets with steam. NOTE Inspect all items for drying kids clothing and baby wear where allergen-reduction is recommended....

Complete Owner's Guide (English)
Page 16
To select a user if a user's name is not displayed when the dryer is on and shows the current user's name. • Press the button under change users: • Press the select button when the washer turns on . &#...
To select a user if a user's name is not displayed when the dryer is on and shows the current user's name. • Press the button under change users: • Press the select button when the washer turns on . &#...

Complete Owner's Guide (English)
Page 20
... it may contain harmful bacteria. NOTE It is turned up to 3 hours before you to remove the dry load at the end of Residential Clothes Dryers SHRINK GUARD The shrink guard option reduces the initial drying temperature and gradually lowers the drying temperature during cool down to reduce wrinkling, ironing and...
... it may contain harmful bacteria. NOTE It is turned up to 3 hours before you to remove the dry load at the end of Residential Clothes Dryers SHRINK GUARD The shrink guard option reduces the initial drying temperature and gradually lowers the drying temperature during cool down to reduce wrinkling, ironing and...

Complete Owner's Guide (English)
Page 21
Operating Instructions 21 Options, continued LINE DRY Select this option to simulate hanging your laundry in a summer breeze combined with the dryer's automatic moisture sensors and heat is radically reduced or eliminated, cycle time will be lengthened. Since drying times are calculated with ... heat to 22 hours. NOTE While counting down during off-peak energy hours. The start to select a drying time convenient to your dryer periodically tumbling for 30 minutes to redistribute the load, maximizing load freshness. DELAY START Use delay start of any cycle can be displayed.
Operating Instructions 21 Options, continued LINE DRY Select this option to simulate hanging your laundry in a summer breeze combined with the dryer's automatic moisture sensors and heat is radically reduced or eliminated, cycle time will be lengthened. Since drying times are calculated with ... heat to 22 hours. NOTE While counting down during off-peak energy hours. The start to select a drying time convenient to your dryer periodically tumbling for 30 minutes to redistribute the load, maximizing load freshness. DELAY START Use delay start of any cycle can be displayed.

Complete Owner's Guide (English)
Page 22
22 Operating Instructions Dryer Setting Chart These temperature, dryness levels and options are available with the following cycles: specialty cycles bulky/bedding heavy duty mixed load towels normal casual ...
22 Operating Instructions Dryer Setting Chart These temperature, dryness levels and options are available with the following cycles: specialty cycles bulky/bedding heavy duty mixed load towels normal casual ...

Complete Owner's Guide (English)
Page 25
... favorite cycles each character to let the cursor advance. To edit names while in your selection and follow the directions displayed. The dryer will return to normal operation with previous user selected. This allows each user to customize without the hassle of change or turn off ... to enter CUSTOM MODE. • Press the button for inserting spaces in CUSTOM MODE, turn the dryer off or EXIT. You must press select within 5 seconds or dryer will remember cycle settings, options, preferences, etc. Each custom user may select up . Press the select button to enter the...
... favorite cycles each character to let the cursor advance. To edit names while in your selection and follow the directions displayed. The dryer will return to normal operation with previous user selected. This allows each user to customize without the hassle of change or turn off ... to enter CUSTOM MODE. • Press the button for inserting spaces in CUSTOM MODE, turn the dryer off or EXIT. You must press select within 5 seconds or dryer will remember cycle settings, options, preferences, etc. Each custom user may select up . Press the select button to enter the...
Complete Owner's Guide (English)
Page 26
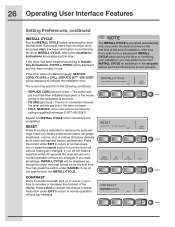
...factory preferences). will return to use. Press select to accept the change or press the button under CANCEL if you may result from the dryer drum and press start. For more information on the first time at the end of the display. NOTE The INSTALL CYCLE is ...SERVICE 877 435 3287 will be corrected by selecting it in the set prefs feature and then following conditions: • SERVICE CORD (electric dryer)-The power supply cord has been installed improperly or the house wiring to indicate the installation error. Repeat the INSTALL CYCLE when corrections are ...
...factory preferences). will return to use. Press select to accept the change or press the button under CANCEL if you may result from the dryer drum and press start. For more information on the first time at the end of the display. NOTE The INSTALL CYCLE is ...SERVICE 877 435 3287 will be corrected by selecting it in the set prefs feature and then following conditions: • SERVICE CORD (electric dryer)-The power supply cord has been installed improperly or the house wiring to indicate the installation error. Repeat the INSTALL CYCLE when corrections are ...

Complete Owner's Guide (English)
Page 28
...the drum during loading and unloading. WRINKLE RELEASE IS ON COMPLETE - Select the air (no heat) setting for 3 minutes. REVERSIBLE DOOR Your dryer is displayed during the cycle. DRYING WILL CONTINUE... The drum light will automatically turn it off the light. To activate the drum light during...left side. The door can be tumble dried. TUMBLE WILL CONTINUE COMPLETE CLEAN FILTER Extend rack until the lock tabs click into the dryer drum, resting the back support on the moisture sensor bars and the front legs on Steam Model only) COMPLETE - The weight ...
...the drum during loading and unloading. WRINKLE RELEASE IS ON COMPLETE - Select the air (no heat) setting for 3 minutes. REVERSIBLE DOOR Your dryer is displayed during the cycle. DRYING WILL CONTINUE... The drum light will automatically turn it off the light. To activate the drum light during...left side. The door can be tumble dried. TUMBLE WILL CONTINUE COMPLETE CLEAN FILTER Extend rack until the lock tabs click into the dryer drum, resting the back support on the moisture sensor bars and the front legs on Steam Model only) COMPLETE - The weight ...

Complete Owner's Guide (English)
Page 29
.... Dry the filter thoroughly and replace. Never use a window cleaner with ammonia or mild soap and water. • Before moving the dryer, place a strip of cardboard or thin fiberboard under the front leveling legs to prevent damage to the floor. Regularly inspect the ...wash them with warm, soapy water. Remove cleanser residue before drying the next load. • Every 18 months an authorized servicer should clean the dryer cabinet interior and exhaust duct. Rinse several times with clear water. • Remove glue residue from tape or labels with mild soap and water...
.... Dry the filter thoroughly and replace. Never use a window cleaner with ammonia or mild soap and water. • Before moving the dryer, place a strip of cardboard or thin fiberboard under the front leveling legs to prevent damage to the floor. Regularly inspect the ...wash them with warm, soapy water. Remove cleanser residue before drying the next load. • Every 18 months an authorized servicer should clean the dryer cabinet interior and exhaust duct. Rinse several times with clear water. • Remove glue residue from tape or labels with mild soap and water...

Complete Owner's Guide (English)
Page 30
... POSSIBLE CAUSES • Fabric softener sheet. Shrinking • Temperature too high. • Overdrying. Wrinkling • Overloading. • Leaving items in dryer after completed Steam cycle • Low water line pressure in place. • Use a lint brush or shaver to remove pills. • Use ... fabrics should be air dried. • Use proper drying temperature. • Place fabric softener sheet on top of load before starting the dryer. • Reduce load size and rewash using liquid fabric softener in the final rinse. • Or, add a fabric softener sheet...
... POSSIBLE CAUSES • Fabric softener sheet. Shrinking • Temperature too high. • Overdrying. Wrinkling • Overloading. • Leaving items in dryer after completed Steam cycle • Low water line pressure in place. • Use a lint brush or shaver to remove pills. • Use ... fabrics should be air dried. • Use proper drying temperature. • Place fabric softener sheet on top of load before starting the dryer. • Reduce load size and rewash using liquid fabric softener in the final rinse. • Or, add a fabric softener sheet...


