
User Guide
Page 2
... working correctly or you can't get it to work according to this User Guide carefully and keep it up. 2 Contents Dynex DX-DTCAM Web Camera Contents Important safety instructions 2 Web camera components 3 Setting up the Web camera 4 Using the Web camera 5 Legal notices 14 Français 16 Español 30 Important safety instructions Do not attempt to come in...
... working correctly or you can't get it to work according to this User Guide carefully and keep it up. 2 Contents Dynex DX-DTCAM Web Camera Contents Important safety instructions 2 Web camera components 3 Setting up the Web camera 4 Using the Web camera 5 Legal notices 14 Français 16 Español 30 Important safety instructions Do not attempt to come in...

User Guide
Page 3
Provides sound reception for the Web camera. Turns on when the Web camera is connected. Adjusts to the Web camera. Adjust the focus by turning the lens. Web camera components 3 Web camera components 1 2 3 4 Item Description 1 Lens 2 LED indicator 3 Microphone 4 Adjustable base Function Provides the image to provide the view you want.
Provides sound reception for the Web camera. Turns on when the Web camera is connected. Adjusts to the Web camera. Adjust the focus by turning the lens. Web camera components 3 Web camera components 1 2 3 4 Item Description 1 Lens 2 LED indicator 3 Microphone 4 Adjustable base Function Provides the image to provide the view you want.
User Guide
Page 4
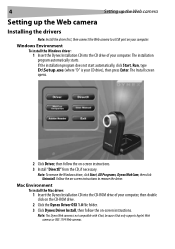
... Driver, then follow the on -screen instructions. 3 Install "DirectX" from the CD, if necessary. Note: This Dynex Web camera is your computer, then double click on the CD-ROM drive. 2 Click the Dynex Driver OSX 1.0 file folder. 3 Click Dynex Driver Install, then follow the on -screen instructions. Note: To remove the Windows driver, click Start...
... Driver, then follow the on -screen instructions. 3 Install "DirectX" from the CD, if necessary. Note: This Dynex Web camera is your computer, then double click on the CD-ROM drive. 2 Click the Dynex Driver OSX 1.0 file folder. 3 Click Dynex Driver Install, then follow the on -screen instructions. Note: To remove the Windows driver, click Start...

User Guide
Page 5
... chat" on your desk with the lens facing you take using the Dynex application. You can use the Dynex Web camera interface (provided) to save the images you . Note: After installing the Dynex Windows driver, the system automatically creates a folder (C:\My Documents\WebCam Center... Start, All Programs, Dynex WebCam, then click Dynex WebCam. Using the Web camera The Dynex Web camera interface (Windows only) You can also start the program by clicking the Dynex shortcut on -screen instructions. Installing the hardware To install the hardware: 1 Insert the Web camera's USB cable into the...
... chat" on your desk with the lens facing you take using the Dynex application. You can use the Dynex Web camera interface (provided) to save the images you . Note: After installing the Dynex Windows driver, the system automatically creates a folder (C:\My Documents\WebCam Center... Start, All Programs, Dynex WebCam, then click Dynex WebCam. Using the Web camera The Dynex Web camera interface (Windows only) You can also start the program by clicking the Dynex shortcut on -screen instructions. Installing the hardware To install the hardware: 1 Insert the Web camera's USB cable into the...

User Guide
Page 6
Click the icon to enter the mode you start the application: Interface screen icons The following interface screen (in Preview mode) opens when you want: Icon Description Preview mode Snapshot mode Video Clip mode Security Monitoring mode Exit Camera control 6 Using the Web camera The main interface screen The following icons appear on the interface screen.
Click the icon to enter the mode you start the application: Interface screen icons The following interface screen (in Preview mode) opens when you want: Icon Description Preview mode Snapshot mode Video Clip mode Security Monitoring mode Exit Camera control 6 Using the Web camera The main interface screen The following icons appear on the interface screen.

User Guide
Page 7
... resolutions. Choose between RGB24 and I420, then select one of I420 images are in Preview mode: Button Description Zoom in on the subject. Using the Web camera 7 Preview mode The following Preview mode screen opens when you first open the program, or when you click the Preview mode icon : Preview mode control...
... resolutions. Choose between RGB24 and I420, then select one of I420 images are in Preview mode: Button Description Zoom in on the subject. Using the Web camera 7 Preview mode The following Preview mode screen opens when you first open the program, or when you click the Preview mode icon : Preview mode control...

User Guide
Page 8
8 Using the Web camera SnapShot mode The following buttons are in Preview mode. SnapShot mode control buttons The following SnapShot mode screen opens when you are available when you click the SnapShot mode icon : Use the SnapShot mode to Preview mode and make the change there. Shows the choice you made in SnapShot mode: Button Description Send the photo by e-mail. Note: To change the resolution, go back to take one or more pictures. Shoot continuously.
8 Using the Web camera SnapShot mode The following buttons are in Preview mode. SnapShot mode control buttons The following SnapShot mode screen opens when you are available when you click the SnapShot mode icon : Use the SnapShot mode to Preview mode and make the change there. Shows the choice you made in SnapShot mode: Button Description Send the photo by e-mail. Note: To change the resolution, go back to take one or more pictures. Shoot continuously.

User Guide
Page 9
.... 3 Press to return to MPEG-1 format Start recording Stop recording Exit the Video Clip mode Shows the choice you made in Preview mode. Using the Web camera 9 Video Clip mode The following Video Clip mode screen opens when you click the Video Clip mode icon : Video Clip mode control buttons The following...
.... 3 Press to return to MPEG-1 format Start recording Stop recording Exit the Video Clip mode Shows the choice you made in Preview mode. Using the Web camera 9 Video Clip mode The following Video Clip mode screen opens when you click the Video Clip mode icon : Video Clip mode control buttons The following...

User Guide
Page 10
.... Set up time parameters of image recording. Note: You can use any image resolution in Security Monitoring mode: Button Description Start recording. 10 Using the Web camera Security Monitoring mode The following Security Monitoring mode screen opens when you click the Security Monitoring mode icon : Security Monitoring mode control buttons The following...
.... Set up time parameters of image recording. Note: You can use any image resolution in Security Monitoring mode: Button Description Start recording. 10 Using the Web camera Security Monitoring mode The following Security Monitoring mode screen opens when you click the Security Monitoring mode icon : Security Monitoring mode control buttons The following...

User Guide
Page 11
... mode you set up. 6 Outdoor/Indoor-Set based on where your Web camera is located in a backlight position, select this , you need to select ...3 4 7 Setting Function 1 Image Mirror-Flip the image horizontally. B/W Mode-Select to save the values you can personalize your camera settings for different circumstances. Low Light-Select to get a clear image in Auto to adjust. 5 Click Reset to return to ... according to the country where you are using the Web camera. (Before doing this to your Web camera is located. Click Restore to return to the manufacturer's settings.
... mode you set up. 6 Outdoor/Indoor-Set based on where your Web camera is located in a backlight position, select this , you need to select ...3 4 7 Setting Function 1 Image Mirror-Flip the image horizontally. B/W Mode-Select to save the values you can personalize your camera settings for different circumstances. Low Light-Select to get a clear image in Auto to adjust. 5 Click Reset to return to ... according to the country where you are using the Web camera. (Before doing this to your Web camera is located. Click Restore to return to the manufacturer's settings.

User Guide
Page 12
Frame-Select from 16 different video effects. No effect & frame-Select this box. 12 Effects tab 1 Using the Web camera 2 3 Setting Function 1 Effects-Select from 10 different video frames. Also, you can directly connect to this Effects page from the video chat software. 2 Customized Frame-...
Frame-Select from 16 different video effects. No effect & frame-Select this box. 12 Effects tab 1 Using the Web camera 2 3 Setting Function 1 Effects-Select from 10 different video frames. Also, you can directly connect to this Effects page from the video chat software. 2 Customized Frame-...

User Guide
Page 13
.... Whether you how to enable the zoom function and control the image. It explains each button and option and also shows you use . Using the Web camera 13 Zoom tab Use this screen to perform most out of any Webcam.
.... Whether you how to enable the zoom function and control the image. It explains each button and option and also shows you use . Using the Web camera 13 Zoom tab Use this screen to perform most out of any Webcam.

