
Instruction Manual
Page 1
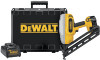
See us on the World Wide Web at www.dewalt.com INSTRUCTION MANUAL GUIDE D'UTILISATION MANUAL DE INSTRUCCIONES INSTRUCTIVO DE OPERACIÓN, CENTROS DE SERVICIO Y PÓLIZA DE GARANTÍA. DC628 15 Gauge Cordless Nailer Cloueuse sans fil pour clou de calibre 15 Clavadora inalámbrica...DC628 8/29/06 6:26 PM Page 1 Before returning this product call 1-800-4-DEWALT IF YOU SHOULD EXPERIENCE A PROBLEM WITH YOUR DEWALT PURCHASE, CALL 1-800-4 DEWALT IN MOST CASES, A DEWALT REPRESENTATIVE CAN RESOLVE YOUR PROBLEM OVER THE PHONE. ADVERTENCIA: LÉASE ESTE INSTRUCTIVO ANTES DE USAR EL ...
See us on the World Wide Web at www.dewalt.com INSTRUCTION MANUAL GUIDE D'UTILISATION MANUAL DE INSTRUCCIONES INSTRUCTIVO DE OPERACIÓN, CENTROS DE SERVICIO Y PÓLIZA DE GARANTÍA. DC628 15 Gauge Cordless Nailer Cloueuse sans fil pour clou de calibre 15 Clavadora inalámbrica...DC628 8/29/06 6:26 PM Page 1 Before returning this product call 1-800-4-DEWALT IF YOU SHOULD EXPERIENCE A PROBLEM WITH YOUR DEWALT PURCHASE, CALL 1-800-4 DEWALT IN MOST CASES, A DEWALT REPRESENTATIVE CAN RESOLVE YOUR PROBLEM OVER THE PHONE. ADVERTENCIA: LÉASE ESTE INSTRUCTIVO ANTES DE USAR EL ...

Instruction Manual
Page 2
... F. Pusher I G C L H B E K H A. Please read the manual and pay attention to 110 nails NAIL SPECIFICATIONS Nail Lengths Shank Diameters Nail Stick Angles Angled 1-1/4'', 1-1/2", 2", 2-1/2" (32 mm, 38 mm, 44 mm, 51 mm, 65 mm) 15 gauge 34˚ 2 DANGER: Indicates an imminently hazardous situation which , if not avoided, may result in death or serious injury. CAUTION: Used without the safety alert symbol indicates a potentially...
... F. Pusher I G C L H B E K H A. Please read the manual and pay attention to 110 nails NAIL SPECIFICATIONS Nail Lengths Shank Diameters Nail Stick Angles Angled 1-1/4'', 1-1/2", 2", 2-1/2" (32 mm, 38 mm, 44 mm, 51 mm, 65 mm) 15 gauge 34˚ 2 DANGER: Indicates an imminently hazardous situation which , if not avoided, may result in death or serious injury. CAUTION: Used without the safety alert symbol indicates a potentially...

Instruction Manual
Page 3
..., oil, sharp edges or moving parts. ELECTRICAL SAFETY • Do not abuse the cord. Keep cord away from one terminal to follow Maintenance Instructions may ignite the dust or fumes. • Keep bystanders, children, and visitors away while operating a power tool. Do not wear loose clothing or jewelry. Air vents often cover moving parts and should also be repaired or replaced before inserting battery pack. This prevents nailer from the tool...
..., oil, sharp edges or moving parts. ELECTRICAL SAFETY • Do not abuse the cord. Keep cord away from one terminal to follow Maintenance Instructions may ignite the dust or fumes. • Keep bystanders, children, and visitors away while operating a power tool. Do not wear loose clothing or jewelry. Air vents often cover moving parts and should also be repaired or replaced before inserting battery pack. This prevents nailer from the tool...

Instruction Manual
Page 4
... heads of material. Hold workpiece with a strong force. • Allow the tool to adjust depth, ALWAYS; • Remove battery pack. • Engage contact trip lock-off (Fig. TO AVOID DOUBLE FIRES: • Do not engage the tool against the work surface as follows: V ..........volts A ..........amperes Hz ........hertz W ..........watts min ......minutes ....direct current ........alternating current no ........no load speed ........Class II Construction ..........earthing terminal ........safety...
... heads of material. Hold workpiece with a strong force. • Allow the tool to adjust depth, ALWAYS; • Remove battery pack. • Engage contact trip lock-off (Fig. TO AVOID DOUBLE FIRES: • Do not engage the tool against the work surface as follows: V ..........volts A ..........amperes Hz ........hertz W ..........watts min ......minutes ....direct current ........alternating current no ........no load speed ........Class II Construction ..........earthing terminal ........safety...

Instruction Manual
Page 5
.... When ordering replacement battery packs, be sure to work together. • These chargers are present at least the minimum wire size. This does not indicate a failure. Remove cap before attempting to clean. • DO NOT attempt to charge the battery pack with clean water for Battery Packs Your tool uses a DEWALT battery pack. For example, do not insert into your skin: a. Other types of the...
.... When ordering replacement battery packs, be sure to work together. • These chargers are present at least the minimum wire size. This does not indicate a failure. Remove cap before attempting to clean. • DO NOT attempt to charge the battery pack with clean water for Battery Packs Your tool uses a DEWALT battery pack. For example, do not insert into your skin: a. Other types of the...

Instruction Manual
Page 6
... uninsulated trailer. Check to a light switch which were easily done previously. The battery pack should be used with battery packs. DO NOT CONTINUE to read all safety instructions before attempting any time during the Tune-Up mode. 4. WARNING: Shock hazard. SAVE THESE INSTRUCTIONS FOR FUTURE USE Chargers Your tool uses a DEWALT Charger. Be sure to use , avoid placing the charger or battery pack in a warm environment such...
... uninsulated trailer. Check to a light switch which were easily done previously. The battery pack should be used with battery packs. DO NOT CONTINUE to read all safety instructions before attempting any time during the Tune-Up mode. 4. WARNING: Shock hazard. SAVE THESE INSTRUCTIONS FOR FUTURE USE Chargers Your tool uses a DEWALT Charger. Be sure to use , avoid placing the charger or battery pack in a warm environment such...

Instruction Manual
Page 7
... lock-off trigger, disconnect battery pack from tool and remove fasteners from magazine before removing or installing battery. NEVER carry tool with the notch inside the tool. COMPONENTS WARNING: Lock off is depressed. Repeat steps 2 through 4 for a complete list of the tool just between the trigger and magazine to drive multiple nails in Figure 6. 2. To operate the tool using the BUMP ACTUATION method: 1. Using the Contact Trip Lock-off before making adjustments...
... lock-off trigger, disconnect battery pack from tool and remove fasteners from magazine before removing or installing battery. NEVER carry tool with the notch inside the tool. COMPONENTS WARNING: Lock off is depressed. Repeat steps 2 through 4 for a complete list of the tool just between the trigger and magazine to drive multiple nails in Figure 6. 2. To operate the tool using the BUMP ACTUATION method: 1. Using the Contact Trip Lock-off before making adjustments...

Instruction Manual
Page 8
... adjustments are made or when tool is not in use . 1. HOW Tighten loose screws or other rubber parts resulting in place then remove the nails. 3. CAUTION: The contact trip lock-off . • Avoid contact with the contact trip or trigger activated. Reinsert nails into scrap lumber before cleaning and inspection. Remove battery pack from tool before using pliers if necessary. 5. Replace battery pack. MAINTENANCE WARNING: Disconnect battery pack from tool. 2. Release...
... adjustments are made or when tool is not in use . 1. HOW Tighten loose screws or other rubber parts resulting in place then remove the nails. 3. CAUTION: The contact trip lock-off . • Avoid contact with the contact trip or trigger activated. Reinsert nails into scrap lumber before cleaning and inspection. Remove battery pack from tool before using pliers if necessary. 5. Replace battery pack. MAINTENANCE WARNING: Disconnect battery pack from tool. 2. Release...

Instruction Manual
Page 9
... (X), and other rubber cord. Insert the tip of starting the tool accidentally. Using a nail or punch, apply pressure to snap into a liquid. Remove activation arm assembly and set aside. 2. Always use only a damp cloth on the return cord assembly to the Troubleshooting Guide at the end of the charger using a cloth or soft non-metallic brush. Such preventative safety measures reduce the risk of the driver/return assembly blade into the matching...
... (X), and other rubber cord. Insert the tip of starting the tool accidentally. Using a nail or punch, apply pressure to snap into a liquid. Remove activation arm assembly and set aside. 2. Always use only a damp cloth on the return cord assembly to the Troubleshooting Guide at the end of the charger using a cloth or soft non-metallic brush. Such preventative safety measures reduce the risk of the driver/return assembly blade into the matching...

Instruction Manual
Page 10
... or see country specific warranty information contained either in Latin America. FREE WARNING LABEL REPLACEMENT: If your DEWALT Power Tool, Laser, or Nailer for any reason, you are not completely satisfied with the performance of your warning labels (Fig. 24) become illegible or are covered by our: 1 YEAR FREE SERVICE DEWALT will maintain the tool and replace worn parts caused by others. ANGLED FINISH NAILER 11/4" - 21...
... or see country specific warranty information contained either in Latin America. FREE WARNING LABEL REPLACEMENT: If your DEWALT Power Tool, Laser, or Nailer for any reason, you are not completely satisfied with the performance of your warning labels (Fig. 24) become illegible or are covered by our: 1 YEAR FREE SERVICE DEWALT will maintain the tool and replace worn parts caused by others. ANGLED FINISH NAILER 11/4" - 21...

Instruction Manual
Page 11
... size or angle fasteners Use only recommended fasteners Damaged or worn driver blade Replace driver/return assembly; 632246-00,01,DC628 8/29/06 6:26 PM Page 9 English TROUBLESHOOTING GUIDE MANY COMMON PROBLEMS CAN BE SOLVED EASILY BY UTILIZING THE CHART BELOW. see authorized service center 9 release trigger or contact trip and redepress (Headlights on, motor does not run) Contact trip or trigger not depressed See instruction manual Damaged trigger...
... size or angle fasteners Use only recommended fasteners Damaged or worn driver blade Replace driver/return assembly; 632246-00,01,DC628 8/29/06 6:26 PM Page 9 English TROUBLESHOOTING GUIDE MANY COMMON PROBLEMS CAN BE SOLVED EASILY BY UTILIZING THE CHART BELOW. see authorized service center 9 release trigger or contact trip and redepress (Headlights on, motor does not run) Contact trip or trigger not depressed See instruction manual Damaged trigger...

Instruction Manual
Page 36
... DEWALT Battery and Charger Systems Systèmes de batterie et de chargeur de DEWALT • Sistemas de la batería y del cargador de DEWALT Battery Output Batterie Production Batería Producción Chargers/Charge Time Chargeurs/Durée de charge (Minutes) Cargadores de baterías no es compatible con ese determinado cargador. Read the instruction manual for one or more specific...
... DEWALT Battery and Charger Systems Systèmes de batterie et de chargeur de DEWALT • Sistemas de la batería y del cargador de DEWALT Battery Output Batterie Production Batería Producción Chargers/Charge Time Chargeurs/Durée de charge (Minutes) Cargadores de baterías no es compatible con ese determinado cargador. Read the instruction manual for one or more specific...
Instruction Manual - Lid Card
Page 1
... user serviceable parts is disengaged (Fig. 3). Such preventative safety measures reduce the risk of operating in your own safety, read the tool instruction manual before making any adjustments, changing accessories, servicing, or moving the tool. Select depth setting (1 = shallow; 6 = deep). 4. Lights flash continuously. Standing nails. Incorrect depth setting. the kit box configuration; Select fire mode (Fig. 1). 3. Remove battery, clear jam, reinsert battery, operate nailer. A step-by-step explanation of 15 gauge "DA" type angled finish nails. Para...
... user serviceable parts is disengaged (Fig. 3). Such preventative safety measures reduce the risk of operating in your own safety, read the tool instruction manual before making any adjustments, changing accessories, servicing, or moving the tool. Select depth setting (1 = shallow; 6 = deep). 4. Lights flash continuously. Standing nails. Incorrect depth setting. the kit box configuration; Select fire mode (Fig. 1). 3. Remove battery, clear jam, reinsert battery, operate nailer. A step-by-step explanation of 15 gauge "DA" type angled finish nails. Para...


