
Owners Manual
Page 2
... PRODUCT SHOULD NOT BE ADJUSTED OR REPAIRED BY ANYONE EXCEPT PROPERLY QUALIFIED SERVICE PERSONNEL. Install in public without the consent of the polarized or grounding-type plug. ENGLISH FRANCAIS ESPAÑOL n SAFETY PRECAUTIONS CAUTION RISK OF ELECTRIC SHOCK DO NOT OPEN CAUTION: TO REDUCE THE RISK OF ELECTRIC SHOCK, DO NOT REMOVE COVER (OR BACK). NO USER-SERVICEABLE PARTS INSIDE...
... PRODUCT SHOULD NOT BE ADJUSTED OR REPAIRED BY ANYONE EXCEPT PROPERLY QUALIFIED SERVICE PERSONNEL. Install in public without the consent of the polarized or grounding-type plug. ENGLISH FRANCAIS ESPAÑOL n SAFETY PRECAUTIONS CAUTION RISK OF ELECTRIC SHOCK DO NOT OPEN CAUTION: TO REDUCE THE RISK OF ELECTRIC SHOCK, DO NOT REMOVE COVER (OR BACK). NO USER-SERVICEABLE PARTS INSIDE...

Owners Manual
Page 3
...; Reorient or relocate the receiving antenna. • Increase the separation between the equipment and receiver. • Connect the product into the unit. • Ne pas laisser des objets étrangers dans l'appareil. • No deje objetos extraños dentro del equipo. • Unplug the power cord when not using the unit for a Class B digital device, pursuant to Part 15 of the FCC...
...; Reorient or relocate the receiving antenna. • Increase the separation between the equipment and receiver. • Connect the product into the unit. • Ne pas laisser des objets étrangers dans l'appareil. • No deje objetos extraños dentro del equipo. • Unplug the power cord when not using the unit for a Class B digital device, pursuant to Part 15 of the FCC...

Owners Manual
Page 4
... from this instructions along with other devices. • Cautions on the cable. • Do not open the top cover. Contents Getting Started Accessories 1 Before using 1, 2 About discs Discs usable on this set 2 Before playing MP3 or WMA (Windows Media® Audio) files 2 Holding discs 2 Loading discs 2 Cautions on loading discs 3 Cautions on handling 3 Cautions on storing discs 3 Cleaning discs 3 About the remote control unit Inserting the batteries 3 Operating range of the player there are...
... from this instructions along with other devices. • Cautions on the cable. • Do not open the top cover. Contents Getting Started Accessories 1 Before using 1, 2 About discs Discs usable on this set 2 Before playing MP3 or WMA (Windows Media® Audio) files 2 Holding discs 2 Loading discs 2 Cautions on loading discs 3 Cautions on handling 3 Cautions on storing discs 3 Cleaning discs 3 About the remote control unit Inserting the batteries 3 Operating range of the player there are...

Owners Manual
Page 5
... using the TIME button on the remote control unit) to MP3 or WMA files, respectively. Note however that with packet write software or playlists. • The time may not be displayed properly when searching or pausing during variable bit rate playback. • The time display cannot be played. Before playing MP3 or WMA (Windows Media® Audio) files There are output with extensions other formats. "Windows Media" and "Windows" are recorded in the inner tray guide...
... using the TIME button on the remote control unit) to MP3 or WMA files, respectively. Note however that with packet write software or playlists. • The time may not be displayed properly when searching or pausing during variable bit rate playback. • The time display cannot be played. Before playing MP3 or WMA (Windows Media® Audio) files There are output with extensions other formats. "Windows Media" and "Windows" are recorded in the inner tray guide...

Owners Manual
Page 6
... the set does not operate even when the remote control unit is exposed to protect them off using the disc. Places exposed to scratch discs when removing them off before using a hairdryer, etc. ENGLISH Getting Started Cautions on which the sticky part of cellophane tape or labels is exposed or on loading discs • Only load one . • Do not use two different types of batteries. •...
... the set does not operate even when the remote control unit is exposed to protect them off using the disc. Places exposed to scratch discs when removing them off before using a hairdryer, etc. ENGLISH Getting Started Cautions on which the sticky part of cellophane tape or labels is exposed or on loading discs • Only load one . • Do not use two different types of batteries. •...

Owners Manual
Page 7
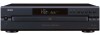
... 20-track music calender u Time indicator i Time display mode indicator o Track number indicator !0 Remote control signal receive indicator • ®, HDCD®, High Definition Compatible Digital® and Microsoft® are either registered trademarks or trademarks of repeat modes are a trademarks of discs. Display q we r t !4 !3 !2 !1 !5 q POWER switch • Press once to begin random play. u Automatic/Manual Search Forward button (7/9) • Press this button for fast reverse search. w Remote control sensor This sensor receives the infrared light transmitted...
... 20-track music calender u Time indicator i Time display mode indicator o Track number indicator !0 Remote control signal receive indicator • ®, HDCD®, High Definition Compatible Digital® and Microsoft® are either registered trademarks or trademarks of repeat modes are a trademarks of discs. Display q we r t !4 !3 !2 !1 !5 q POWER switch • Press once to begin random play. u Automatic/Manual Search Forward button (7/9) • Press this button for fast reverse search. w Remote control sensor This sensor receives the infrared light transmitted...

Owners Manual
Page 8
... DISPLAY button 10) Pause button (3 8) Skip buttons (8, 9 8) Search buttons (6, 7 9) CLEAR button 9) CALL button 9) DISC SKIP (+/-) buttons 7, 8) A-B button 10) TIME button 2, 5) Switches the time display Elapsed time of currently playing track Remaining time of currently playing track Remaining time of these to use this connector. Consult your DENON dealer if you wish to an AC power supply using an optical fiber cable (commercially available). r REMOTE CONTROL jack (ROOM TO ROOM OUT) This is output in , the function of all remaining tracks Play button (1 8, 9, 10) Stop...
... DISPLAY button 10) Pause button (3 8) Skip buttons (8, 9 8) Search buttons (6, 7 9) CLEAR button 9) CALL button 9) DISC SKIP (+/-) buttons 7, 8) A-B button 10) TIME button 2, 5) Switches the time display Elapsed time of currently playing track Remaining time of currently playing track Remaining time of these to use this connector. Consult your DENON dealer if you wish to an AC power supply using an optical fiber cable (commercially available). r REMOTE CONTROL jack (ROOM TO ROOM OUT) This is output in , the function of all remaining tracks Play button (1 8, 9, 10) Stop...

Owners Manual
Page 9
... making connections, also refer to the operating instructions of the other components. • Be sure to connect the left and right channels properly (left with left (L) and right (R) input terminal of noise. • Do not unplug the power supply cord while the set is operating. 6 ENGLISH Audio cable A Analog connections (Stereo) (White) (Red) L L R R Pin-plug cable B Digital connections (Coaxial) (Orange) Coaxial cable (75 Ω/ohms pin-plug cable) C Digital connections (Optical) Signal direction Audio signal OUT IN CD recorder etc. Stereo...
... making connections, also refer to the operating instructions of the other components. • Be sure to connect the left and right channels properly (left with left (L) and right (R) input terminal of noise. • Do not unplug the power supply cord while the set is operating. 6 ENGLISH Audio cable A Analog connections (Stereo) (White) (Red) L L R R Pin-plug cable B Digital connections (Coaxial) (Orange) Coaxial cable (75 Ω/ohms pin-plug cable) C Digital connections (Optical) Signal direction Audio signal OUT IN CD recorder etc. Stereo...

Owners Manual
Page 10
... hole. 3 Press DISC SKIP. The carousel turns and a disc can be loaded in the disc tray manually when the power is off as this explanation < > : Buttons on the main unit [ ] : Buttons on the remote control unit Button name only : Buttons on the main unit and remote control unit 7 ENGLISH Doing so could damage the internal mechanism in all of the disc trays other than one whose disc is currently playing. 4 Press 5 again...
... hole. 3 Press DISC SKIP. The carousel turns and a disc can be loaded in the disc tray manually when the power is off as this explanation < > : Buttons on the main unit [ ] : Buttons on the remote control unit Button name only : Buttons on the main unit and remote control unit 7 ENGLISH Doing so could damage the internal mechanism in all of the disc trays other than one whose disc is currently playing. 4 Press 5 again...
Owners Manual
Page 11
... [DISC SELECT] [5] [+10] [2]. Operation To pause playback Use this function to stop playback Press 2 during playback. • The pickup will advance to the beginning of the next track and playback will forward the pickup the corresponding number tracks. • When [DISC SKIP-] on the remote control unit is pressed, the carousel turns in the drawer turns and the disc on the disc has been played. Pressing the button several times will continue. ENGLISH Operation Starting playback Various playback functions...
... [DISC SELECT] [5] [+10] [2]. Operation To pause playback Use this function to stop playback Press 2 during playback. • The pickup will advance to the beginning of the next track and playback will forward the pickup the corresponding number tracks. • When [DISC SKIP-] on the remote control unit is pressed, the carousel turns in the drawer turns and the disc on the disc has been played. Pressing the button several times will continue. ENGLISH Operation Starting playback Various playback functions...

Owners Manual
Page 12
...is deleted each time the [CLEAR] is reached during playback. • " " is displayed if the beginning of the first track is displayed. The tracks are played in the programmed order. ¢ Checking the programmed tracks: Press [CALL]. If this happens, use [7] or to turn the display off . ENGLISH Operation 1 REPEAT RANDOM 5 [NUMBER] (0~9, +10) [DIRECT] [DISC SELECT] RANDOM [DISPLAY] 1 [6] 5 [CLEAR] [CALL] [PROGRAM] [A-B] REPEAT [7] Operation Manual search Programmed play Use this explanation < > : Buttons on the main unit [ ] : Buttons on the remote control unit Button...
...is deleted each time the [CLEAR] is reached during playback. • " " is displayed if the beginning of the first track is displayed. The tracks are played in the programmed order. ¢ Checking the programmed tracks: Press [CALL]. If this happens, use [7] or to turn the display off . ENGLISH Operation 1 REPEAT RANDOM 5 [NUMBER] (0~9, +10) [DIRECT] [DISC SELECT] RANDOM [DISPLAY] 1 [6] 5 [CLEAR] [CALL] [PROGRAM] [A-B] REPEAT [7] Operation Manual search Programmed play Use this explanation < > : Buttons on the main unit [ ] : Buttons on the remote control unit Button...
Owners Manual
Page 13
...; Disc Sequential Random Play: OFF 2 Press 1. All-disc Repeat • The "REPEAT DISC" indicator lights. • All the discs currently loaded are played once each in random order, then played again in random order. In such a case, the player will now return to correct. During programmed playback: The tracks are played once in random order, then played again in three steps or turned off. ENGLISH Operation Random play Repeat play 1 Use...
...; Disc Sequential Random Play: OFF 2 Press 1. All-disc Repeat • The "REPEAT DISC" indicator lights. • All the discs currently loaded are played once each in random order, then played again in random order. In such a case, the player will now return to correct. During programmed playback: The tracks are played once in random order, then played again in three steps or turned off. ENGLISH Operation Random play Repeat play 1 Use...

Owners Manual
Page 14
... of the • Use a properly recorded disc. 2 disc itself it poor. No digital signals are output. • The connection cables are not properly connected. • Check the connections. 6 Specific section of the disc cannot be • The disc has not been finalized. • Finalize the disc then play it. 2 played. • The recording conditions are spent. • Replace the batteries with new ones. 3 remote control unit is operated. • The remote control unit is displayed when playing • You...
... of the • Use a properly recorded disc. 2 disc itself it poor. No digital signals are output. • The connection cables are not properly connected. • Check the connections. 6 Specific section of the disc cannot be • The disc has not been finalized. • Finalize the disc then play it. 2 played. • The recording conditions are spent. • Replace the batteries with new ones. 3 remote control unit is operated. • The remote control unit is displayed when playing • You...

Owners Manual
Page 15
... 120 V, 60 Hz 15 W 434 (W) x 120 (H) x 400 (D) mm (17-3/32" x 4-3/4" x 15-3/4") (including protruding parts) 6.3 kg (13.1 lbs.) ¢ Remote control unit (RC-1033) Remote control type: Infrared pulse Batteries: R03/AAA Type (two batteries) External dimensions: 49 (W) x 220 (H) x 21 (D) mm (1-15/16" x 8-11/16" x 7/8") Mass: 106 g (0.23 lbs.) (included batteries) * For purposes of improvement, specifications and design are subject to change without notice. 12 ENGLISH ENGLISH Specifications
... 120 V, 60 Hz 15 W 434 (W) x 120 (H) x 400 (D) mm (17-3/32" x 4-3/4" x 15-3/4") (including protruding parts) 6.3 kg (13.1 lbs.) ¢ Remote control unit (RC-1033) Remote control type: Infrared pulse Batteries: R03/AAA Type (two batteries) External dimensions: 49 (W) x 220 (H) x 21 (D) mm (1-15/16" x 8-11/16" x 7/8") Mass: 106 g (0.23 lbs.) (included batteries) * For purposes of improvement, specifications and design are subject to change without notice. 12 ENGLISH ENGLISH Specifications

Owners Manual
Page 16
www.denon.com D&M Holdings Inc. Printed in China 00D 511 4437 302
www.denon.com D&M Holdings Inc. Printed in China 00D 511 4437 302


