
Owner's Manual
Page 4
3 Solving Problems Troubleshooting Tips 31 Battery Problems 31 Drive Problems 31 CD and DVD drive problems 32 Hard drive problems 33 E-Mail, Modem, and Internet Problems 33 Error Messages 34 IEEE 1394 Device Problems 35 Keyboard Problems 35 Lockups and Software Problems 36 The ...
3 Solving Problems Troubleshooting Tips 31 Battery Problems 31 Drive Problems 31 CD and DVD drive problems 32 Hard drive problems 33 E-Mail, Modem, and Internet Problems 33 Error Messages 34 IEEE 1394 Device Problems 35 Keyboard Problems 35 Lockups and Software Problems 36 The ...

Owner's Manual
Page 6
... Cards 77 Drives 82 General Installation Guidelines 82 Connecting Drive Cables 83 Hard Drive 84 Removing a Hard Drive 84 Installing a Hard Drive 85 Adding a Second Hard Drive 88 Floppy Drive 89 Removing a Floppy Drive 89 Installing a Floppy Drive 90 CD/DVD Drive 92 Removing a CD/DVD Drive 92 Installing a CD/DVD Drive 93 Processor Airflow...100 Front Panel 102 Removing the Front Panel 102 Replacing the Front Panel 103 Drive Door 104 Removing the Drive Door 104 Replacing the Drive Door 105 Battery 107 Replacing the Battery 107 Closing the Computer Cover 108 6 Contents
... Cards 77 Drives 82 General Installation Guidelines 82 Connecting Drive Cables 83 Hard Drive 84 Removing a Hard Drive 84 Installing a Hard Drive 85 Adding a Second Hard Drive 88 Floppy Drive 89 Removing a Floppy Drive 89 Installing a Floppy Drive 90 CD/DVD Drive 92 Removing a CD/DVD Drive 92 Installing a CD/DVD Drive 93 Processor Airflow...100 Front Panel 102 Removing the Front Panel 102 Replacing the Front Panel 103 Drive Door 104 Removing the Drive Door 104 Replacing the Drive Door 105 Battery 107 Replacing the Battery 107 Closing the Computer Cover 108 6 Contents
Owner's Manual
Page 11
...arrow icon. 3 Click the topic that describes your computer when you use Windows XP • Documentation for my computer • Documentation for my computer • How to use support.dell.com or contact technical support. • Enter the Express Service Code to view...technical service and support questions • Online discussions with other users and technical support • Documentation for devices (such as memory, the hard drive, and the operating system • Customer Care - The Express Service Code is not available in all countries. Upgrade information for components, ...
...arrow icon. 3 Click the topic that describes your computer when you use Windows XP • Documentation for my computer • Documentation for my computer • How to use support.dell.com or contact technical support. • Enter the Express Service Code to view...technical service and support questions • Online discussions with other users and technical support • Documentation for devices (such as memory, the hard drive, and the operating system • Customer Care - The Express Service Code is not available in all countries. Upgrade information for components, ...
Owner's Manual
Page 17
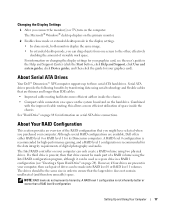
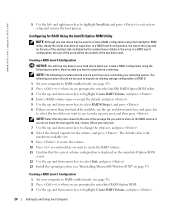
...0 or RAID level 1 volumes. The Microsoft® Windows® desktop displays on the hard drive. About Serial ATA Drives Your Dell™ Dimension™ XPS computer supports up to ensure that drive cannot be made part of space inside the chassis. • Compact cable connectors save space...information on changing the display settings for the data integrity requirements of the RAID configuration that are present in order to three serial ATA hard drives. The Intel RAID controller on page 24). NOTE: RAID levels do not represent a hierarchy. A RAID level 0 configuration is ...
...0 or RAID level 1 volumes. The Microsoft® Windows® desktop displays on the hard drive. About Serial ATA Drives Your Dell™ Dimension™ XPS computer supports up to ensure that drive cannot be made part of space inside the chassis. • Compact cable connectors save space...information on changing the display settings for the data integrity requirements of the RAID configuration that are present in order to three serial ATA hard drives. The Intel RAID controller on page 24). NOTE: RAID levels do not represent a hierarchy. A RAID level 0 configuration is ...
Owner's Manual
Page 18
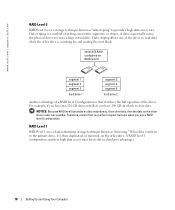
For example, if you have 240 GB on the other drive is a method of writing consecutive segments, or stripes, of the drives. serial ATA RAID configured for RAID level 0 segment 1 segment 3 segment 5 hard drive 1 segment 2 segment 4 segment 6 hard drive 2 Another advantage of a RAID level 0 configuration is also... you have two 120-GB drives installed, you use a RAID level 0 configuration. When data is written to the primary drive, it utilizes the full capacities of data sequentially across the physical drives to store data. www.dell.com | support.dell.com RAID Level 0 RAID...
For example, if you have 240 GB on the other drive is a method of writing consecutive segments, or stripes, of the drives. serial ATA RAID configured for RAID level 0 segment 1 segment 3 segment 5 hard drive 1 segment 2 segment 4 segment 6 hard drive 2 Another advantage of a RAID level 0 configuration is also... you have two 120-GB drives installed, you use a RAID level 0 configuration. When data is written to the primary drive, it utilizes the full capacities of data sequentially across the physical drives to store data. www.dell.com | support.dell.com RAID Level 0 RAID...

Owner's Manual
Page 19
..., and press . 4 Use the left- You can then be rebuilt using the data from the surviving drive. Both methods require that you install the operating system onto the hard drive. and right-arrow keys to configure RAID hard drive volumes. Setting Your Computer to store data. For instructions on which to RAID-Enabled Mode 1 Enter...
..., and press . 4 Use the left- You can then be rebuilt using the data from the surviving drive. Both methods require that you install the operating system onto the hard drive. and right-arrow keys to configure RAID hard drive volumes. Setting Your Computer to store data. For instructions on which to RAID-Enabled Mode 1 Enter...
Owner's Manual
Page 20
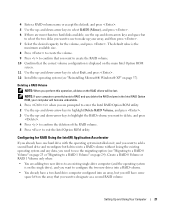
...to select RAID0(Stripe), and press . 6 If there are reinstalling your operating system. www.dell.com | support.dell.com 5 Use the left- and down -arrow keys to exit system setup and resume ... Exit, and press . 13 Install the operating system (see "Reinstalling Microsoft® Windows® XP" on your computer to RAID-enabled mode (see page 19). 2 Press when you create a ...utility, ideally the drives should only be the smaller of the array will lose any size drives may be used to migrate an existing storage configuration to RAID 0. 1 Set your hard drives when you are prompted...
...to select RAID0(Stripe), and press . 6 If there are reinstalling your operating system. www.dell.com | support.dell.com 5 Use the left- and down -arrow keys to exit system setup and resume ... Exit, and press . 13 Install the operating system (see "Reinstalling Microsoft® Windows® XP" on your computer to RAID-enabled mode (see page 19). 2 Press when you create a ...utility, ideally the drives should only be the smaller of the array will lose any size drives may be used to migrate an existing storage configuration to RAID 0. 1 Set your hard drives when you are prompted...
Owner's Manual
Page 21
...down-arrow keys to select RAID1(Mirror), and press . 6 If there are more than two hard disks available, use the migrating option (see "Reinstalling Microsoft® Windows® XP" on the RAID drives will become unbootable. 1 Press when you perform this operation, all data on page 57). ... the Intel(R) Application Accelerator If you already have one hard drive with the operating system installed on it, and you want to add a second hard drive and reconfigure both drives into an array, but you still have a two-hard drive computer configured into a RAID volume without losing the existing...
...down-arrow keys to select RAID1(Mirror), and press . 6 If there are more than two hard disks available, use the migrating option (see "Reinstalling Microsoft® Windows® XP" on the RAID drives will become unbootable. 1 Press when you perform this operation, all data on page 57). ... the Intel(R) Application Accelerator If you already have one hard drive with the operating system installed on it, and you want to add a second hard drive and reconfigure both drives into an array, but you still have a two-hard drive computer configured into a RAID volume without losing the existing...
Owner's Manual
Page 22
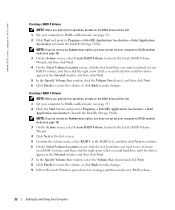
... Create RAID Volume to launch the Create RAID Volume Wizard, and then click Next. 4 On the Select Volume Location screen, click the first hard drive you want to use to include in your computer to RAID-enabled mode (see page 19). 2 Click Start and point to Programs→...→ Intel Application Accelerator to make changes. www.dell.com | support.dell.com Creating a RAID 0 Volume NOTE: When you perform this operation, all data on the new RAID volume. 22 Setting Up and Using Your Computer Click a second hard drive until two drives appear in the Selected window, and then click Next...
... Create RAID Volume to launch the Create RAID Volume Wizard, and then click Next. 4 On the Select Volume Location screen, click the first hard drive you want to use to include in your computer to RAID-enabled mode (see page 19). 2 Click Start and point to Programs→...→ Intel Application Accelerator to make changes. www.dell.com | support.dell.com Creating a RAID 0 Volume NOTE: When you perform this operation, all data on the new RAID volume. 22 Setting Up and Using Your Computer Click a second hard drive until two drives appear in the Selected window, and then click Next...

Owner's Manual
Page 23
...want to keep on the RAID volume). 8 On the Select Source Hard Drive screen, double-click the hard drive from which you want to migrate, and click Next. 9 On the Select Member Hard Drive screen, double-click the hard drive to select the member drive to span the stripe array, and click Next. 10 On the ...will lose all data on the RAID volume. Deleting a RAID Volume NOTE: While this procedure deletes the RAID 1 volume, it should be the hard drive containing the data or operating system files that you want to delete in the Available box, click the right-arrow button to move the highlighted...
...want to keep on the RAID volume). 8 On the Select Source Hard Drive screen, double-click the hard drive from which you want to migrate, and click Next. 9 On the Select Member Hard Drive screen, double-click the hard drive to select the member drive to span the stripe array, and click Next. 10 On the ...will lose all data on the RAID volume. Deleting a RAID Volume NOTE: While this procedure deletes the RAID 1 volume, it should be the hard drive containing the data or operating system files that you want to delete in the Available box, click the right-arrow button to move the highlighted...

Owner's Manual
Page 24
...hard drive to select the member drive that you want to use your source hard drive (it should be created with a RAID 1 array. Creating a Spare Hard Drive A spare hard drive may be the hard drive containing the data or operating system files that you want to make changes. You can use as the RAID level. www.dell.com | support.dell....com 11 Click Finish to start migrating, or click Back to keep on the RAID volume). 7 On the Select Source Hard Drive screen, double-click the hard drive from within Disk Manager or the Intel ...
...hard drive to select the member drive that you want to use your source hard drive (it should be created with a RAID 1 array. Creating a Spare Hard Drive A spare hard drive may be the hard drive containing the data or operating system files that you want to make changes. You can use as the RAID level. www.dell.com | support.dell....com 11 Click Finish to start migrating, or click Back to keep on the RAID volume). 7 On the Select Source Hard Drive screen, double-click the hard drive from within Disk Manager or the Intel ...

Owner's Manual
Page 25
... Spare Marking From a Spare Hard Drive: 1 Right-click the spare hard drive icon. 2 Click Reset Hard Drive to Non-RAID Rebuilding a Degraded RAID 1 Volume If your computer does not have a Windows XP CD? Transferring Information to a New Computer The Microsoft® Windows® XP operating system provides a Files and...Application Accelerator→ Intel Application Accelerator to launch the Intel(R) Storage Utility. 2 Right-click the available hard drive to which you can use the wizard from the Windows XP CD and click Next. 5 When the Now go to your old computer screen appears, go to the...
... Spare Marking From a Spare Hard Drive: 1 Right-click the spare hard drive icon. 2 Click Reset Hard Drive to Non-RAID Rebuilding a Degraded RAID 1 Volume If your computer does not have a Windows XP CD? Transferring Information to a New Computer The Microsoft® Windows® XP operating system provides a Files and...Application Accelerator→ Intel Application Accelerator to launch the Intel(R) Storage Utility. 2 Right-click the available hard drive to which you can use the wizard from the Windows XP CD and click Next. 5 When the Now go to your old computer screen appears, go to the...

Owner's Manual
Page 27
... Copy. Using Blank CD-Rs, CD-RWs, DVD+Rs, and DVD+RWs Your CD-RW drive can be used to four different types of information. Use blank DVD+RWs when you have finished...not be played only on MP3 players or on your computer hard drive. Setting Up and Using Your Computer 27 Once you have one CD or DVD drive, ensure that disc again if the disc is "finalized"...blank CD or DVD. The computer copies the data on that have created automatically ejects. Your DVD writable drive can be able write to a temporary folder on computers that disc later. Helpful Tips • Use...
... Copy. Using Blank CD-Rs, CD-RWs, DVD+Rs, and DVD+RWs Your CD-RW drive can be used to four different types of information. Use blank DVD+RWs when you have finished...not be played only on MP3 players or on your computer hard drive. Setting Up and Using Your Computer 27 Once you have one CD or DVD drive, ensure that disc again if the disc is "finalized"...blank CD or DVD. The computer copies the data on that have created automatically ejects. Your DVD writable drive can be able write to a temporary folder on computers that disc later. Helpful Tips • Use...

Owner's Manual
Page 33
... open your e-mail attachments: 1 In Outlook Express, click Tools, click Options, and then click Security. 2 Click Do not allow attachments to the telephone wall jack. Hard drive problems RUN CHECK DISK - 1 Click the Start button and click My Computer. 2 Right-click Local Disk C:. 3 Click Properties. 4 Click the Tools tab. 5 Under Error-checking...
... open your e-mail attachments: 1 In Outlook Express, click Tools, click Options, and then click Security. 2 Click Do not allow attachments to the telephone wall jack. Hard drive problems RUN CHECK DISK - 1 Click the Start button and click My Computer. 2 Right-click Local Disk C:. 3 Click Properties. 4 Click the Tools tab. 5 Under Error-checking...
Owner's Manual
Page 38
...supports DDR2 memory. For more information about the type of memory supported by your computer, see "Memory" on page 109. • Run the Dell Diagnostics (see page 61), reconnect the mouse cable as shown on the setup diagram for your computer, and then restart the computer. 38 Solving ...YOU EXPERIENCE OTHER MEMORY PROBLEMS - • Reseat the memory modules (see page 70) to see page 50). www.dell.com | support.dell.com USE A VIRUS-SCANNING PROGRAM TO CHECK THE HARD DRIVE, FLOPPY DISKS, OR CDS SAVE AND CLOSE ANY OPEN FILES OR PROGRAMS AND SHUT DOWN YOUR COMPUTER THROUGH THE START...
...supports DDR2 memory. For more information about the type of memory supported by your computer, see "Memory" on page 109. • Run the Dell Diagnostics (see page 61), reconnect the mouse cable as shown on the setup diagram for your computer, and then restart the computer. 38 Solving ...YOU EXPERIENCE OTHER MEMORY PROBLEMS - • Reseat the memory modules (see page 70) to see page 50). www.dell.com | support.dell.com USE A VIRUS-SCANNING PROGRAM TO CHECK THE HARD DRIVE, FLOPPY DISKS, OR CDS SAVE AND CLOSE ANY OPEN FILES OR PROGRAMS AND SHUT DOWN YOUR COMPUTER THROUGH THE START...

Owner's Manual
Page 48
... all USB devices, check cable connections, and then restart the computer. = yellow = green = off 48 Advanced Troubleshooting A possible floppy or hard drive failure has occurred. A possible USB failure has occurred. A possible graphics card failure has occurred. If the computer starts normally, reinstall an additional...8226; If available, install properly working memory of the same type into your computer (see page 71). • If the problem persists, contact Dell (see page 123). • If the computer has a graphics card, remove the card (see page 81), reinstall it, and then restart...
... all USB devices, check cable connections, and then restart the computer. = yellow = green = off 48 Advanced Troubleshooting A possible floppy or hard drive failure has occurred. A possible USB failure has occurred. A possible graphics card failure has occurred. If the computer starts normally, reinstall an additional...8226; If available, install properly working memory of the same type into your computer (see page 71). • If the problem persists, contact Dell (see page 123). • If the computer has a graphics card, remove the card (see page 81), reinstall it, and then restart...

Owner's Manual
Page 50
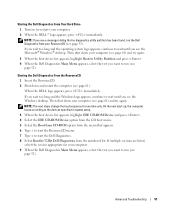
...a problem with your computer. • If the problem persists, contact Dell (see page 31) and run the Dell Diagnostics before you experience a problem with a device (such as the floppy drive or hard drive), check the device to make sure the boot sequence is attempting to ...boot from a device (such as the floppy drive or hard drive); Start the Dell Diagnostics from the Dell Dimension ResourceCD. 50 Advanced Troubleshooting www.dell.com | support.dell.com Light Pattern ABCD ABCD Problem Description Another failure has occurred. Suggested Resolution ...
...a problem with your computer. • If the problem persists, contact Dell (see page 31) and run the Dell Diagnostics before you experience a problem with a device (such as the floppy drive or hard drive), check the device to make sure the boot sequence is attempting to ...boot from a device (such as the floppy drive or hard drive); Start the Dell Diagnostics from the Dell Dimension ResourceCD. 50 Advanced Troubleshooting www.dell.com | support.dell.com Light Pattern ABCD ABCD Problem Description Another failure has occurred. Suggested Resolution ...
Owner's Manual
Page 51
... appears, press immediately. If you wait too long and the Windows logo appears, continue to run (see the Windows desktop. Starting the Dell Diagnostics From Your Hard Drive 1 Turn on (or restart) your computer (see page 61). NOTE: If you see page 52). If you wait too long and the operating system logo...
... appears, press immediately. If you wait too long and the Windows logo appears, continue to run (see the Windows desktop. Starting the Dell Diagnostics From Your Hard Drive 1 Turn on (or restart) your computer (see page 61). NOTE: If you see page 52). If you wait too long and the operating system logo...

Owner's Manual
Page 55
For drivers information, see the Windows desktop, reinsert the ResourceCD. 5 At the Welcome Dell System Owner screen, click Next. Manually Reinstalling Drivers 1 After extracting the driver files to your hard drive as described in the previous section, click the Start button and right-click My Computer. 2 Click...browse to the location to which you are used by your operating system. Using Microsoft® Windows® XP System Restore The Microsoft® Windows® XP operating system provides System Restore to allow you to return your data files or recover them. If you ...
For drivers information, see the Windows desktop, reinsert the ResourceCD. 5 At the Welcome Dell System Owner screen, click Next. Manually Reinstalling Drivers 1 After extracting the driver files to your hard drive as described in the previous section, click the Start button and right-click My Computer. 2 Click...browse to the location to which you are used by your operating system. Using Microsoft® Windows® XP System Restore The Microsoft® Windows® XP operating system provides System Restore to allow you to return your data files or recover them. If you ...

Owner's Manual
Page 57
...list, click I need to resolve the incompatibility. Reinstalling Microsoft® Windows® XP NOTICE: You must use the Hardware Troubleshooter to resolve a hardware conflict on your primary hard drive. If Device Driver Rollback does not resolve the problem, then use System Restore (... in before you installed the new device driver. For conventional hard drive configurations, the primary hard drive is detected but incorrectly configured, you can use Windows XP Service Pack 1 (SP1) or later when you reinstall Windows XP with a newly installed driver, first try using the Hardware ...
...list, click I need to resolve the incompatibility. Reinstalling Microsoft® Windows® XP NOTICE: You must use the Hardware Troubleshooter to resolve a hardware conflict on your primary hard drive. If Device Driver Rollback does not resolve the problem, then use System Restore (... in before you installed the new device driver. For conventional hard drive configurations, the primary hard drive is detected but incorrectly configured, you can use Windows XP Service Pack 1 (SP1) or later when you reinstall Windows XP with a newly installed driver, first try using the Hardware ...


