Owner's Manual
Page 8
Replacing the System Board 75 Procedure 75 Postrequisites 75 Entering the Service Tag in system setup 75 System Setup 76 Overview 76 Entering System Setup 76 Changing Boot Sequence 82 Clearing Forgotten Passwords 83 Clearing CMOS Settings 84 Flashing the BIOS 85 More Information 86 8 | Contents
Replacing the System Board 75 Procedure 75 Postrequisites 75 Entering the Service Tag in system setup 75 System Setup 76 Overview 76 Entering System Setup 76 Changing Boot Sequence 82 Clearing Forgotten Passwords 83 Clearing CMOS Settings 84 Flashing the BIOS 85 More Information 86 8 | Contents

Owner's Manual
Page 69
See "System-Board Components" on page 15. For additional safety best practices information, see the Regulatory Compliance Homepage at dell.com/regulatory_compliance. See "Removing the Computer Cover" on page 13. 2 Press the securing clip away from the coin-cell ...Your Computer" on the system board. Procedure 1 Locate the battery socket on page 11. CAUTION: Removing the coin-cell battery resets the BIOS settings to default. Prerequisites Remove the computer cover. Removing the Coin-Cell Battery WARNING: Before working inside your computer, read the safety information ...
See "System-Board Components" on page 15. For additional safety best practices information, see the Regulatory Compliance Homepage at dell.com/regulatory_compliance. See "Removing the Computer Cover" on page 13. 2 Press the securing clip away from the coin-cell ...Your Computer" on the system board. Procedure 1 Locate the battery socket on page 11. CAUTION: Removing the coin-cell battery resets the BIOS settings to default. Prerequisites Remove the computer cover. Removing the Coin-Cell Battery WARNING: Before working inside your computer, read the safety information ...

Owner's Manual
Page 74
You must enter the service tag in the system board. Procedure NOTE: Your computer's service tag is stored in the BIOS after you replace the system board. NOTE: Before disconnecting the cables from the system board, note the location of the connectors, so that you can ...
You must enter the service tag in the system board. Procedure NOTE: Your computer's service tag is stored in the BIOS after you replace the system board. NOTE: Before disconnecting the cables from the system board, note the location of the connectors, so that you can ...

Owner's Manual
Page 77
...help screen, and key functions. Help Screen - In this section may appear, or may not appear exactly as listed. Main→ System Information BIOS Revision BIOS Build Date System Name System Time (hh:mm:ss) System Date (mm:dd:yy) Service Tag Service Tag Input Asset Tag Display the... below the Help Screen and lists keys and their functions within the active system setup field. Scroll up - System Setup | 77 Displays the BIOS release date. Setup Item - and down-arrow keys. System Setup Screens The system setup screen displays current or changeable configuration information for your current...
...help screen, and key functions. Help Screen - In this section may appear, or may not appear exactly as listed. Main→ System Information BIOS Revision BIOS Build Date System Name System Time (hh:mm:ss) System Date (mm:dd:yy) Service Tag Service Tag Input Asset Tag Display the... below the Help Screen and lists keys and their functions within the active system setup field. Scroll up - System Setup | 77 Displays the BIOS release date. Setup Item - and down-arrow keys. System Setup Screens The system setup screen displays current or changeable configuration information for your current...
Owner's Manual
Page 82
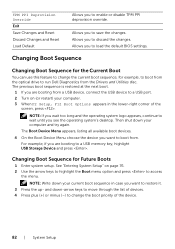
... sequence in the lower-right corner of the device. 82 | System Setup Changing Boot Sequence for example, to boot from the optical drive to run Dell Diagnostics from a USB device, connect the USB device to a USB port. 2 Turn on page 76. 2 Use the arrow keys to highlight the Boot menu ... key, highlight USB Storage Device and press . The previous boot sequence is restored at the next boot. 1 If you are booting to load the default BIOS settings. Changing Boot Sequence Changing Boot Sequence for the Current Boot You can use this feature to change the boot priority of the screen, press...
... sequence in the lower-right corner of the device. 82 | System Setup Changing Boot Sequence for example, to boot from the optical drive to run Dell Diagnostics from a USB device, connect the USB device to a USB port. 2 Turn on page 76. 2 Use the arrow keys to highlight the Boot menu ... key, highlight USB Storage Device and press . The previous boot sequence is restored at the next boot. 1 If you are booting to load the default BIOS settings. Changing Boot Sequence Changing Boot Sequence for the Current Boot You can use this feature to change the boot priority of the screen, press...
Owner's Manual
Page 85
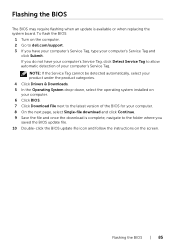
... require flashing when an update is complete, navigate to the folder where you saved the BIOS update file. 10 Double-click the BIOS update file icon and follow the instructions on the computer. 2 Go to dell.com/support. 3 If you do not have your computer's Service Tag, type your computer's Service... Tag and click Submit. To flash the BIOS: 1 Turn on the screen. NOTE: If the Service Tag cannot be detected automatically, select your...
... require flashing when an update is complete, navigate to the folder where you saved the BIOS update file. 10 Double-click the BIOS update file icon and follow the instructions on the computer. 2 Go to dell.com/support. 3 If you do not have your computer's Service Tag, type your computer's Service... Tag and click Submit. To flash the BIOS: 1 Turn on the screen. NOTE: If the Service Tag cannot be detected automatically, select your...

Owner's Manual
Page 86
... computer features: • Quick Start Guide: provides information about setting up your computer. • Specifications: provides information about your computer specifications. • Me and My Dell: provides information about the Windows 8 features. To learn about your computer features: 1 Follow the instructions from step 1 to step 3 in "Flashing the...
... computer features: • Quick Start Guide: provides information about setting up your computer. • Specifications: provides information about your computer specifications. • Me and My Dell: provides information about the Windows 8 features. To learn about your computer features: 1 Follow the instructions from step 1 to step 3 in "Flashing the...


