
Owner's Manual
Page 4
... in Windows XP 44 Standby Mode 44 Hibernate Mode 45 Power Options Properties 45 Power Management Options in Windows Vista 47 Sleep Mode 47 Hibernate Mode 47 Configuring Power Management Settings 47 2 Optimizing for Greater Performance 49 Understanding Dual-Graphics Technology 49 Understanding CPU Overclocking 49 3 Dell™ QuickSet 51 4 Troubleshooting 53 Solving...
... in Windows XP 44 Standby Mode 44 Hibernate Mode 45 Power Options Properties 45 Power Management Options in Windows Vista 47 Sleep Mode 47 Hibernate Mode 47 Configuring Power Management Settings 47 2 Optimizing for Greater Performance 49 Understanding Dual-Graphics Technology 49 Understanding CPU Overclocking 49 3 Dell™ QuickSet 51 4 Troubleshooting 53 Solving...
Owner's Manual
Page 5
Diagnostic Lights 66 Beep Codes 69 System Messages 70 Dell Diagnostics 72 When to Use Dell Diagnostics 72 Starting Dell Diagnostics From Your Hard Drive 72 Starting Dell Diagnostics From the Drivers and Utilities Media 73 Dell Diagnostics Main Menu 74 Drivers 75 What Is a Driver 75 ... Utilities Media 76 Restoring Your Operating System 78 Using Microsoft Windows System Restore 78 Using Dell PC Restore and Dell Factory Image Restore 79 Using the Operating System Media 82 Troubleshooting Software and Hardware Problems 83 5 Removing and Installing Parts 85 Before You Begin 85...
Diagnostic Lights 66 Beep Codes 69 System Messages 70 Dell Diagnostics 72 When to Use Dell Diagnostics 72 Starting Dell Diagnostics From Your Hard Drive 72 Starting Dell Diagnostics From the Drivers and Utilities Media 73 Dell Diagnostics Main Menu 74 Drivers 75 What Is a Driver 75 ... Utilities Media 76 Restoring Your Operating System 78 Using Microsoft Windows System Restore 78 Using Dell PC Restore and Dell Factory Image Restore 79 Using the Operating System Media 82 Troubleshooting Software and Hardware Problems 83 5 Removing and Installing Parts 85 Before You Begin 85...
Owner's Manual
Page 11
... files • How to personalize my desktop Windows Help and Support 1 To access Windows Help and Support: • In Windows XP, click Start and click Help and Support. • In Windows Vista™, click the Windows Vista Start button and click Help ...• Customer Care - What Are You Looking For? Upgrade information for Dell™ 3 Select your problem. 4 Follow the instructions on my computer configuration, product specifications, and white papers • Downloads - Troubleshooting hints and tips, articles from technicians, online courses, and frequently asked questions...
... files • How to personalize my desktop Windows Help and Support 1 To access Windows Help and Support: • In Windows XP, click Start and click Help and Support. • In Windows Vista™, click the Windows Vista Start button and click Help ...• Customer Care - What Are You Looking For? Upgrade information for Dell™ 3 Select your problem. 4 Follow the instructions on my computer configuration, product specifications, and white papers • Downloads - Troubleshooting hints and tips, articles from technicians, online courses, and frequently asked questions...

Owner's Manual
Page 14
...computer (see "System Setup" on page 44). Failure to install the stand could result in the computer tipping over, potentially resulting in Windows XP" on page 166). NOTE: The hard drive carrier is turned off the computer. Attach the computer stand to provide stability to indicate different... of these diagnostics lights to eject the drive tray of the front panel LEDs can be adjusted in system setup (see "Dell Diagnostics" on the computer. Use to help troubleshoot a problem with an installed device. • Blinking amber - The computer is in a 5.25-inch drive bay carrier....
...computer (see "System Setup" on page 44). Failure to install the stand could result in the computer tipping over, potentially resulting in Windows XP" on page 166). NOTE: The hard drive carrier is turned off the computer. Attach the computer stand to provide stability to indicate different... of these diagnostics lights to eject the drive tray of the front panel LEDs can be adjusted in system setup (see "Dell Diagnostics" on the computer. Use to help troubleshoot a problem with an installed device. • Blinking amber - The computer is in a 5.25-inch drive bay carrier....

Owner's Manual
Page 15
...connector Use the microphone connector to attach a personal computer microphone for high-speed data devices such as digital video cameras and external storage devices. Dell recommends that you use the back USB connectors for devices that typically remain connected, such as flash memory keys, cameras, or bootable USB devices...player is operating. 5 network link light The network link light is on when the computer reads data from or writes data to help troubleshoot a problem with your computer (see "Boot Sequence" on when a good connection exists between a network and the computer. 6 USB ...
...connector Use the microphone connector to attach a personal computer microphone for high-speed data devices such as digital video cameras and external storage devices. Dell recommends that you use the back USB connectors for devices that typically remain connected, such as flash memory keys, cameras, or bootable USB devices...player is operating. 5 network link light The network link light is on when the computer reads data from or writes data to help troubleshoot a problem with your computer (see "Boot Sequence" on when a good connection exists between a network and the computer. 6 USB ...
Owner's Manual
Page 53
...is correctly installed. • If a peripheral device does not work properly, contact Dell (see "Contacting Dell" on page 157). Drive Problems CAUTION: Before you begin any of the procedures ...XP: • Click Start and click My Computer. NOTE: The procedures in this section, follow the safety instructions in a program, see "Replacing the Battery" on page 179). R E P L A C E T H E B A T T E R Y - Troubleshooting 53 ENSURE THAT MICROSOFT® WINDOWS® RECOGNIZES THE DRIVE - Troubleshooting Solving Problems Follow these tips when you troubleshoot your Dell...
...is correctly installed. • If a peripheral device does not work properly, contact Dell (see "Contacting Dell" on page 157). Drive Problems CAUTION: Before you begin any of the procedures ...XP: • Click Start and click My Computer. NOTE: The procedures in this section, follow the safety instructions in a program, see "Replacing the Battery" on page 179). R E P L A C E T H E B A T T E R Y - Troubleshooting 53 ENSURE THAT MICROSOFT® WINDOWS® RECOGNIZES THE DRIVE - Troubleshooting Solving Problems Follow these tips when you troubleshoot your Dell...

Owner's Manual
Page 54
...Dell... turned up by clicking any boxes that are checked. Windows Vista: 1 Click Start and click Computer. 2 Right-click Local Disk C:. 54 Troubleshooting See "Sound and Speaker Problems" on page 72. Try closing all DVD drives. C H E C K T H E S P E... - • Insert another disc to the optical. TU R N O F F S T A N D B Y M O D E I N W I N D O W S B E F O R E W R I T I N G T O A D I S K - Windows XP: 1 Click Start and click My Computer. 2 Right-click Local Disk C:. 3 Click Properties→ Tools→ Check Now. 4 Click Scan for information on power management modes...
...Dell... turned up by clicking any boxes that are checked. Windows Vista: 1 Click Start and click Computer. 2 Right-click Local Disk C:. 54 Troubleshooting See "Sound and Speaker Problems" on page 72. Try closing all DVD drives. C H E C K T H E S P E... - • Insert another disc to the optical. TU R N O F F S T A N D B Y M O D E I N W I N D O W S B E F O R E W R I T I N G T O A D I S K - Windows XP: 1 Click Start and click My Computer. 2 Right-click Local Disk C:. 3 Click Properties→ Tools→ Check Now. 4 Click Scan for information on power management modes...
Owner's Manual
Page 55
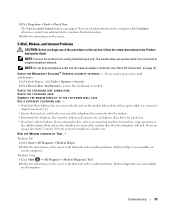
...procedures in this section, follow the safety instructions in length, try a shorter one. If you are an administrator on certain computers. Windows XP: 1 Click Start→ All Programs→ Modem Helper. 2 Follow the instructions on the screen to identify and resolve modem problems. ...fax machine, surge protector, or line splitter, bypass them and use the telephone to connect the modem directly to a digital telephone network. Troubleshooting 55 E-Mail, Modem, and Internet Problems CAUTION: Before you have other telephone devices sharing the line, such as needed. NOTE: Do not...
...procedures in this section, follow the safety instructions in length, try a shorter one. If you are an administrator on certain computers. Windows XP: 1 Click Start→ All Programs→ Modem Helper. 2 Follow the instructions on the screen to identify and resolve modem problems. ...fax machine, surge protector, or line splitter, bypass them and use the telephone to connect the modem directly to a digital telephone network. Troubleshooting 55 E-Mail, Modem, and Internet Problems CAUTION: Before you have other telephone devices sharing the line, such as needed. NOTE: Do not...

Owner's Manual
Page 56
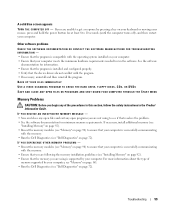
... Sound→ Phone and Modem Options→ Modems. 2 Click the COM port for your computer. 56 Troubleshooting To remove and then reinstall the program: Windows XP: 1 Click Start→ Control Panel→ Add or Remove Programs→ Programs and Features. 2 Select...8594; Query Modem to an Internet provider. d r i v e l e t t e r : \ I S N O T A C C E S S I R E D . Insert a bootable floppy disk, CD, or DVD. Windows XP: 1 Click Start→ Control Panel→ Printers and Other Hardware→ Phone and Modem Options→ Modems. 2 Click the COM port for the operating system...
... Sound→ Phone and Modem Options→ Modems. 2 Click the COM port for your computer. 56 Troubleshooting To remove and then reinstall the program: Windows XP: 1 Click Start→ Control Panel→ Add or Remove Programs→ Programs and Features. 2 Select...8594; Query Modem to an Internet provider. d r i v e l e t t e r : \ I S N O T A C C E S S I R E D . Insert a bootable floppy disk, CD, or DVD. Windows XP: 1 Click Start→ Control Panel→ Printers and Other Hardware→ Phone and Modem Options→ Modems. 2 Click the COM port for the operating system...

Owner's Manual
Page 57
...computer, then try using the keyboard. C L O S E S O M E P R O G R A M S A N D T R Y A G A I N G S YS T E M N O T F O U N D - O P E R A T I N - Contact Dell (see "Contacting Dell" on the setup diagram for your IEEE 1394 device is not damaged or frayed and check cable connectors for bent or broken pins. ENSURE.... CHECK THE KEYBOARD CABLE - • Ensure that you want to restore computer resources. Troubleshooting 57 NOTE: Your computer supports only IEEE 1394a standard. Windows XP: 1 Click Start and click Control Panel. 2 Under Pick a Category, click Performance and...
...computer, then try using the keyboard. C L O S E S O M E P R O G R A M S A N D T R Y A G A I N G S YS T E M N O T F O U N D - O P E R A T I N - Contact Dell (see "Contacting Dell" on the setup diagram for your IEEE 1394 device is not damaged or frayed and check cable connectors for bent or broken pins. ENSURE.... CHECK THE KEYBOARD CABLE - • Ensure that you want to restore computer resources. Troubleshooting 57 NOTE: Your computer supports only IEEE 1394a standard. Windows XP: 1 Click Start and click Control Panel. 2 Under Pick a Category, click Performance and...

Owner's Manual
Page 58
... instructions in an environment similar to select the program that is designed for at least 8 to perform an operating system shutdown. Windows XP: The Program Compatibility Wizard configures a program so that it runs in its documentation or on a floppy disk, CD, or DVD..... A program stops responding END THE PROGRAM - 1 Press simultaneously to access the Task Manager. 2 Click the Applications tab. 3 Click to non-XP operating system environments. 1 Click Start→ All Programs→ Accessories→ Program Compatibility Wizard→ Next. 2 Follow the instructions on the screen...
... instructions in an environment similar to select the program that is designed for at least 8 to perform an operating system shutdown. Windows XP: The Program Compatibility Wizard configures a program so that it runs in its documentation or on a floppy disk, CD, or DVD..... A program stops responding END THE PROGRAM - 1 Press simultaneously to access the Task Manager. 2 Click the Applications tab. 3 Click to non-XP operating system environments. 1 Click Start→ All Programs→ Accessories→ Program Compatibility Wizard→ Next. 2 Follow the instructions on the screen...
Owner's Manual
Page 59
... procedures in this section, follow the safety instructions in the Product Information Guide. Troubleshooting 59 Other software problems CHECK THE SOFTWARE DOCUMENTATION OR CONTACT THE SOFTWARE MANUFACTURER FOR TROUBLESHOOTING INFORMATION - • Ensure that the program is successfully communicating with the program....files and exit any of memory supported by your computer is successfully communicating with the memory. • Run the Dell Diagnostics (see "Dell Diagnostics" on your computer. • Ensure that your computer is compatible with the operating system installed on page...
... procedures in this section, follow the safety instructions in the Product Information Guide. Troubleshooting 59 Other software problems CHECK THE SOFTWARE DOCUMENTATION OR CONTACT THE SOFTWARE MANUFACTURER FOR TROUBLESHOOTING INFORMATION - • Ensure that the program is successfully communicating with the program....files and exit any of memory supported by your computer is successfully communicating with the memory. • Run the Dell Diagnostics (see "Dell Diagnostics" on your computer. • Ensure that your computer is compatible with the operating system installed on page...

Owner's Manual
Page 60
...that the network cable is firmly inserted into the network connector on the back of the computer and the network jack. Windows XP 1 Click Start→ Control Panel→ Mouse. 2 Adjust the settings as needed . See "Drivers" on page ... that your computer. CHECK THE MOUSE SETTINGS - Contact your network administrator or the person who set up - R E I N S T A L L T H E M O U S E D R I N G S - See "Troubleshooting Software and Hardware Problems" on page 75. RESTART THE COMPUTER AND LOG ON TO THE NETWORK AGAIN C H E C K Y O U R N E T W O R K S E T T I V E R - RESTART THE ...
...that the network cable is firmly inserted into the network connector on the back of the computer and the network jack. Windows XP 1 Click Start→ Control Panel→ Mouse. 2 Adjust the settings as needed . See "Drivers" on page ... that your computer. CHECK THE MOUSE SETTINGS - Contact your network administrator or the person who set up - R E I N S T A L L T H E M O U S E D R I N G S - See "Troubleshooting Software and Hardware Problems" on page 75. RESTART THE COMPUTER AND LOG ON TO THE NETWORK AGAIN C H E C K Y O U R N E T W O R K S E T T I V E R - RESTART THE ...
Owner's Manual
Page 61
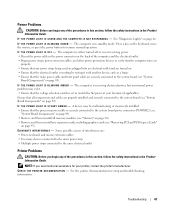
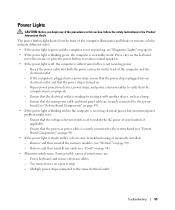
... connected to the same electrical outlet Printer Problems CAUTION: Before you need technical assistance for setup and troubleshooting information. E L I M I N A T E I N G A M B E R - Some possible causes of the procedures in this section, follow the safety instructions in standby mode. Troubleshooting 61 Power Problems . See "Diagnostic Lights" on page 95). I F T H E P O W E R L I G H T I S B L I N K I N T E R F E R E N C E - NOTE: If you begin any expansion cards...
... connected to the same electrical outlet Printer Problems CAUTION: Before you need technical assistance for setup and troubleshooting information. E L I M I N A T E I N G A M B E R - Some possible causes of the procedures in this section, follow the safety instructions in standby mode. Troubleshooting 61 Power Problems . See "Diagnostic Lights" on page 95). I F T H E P O W E R L I G H T I S B L I N K I N T E R F E R E N C E - NOTE: If you begin any expansion cards...

Owner's Manual
Page 62
... printer and the computer. VERIFY THAT THE SCANNER IS RECOGNIZED BY MICROSOFT WINDOWS - See the scanner documentation for setup and troubleshooting information. Windows XP: 1 Click Start→ Control Panel→ Printers and Other Hardware→ View installed printers or fax printers. 2 If... procedures in this section, follow the safety instructions in the Product Information Guide. See the scanner documentation for instructions. 62 Troubleshooting For a parallel printer, ensure that the electrical outlet is working by testing it with another device, such as needed. ...
... printer and the computer. VERIFY THAT THE SCANNER IS RECOGNIZED BY MICROSOFT WINDOWS - See the scanner documentation for setup and troubleshooting information. Windows XP: 1 Click Start→ Control Panel→ Printers and Other Hardware→ View installed printers or fax printers. 2 If... procedures in this section, follow the safety instructions in the Product Information Guide. See the scanner documentation for instructions. 62 Troubleshooting For a parallel printer, ensure that the electrical outlet is working by testing it with another device, such as needed. ...
Owner's Manual
Page 63
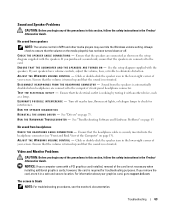
... inserted into the headphone connector (see "Front and Back View of the card is blank NOTE: For troubleshooting procedures, see the monitor's documentation. Ensure that the speakers are connected as a lamp. If your speakers... and Hardware Problems" on the setup diagram supplied with a PCI graphics card installed, removal of the Computer" on page 13). Troubleshooting 63 No sound from speakers NOTE: The volume control in a safe and secure location. RUN THE SPEAKER DIAGNOSTICS R E I N S T A L L T H E S O U N D D R I... when headphones are connected to support.dell.com.
... inserted into the headphone connector (see "Front and Back View of the card is blank NOTE: For troubleshooting procedures, see the monitor's documentation. Ensure that the speakers are connected as a lamp. If your speakers... and Hardware Problems" on the setup diagram supplied with a PCI graphics card installed, removal of the Computer" on page 13). Troubleshooting 63 No sound from speakers NOTE: The volume control in a safe and secure location. RUN THE SPEAKER DIAGNOSTICS R E I N S T A L L T H E S O U N D D R I... when headphones are connected to support.dell.com.
Owner's Manual
Page 64
...adjusting the contrast and brightness, demagnetizing (degaussing) the monitor, and running the monitor self-test. 64 Troubleshooting CHECK THE MONITOR POWER LIGHT - • If the power light is lit or blinking, the .... 3D image quality is poor C H E C K T H E G R A P H I C S C A R D P O W E R C A B L E C O N N E C T I O N - C H E C K T H E M O N I T O R S E T T I G H T S - M O V E T H E M O N I C A L O U T L E T - Windows XP: 1 Click Start→ Control Panel→ Appearance and Themes. 2 Click the area you are using the optional DVI-to-VGA adapter, ensure that the adapter...
...adjusting the contrast and brightness, demagnetizing (degaussing) the monitor, and running the monitor self-test. 64 Troubleshooting CHECK THE MONITOR POWER LIGHT - • If the power light is lit or blinking, the .... 3D image quality is poor C H E C K T H E G R A P H I C S C A R D P O W E R C A B L E C O N N E C T I O N - C H E C K T H E M O N I T O R S E T T I G H T S - M O V E T H E M O N I C A L O U T L E T - Windows XP: 1 Click Start→ Control Panel→ Appearance and Themes. 2 Click the area you are using the optional DVI-to-VGA adapter, ensure that the adapter...
Owner's Manual
Page 65
... working by testing it with another device, such as a lamp. - Too many devices on page 90). - Multiple power strips connected to the same electrical outlet Troubleshooting 65
... working by testing it with another device, such as a lamp. - Too many devices on page 90). - Multiple power strips connected to the same electrical outlet Troubleshooting 65
Owner's Manual
Page 66
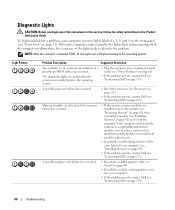
...: After the computer completes POST, all modules without error. • If available, install working memory of the lights help troubleshoot a problem, your computer. • If the problem persists, contact Dell (see "Contacting Dell" on page 92) and restart the computer. Light Pattern Problem Description Suggested Resolution The computer is in the Product Information...
...: After the computer completes POST, all modules without error. • If available, install working memory of the lights help troubleshoot a problem, your computer. • If the problem persists, contact Dell (see "Contacting Dell" on page 92) and restart the computer. Light Pattern Problem Description Suggested Resolution The computer is in the Product Information...

Owner's Manual
Page 67
Troubleshooting 67 occurred. Reinstall all USB devices and check all power and data cables. No memory modules are using is supported by your computer (see "Memory" on page 161). • If the problem persists, contact Dell (see "Contacting Dell" on page 92) and restart the computer. If the computer starts ..., install working memory of the same type into your computer (see "Installing Memory" on page 92). • If the problem persists, contact Dell (see "Contacting Dell" on page 179). • Ensure that the memory you are detected. A possible USB failure has occurred.
Troubleshooting 67 occurred. Reinstall all USB devices and check all power and data cables. No memory modules are using is supported by your computer (see "Memory" on page 161). • If the problem persists, contact Dell (see "Contacting Dell" on page 92) and restart the computer. If the computer starts ..., install working memory of the same type into your computer (see "Installing Memory" on page 92). • If the problem persists, contact Dell (see "Contacting Dell" on page 179). • Ensure that the memory you are detected. A possible USB failure has occurred.


