Owner's Manual
Page 6
6 System Setup 77 Overview 77 Entering System Setup 77 System Setup Screens 77 System Setup Options 79 Boot Sequence 82 Option Settings 82 Changing Boot Sequence for the Current Boot 82 Changing Boot Sequence for Future Boots 83 7 Clearing Passwords and CMOS Settings 85 Clearing Passwords 85 Clearing CMOS Settings 87 Flashing the BIOS 88 8 Troubleshooting Tools 89 Power Lights 89 Beep Codes 90 System Messages 93 Hardware Troubleshooter 95 6 Contents
6 System Setup 77 Overview 77 Entering System Setup 77 System Setup Screens 77 System Setup Options 79 Boot Sequence 82 Option Settings 82 Changing Boot Sequence for the Current Boot 82 Changing Boot Sequence for Future Boots 83 7 Clearing Passwords and CMOS Settings 85 Clearing Passwords 85 Clearing CMOS Settings 87 Flashing the BIOS 88 8 Troubleshooting Tools 89 Power Lights 89 Beep Codes 90 System Messages 93 Hardware Troubleshooter 95 6 Contents

Owner's Manual
Page 8
Troubleshooting Software and Hardware Problems in the Microsoft® Windows® XP and Windows Vista® Operating Systems 121 Restoring Your Operating System 122 Using Microsoft Windows System Restore . . . . 122 Using Dell™ PC Restore and Dell Factory Image Restore 124 Using the Operating System Media 127 11 Specifications 129 12 Getting Help 135 Obtaining Assistance 135 Technical Support and Customer Service . . . . 136 DellConnect 136 Online Services 136 AutoTech Service 137 Automated Order-Status Service 137 Problems With Your Order 137 Product Information...
Troubleshooting Software and Hardware Problems in the Microsoft® Windows® XP and Windows Vista® Operating Systems 121 Restoring Your Operating System 122 Using Microsoft Windows System Restore . . . . 122 Using Dell™ PC Restore and Dell Factory Image Restore 124 Using the Operating System Media 127 11 Specifications 129 12 Getting Help 135 Obtaining Assistance 135 Technical Support and Customer Service . . . . 136 DellConnect 136 Online Services 136 AutoTech Service 137 Automated Order-Status Service 137 Problems With Your Order 137 Product Information...
Owner's Manual
Page 14
... utility. Utility, and click Download Now. 6 Click Run to run the driver, or Save to save the driver to support.dell.com and click Drivers and Downloads. 2 Click Select Model. 3 Select your computer and operating system and installs the updates appropriate for components, such as memory, the hard drive, and the operating system • Customer Care - Troubleshooting hints and Dell Support Website - If you reinstall the operating system for processors, optical drives, USB devices, and so on. The software...
... utility. Utility, and click Download Now. 6 Click Run to run the driver, or Save to save the driver to support.dell.com and click Drivers and Downloads. 2 Click Select Model. 3 Select your computer and operating system and installs the updates appropriate for components, such as memory, the hard drive, and the operating system • Customer Care - Troubleshooting hints and Dell Support Website - If you reinstall the operating system for processors, optical drives, USB devices, and so on. The software...
Owner's Manual
Page 22
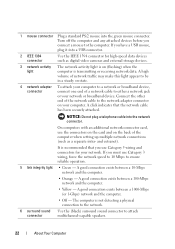
... make this light appear to be in a steady on (flashing) when the computer is not detecting a physical connection to the network. 6 surround sound Use the (black) surround sound connector to ensure reliable operation. 5 link integrity light • Green - The computer is transmitting or receiving network data. If you use the connectors on the card and on the back of a network cable to the network adapter connector on your network or broadband device. A good connection...
... make this light appear to be in a steady on (flashing) when the computer is not detecting a physical connection to the network. 6 surround sound Use the (black) surround sound connector to ensure reliable operation. 5 link integrity light • Green - The computer is transmitting or receiving network data. If you use the connectors on the card and on the back of a network cable to the network adapter connector on your network or broadband device. A good connection...
Owner's Manual
Page 33
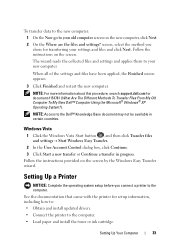
... the instructions provided on the screen. Windows Vista 1 Click the Windows Vista Start button , and then click Transfer files and settings→ Start Windows Easy Transfer. 2 In the User Account Control dialog box, click Continue. 3 Click Start a new transfer or Continue a transfer in certain countries. Setting Up a Printer NOTICE: Complete the operating system setup before you chose for transferring your new computer. The wizard reads the collected files and settings...
... the instructions provided on the screen. Windows Vista 1 Click the Windows Vista Start button , and then click Transfer files and settings→ Start Windows Easy Transfer. 2 In the User Account Control dialog box, click Continue. 3 Click Start a new transfer or Continue a transfer in certain countries. Setting Up a Printer NOTICE: Complete the operating system setup before you chose for transferring your new computer. The wizard reads the collected files and settings...
Owner's Manual
Page 35
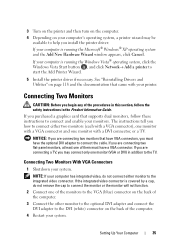
... Add New Hardware Wizard window appears, click Cancel. Connecting Two Monitors CAUTION: Before you purchased a graphics card that supports dual monitors, follow the safety instructions in addition to the TV. If you begin any of the procedures in this section, follow these instructions to connect and enable your monitors. If the integrated video connector is running the Windows Vista® operating system, click the Windows Vista Start button , and click Network→ Add a printer to start the Add Printer Wizard. 5 Install...
... Add New Hardware Wizard window appears, click Cancel. Connecting Two Monitors CAUTION: Before you purchased a graphics card that supports dual monitors, follow the safety instructions in addition to the TV. If you begin any of the procedures in this section, follow these instructions to connect and enable your monitors. If the integrated video connector is running the Windows Vista® operating system, click the Windows Vista Start button , and click Network→ Add a printer to start the Add Printer Wizard. 5 Install...
Owner's Manual
Page 82
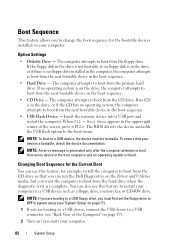
... a USB device, connect the USB device to boot from the next bootable device in the boot sequence. • CD Drive - The BIOS detects the device and adds the USB flash option to restart your device is on the Driver and Utilities media, but you can also use this feature to the boot menu. If the floppy disk in the drive is not bootable, if no floppy disk is in the drive, or if there is no operating...
... a USB device, connect the USB device to boot from the next bootable device in the boot sequence. • CD Drive - The BIOS detects the device and adds the USB flash option to restart your device is on the Driver and Utilities media, but you can also use this feature to the boot menu. If the floppy disk in the drive is not bootable, if no floppy disk is in the drive, or if there is no operating...
Owner's Manual
Page 95
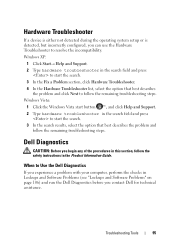
... remaining troubleshooting steps. Windows XP: 1 Click Start→ Help and Support. 2 Type hardware troubleshooter in the search field and press to start the search. 3 In the Fix a Problem section, click Hardware Troubleshooter. 4 In the Hardware Troubleshooter list, select the option that best describes the problem and follow the remaining troubleshooting steps. Hardware Troubleshooter If a device is either not detected during the operating system setup or is detected, but incorrectly configured, you can use the Hardware Troubleshooter to start...
... remaining troubleshooting steps. Windows XP: 1 Click Start→ Help and Support. 2 Type hardware troubleshooter in the search field and press to start the search. 3 In the Fix a Problem section, click Hardware Troubleshooter. 4 In the Hardware Troubleshooter list, select the option that best describes the problem and follow the remaining troubleshooting steps. Hardware Troubleshooter If a device is either not detected during the operating system setup or is detected, but incorrectly configured, you can use the Hardware Troubleshooter to start...
Owner's Manual
Page 99
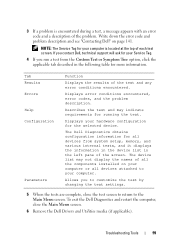
... error code and a description of the test and any error conditions encountered. To exit the Dell Diagnostics and restart the computer, close the test screen to return to customize the test by changing the test settings. 5 When the tests are complete, close the Main Menu screen. 6 Remove the Dell Drivers and Utilities media (if applicable). Troubleshooting Tools 99 Displays your hardware configuration for your Service Tag. 4 If you to the Main Menu screen. Displays error conditions encountered, error codes, and the problem...
... error code and a description of the test and any error conditions encountered. To exit the Dell Diagnostics and restart the computer, close the test screen to return to customize the test by changing the test settings. 5 When the tests are complete, close the Main Menu screen. 6 Remove the Dell Drivers and Utilities media (if applicable). Troubleshooting Tools 99 Displays your hardware configuration for your Service Tag. 4 If you to the Main Menu screen. Displays error conditions encountered, error codes, and the problem...
Owner's Manual
Page 108
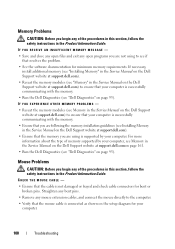
... following the memory installation guidelines (see "Dell Diagnostics" on the setup diagram for bent or broken pins. If necessary, install additional memory (see "Installing Memory" in the Service Manual on the Dell Support website at support.dell.com). • Reseat the memory modules (see "Memory" in the Service Manual on the Dell Support website at support.dell.comon page 161. • Run the Dell Diagnostics (see Installing Memory in the Service Manual on the Dell Support website at support.dell.com) to ensure that the mouse cable is...
... following the memory installation guidelines (see "Dell Diagnostics" on the setup diagram for bent or broken pins. If necessary, install additional memory (see "Installing Memory" in the Service Manual on the Dell Support website at support.dell.com). • Reseat the memory modules (see "Memory" in the Service Manual on the Dell Support website at support.dell.comon page 161. • Run the Dell Diagnostics (see Installing Memory in the Service Manual on the Dell Support website at support.dell.com) to ensure that the mouse cable is...

Owner's Manual
Page 113
... video extension cables and connect the monitor directly to the graphics card and monitor. • Ensure that the sound is securely inserted into the headphone connector (see the monitor's documentation. For information about your screen. NOTICE: If your computer came with a PCI graphics card installed, removal of your graphics card, go to the correct graphics card (for troubleshooting purposes. If you are using the optional DVI-to-VGA adapter, ensure that the adapter is required for dual graphics card configurations...
... video extension cables and connect the monitor directly to the graphics card and monitor. • Ensure that the sound is securely inserted into the headphone connector (see the monitor's documentation. For information about your screen. NOTICE: If your computer came with a PCI graphics card installed, removal of your graphics card, go to the correct graphics card (for troubleshooting purposes. If you are using the optional DVI-to-VGA adapter, ensure that the adapter is required for dual graphics card configurations...
Owner's Manual
Page 114
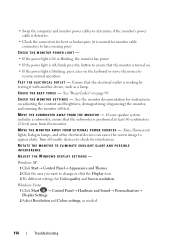
...Windows Vista: 1 Click Start → Control Panel→ Hardware and Sound→ Personalization→ Display Settings. 2 Adjust Resolution and Colors settings, as a lamp. TE S T T H E E L E C T R I N G S - C H E C K T H E B E E P C O D E S - C H E C K T H E M O N I T O R S E T T I C A L O U T L E T - If your speaker system includes a subwoofer, ensure that the electrical outlet is working by testing it is normal for interference. Turn off , firmly press the button to ensure that the monitor is turned on. • If the power light is blinking, press a key on the keyboard...
...Windows Vista: 1 Click Start → Control Panel→ Hardware and Sound→ Personalization→ Display Settings. 2 Adjust Resolution and Colors settings, as a lamp. TE S T T H E E L E C T R I N G S - C H E C K T H E B E E P C O D E S - C H E C K T H E M O N I T O R S E T T I C A L O U T L E T - If your speaker system includes a subwoofer, ensure that the electrical outlet is working by testing it is normal for interference. Turn off , firmly press the button to ensure that the monitor is turned on. • If the power light is blinking, press a key on the keyboard...
Owner's Manual
Page 115
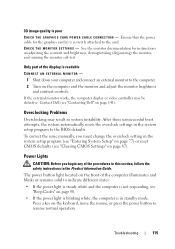
... image quality is readable CONNECT AN EXTERNAL MONITOR - 1 Shut down your computer and connect an external monitor to the computer. 2 Turn on the computer and the monitor and adjust the monitor brightness and contrast controls. Contact Dell (see "Clearing CMOS Settings" on the keyboard, move the mouse, or press the power button to the BIOS defaults. C H E C K T H E M O N I T O R S E T T I O N - See the monitor documentation for the graphics card(s) is in the Product Information Guide. Press a key on page 87). The power button light located...
... image quality is readable CONNECT AN EXTERNAL MONITOR - 1 Shut down your computer and connect an external monitor to the computer. 2 Turn on the computer and the monitor and adjust the monitor brightness and contrast controls. Contact Dell (see "Clearing CMOS Settings" on the keyboard, move the mouse, or press the power button to the BIOS defaults. C H E C K T H E M O N I T O R S E T T I O N - See the monitor documentation for the graphics card(s) is in the Product Information Guide. Press a key on page 87). The power button light located...
Owner's Manual
Page 118
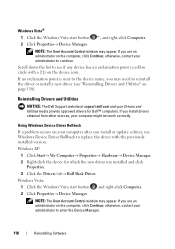
... Drivers and Utilities NOTICE: The Dell Support website at support.dell.com and your administrator to enter the Device Manager. 118 Reinstalling Software otherwise, contact your Drivers and Utilities media provide approved drivers for which the new driver was installed and click Properties. 3 Click the Drivers tab→ Roll Back Driver. otherwise, contact your computer might not work correctly. Using Windows Device Driver Rollback If a problem occurs on the computer, click Continue; If you install or update a driver, use Windows Device Driver...
... Drivers and Utilities NOTICE: The Dell Support website at support.dell.com and your administrator to enter the Device Manager. 118 Reinstalling Software otherwise, contact your Drivers and Utilities media provide approved drivers for which the new driver was installed and click Properties. 3 Click the Drivers tab→ Roll Back Driver. otherwise, contact your computer might not work correctly. Using Windows Device Driver Rollback If a problem occurs on the computer, click Continue; If you install or update a driver, use Windows Device Driver...
Owner's Manual
Page 119
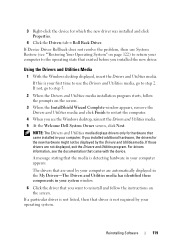
... computer appears. Reinstalling Software 119 If Device Driver Rollback does not resolve the problem, then use the Drivers and Utilities media, go to step 5. 2 When the Drivers and Utilities media installation program starts, follow the instructions on page 122) to use System Restore (see the Windows desktop, reinsert the Drivers and Utilities media. 5 At the Welcome Dell System Owner screen, click Next. NOTE: The Drivers and Utilities media displays drivers only for hardware that the media is not listed, then that came...
... computer appears. Reinstalling Software 119 If Device Driver Rollback does not resolve the problem, then use the Drivers and Utilities media, go to step 5. 2 When the Drivers and Utilities media installation program starts, follow the instructions on page 122) to use System Restore (see the Windows desktop, reinsert the Drivers and Utilities media. 5 At the Welcome Dell System Owner screen, click Next. NOTE: The Drivers and Utilities media displays drivers only for hardware that the media is not listed, then that came...
Owner's Manual
Page 120
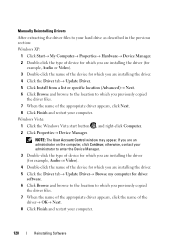
... Continue; NOTE: The User Account Control window may appear. Windows Vista: 1 Click the Windows Vista start button , and right-click Computer. 2 Click Properties→ Device Manager. Manually Reinstalling Drivers After extracting the driver files to your hard drive as described in the previous section: Windows XP: 1 Click Start→ My Computer→ Properties→ Hardware→ Device Manager. 2 Double-click the type of device for which you are installing the driver (for example, Audio or Video). 3 Double-click...
... Continue; NOTE: The User Account Control window may appear. Windows Vista: 1 Click the Windows Vista start button , and right-click Computer. 2 Click Properties→ Device Manager. Manually Reinstalling Drivers After extracting the driver files to your hard drive as described in the previous section: Windows XP: 1 Click Start→ My Computer→ Properties→ Hardware→ Device Manager. 2 Double-click the type of device for which you are installing the driver (for example, Audio or Video). 3 Double-click...
Owner's Manual
Page 121
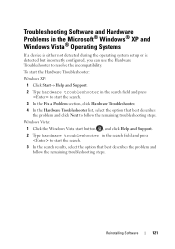
Windows Vista: 1 Click the Windows Vista start button , and click Help and Support. 2 Type hardware troubleshooter in the search field and press to resolve the incompatibility. Troubleshooting Software and Hardware Problems in the Microsoft® Windows® XP and Windows Vista® Operating Systems If a device is either not detected during the operating system setup or is detected but incorrectly configured, you can use the Hardware Troubleshooter to start the search. 3 In the search results, select the option that...
Windows Vista: 1 Click the Windows Vista start button , and click Help and Support. 2 Type hardware troubleshooter in the search field and press to resolve the incompatibility. Troubleshooting Software and Hardware Problems in the Microsoft® Windows® XP and Windows Vista® Operating Systems If a device is either not detected during the operating system setup or is detected but incorrectly configured, you can use the Hardware Troubleshooter to start the search. 3 In the search results, select the option that...
Owner's Manual
Page 128
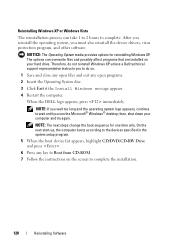
... to complete the installation. 128 Reinstalling Software NOTE: The next steps change the boot sequence for reinstalling Windows XP. The options can take 1 to 2 hours to do not reinstall Windows XP unless a Dell technical support representative instructs you must also reinstall the device drivers, virus protection program, and other software. then, shut down your hard drive. NOTICE: The Operating System media provides options for one time only. Reinstalling Windows XP or Windows Vista The reinstallation...
... to complete the installation. 128 Reinstalling Software NOTE: The next steps change the boot sequence for reinstalling Windows XP. The options can take 1 to 2 hours to do not reinstall Windows XP unless a Dell technical support representative instructs you must also reinstall the device drivers, virus protection program, and other software. then, shut down your hard drive. NOTICE: The Operating System media provides options for one time only. Reinstalling Windows XP or Windows Vista The reinstallation...
Owner's Manual
Page 159
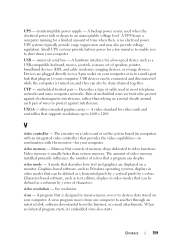
... embedded virus also starts. UPS - video memory - The amount of video memory installed primarily influences the number of colors that plugs in to a multi-port hub that a program can be defined as a USB-compatible keyboard, mouse, joystick, scanner, set of cable used when the electrical power fails or drops to your computer. A virus program moves from the Internet, or e-mail attachments. universal serial bus - UXGA - Memory that supports resolutions up...
... embedded virus also starts. UPS - video memory - The amount of video memory installed primarily influences the number of colors that plugs in to a multi-port hub that a program can be defined as a USB-compatible keyboard, mouse, joystick, scanner, set of cable used when the electrical power fails or drops to your computer. A virus program moves from the Internet, or e-mail attachments. universal serial bus - UXGA - Memory that supports resolutions up...
Owner's Manual
Page 165
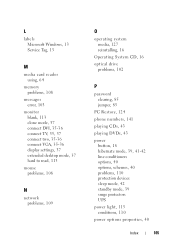
... Microsoft Windows, 13 Service Tag, 13 M media card reader using, 64 memory problems, 108 messages error, 103 monitor blank, 113 clone mode, 37 connect DVI, 35-36 connect TV, 35, 37 connect two, 35-36 connect VGA, 35-36 display settings, 37 extended desktop mode, 37 hard to read, 113 mouse problems, 108 N network problems, 109 O operating system media, 127 reinstalling, 16 Operating System CD, 16 optical drive problems, 102 P password clearing, 85 jumper, 85 PC Restore, 124 phone numbers, 141 playing CDs, 43 playing DVDs, 43 power button...
... Microsoft Windows, 13 Service Tag, 13 M media card reader using, 64 memory problems, 108 messages error, 103 monitor blank, 113 clone mode, 37 connect DVI, 35-36 connect TV, 35, 37 connect two, 35-36 connect VGA, 35-36 display settings, 37 extended desktop mode, 37 hard to read, 113 mouse problems, 108 N network problems, 109 O operating system media, 127 reinstalling, 16 Operating System CD, 16 optical drive problems, 102 P password clearing, 85 jumper, 85 PC Restore, 124 phone numbers, 141 playing CDs, 43 playing DVDs, 43 power button...


